Table of Contents
Advertisement
Advertisement
Table of Contents

Related Manuals for Asus P023


Summary of Contents for Asus P023
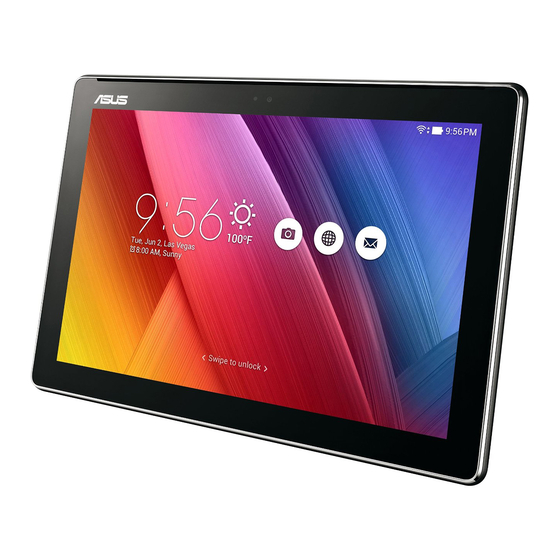
- Page 1 ASUS Tablet...
- Page 2 Circumstances may arise where because of a default on ASUS’ part or other liability, you are entitled to recover damages from ASUS. In each such instance, regardless of the basis on which you are entitled to claim damages from ASUS, ASUS is liable for no more than damages for bodily injury (including death) and damage to real property and tangible personal property;...
-
Page 3: Table Of Contents
Package contents ..........................23 Parts and features ..........................23 Charging your ASUS Mobile Dock ....................25 Pairing your ASUS Tablet with ASUS Mobile Dock ..............26 Pairing your Bluetooth devices with ASUS Mobile Dock ............27 Docking your ASUS Tablet ........................28 Using the special keys ........................28 Undocking your ASUS Tablet ......................30... - Page 4 Keeping in touch Managing contacts .....................49 Launching the Contacts app ......................49 Contacts Settings ..........................49 Setting up your profile ........................49 Adding contacts ...........................50 Setting up your VIPs ...........................51 Marking your favorite contacts ......................54 Importing contacts ..........................55 Exporting contacts ..........................55 Social networking with your contacts ..................56 Send messages and more ..................57 Messaging (on selected models) ....................57 Linking your contacts’...
- Page 5 Enabling Wi-Fi ............................ 109 Connecting to a Wi-Fi network ....................109 Disabling Wi-Fi ........................... 110 Bluetooth® .........................110 Enabling Bluetooth® ........................110 Pairing your ASUS Tablet to a Bluetooth® device ..............111 Unpairing your ASUS Tablet from the Bluetooth® device ..........111...
- Page 6 Audio Wizard ............................134 Splendid ............................... 135 Power Saver ............................138 Maintain your Zen Keeping your device up-to-date ................141 Updating your system ........................141 Storage ..............................141 Backup and reset ..........................141 Securing your ASUS Tablet ......................142 Appendix Notices ........................147...
-
Page 7: Conventions Used
Use only AC adapters and cables approved by ASUS for use with this device. Refer to the rating label on the bottom of your device and ensure that your power adapter complies with this rating. -
Page 8: Proper Disposal
Proper disposal Risk of explosion if battery is replaced by an incorrect type. Dispose of used batteries according to the instructions. Do not throw your device in municipal waste. This product has been designed to enable proper reuse of parts and recycling. The symbol of the crossed out wheeled bin indicates that the product (electrical, electronic equipment and mercury- containing button cell battery) should not be placed in municipal waste. -
Page 9: Get Your Zen Ready
Get your Zen ready! Get your Zen ready! Parts and features Take a hold of your device and have it up and running in a jiffy. Ambient light sensor Audio speakers Front camera Touch screen panel Power button Rear camera Volume button Microphone Speaker/Headset port... -
Page 10: Installing A Memory Card
CAUTION! Be extra careful when handling a memory card. ASUS is not responsible for any data loss or damage incurred to your memory card. - Page 11 Push the memory card all the way into the slot until it is seated firmly in place. Put back the memory card slot cover. NOTE: After installing a formatted memory card, you can access its contents from ASUS > File Manager > Internal storage > sdcard.
-
Page 12: Removing A Memory Card
Removing a memory card CAUTION! • Be extra careful when handling a memory card. ASUS is not responsible for any data loss or damage incurred to your memory card. • Eject the memory card properly to safely remove it from device. To eject the memory card, go to Settings > Storage > Unmount external storage. To remove a memory card: Orient your device as shown, and open the micro SIM/microSD card compartment. CAUTION! • Be careful not to damage the slot cover or injure your fingernails when you remove the cover. - Page 13 Press the memory card to eject, then pull it out. Put back the memory card slot cover. Chapter 1: Get your Zen ready!
-
Page 14: Installing A Micro Sim Card (On Selected Models)
NOTE: To prevent connector damage, ensure to use a standard micro SIM card without a SIM adapter or the use of a cutter. CAUTION! Be extra careful when handling a micro SIM card. ASUS is not responsible for any data loss or damage incurred to your micro SIM card. - Page 15 Align and insert a micro SIM card into the micro SIM card slot. Push the micro SIM card all the way into the slot until it is seated firmly in place. Put back the memory card slot cover. Chapter 1: Get your Zen ready!
-
Page 16: Removing A Micro Sim Card (On Selected Models)
Removing a micro SIM card (on selected models) CAUTION! Be extra careful when handling a micro SIM card. ASUS is not responsible for any data loss or micro SIM damage incurred to your card. To remove a micro SIM card: Orient your device as shown, and open the micro SIM/microSD card compartment. -
Page 17: Charging Your Asus Tablet
Put back the memory card slot cover. Charging your ASUS Tablet Your ASUS Tablet comes partially charged but you must charge it fully before using it for the first time. Read the following important notices and cautions before charging your device. - Page 18 • Charge your ASUS Tablet for eight (8) hours before using it in battery mode for the first time. • The status of battery charge is indicated by the following icons: Not Charging Charging Full When fully-charged, disconnect the USB cable from your ASUS Tablet first before unplugging the AC power adapter from the power outlet. NOTE: • You can use your device while charging but it may take longer to fully charge the device. • Charging your device via USB port of a computer may take longer to fully charge the device. • If your computer does not provide enough power for charging via USB port, charge your ASUS Tablet using the AC power adapter plugged to a power outlet instead.
-
Page 19: Turning Your Asus Tablet On Or Off
Turning your ASUS Tablet on or off Turning your device on To turn your device on, press and hold the power button until your device starts up. Turning your device off To turn your device off: If your screen is turned off, press the power button to turn it on. If your screen is locked, unlock the device screen. -
Page 20: Basics
Explore the intuitive simplicity of ASUS Zen UI! ASUS Zen UI is a charming and intuitive interface exclusively for ASUS Tablets. It provides you with special apps, which are integrated in or with other apps, to fit your unique individual needs and make your life easier while letting you have fun with your ASUS Tablet. -
Page 21: Starting For The First Time
Follow the onscreen instructions to select your language, select input methods, set up your mobile network, Wi-Fi, sync accounts, and configure your location services. Use your Google or ASUS account to set up your device, if you do not have a Google or ASUS account yet, go ahead and create one. - Page 22 Battery power conservation tips The battery charge is the lifeline of your ASUS Tablet. Here are some battery power conservation tips that helps preserve the power of your ASUS Tablet’s battery. – Close all running apps that are not in use.
-
Page 23: Using Your Asus Mobile Dock
Using your ASUS Mobile Dock Package contents ASUS Mobile Dock User Guide NOTE: If any of the items is damaged or missing, contact your retailer. Parts and features Hinge Two-color battery indicator Audio Bluetooth indicator Keyboard Bluetooth indicator Power switch/... -
Page 24: Left View
Two-color battery charge indicator The two-color LED provides a visual indication of the battery’s charge status. Refer to the following table for details: Color Status Solid Green Fully Charged Solid Orange Charging Blinking Orange Low Battery Lights off Battery mode Keyboard and Audio indicator The LED provides a visual indication of the pairing status. -
Page 25: Charging Your Asus Mobile Dock
Connect the micro USB cable to the power adapter. Plug the power adapter into a grounded power outlet. Plug the micro USB connector into your ASUS Mobile Dock. NOTE: The input voltage of your ASUS Mobile Dock is DC 5.2V, 1.35A, 7W. IMPORTANT! • Use only the power adapter and micro USB cable of ZenPad 10 to charge your ASUS Mobile Dock. -
Page 26: Pairing Your Asus Tablet With Asus Mobile Dock
Pairing your ASUS Tablet with ASUS Mobile Dock You may use your ASUS Mobile Dock to wirelessly connect with your ASUS ZenPad 10 via Bluetooth pairing. Refer to the following steps to learn how to establish this connection. Turn on your ASUS Mobile Dock and its Bluetooth function by pressing the switch all the way to the right and hold for five (5) seconds. -
Page 27: Pairing Your Bluetooth Devices With Asus Mobile Dock
Bluetooth pairing. Refer to the following steps to learn how to establish this connection. Turn on your ASUS Mobile Dock and its Bluetooth function by pressing the switch all the way to the right and hold for five (5) seconds. -
Page 28: Docking Your Asus Tablet
Align your ASUS Tablet with ASUS Mobile Dock. Firmly insert your ASUS Tablet into the hinge. IMPORTANT! Always pick up the entire assembly from the bottom when your ASUS Tablet is attached to ASUS Mobile Dock. Using the special keys The special keys on your ASUS Mobile Dock have standalone functions and some must be used with the function key <Fn>. - Page 29 Returns to previous page. Activates sleep mode. Toggles the internal wireless LAN ON or OFF. Decreases the display brightness. Increases the display brightness. PgUp Captures the screen image. PgUp PgDp Home Returns to the previous track when playing music. PgUp PgDp Home Starts playing music from your playlist.
-
Page 30: Undocking Your Asus Tablet
Undocking your ASUS Tablet To undock your ASUS Tablet: Put the entire assembly on a flat and stable surface. Lift your ASUS Tablet from the bottom left corner to detach it from ASUS Mobile Dock. Chapter 1: Get your Zen ready! -
Page 31: Using The Touchscreen
Using the touchscreen Use these gestures on the touchscreen to launch apps, access some settings, and navigate your ASUS Tablet. Launching apps or selecting items Do any of the following: • To launch an app, simply tap on it. • To select an item such as in File Manager app, simply tap on it. Moving or deleting items Do any of the following: •... - Page 32 Moving through pages or screens Do any of the following: • Swipe your finger to the left or to the right to switch between screens or to flip through a gallery of images. • Scroll your finger up or down to go through web pages or list of items. Zooming in Spread apart your two fingers on the touch panel to zoom in an image in Gallery or Maps, or zoom in a web page. Chapter 1: Get your Zen ready!
-
Page 33: Zenmotion
ZenMotion When your touch screen panel is off, with these easy and intuitive gestures, you can launch apps on your ASUS Tablet in a snap by simply writing down an alphabet. Gesture Wi-Fi / 3G / LTE models... - Page 34 Chapter 1: Get your Zen ready!
-
Page 35: There's No Place Like Home
There’s no place like Home There’s no place like Home NOTE: Actual apps shown onscreen may vary per model. The following screenshot is for reference only. Zen Home features Home screen Get reminders of important events, app and system updates, weather forecasts, and text messages from people who really matter to you, right from your Home screen. - Page 36 Understanding notification icons These icons are shown on the status bar and will guide you of the current status of your ASUS Tablet. Mobile network (on selected models) Shows the signal strength of your mobile network. Messages Shows that you have an unread message.
-
Page 37: Personalizing Your Home Screen
Personalizing your Home screen Stamp your own personality on your Home screen. Select an attractive design as your wallpaper, add shortcuts for quick access to your favorite apps, and add widgets for a quick review of important info. You can also add more pages so you can add and quickly access or view more apps or widgets on your Home screen. -
Page 38: Widgets
Grouping your app shortcuts in a folder Create folders to organize your app shortcuts on your Home screen. On your Home screen, tap and drag an app onto another app and a folder will appear. Tap the new folder and tap Unnamed Folder to assign a name to this folder. Widgets You can put widgets, which are small dynamic apps, on your Home screen. -
Page 39: Wallpapers
Wallpapers Let your apps, icons, and other Zen elements sit on an attractively designed wallpaper. You may add a translucent background tint to your wallpaper for readability and clarity. You can also select an animated wallpaper to make your screen come alive. Move the slider to adjust the transparency of the wallpaper Tap to select wallpaper Tap to select an image from... -
Page 40: Extended Home Screen
Applying an animated wallpaper To apply an animated wallpaper: Tap and hold an empty area on your Home screen and select Wallpapers. Select where you want your wallpaper: on your Home screen, or Home Screen and Lock screen. Select an animated wallpaper, then tap Apply. NOTE: You can also set up your wallpaper settings from >... -
Page 41: Setting Up The Date And Time
Setting up the date and time By default, the date and time displayed on your Home screen automatically syncs when you are connected to the internet. To change the date and time settings: Launch the Settings screen by doing any of the following: •... -
Page 42: Quick Settings
ASUS Tablet. Each of these features are represented by a button. To launch the Quick settings panel, swipe down with two fingers from the top of your ASUS Tablet. NOTE: A blue button indicates that the feature is currently enabled while a gray button indicates a disabled feature. -
Page 43: System Notifications
Adding or removing buttons To add or remove existing buttons from the ASUS Quick settings notification panel: Launch Quick settings then tap Tap the box beside the feature to add or remove it from the ASUS Quick settings notification panel. NOTE: A checked box indicates that the feature's button is accessible via the ASUS Quick settings notification panel while an unchecked box means the opposite. -
Page 44: Lock Screen
Scroll down the Settings screen and select Lock screen. In the next screen, tap Screen lock. Tap the screen lock option you would like to use. NOTE: For more details, see Securing your ASUS Tablet. Chapter 2: There’s no place like Home... -
Page 45: Customizing The Quick Access Buttons
Customizing the quick access buttons By default, your lock screen includes quick access buttons for these apps: Messaging, and Camera. Change this default settings and customize these buttons to launch other apps on the lock screen using the following steps: Launch Quick settings then tap Scroll down the Settings screen and select Lock screen. -
Page 46: Voice Search
Once the mic icon turns red, start saying your voice command. NOTE: Speak clearly and use concise phrases when talking to your ASUS Tablet. It also helps to start your commands with a verb related to the ASUS Tablet feature you want to use. - Page 47 Customizing voice search results from the Tablet search group If you want to set parameters for the voice search results gathered from your Google account and your ASUS Tablet’s data, you may do so using the following steps: On your ASUS Tablet’s Home screen, tap >...
- Page 48 Tap Tablet search. Tick the box of the search groups you would like to include as source when using Voice Search. Chapter 2: There’s no place like Home...
-
Page 49: Keeping In Touch
Launch the Contacts app then tap Set up my profile or ME. NOTE: ME appears when you’ve set up your Google account on your ASUS Tablet. Fill in your info such as mobile or home number. To add other info, tap Add another field. -
Page 50: Adding Contacts
Tap to view your profile info Adding contacts Add contacts to your device, corporate, Google, or other email accounts and fill in more important contact information such as contact numbers, email addresses, special events for VIPs, and more. Launch the Contacts app then tap Select Device. -
Page 51: Setting Up Your Vips
Customizing your contact’s profile Edit your contact’s info, add a photo, or take a photo as a cover for your contact’s profile. Launch the Contacts app then select the contact whose info or profile you want to edit or customize. Make the changes from the contact’s profile page. - Page 52 Set up your VIP from the Groups screen To set up your VIP from the Groups screen: Launch the Contacts app. > VIP. In the VIP screen, tap Select the contact or contacts you want to group as VIPs, then tap Add. The contact or contacts are added to your VIP list.
- Page 53 Adding an event to a VIP contact You can add an event to a VIP contact such as anniversary, birthday, and other important events. Launch the Contacts app, tap the contact you want to add an event detail to, then tap In the contact’s info screen, tap Add another field >...
-
Page 54: Marking Your Favorite Contacts
Set your frequently-accessed contacts as your favorites to be able to locate them quickly from the Contacts app. Launch the Contacts app by doing any of the following: a. From the Home screen, tap ASUS > Contacts app. b. From the All Apps screen, tap Contacts app. From the Contacts app screen, tap then tap Tick the boxes of the contacts that you wish to add to Favorites. -
Page 55: Importing Contacts
Importing contacts Import your contacts and their respective data from one contact source to your ASUS Tablet, or email account, or a micro SIM card. Tap Asus > Contacts then tap > Manage contacts. Tap Import/export then select from the following importing options: a. -
Page 56: Social Networking With Your Contacts
Syncing your social network account Sync your social network account to add the social network accounts of your contacts to your ASUS Tablet. Do any of the following to launch the Settings app: •... -
Page 57: Send Messages And More
Messaging lets you send, promptly reply, or reply at a later time to important messages from your contacts in any of your SIM cards installed on your ASUS Tablet. You can also email your message threads or conversations to others to keep them in the loop. - Page 58 In the message screen, tap . Tap Reply later. The message is added to your Do It Later tasks. To retrieve and reply to the email, tap Asus > Do It Later from the Home screen. NOTE: For details on replying to reply-later messages, see Replying now (on selected models).
-
Page 59: Linking Your Contacts' Info
Linking your contacts’ info When you add social network or email accounts, data from these accounts automatically sync with the Contacts app. In some instances, some contact info may appear in several places or under different name variations or nicknames in the Contacts app. You can manually link and unify all these info and put them under one place or profile. - Page 60 Using your Google™ account To register using your Google™ account: then tap Omlet Chat. On the Sign Up screen, tap Connect a different account here then tap Google. Tap OK to use the Google account that you registered with your device. Key in your name then tap Get Started.
- Page 61 Using your Facebook® account To register using your Facebook account: then tap Omlet Chat. On the Sign Up screen, tap Connect a different account here then tap Facebook. Omlet Chat app will take you to Facebook screen to log in to your Facebook account. Log in to your Facebook account then tap OK.
-
Page 62: Using Omlet Chat
Using Omlet chat Send text and multimedia messages for a fun, creative, and interactive conversation. To start a conversation: to display Omlet Chat menu then tap Contacts. From the Omlet Chat screen, tap Tap the contact that you wish to chat then tap Sending a chat message To send a chat message, key in your message in What’s up field then tap Sending a voice message... - Page 63 Using drawer apps Omlet Chat features these value-added drawer apps, allowing you to share multimedia messages for a more fun and personal touch. To use these drawer apps, tap from the chat thread then select an app from the drawer app list to send a specific multimedia message.
- Page 64 To view the shared photos: Launch the Gallery app by doing any of the following: a. From the Home screen, tap ASUS > Gallery app. b. From the All Apps screen, tap Gallery app. From the Gallery main screen, tap then select from the following options: a.
- Page 65 Viewing all shared photos Tap All shared photos to view all photos shared by you and your Omlet Chat contacts. Viewing shared photos by chat room Tap Chat room to view photos shared by chat room or social hotspot. Chapter 3: Keeping in touch...
- Page 66 To view Omlet Contacts from Contacts app: Launch the Contacts app by doing any of the following: a. From the Home screen, tap ASUS > Contacts app. b. From the All Apps screen, tap Contacts app. Chapter 3: Keeping in touch...
- Page 67 Tap Contacts to display dropdown list to view the contact groups. Untick all contact groups except Omlet Chat, then tap anywhere. Your Contacts screen displays all Omlet contacts. Tap an Omlet contact to select and view the contact details or chat with that contact directly. Chapter 3: Keeping in touch...
- Page 68 Syncing Omlet Chat to Cloud If you have a Dropbox®, Box®, or Baidu PCS Cloud account, the Omlet Chat app instantly uploads your private conversations and chat logs securely. Before Omlet Chat app uploads your data, you have to sync your Cloud account to Omlet Chat app first.
-
Page 69: Your Precious Moments
NOTE: The following screenshot is for reference only. Capture moments Launching the Camera app Capture images and record videos using your ASUS Tablet’s Camera app. Refer to any of the steps below to open the Camera app. From the lock screen Drag down until the camera app is launched. -
Page 70: Using Camera For The First Time
Tutorial and Image locations. Tutorial If it is your first time to use your ASUS Tablet’s camera, you will encounter the following tutorial screen after launching the Camera app. Refer to the following steps to proceed from this screen. -
Page 71: Camera Home Screen
Your ASUS Tablet’s camera is equipped with auto-scene detection and auto-image stabilizer features. It also features a video stabilization function that helps prevent shakiness while video recording. Tap the icons to start using your camera and explore the image and video features of your ASUS Tablet. Switch between the front... -
Page 72: Image Settings
Image settings Adjust the appearance of your captured images by configuring your camera’s settings using the steps below. IMPORTANT! Apply the settings first before taking images. On the camera’s home screen, tap > Scroll down and configure the available options. Image Configure the image quality using these options. -
Page 73: Video Settings
Video settings Adjust the appearance of your recorded videos by configuring your camera’s settings using the steps below. IMPORTANT! Apply the settings first before taking images. On the camera’s home screen, tap > Scroll down and configure the available options. Image Configure the video quality using these options. -
Page 74: Advanced Camera Features
Have fun during and after taking photos of your family and friends using the Beautification feature of your ASUS Tablet. When enabled, this feature allows you to make live beauty enhancements on your subject’s face before you press the shutter button. -
Page 75: Depth Of Field
Take well-lit photos even on night time or on low-light situations using the Night feature of your ASUS Tablet. NOTE: Keep your hands steady before and while the ASUS Tablet is capturing the image to prevent blurry results. Capturing Night photos >... - Page 76 Take advantage of your rear camera’s high megapixel specs without worrying about pressing the shutter button. Using face-detection, you can set your ASUS Tablet to detect up to four faces using the rear camera then automatically capture your selfie or group selfie.
-
Page 77: Gif Animation
From the Camera app’s home screen, tap then pan your ASUS Tablet to the left or right to capture the scenery. NOTE: While panning your ASUS Tablet, a timeline of thumbnails appears on the lower part of your screen as it captures the scenery. -
Page 78: Smart Remove
Time lapse The time lapse video feature of your ASUS Tablet allows you to capture stills for automatic time lapse playback. In effect, events seem to move in a fast-forward manner though they actually occured and were recorded between long intervals. -
Page 79: Using The Gallery
View images and play videos on your ASUS Tablet using the Gallery app. This app also allows you to edit, share, or delete image and video files stored in your ASUS Tablet. From Gallery, you can display images in a slideshow or tap to view the selected image or video file. -
Page 80: Viewing The Photo Location
Viewing the photo location Enable the location access on your ASUS Tablet, and get the location details on your photos. Your photos’ location details include the area where the photos are taken, as well a map of the location via Google Map or Baidu (in China only). -
Page 81: Sharing Files From The Gallery
Editing images The Gallery also features its own image editing tools that you can use to enhance images saved on your ASUS Tablet. From the Gallery screen, tap the folder where the files are located. After opening the folder, tap the image you want to edit. -
Page 82: Using Minimovie
Using MiniMovie Turn photos into a creative slideshow using the MiniMovie feature of the Gallery. MiniMovie contains a theme of slideshow presentations which you can immediately apply to selected photos. To create a MiniMovie from a photo folder: Launch Gallery then tap to select the location of your photo folder. -
Page 83: Using Playto
After selecting a theme, tap to save the slideshow. You can access your saved slideshows from ASUS > File Manager > Movies > MiniMovie. You can then share the slideshow to social network sites or instant messaging apps such as Facebook, Google Plus, or Omlet Chat. - Page 84 Chapter 4: Your precious moments...
-
Page 85: Work Hard, Play Harder
Its clean and intuitive Zen interface powered by text-reflow technology optimizes web contents to better fit the screen of your ASUS Tablet. With its magazine view mode via its Smart Reader feature, you can pleasurably read your favorite web contents online or offline without any distracting items such as banner ads. -
Page 86: Sharing Pages
Sharing pages Share interesting pages from your ASUS Tablet to others via an email account, cloud storage account, Bluetooth, or other ASUS Tablet apps. Launch the browser. From a web page, tap > Share page. Tap the account or app that you want to use as medium in sharing the page. -
Page 87: Clearing The Browser Cache
Key in an account name that you want to be displayed in the outgoing messages, then tap Next to log into your inbox. NOTE: If you want to set up your work account on your ASUS Tablet, ask for the email settings from your network administrator. -
Page 88: Adding Email Accounts
Setting up a Gmail account Set up your Gmail account to get into Google-related services and apps as well as receive, send, and browse emails right from your ASUS Tablet. Tap Google then tap Gmail. Tap Existing and key in your existing Gmail account and password, then tap NOTE: • Tap New if you do not own a Google account. -
Page 89: Calendar
Once finished, tap Done to save and exit. Adding accounts to Calendar Aside from creating an event logged on your ASUS Tablet, you can also use Calendar to create events that get automatically synced with your online accounts. But first, these accounts must be added to Calendar using the following steps: Tap Asus >... -
Page 90: Creating An Event From Your Account
Creating an event from your account After adding online accounts that you would like to sync with Calendar, you may now use your ASUS Tablet to create notifications for those online accounts by following these steps: Tap Asus > Calendar. -
Page 91: What's Next
What’s Next Do not miss out on important events, having fun out in the sun, or getting messages/emails/calls (on selected models) from your VIP contacts. Set up your calendar of events, VIP groups, or weather update settings to get alerts and reminders of What’s Next. View your What’s Next alerts from the Lock screen, System notifications panel, and What’s Next widget or app. -
Page 92: Accepting Or Declining Invites To Events
Calendar app. NOTE: For more details, see Email and Calendar. IMPORTANT! Your ASUS Tablet must be connected to a Wi-Fi or mobile network to get emailed invites or event-related alerts. For more details, see Staying connected. -
Page 93: Getting Event-Related Alerts
Getting event-related alerts When you accept an invitation to an event, you’ll get reminders of any changes to the event such as postponement, cancellation, change in event location, or shift in event schedule. These event- related alerts will be posted on the Lock screen, System notifications panel, and What’s Next widget or app. -
Page 94: Getting The Weather Updates
In the search box, enter the city or area whose weather updates you want search for. Wait for a while your ASUS Tablet gets the weather information. The city or area’s weather data will be added to your location list. Tap the city’s or area’s weather data that you want to display on the What’s Next widget on the Home screen. -
Page 95: Do It Later
Create important to-do tasks to organize your work or social activities in your professional or social life. From the Home screen, tap Asus > Do It Later. then fill in the necessary information. If you want to set the importance level, select High in the Importance field. -
Page 96: Catching Up On My Online Reading Now
You can retrieve pages that you’ve previously marked as read later tasks and catch up on your online reading at your convenience from the Do It Later app. From the Home screen, tap Asus > Do It Later. Select the page or pages that you want to read now, then tap Read now. -
Page 97: Supernote
SuperNote Turn note-taking into a fun and creative activity using Supernote. This intuitive app allows you to create notes organized per notebook by directly writing or drawing on the touchscreen. While creating notes, you can also add multimedia files from other apps and share them via social networks or your Cloud storage account. -
Page 98: Creating A Notebook
On the Supernote home screen, tap-and-hold the notebook you would like to share. In the pop-up screen, tap Enable cloud sync. Input your ASUS WebStorage account’s User name and Password details to proceed with syncing your notebook to the Cloud. -
Page 99: File Manager
Accessing the internal storage To access the internal storage: > File Manager. > Internal storage to view the contents of your ASUS Tablet then tap an item to select. Accessing the external storage device To access the external storage device: Insert the microSD card into your ASUS Tablet. -
Page 100: The Cloud
Cloud account such as ASUS WebStorage, Drive, OneDrive, and Dropbox. ASUS WebStorage Register for or sign in to ASUS WebStorage and get free cloud storage. Automatically upload newly captured photos for instant sharing, sync files among different devices, or share files via your ASUS WebStorage account. -
Page 101: Data Transfer
Data Transfer Transfer your data such as contacts, calendar entries from your old mobile device to your ASUS Tablet via Bluetooth technology. To use Data Transfer: Pair your old mobile device with your ASUS Tablet via Bluetooth. NOTE: For more details on pairing devices, see Pairing your ASUS Tablet to a Bluetooth®... -
Page 102: Asus Support
Find answers from FAQs (Frequently Asked Questions) or directly interact with other Zen UI users to find and share solutions about ZenUI 2.0 apps. To access ZenUI Help: > ASUS Support. Tap ZenUI Tips, then select the app that you want to find answers for. Chapter 5: Work hard, play harder... -
Page 103: Fun And Entertainment
Fun and entertainment Fun and entertainment Using a headset Have the freedom to do other things while you’re in a call or enjoy listening to your favorite music using a headset. Connecting the audio jack Insert the 3.5 mm headset jack into the audio port of your device. WARNING! • Do not insert other objects into the audio jack port. -
Page 104: Music
Music app automatically searches for music files from the internal and external storages on your ASUS Tablet. You can organize these music files in a playlist or add them in a queue to play them sequentially. You can also stream music from cloud accounts such as ASUS WebStorage, Dropbox, OneDrive, and Drive. -
Page 105: Streaming Cloud Music
Get answers to your questions and you can send us your feedbacks. Streaming Cloud music Register or sign in to a cloud account and stream music from your cloud account to your ASUS Tablet. IMPORTANT! Ensure that Wi-Fi or mobile network is enabled on your ASUS Tablet. For details, see Staying connected. -
Page 106: Creating A Playlist
Streaming music from the cloud To stream music from your cloud account: From the Music home screen, tap Under Cloud Music, tap the cloud account where you want to stream music from. Select the song, then tap to play it. Creating a playlist Get your favorite songs from different sources such as internal storage, external storage, or cloud accounts and organize them in a playlist. -
Page 107: Playto Other Devices
To use PlayTo: From a currently-playing song, tap > PlayTo. Tap the device that you want to stream music to. Music from your ASUS Tablet will play or stream on the other device. To stop PlayTo, tap > Disconnect. - Page 108 Chapter 6: Fun and entertainment...
-
Page 109: Staying Connected
Staying connected Staying connected Wi-Fi The Wi-Fi technology of your ASUS Tablet gets you connected to the wireless world. Update your social media accounts, browse the Internet, or exchange data and messages wirelessly from your ASUS Tablet. Enabling Wi-Fi Launch the Settings screen by doing any of the following: •... -
Page 110: Disabling Wi-Fi
Quick Settings screen. Bluetooth® Use the Bluetooth feature of your ASUS Tablet to send or receive files and stream multimedia files with other smart devices over short distances. With Bluetooth, you can share your media files with your friends’ smart devices, send data for print with a Bluetooh printer, or play music files with a Bluetooth speaker. -
Page 111: Pairing Your Asus Tablet To A Bluetooth® Device
Pairing your ASUS Tablet to a Bluetooth® device Before using the Bluetooth feature of your ASUS Tablet in full scale, you have to pair it first with the Bluetooth device. The ASUS Tablet automatically stores the pairing connection of the Bluetooth device. -
Page 112: Tethering
Tethering When Wi-Fi service is not available, you can use your ASUS Tablet as a modem or turn it into a Wi-Fi hotspot to get Internet access on your laptop, tablet, and other mobile devices. IMPORTANT! Most mobile service providers may require a data plan for you to be able to use the tethering function. -
Page 113: Bluetooth Tethering
Connect other devices to your ASUS Tablet’s hotspot connection the same way you connect to a Wi-Fi network. Bluetooth Tethering Enable Bluetooth on your ASUS Tablet and use it to link with other devices using Share Link, or link to a printer. Enable Bluetooth on your ASUS Tablet and the other device. -
Page 114: Playto
PlayTo PlayTo app lets you screencast your ASUS Tablet to a streaming-supported display. Doing this allows an external display to become a dual monitor or second screen to your ASUS Tablet. IMPORTANT! Your external display must have Miracast™ or DLNA® technology to support PlayTo app. -
Page 115: Travel And Maps
Travel and Maps Travel and Maps Weather Get real-time weather updates straight from your ASUS Tablet using the weather app. Using Weather, you can also check other weather details from around the world. Launching the Weather app From your Home screen, launch the Weather app using either of the following options: >... -
Page 116: Weather Home Screen
Weather home screen Set up and get your current location’s weather updates as well as other parts of the world. You can display the weather updates or daily weather forecast on the What’s Next widget or app, and on the Calendar app. -
Page 117: Clock
Clock Customize the time zone settings of your ASUS Tablet, set alarms, and use your ASUS Tablet as a stop watch using the Clock app. Launching Clock Launch the Clock app using either of the following options: > Clock. •... -
Page 118: Alarm Clock
Alarm clock to access the world clock settings of your ASUS Tablet. Tap this to delete any of the previously set alarms Tap this to set a new alarm time Tap this to access the settings of the alarm clock feature Stopwatch to use your ASUS Tablet as a stopwatch. -
Page 119: Timer
Timer You may set multiple timer options for your ASUS Tablet. To do this, follow the steps below. Setting the timer to access the timer feature of your ASUS Tablet. Numeric keypad Use the numeric keypad to input your target time then tap start to start the timer. - Page 120 Chapter 8: Travel and Maps...
-
Page 121: Zenlink
Your ZenLink comprises of the following apps: Share Link, PC Link, and Remote Link. NOTE: Some of these ZenLink apps may not be available in your ASUS Tablet. Chapter 9: ZenLink... -
Page 122: Share Link
Share and receive files, apps, or media contents with Android mobile devices using Share Link app (for ASUS mobile devices) or SHAREit app (for other mobile devices) via a Wi-Fi hotspot. With this app, you can send or receive files that are larger than 100 MB and lets you share or receive multiple files at the same time. -
Page 123: Pc Link
Tap Receive file to receive the files from the sender. PC Link Use your computer to access and control your ASUS Tablet and its apps via the PC Link. It allows you to control your ASUS Tablet using your computer’s keyboard and mouse. - Page 124 Understanding the PC Link settings Click this icon to rotate the mirrored ASUS Tablet screen on your computer screen. Click this icon to increase or decrease the volume. Click this icon to capture a screenshot. Click this icon to wake your ASUS Tablet or put it to sleep.
-
Page 125: Remote Link
Remote Link Turn your ASUS Tablet into a wireless input device and a presentation tool. Using this app, you can use your ASUS Tablet as a touchpad, touchscreen panel, laser pointer for presentations, and Windows® Media Player controller while connected to your computer via bluetooth or Wi-Fi. - Page 126 Remote Link presentation controller to control the presentation slides on your computer. Tap and hold this button to activate the laser pointer Tap this button to go to next slide Tap this button to go back to previous slide Remote Link Windows® Media Player controller to control the Windows®...
- Page 127 Remote Link keyboard input to use keyboard input. You can also use the microphone icon for voice input. Tap this button to key in your message via voice input Tap this button to send the message to your computer Key in your message in this field Chapter 9: ZenLink...
- Page 128 Chapter 9: ZenLink...
-
Page 129: Zen Everywhere
Zen Everywhere Zen Everywhere Special Zen Tools Calculator One-swipe and a tap is all it takes to launch your Calculator. When you open the Quick settings panel, the Calculator icon is there visibly on top of the list. Tap it to get started with your computations. - Page 130 Calculator screen Chapter 10: Zen Everywhere...
-
Page 131: Quick Memo
Creating a sticky note You can turn Quick Memo notes into a sticky note so you can view them anywhere on your ASUS Tablet. To create a sticky note, just tap on the pin icon on the upper right corner of Quick Memo after creating your note. -
Page 132: Sound Recorder
Sound Recorder Record audio files using your ASUS Tablet by enabling the Sound Recorder app. Launching Sound Recorder > Sound Recorder. To launch Sound Recorder, tap Tap to customize the Sound Recorder settings Tap to start audio recording During recording, tap this to temporarily stop or pause the recording... - Page 133 Pausing a recording During a paused recording, you can choose to resume, delete, or save the recording. Tap to resume the recording Tap to save the recording Tap to delete the recording Recording List From the Recording List, you can play, rename, share, or deleted a saved audio recording file. View your recording list at the right side of the Sound Recorder main screen.
-
Page 134: Audio Wizard
Audio Wizard Audio Wizard allows you to customize the sound modes of your ASUS Tablet for a clearer audio output that fits actual usage scenarios. Using Audio Wizard To use AudioWizard: Tap ASUS > Audio Wizard. In the AudioWizard window, tap the sound mode you want to activate. -
Page 135: Splendid
Splendid ASUS Splendid allows you to easily adjust the display settings. It enriches the color of your screen with its preset screen color modes. Using Splendid To use Splendid: From your Home screen tap ASUS > Splendid. Select any of these screen color modes: Balance, Bluelight Filter, Vivid, and Customized. - Page 136 Tap to reset to factory defaults Move to adjust the color temperature Vivid mode This mode provides a fine-tuned color preset that enriches the screen color of your ASUS Tablet. Tap to reset to factory defaults Move to adjust the color temperature...
- Page 137 Customized mode This mode allows you to adjust the screen display based on your preferred color temperature, hue, and saturation. Move to adjust the color temperature Move to adjust hue Tap to reset to factory defaults Move to adjust saturation Chapter 10: Zen Everywhere...
-
Page 138: Power Saver
Power Saver Fully maximize or extend the power of your ASUS Tablet even when it is idle or while it stays connected to your network. Smartly customize the power settings for your frequent activities such as reading emails or watching videos. -
Page 139: Customizing Power Saver
Set the brightness level for your frequent activities such as reading emails or ebooks, watching videos, browsing websites, and listening to music. You can also enable the power saving function for some apps or enable the auto-disconnection of your network when your ASUS Tablet is asleep. From Power Saver, tick Customized mode. - Page 140 Chapter 11: Maintain your Zen...
-
Page 141: Maintain Your Zen
You can store data, apps, or files on your ASUS Tablet (internal storage), on an external storage, or on an online storage. You need an internet connection to transfer or download your files on an online storage. Use the bundled USB cable to copy files to or from the computer to your ASUS Tablet. -
Page 142: Securing Your Asus Tablet
Use the security features of your ASUS Tablet to prevent unauthorized access of information. Unlocking your screen When the screen is locked, you can open it with the security unlocking options that the ASUS Tablet offers you. then tap Settings > Lock Screen. - Page 143 Key in at least four numbers to set a PIN. IMPORTANT! Ensure to remember the PIN that you created to unlock your device. Pattern Slide your finger on the dots and create a pattern. IMPORTANT! You can create a pattern with a minimum of four dots. Ensure to remember the pattern that you created to unlock your device.
- Page 144 Instant camera: Slide the Instant camera switch to ON to launch the Camera app even if your • ASUS Tablet is in idle mode by pressing the volume button twice. Owner info: Tap this to edit and key in the information that you want to appear even when •...
- Page 145 Know your ASUS Tablet’s identity such as serial number, IMEI (International Mobile Equipment Identity) number, or model number. This is important, as when you lose your ASUS Tablet, you can contact your mobile carrier and provide the information to blacklist the unauthorized use of your ASUS Tablet.
- Page 146 Chapter 11: Maintain your Zen...
-
Page 147: Appendix
Appendix Appendix Notices For Model P023 Federal Communications Commission Statement This device complies with FCC Rules Part 15. Operation is subject to the following two conditions: • This device may not cause harmful interference. • This device must accept any interference received, including interference that may cause undesired operation. This equipment has been tested and found to comply with the limits for a class B digital device, pursuant to Part 15 of the Federal Communications Commission (FCC) rules. - Page 148 (2) this device must accept any interference, including interference that may cause undesired operation of the device. The IC ID for this device is 3568A-P023. For FCC and IC e-labelling information, please go to Settings > About > Regulatory information.
-
Page 149: Ic Warning Statement
(2) cet appareil doit accepter toute interférence, notamment les interférences qui peuvent affecter son fonctionnement. L’identifiant IC de cet appareil est 3568A-P023. Pour les informations d’étiquette électrique de FCC et IC, s’il vous plaît aller à Paramètres > À... -
Page 150: Ce Mark Warning
CE Mark Warning CE marking for devices with wireless LAN/Bluetooth This equipment complies with the requirements of Directive 1999/5/EC of the European Parliament and Commission from 9 March, 1999 governing Radio and Telecommunications Equipment and recognition of conformity. The highest CE SAR value for the device is 0.081 W/Kg. RF Exposure information (SAR) - CE This device meets the EU requirements (1999/5/EC) on the limitation of exposure of the general public to electromagnetic fields by way of health protection. -
Page 151: Ec Declaration Of Conformity
ASUS will only be responsible for or indemnify you for loss, damages or claims based in contract, tort or infringement under this Warranty Statement. This limit also applies to ASUS’ suppliers and its reseller. It is the maximum for which ASUS, its suppliers, and your reseller are collectively responsible. -
Page 152: Energy Star Complied Product
U.S. Department of Energy helping us all save money and protect the environment through energy efficient products and practices. All ASUS slate computers with the ENERGY STAR logo comply with the ENERGY STAR standard, and the power management feature is enabled by default. The display will be automatically set to sleep within 10 minutes user inactivity. - Page 153 For Model P021 Prevention of Hearing Loss To prevent possible hearing damage, do not listen at high volume levels for long periods. For France, headphones/earphones for this device are compliant with the sound pressure level requirement laid down in the applicable EN 50332-1:2000 and/or EN 50332-2:2003 standard required by French Article L.5232-1.
- Page 154 ASUS will only be responsible for or indemnify you for loss, damages or claims based in contract, tort or infringement under this Warranty Statement. This limit also applies to ASUS’ suppliers and its reseller. It is the maximum for which ASUS, its suppliers, and your reseller are collectively responsible.
- Page 155 I/O ports are located. ASUS Recycling/Takeback Services ASUS recycling and takeback programs come from our commitment to the highest standards for protecting our environment. We believe in providing solutions for you to be able to responsibly recycle our products, batteries, other components as well as the packaging materials.
- Page 156 CE Mark Warning 2200 CE marking for devices with wireless LAN/Bluetooth This equipment complies with the requirements of Directive 1999/5/EC of the European Parliament and Commission from 9 March, 1999 governing Radio and Telecommunications Equipment and recognition of conformity. The highest CE SAR value for the device is 1.140 W/Kg. This equipment may be operated in: For DTS patents, see http://patents.dts.com.
- Page 157 The reduction of the number of the manual pages complies with the reduction of carbon emission. For the detailed user manual and related information, refer to the user manual included in the ASUS Fonepad or visit the ASUS Support Site at http://support.asus.com/.
- Page 158 ASUS will only be responsible for or indemnify you for loss, damages or claims based in contract, tort or infringement under this Warranty Statement. This limit also applies to ASUS’ suppliers and its reseller. It is the maximum for which ASUS, its suppliers, and your reseller are collectively responsible.
-
Page 159: Federal Communications Commission Statement
For Model DA01 Federal Communications Commission Statement This device complies with FCC Rules Part 15. Operation is subject to the following two conditions: • This device may not cause harmful interference. • This device must accept any interference received, including interference that may cause undesired operation. This equipment has been tested and found to comply with the limits for a class B digital device, pursuant to Part 15 of the Federal Communications Commission (FCC) rules. - Page 160 ASUS will only be responsible for or indemnify you for loss, damages or claims based in contract, tort or infringement under this Warranty Statement. This limit also applies to ASUS’ suppliers and its reseller. It is the maximum for which ASUS, its suppliers, and your reseller are collectively responsible.
- Page 161 The reduction of the number of the manual pages complies with the reduction of carbon emission. For the detailed user manual and related information, refer to the user manual included in the ASUS Fonepad or visit the ASUS Support Site at http://support.asus.com/.
- Page 162 EC Declaration of Conformity We, the undersigned, Manufacturer: ASUSTeK COMPUTER INC. Address: 4F, No. 150, LI-TE Rd., PEITOU, TAIPEI 112, TAIWAN Authorized representative in Europe: ASUS COMPUTER GmbH Address, City: HARKORT STR. 21-23, 40880 RATINGEN Country: GERMANY declare the following apparatus: ASUS Tablet...
- Page 163 EC Declaration of Conformity We, the undersigned, Manufacturer: ASUSTeK COMPUTER INC. Address: 4F, No. 150, LI-TE Rd., PEITOU, TAIPEI 112, TAIWAN Authorized representative in Europe: ASUS COMPUTER GmbH Address, City: HARKORT STR. 21-23, 40880 RATINGEN Country: GERMANY declare the following apparatus: ASUS Tablet...
- Page 164 EC Declaration of Conformity We, the undersigned, Manufacturer: ASUSTeK COMPUTER INC. Address: 4F, No. 150, LI-TE Rd., PEITOU, TAIPEI 112, TAIWAN Authorized representative in Europe: ASUS COMPUTER GmbH Address, City: HARKORT STR. 21-23, 40880 RATINGEN Country: GERMANY declare the following apparatus: ASUS Tablet...
- Page 165 EC Declaration of Conformity We, the undersigned, Manufacturer: ASUSTeK COMPUTER INC. Address: 4F, No. 150, LI-TE Rd., PEITOU, TAIPEI 112, TAIWAN Authorized representative in Europe: ASUS COMPUTER GmbH Address, City: HARKORT STR. 21-23, 40880 RATINGEN Country: GERMANY declare the following apparatus: Mobile Dock...
- Page 166 Model name: P023 / P021 / P01T / DA01 Manufacturer: ASUSTeK Computer Inc. Address: 4F, No.150, LI-TE Rd., PEITOU, TAIPEI 112, TAIWAN Authorised representative ASUS Computer GmbH in Europe: Address: HARKORT STR. 21-23, 40880 RATINGEN, GERMANY Appendix...