
Related Manuals for Miele F 456 i-3


Summary of Contents for Miele F 456 i-3
- Page 1 Operating and installation instructions Freezer F 456 i-3 To avoid the risk of accidents or damage to the appliance, it is essential to read these instructions before it is installed and used for the first time. M.-Nr. 06 993 960...
-
Page 2: Table Of Contents
Before placing food in the freezer ........ - Page 3 Contents After sales service ..........31 Electrical connection .
-
Page 4: Guide To The Appliance
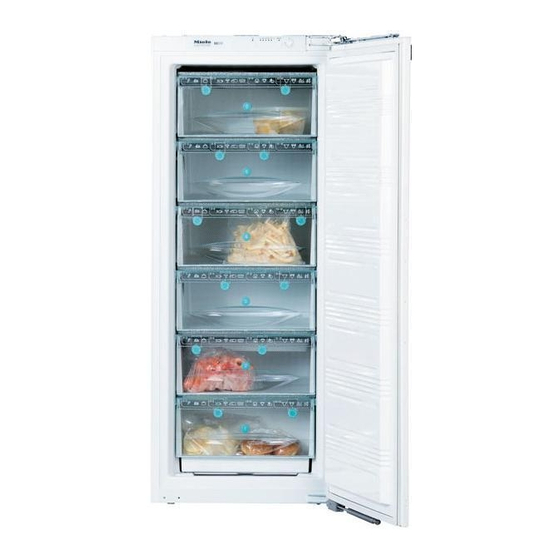
Guide to the appliance a Alarm off button and indicator light b Temperature display e Freezer drawers with freezer calendar f Marker system for frozen food c Super freeze button and indicator light d On/Off and temperature selector dial... -
Page 5: Caring For The Environment
Disposal of the packing material The transport and protective packing has been selected from materials which are environmentally friendly for disposal, and can normally be recycled. Ensure that any plastic wrappings, bags etc. are disposed of safely and kept out of the reach of babies and young children. -
Page 6: Warning And Safety Instructions
Warning and Safety instructions This appliance complies with all relevant legal safety requirements. Improper use of the appliance can, however, present a risk of both personal injury and material damage. To avoid the risk of accidents and damage to the appliance, please read these instructions carefully before installation and before using it for the first time. -
Page 7: Technical Safety
(e.g. electric shock). If the connection cable is faulty it must only be replaced by a Miele approved service technician to protect the user from danger. - Page 8 Do not take ice cubes out with your bare hands and never place ice cubes or ice lollies in your mouth straight from the freezer. The very low temperature of the frozen ice or lollies can cause frost burn to the lips and tongue.
- Page 9 Do not store cans or bottles containing carbonated drinks or liquids which could freeze in the freezer section. The cans or bottles could explode. Danger of injury and damage to the appliance. When cooling drinks quickly in the freezer, make sure bottles are not...
- Page 10 Warning and Safety instructions Disposal of your old freezer Before disposing of an old appliance, first make the door latch or lock unusable. This way you will prevent children from accidentally locking themselves in and endangering their lives. Disconnect it from the mains, cut...
-
Page 11: How To Save Energy
With a medium setting of 2 to 3. Cellar section 8 to 12°C Refrigerator section 4 to 5 °C PerfectFresh zone just above 0 °C Freezer section -18°C Wine storage section 10 to 12 °C Only open the doors when necessary and for as short a time as possible. - Page 12 How to save energy Defrosting Normal energy consumption Defrost the freezer compartment when a layer of ice 0.5 cm thick has built up. Increased energy consumption A layer of ice hinders the cold from reaching the frozen food, and causes an increase in energy...
-
Page 13: Switching On And Off
Cool pack Place the cool pack in the top drawer or to save space on the freezer tray. The cool pack will be at its most effective after it has been in the freezer for approx. -
Page 14: Switching Off For Longer Periods Of Time
Switching on and off Switching off for longer periods of time If the appliance is not going to be used for a longer period of time, e.g. whilst on holiday ^ switch the appliance off, ^ switch off at the wall socket and remove the plug, ^ defrost and clean the appliance out ^ leave the door ajar to air the... -
Page 15: The Correct Temperature
It is very important to set the correct temperature for storing food in the freezer. Micro-organisms will cause food which is not stored at the correct temperature to deteriorate rapidly. Temperature influences the growth rate of these micro-organisims. Reducing the temperature reduces their growth rate. -
Page 16: Temperature Display
If you have adjusted the temperature dial in order to set a different temperature, wait for approx. 6 hours if the freezer is not very full and for approx. 24 hours if the freezer is full before checking the temperature display. -
Page 17: Alarm
The alarm will sound and the alarm indicator light will flash, – when the freezer is switched on. – if the freezer door has been left open for a while, e.g. in order to load, to re-arrange or to take food out. -
Page 18: Super Freeze
Switching on Super freeze The Super freeze function should be switched on 4 - 6 hours before placing food in the freezer. When freezing the maximum load of food the Super freeze function should be switched on 24 hours beforehand. -
Page 19: Freezing And Storing Food
^ Store it in the freezer as soon as possible. Never re-freeze partially or fully defrosted food. Consume defrosted... -
Page 20: Home Freezing
– To prevent chops, steaks, cutlets or rolled meat from freezing together in solid blocks when packed, separate with a sheet of plastic freezer film. – Do not season fresh foods or blanched vegetables before freezing. Only season cooked food... -
Page 21: Before Placing Food In The Freezer
^ When freezing more than 2 kg of fresh food, switch on the Super freeze function for some time before placing the food in the freezer (see "Super freeze"). Placing food in the freezer section Fresh food can be placed in any drawer for freezing, however it is preferable to use the upper drawers. -
Page 22: Defrosting
Cooling drinks When cooling drinks quickly, make sure bottles are not left in the freezer for more than one hour, as they could burst. -
Page 23: Freezer Tray
The cool pack will be at its most effective after it has been in the freezer for approx. 24 hours. If there is a power cut, place the cool... -
Page 24: Before Defrosting
^ Remove the frozen food from the freezer and place it in another freezer, or in a cool box, or wrap it in several layers of newspaper or cloths and store in a cool place until the freezer is ready for use again. -
Page 25: After Defrosting
^ Close the door and switch the appliance on. ^ Switch on the Super freeze function so that the freezer can cool down quickly. The indicator light will come on. ^ Once the temperature in the freezer is sufficiently low, place the food back in the freezer drawers and put them back in the freezer. -
Page 26: Cleaning And Care
E-Cloth ^ A microfibre "E-Cloth" is available from the Miele UK Spare Parts Department, which is suitable for cleaning surfaces such as stainless steel, glass, plastic and chrome without the use of chemicals. -
Page 27: After Cleaning
After cleaning ^ Close the door, and switch the appliance on. ^ Switch on the Super freeze function so that the freezer can cool down quickly. The Super freeze indicator light will come on. ^ Once the freezer has reached the... -
Page 28: Troubleshooting
Once the problem has been resolved the alarm indicator light will go out and the alarm goes off..the alarm sounds at the same time as the-15°C temperature display flashes. There is a fault. Call the Miele Service Department. - Page 29 If you still cannot remedy the fault having followed these suggestions, then contact the Miele Service Department To prevent unnecessary loss of temperature it is advisable not to open the door while waiting for the appliance to be serviced.
-
Page 30: Noises
Noises Normal noises Brrrrr... Blubb, blubb... Click... Sssrrrrr... Remember that the noise of the compressor and the coolant circulating in the system is unavoidable. Noises that you can easily rectify Rattling, vibrating What causes them Humming noise made by the motor (compressor). This noise can get louder for brief periods when the motor is switching on. -
Page 31: After Sales Service
In the event of a fault which you cannot correct yourself, or if the appliance is under guarantee, please contact: – Your Miele Dealer – The Miele Service Department (see back cover for address). When contacting your Dealer or the Service Department, please quote the model and serial number of your appliance. -
Page 32: Electrical Connection
Electrical connection Electrical connection U.K. All electrical work should be carried out by a suitably qualified and competent person in strict accordance with current local and national safety regulations (BS 7671 in the UK). The appliance is supplied with a mains cable and moulded plug ready for connection to an a.c. -
Page 33: Installation
Air at the back of the appliance gets warm. The appliance housing unit must be constructed to allow sufficient space for ventilation. Miele kitchen units are designed to provide this ventilation. A ventilation gap of at least 50 mm depth must be allowed for behind the appliance for air to circulate. -
Page 34: Before Installation
Remove the old hinges from the housing unit. They are no longer required because the furniture door is now fitted to the appliance door. All the necessary parts are supplied or can be ordered from the Miele Spare Parts Department. -
Page 35: Building-In Dimensions
Building-in dimensions Niche height [mm] F 456 i-3 1397 - 1410... -
Page 36: Changing The Door Hinging
Changing the door hinging Before building the appliance in, you will need to decide on which side the door is to be hinged. If left hand door hinging is required, follow the instructions below. ^ Open the appliance door. ^ Remove cover a by hand, and remove cover b using a screwdriver. - Page 37 Do not separate the soft-close mechanism from the ball joint. This would damage the mechanism. ^ Stand the appliance door up, and slacken the hinges at the front (the hinges remain open). ^ Remove screws a, and place the stoppers supplied c in the empty holes.
- Page 38 Changing the door hinging ^ Fit the appliance door onto the previously fitted screws a, and then tighten the screws. ^ Refit covers b.
-
Page 39: Building In The Appliance
All building-in instructions given are for a right-hand hinged appliance. If you have converted the appliance to left-hand hinging, you will need to adapt these instructions accordingly. Aligning the housing unit Before installing the appliance, the housing unit must be carefully aligned using a spirit level. - Page 40 Building in the appliance Building in the appliance ^ Push the appliance into its housing unit. When doing this, make sure that the mains cable does not get trapped. ^ Depending on the thickness of the appliance housing unit walls, push the appliance into the niche until –...
-
Page 41: Fitting A Furniture Door
– screw two 4 x 19 mm long chip board screws b loosely into the middle of the long slot on the plastic bracket and then turn the plastic bracket downwards, – Align cover strip d so that it is parallel to the housing unit ceiling. - Page 42 Building in the appliance ^ Hang the furniture door onto adjusting bolts a. ^ Loosely attach the nuts b on the adjusting bolts. ^ Close the door and check the distance between the door and neighbouring furniture doors. ^ Align to match neigbouring doors if necessary: Side adjustments "X"...
- Page 43 ^ Securing the appliance door to the furniture door: – Secure bracket a to the appliance door by screwing hexagon-headed screw b through the pre-drilled holes in the appliance door. – Check that the two metal edges c are flush (see symbol II ). –...
-
Page 44: Adjusting The Door Hinges
Adjusting the door hinges The door hinges are set ex-works to enable the door to be opened wide. However, if the opening angle of the door needs to be limited for any reason, the hinge can be adjusted to accommodate this. –... - Page 48 Alteration rights reserved / 4706 M.-Nr. 06 993 960 / 00 en - GB F 456 i-3...