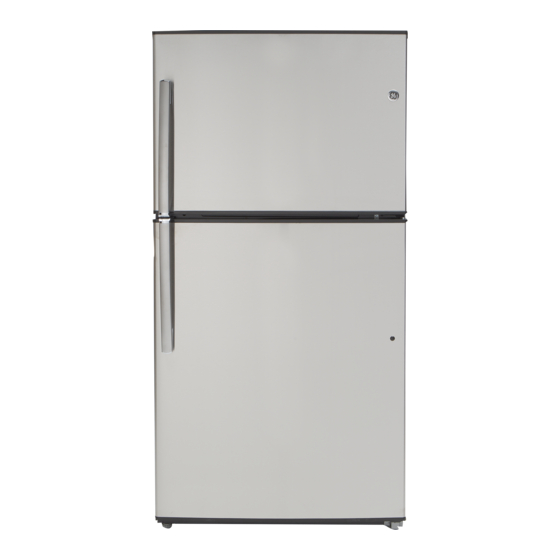
GE GTE21 Owner's Manual And Installation Instructions
Top-freezer
Hide thumbs
Also See for GTE21:
- Owner's manual & installation instructions (78 pages) ,
- Owner's manual and installation instructions (84 pages) ,
- Owner's manual & installation instructions (52 pages)
Table of Contents
Advertisement
GEAppliances.com
Safety Instructions
. . . . . . . . . . . .2-3
Operating Instructions
Automatic Icemaker . . . . . . . . . . . . . . . . . 8
Controls . . . . . . . . . . . . . . . . . . . . . . . . . . . . 4
Crispers and Pans . . . . . . . . . . . . . . . . .6, 7
Shelves and Bins . . . . . . . . . . . . . . . . . . . . 5
Care and Cleaning
Care and Cleaning . . . . . . . . . . . . . . 9, 10
Replacing the Light Bulb . . . . . . . . . . . .10
Preparing to Install
the Refrigerator . . . . . . . . . . . . . . . . . . . .11
Reversing the Door Swing . . . . . . 17-21
Water Line Installation . . . . . . . . . 12-15
Icemaker Installation . . . . . . . . . . . . . . .16
Troubleshooting Tips
Normal Operating Sounds . . . . . . . . . .22
Consumer Support
Consumer Support . . . . . . . . Back Cover
Warranty . . . . . . . . . . . . . . . . . . . . . . . . . .26
Note to Installer -
Be sure to leave
these instructions with the Consumer.
Note to Consumer -
Keep these
instructions for future reference.
Note à l'installateur -
de laisser ces instructions au
consommateur.
Note au consommateur -
Conservez ces instructions pour
référence future.
Nota al instalador -
Asegúrese
de dejar estas instrucciones con el
consumidor.
Nota al consumidor -
estas instrucciones para referencia futura.
Réfrigérateurs
La section française commence à la page 27
Refrigeradores
. . . . . . 23-25
La sección en español empieza en la página 57
Write the model and serial numbers
here:
Model # _________________________
Serial # __________________________
Find these numbers on the gray label
on the left side, near the top of the
refrigerator compartment.
Assurez-vous
Conserve
245D1676P001 49-60726 07-14 GE
Owner's Manual and
Installation Instructions
Models GTE21 and GIE21
Congélateur supérieur
Manuel d'utilisation
et d'installation
Congelador superior
Manual del propietario
e instalación
Advertisement
Table of Contents

Related Manuals for GE GTE21


Summary of Contents for GE GTE21
-
Page 1: Table Of Contents
... .2–3 Operating Instructions Models GTE21 and GIE21 Automatic Icemaker ....8 Controls ......4 Crispers and Pans . - Page 2 IMPORTANT SAFETY INFORMATION. READ ALL INSTRUCTIONS BEFORE USING. SAFETY IMPORTANT SAFETY INFORMATION READ ALL INSTRUCTIONS BEFORE USING GE Appliances website GEAppliances.com For more information on your refrigerator’s operation, visit www . call 800.GECARES (800.432.2737). In Canada visit GEAppliances.ca or call 800.561.3344.
-
Page 3: Use Of Extension Cords
GEAppliances.com SAFETY (CONT.) CONNECTING ELECTRICITY Electrical Shock Hazard. WARNING Plug into a grounded 3-prong outlet Do not remove the ground prong Do not use an adapter Failure to follow these instructions can result in death, fire, or electrical shock. Do not, under any circumstances, cut or remove the third (ground) prong from the power cord. For personal safety, this appliance must be properly grounded. -
Page 4: Control Settings
About the controls on the refrigerator. The controls on your refrigerator will look like the following: Control Settings Initially, set the refrigerator control to the recommended setting. Allow 24 hours for the temperature to stabilize. Several adjustments may be required. Adjust the refrigerator control one increment at a time and allow 12 hours after each adjustment for the refrigerator to reach the temperature you have set. - Page 5 About the shelves and bins. GEAppliances.com Not all features are on all models. Rearranging the Shelves Shelves in the refrigerator and freezer compartments are adjustable. Refrigerator Compartment Full-Width Shelves Track CAUTION Do not clean glass The shelf rests on a molded side-wall shelves or covers with warm water support and locks into a track on the rear when they are cold.
- Page 6 About the crispers and pans. Not all features are on all models. Fruit and Vegetable Crispers Excess water that may accumulate in the bottom of the drawers or under the drawers should be wiped dry. Adjustable Humidity Crisper Slide the control all the way to the Vegetables Slide the control all the way to the Fruits setting setting to provide high humidity recommended to provide lower humidity levels recommended...
- Page 7 About crisper removal. GEAppliances.com Not all features are on all models. Crisper Removal Unload the bottom shelf before attempting to remove the storage drawers. To Remove: Lift the drawers up slightly while pulling them past the stop location. If the door prevents you from taking out the drawers, first try to remove the door bins.
-
Page 8: About The Automatic Icemaker
About the automatic icemaker. A newly-installed refrigerator may take 12–24 hours to begin making ice. Automatic Icemaker Icemaker (on some models) You will hear a buzzing sound each time the Avoid contact with the CAUTION icemaker fills with water. moving parts of the ejector mechanism, or with Throw away the first few batches of ice to allow the heating element (located on the bottom of the water line to clear. -
Page 9: Controls
Care and cleaning of the refrigerator. GEAppliances.com Cleaning the Outside The door handles and trim. Clean with a cloth Friend Soft Cleanser will remove rust, tarnish, dampened with soapy water. Dry with a soft cloth. and small blemishes Use only a liquid cleanser free of grit and rub in the direction of the brush Keep the outside clean. -
Page 10: Preparing For Vacation
Care and cleaning of the refrigerator. Preparing for Vacation For long vacations or absences, remove Set the icemaker power switch to the OFF food and unplug the refrigerator. Move the position and shut off the water supply to the refrigerator control to the OFF position and refrigerator. -
Page 11: Installation Instructions
If the refrigerator has an icemaker, it will have to be refrigerator is transferred from them to the rollers. After connected to a cold water line. A GE water supply kit rolling the refrigerator back into place, turn the legs... -
Page 12: The Refrigerator
, 1/4" outer diameter to connect the refrigerator to Osmosis Water System, the only approved installation the water supply. If using copper, be sure both ends is with a GE RVKit. For other reverse osmosis water of the tubing are cut square. systems, follow the manufacturer’s recommendations. - Page 13 • Two 1/4” outer diameter compression nuts and 2 avoid drawing off any sediment from the water ferrules (sleeves) pipe. the shutoff valve and the refrigerator water valve. • If you are using a GE SmartConnect Refrigerator ™ Tubing kit, the necessary fittings are preassembled to the tubing.
- Page 14 Install it connect it to the shutoff valve. in the water line near the refrigerator. If using GE SmartConnect Refrigerator Tubing kit, you will ™...
-
Page 15: Installing The Refrigerator
TURN THE WATER ON AT THE TO THE REFRIGERATOR (CONT.) SHUTOFF VALVE (CONT.) Place the compression nut and ferrule (sleeve) onto the end of the tubing as shown. On GE Reattach the compressor SmartConnect Refrigerator Tubing kit, the nuts are ™... -
Page 16: Icemaker Installation
Installation Instructions ICEMAKER INSTALLATION INSTRUCTIONS BEFORE YOU BEGIN REPOSITION FREEZER SHELF Make sure the freezer shelf is in the lowest position. Read each step thoroughly before proceeding. WARNING To eliminate the risk of PREPARE FOR INSTALLATION electric shock or injury during installation, you must first unplug the refrigerator There is a lebel on the back of the refrigerator that before proceeding. -
Page 17: Important Notes
Installation Instructions REVERSING THE DOOR SWING IMPORTANT NOTES REMOVE FREEZER DOOR When reversing the door swing: 1. Remove all food from the inner door liner.. • Read the instructions all the way through before 2. Tape the door shut with masking tape. starting. - Page 18 Installation Instructions REVERSING THE DOOR SWING (CONT.) REMOVE REFRIGERATOR DOOR TRANSFER BOTTOM HINGE TO THE LEFT 1. Remove all food from the inner door liner. 1. Using a 5/16 Socket 2. Tape the door shut with masking tape. and ratchet, remove 3.
-
Page 19: Refrigerator Door
3. Remove the fastener from the surface of the freezer door, and cover the new vacant hole with the GE Badge. (For a new unit, the GE Badge can be found in your handle kit. If you need a new badge call 800.GE.CARES (800.432.2737) (in Canada call... - Page 20 Phillips of the freezer door with a screwdriver and remove the Phillips screwdriver. GE badge. 2. For Plactic handle : Pull handle up and off of the fastener on the door 5. For Plactic handle :...
- Page 21 (Left top hinge and cover can be found inside screws with a 5/16 socket and ratchet. of the product. Call GE Service at 800.GE.CARES (800.432.2737 or in Canada call 800.561.3344 if parts are missing.) Support the door on the handle side and make sure the door is straight and the gap between the doors is even across the front.
-
Page 22: Normal Operating Sounds
Normal operating sounds. Newer refrigerators sound different from older refrigerators. Modern refrigerators have more features and use newer technology. Do you hear what I hear? These sounds are normal. HUMMM... WHOOSH... The new high efficiency compressor may run faster and longer than your old refrigerator and you may You may hear the fans spinning at high speeds. -
Page 23: Before You Call For Service
Before you call for service… GEAppliances.com Troubleshooting Tips Save time and money! Review the charts on the following pages first and you may not need to call for service. Problem Possible Causes What To Do Freezer door pops open This is normal if, after •... - Page 24 Before you call for service… Troubleshooting Tips Problem Possible Causes What To Do Automatic icemaker Ice maker feeler arm is not • Move the feeler arm to the ON position. (on some models) set ON. does not work Water supply turned off or •...
- Page 25 GEAppliances.com Problem Possible Causes What To Do Hot air from bottom Normal air flow cooling of refrigerator motor. In the refrigeration process, it is normal that heat be expelled in the area under the refrigerator. Some floor coverings will discolor at these normal and safe temperatures.
-
Page 26: Warranty
This warranty is extended to the original purchaser and any succeeding owner for products purchased for home use within the USA. If the product is located in an area where service by a GE Authorized Servicer is not available, you may be responsible for a trip charge or you may be required to bring the product to an Authorized GE Service location for service.