Table of Contents

Related Manuals for Sharp VC-MH714HM


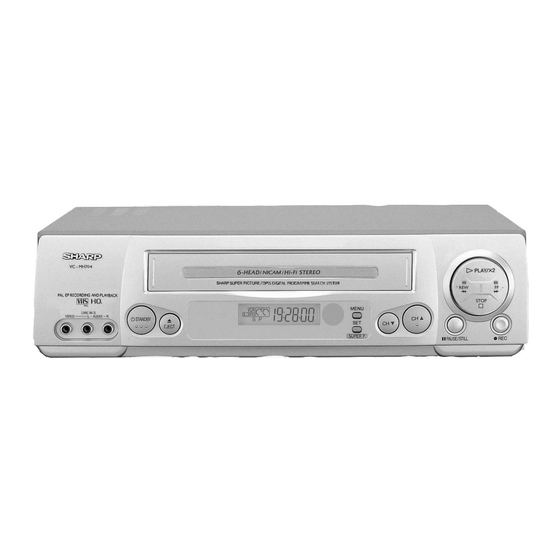
Summary of Contents for Sharp VC-MH714HM
- Page 1 TINS-3992UMZZ HM Final Cover 12/9/01 10:07 am Page 1 VC-MH704HM Shown VC-MH714HM VC-MH704HM VC-MH704LM VIDEO CASSETTE RECORDER OPERATION MANUAL G AUTO INSTALLATION G SHARP SUPER PICTURE G NICAM Hi-Fi STEREO G 6 HEAD EXTENDED PLAY G CHILD LOCK...
- Page 2 TINS-3992UMZZ HM Final Cover 12/9/01 10:07 am Page 2 Dear SHARP Customer Thank you for buying this SHARP VCR. Given proper care it will provide years of entertainment for the whole family. Please read this operation manual carefully before attempting to operate the VCR.
- Page 3 TINS-3992UMZZ HM Final Cover 12/9/01 10:07 am Page 3 VCR REMOTE CONTROL 14. BASIC SHARP TV CONTROLS 1. STANDBY 2. CHILD LOCK 15. ZERO BACK 3. TIMER ON/OFF 4. AUDIO OUT 16. SKIP SEARCH 17. SET 5. MENU 18. MENU SELECT 6.
- Page 4 VCR yourself. For service please contact your dealer. If this is not possible, please call our Customer Information Centre for details of your nearest Sharp Service Centre. In the unlikely event of this equipment requiring repair during the guarantee period, you will need to provide proof of the date of purchase to the repairing company.
-
Page 5: Table Of Contents
Fast forwarding/rewinding a video tape............11 Immediate recording........................11 Tape speed selection ................... 12 How to use to make a recording (vc-mh714hm only)..........13 How to set a delayed recording ....................15 ADVANCED OPERATION Audio and your VCR ........................18 Playback of a video tape ...................... -
Page 6: Before Using Your Vcr Important Notes On Your Vcr
• ... place any heavy object or liquid on top of the VCR. If liquid drops inside the VCR unplug immediately and contact your SHARP dealer. Do not use the VCR. • ... insert or drop anything into the tape... -
Page 7: Unpacking The Accessories
Remove the batteries and keep in a safe place if you do not plan to use the VCR for several months. • Remove and dispose of flat batteries safely and promptly. • Incorrect use of batteries may cause them to leak or burst. www.sharp.co.uk/support... -
Page 8: Installing Your Vcr Connecting The Cables
VCR. - The advantage of a Scart connection is improved picture and sound quality during playback. Connect the VCR to the mains. AERIAL RF CONNECTION CABLE SCART LEAD ✔ The VCR is correctly connected. SHARP Helpline tel: 08705-274277 or www.sharp.co.uk/support... -
Page 9: Auto Tuning
If the AUTO INSTALLATION screen doesn’t appear when you switch on your VCR or you wish to reset your VCR and start the installation again, refer to VCR RESET at the back of the book. See next page to continue SHARP Helpline tel: 08705-274277 or www.sharp.co.uk/support... -
Page 10: Remote Control
(This may take a few minutes.) S E T : E N T E R ME NU : E X I T Button positions for your reference. REMOTE CONTROL See next page to continue SHARP Helpline tel: 08705-274277 or www.sharp.co.uk/support... - Page 11 If you wish to, delete or change the MENU channel order at a later date please refer MANUALLY SORTING CHANNELS towards the back of this book. MENU SELECT BUTTONS See next page to continue SHARP Helpline tel: 08705-274277 or www.sharp.co.uk/support...
- Page 12 NOTE: • You will need to update the clock for Winter/Summer daylight saving. ✔ All the programmes should now be correctly tuned in and the clock set. SHARP Helpline tel: 08705-274277 or www.sharp.co.uk/support...
-
Page 13: Basic Operation Scart Lead Connection (Not Supplied)
To remove minor contamination run a video tape in visual search mode. If this fails, you will need to have the heads cleaned by a SHARP Service Facility. Please note, if cleaning is necessary it is not covered by the guarantee. -
Page 14: Pausing And Slow Motion
STOP STOP EJECT • To eject the tape press on the VCR. SHARP SUPER PICTURE should enhance the picture quality during playback. It is normally set to ON. To turn SHARP SUPER PICTURE on or off press SUPER P. the VCR front panel. -
Page 15: Fast Forwarding/Rewinding A Video Tape
CHANNEL on the remote control or on the VCR front panel. To change between single digit and 2-digit channel numbers, press the button. For example, for channel 24, press the button then press www.sharp.co.uk/support... -
Page 16: Tape Speed Selection
VCR into STANDBY mode, or just eject the tape and place the VCR in STANDBY timer mode if the VCR is in timer record mode. • If the VCR ejects the video tape when you press the tape is record protected. i.e. record protection tab has been removed. www.sharp.co.uk/support... -
Page 17: How To Use
TINS-3992UMZZ English.book Page 13 Wednesday, September 12, 2001 9:46 AM BASIC OPERATION HOW TO USE TO MAKE A RECORDING (VC-MH714HM ONLY) Before you start! TIMER • If the Timer Standby symbol appears on the VCR display, press the ON/OFF button to remove the symbol. - Page 18 TINS-3992UMZZ English.book Page 14 Wednesday, September 12, 2001 9:46 AM BASIC OPERATION HOW TO USE TO MAKE A RECORDING (VC-MH714HM ONLY) If you wish to change the RECORDING SPEED , use the to highlight SP. Press 1 / 2 DA T E...
-
Page 19: How To Set A Delayed Recording
- : - - example to record a programme on channel - - / - - - : - - - : - - 3, press 0 3. Then press to move to the next setting. See next page to continue www.sharp.co.uk/support... - Page 20 If the video tape is ejected when the VCR tries to record the record protection tab has been removed. • During recording, press STOP to cancel the recording. If there are further recordings to be made, the VCR will return to Timer Standby. www.sharp.co.uk/support...
- Page 21 - - / - - - : - - - : - - NOTE: • If there are some programmes to be recorded, do not forget to press TIMER ON/OFF button to return the VCR to Timer Standby mode. www.sharp.co.uk/support...
-
Page 22: Advanced Operation Audio And Your Vcr
• If the poor quality is for a long period the VCR will automatically select the mono track and the sound will be in mono. • NICAM sound may not be stereo. www.sharp.co.uk/support... - Page 23 The diagram below shows how to connect your VCR to audio equipment. When connected in this way stereo sound is possible from the speakers. EXISTING AERIAL CABLE BACK OF TELEVISION RF CONNECTION CABLE AERIAL IN RF-OUT AUDIO OUT L and R AUDIO PHONO LEADS (NOT SUPPLIED) AMPLIFIER www.sharp.co.uk/support...
-
Page 24: Playback Of A Video Tape
: E N T E R ME NU : E X I T Press to select ON or OFF. Press the button to confirm and return to the main menu screen. Press the MENU button to exit to normal screen. www.sharp.co.uk/support... -
Page 25: Lcd Display
VCR (ensure the menu screen is not on) then press and hold the DISPLAY button for approximately 2 seconds. This will reduce the brightness of the VCR display. Repeat the process to change the display back to the previous setting. www.sharp.co.uk/support... -
Page 26: Blue Mute
Follow steps 1 to 3 from BLUE MUTE above. Press the [ ] menu select buttons to select COLOUR. Press menu select buttons to select AUTO or PAL. MENU Press to confirm and then to return to the normal screen. www.sharp.co.uk/support... -
Page 27: Searching The Video Tape
To cancel the search before it has finished, press STOP PLAY/X2 NOTES: • Recordings must be longer than 3 minutes. • The starting point of playback may vary. • This feature will only work with video tapes recorded on a VCR with the DPSS feature. www.sharp.co.uk/support... -
Page 28: Recording From Other Equipment
VCR, select Press to start recording. NOTE: • There are many different ways of connecting external equipment to your VCR. Please refer to your equipment operation manuals for further information. www.sharp.co.uk/support... -
Page 29: Child Lock
If you attempt to change modes by pressing another button while CHILD LOCK is on, indicator will flash on the VCR display. • If power is interrupted for more than 60 seconds (due to power failure etc), CHILD LOCK may disengage. www.sharp.co.uk/support... -
Page 30: Decoder Switching Operation
VCR is connected to both TV and decoder unit by SCART leads. Then: • Press STANDBY to place the VCR in STAND-BY mode. OR • Press TV/VCR on the remote control to place the VCR in ‘VCR mode’. ‘VCR’ will appear on the display. www.sharp.co.uk/support... -
Page 31: Customised Installation Manually Tuning A Channel
CHANNEL instead of the NUMBER BUTTONS Remote Control Press to select ON or OFF for MENU this option. SV/V+/ CLEAR TIMER Press to confirm. Press MENU to leave this function. MODE OSD www.sharp.co.uk/support... -
Page 32: Manually Sorting Channels
MODE OSD button can be used to toggle between a blue background and the normal MENU SELECT picture. BUTTONS The blue background will be shown until either Remote Control another channel is selected or the MODE OSD button is pressed again. www.sharp.co.uk/support... -
Page 33: Deleting Channels
MODE OSD button can be used to toggle between a blue background and the normal picture. The blue background will be shown until either another channel is selected or the MODE OSD button is pressed again. MENU SELECT BUTTONS Remote Control www.sharp.co.uk/support... -
Page 34: Manually Setting The Clock
NUMBER MENU BUTTONS or [ ]. For example, for 2001 enter . For the year 2002 enter Press the button to confirm. MENU SELECT BUTTONS NOTE: • You will need to update the clock for Summer/Winter daylight saving. www.sharp.co.uk/support... -
Page 35: More Information About Your Vcr Vcr Display
TV/VCR button on the remote control. Now the TV broadcast channel will be seen on the TV screen and ‘VCR’ will disappear from the VCR display. TV/VCR • Pressing again will return the TV picture to the playback picture. www.sharp.co.uk/support... -
Page 36: On-Screen Display
The default time and date will not be displayed if the clock has not been set. • The VCR will return to display . each time it is switched on. • If you are recording from this VCR to another, make sure you remove the display from the screen otherwise it will be recorded. www.sharp.co.uk/support... -
Page 37: Specifications
TINS-3992UMZZ English.book Page 33 Wednesday, May 9, 2001 12:25 PM MORE INFORMATION ABOUT YOUR VCR SPECIFICATIONS Format: VHS PAL standard Number of heads: Video signal system: PAL colour or monochrome signal: 625 lines Hi-Fi audio recording Deep layer recording system conforming to system: stereo Hi-Fi VHS standard. -
Page 38: Troubleshooting
. VCR CHANNEL • Try another tape. • The video heads may have been contaminated - refer to a SHARP Service Facility. Playback/Recording • Ensure the VCR is connected to a stereo TV does not play back in with a SCART lead. - Page 39 TINS-3992UMZZ English.book Page 35 Monday, June 4, 2001 9:28 AM TROUBLESHOOTING TROUBLESHOOTING AREA PROBLEM POSSIBLE CAUSE/CURE VIDEOPLUS+ does not • Broadcast does not carry VPS/PDC signal RECORDING record desired which alters recording time. programme.(VC- • Check VPS/PDC mode is switched ON. MH714HM only) •...
-
Page 40: Vcr Reset
OFF and ON. To do this press the CLEAR then buttons on the RF CHANNEL TUNING AUTO remote control at point 3 from above. at point 4 of TUNING on page 5. This will help minimise interference. www.sharp.co.uk/support... -
Page 41: Guarantee
3. To benefit from this guarantee, any fault which occurs must be notified to SHARP, or its appointed Service Facility within one year from the date this product was purchased. Proof of purchase must be provided. 4. The guarantee does not cover carriage costs, batteries or video tapes. -
Page 42: Connecting To The Mains
Do not allow water to come into contact with the power supply cord or plug. • A damaged power supply cord or loose plug may cause electric shock. • Contact your SHARP dealer or a qualified electrician. Do not use the VCR. www.sharp.co.uk/support...