Table of Contents
Advertisement
Advertisement
Table of Contents

Related Manuals for Pioneer BDP-180


Summary of Contents for Pioneer BDP-180
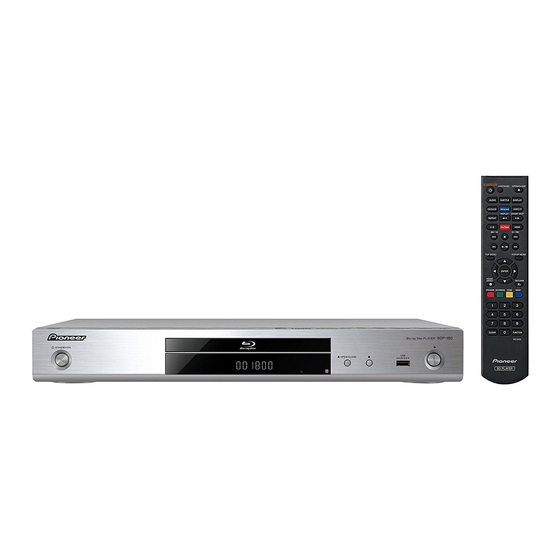
- Page 1 BDP-180 BDP-180 Blu-ray 3D PLAYER BDP-180 For customers in Europe: Discover the benefits of registering your product online at http://www.pioneer.co.uk http://www.pioneer.eu Download an electronic version of this manual from our website. Operating Instructions...
-
Page 2: Operating Environment
Thank you for buying this Pioneer product. Please read through these operating instructions so you will know how to operate your model properly. After you have finished reading the instructions, put them away in a safe place for future reference. - Page 3 (the time depends on the the power cord once in a while. When you find it extent of condensation). The water droplets will damaged, ask your nearest PIONEER authorized dissipate and playback will become possible. service center or your dealer for a replacement.
-
Page 4: Table Of Contents
Contents 01 Before you start Continuing playback from a specified position What’s in the box ........5 (Continued Viewing Playback) . -
Page 5: Before You Start
Chapter 1 Before you start What’s in the box • Remote control x 1 • AAA 700 size manganese batteries x 2 • Power cord • Warranty card (European models only) x 1 • Operating instructions (this document) x 1 Putting the batteries in the Open the rear cover. -
Page 6: Software Update
The player can be controlled from a mobile device by IN U.K.: installing the special application onto the mobile device. http://www.pioneer.eu/ http://www.pioneer.co.uk/ For details, see the product information on the Pioneer website. IN Hong Kong: http://www.pioneerhongkong.com.hk/ This special application may be changed or discontinued without notice. -
Page 7: Types Of Discs/Files That Can Be Played
Types of discs/files that can be played Playable discs Discs with the logo marks below indicated on the disc label, package or jacket can be played. Caution • Only the discs that have been finalized can be played. Application format Disc type Logo CD-DA... -
Page 8: Discs That Cannot Be Played
Discs that cannot be played To enjoy the surround sound of Dolby TrueHD, Dolby Digital Plus, DSD, DTS-HD Master Audio and DTS-HD • HD DVDs High Resolution Audio, it is recommended to connect the player to an AV receiver or amplifier compatible with •... -
Page 9: Playing Cds
About region numbers BD-LIVE functions such as downloading movie trailers or additional audio and subtitle languages Blu-ray Disc Player and BD-ROM or DVD-Video discs are and playing on-line games can be enjoyed over the assigned region numbers according to the region in Internet. -
Page 10: Playable Files
® • It may not be possible to play discs recorded using a DivX Plus HD devices have been tested for high- ® computer or a BD/DVD recorder, if burn quality is not quality DivX (.divx, .avi) and DivX Plus HD (.mkv) good due to characteristics of the disc, scratches, dirt video playback. - Page 11 Table of Playable Files Playable media BD-R/RE/-R DL/ Playable files RE DL/-R LTH, File specifications (Extensions) DVD-R/RW/-R DL/ USB devices Network +R/+RW/+R DL, CD-R/RW Sampling frequencies: Up to 48 kHz Bit rate: Up to 320 kbps (.mp3) Audio type: MPEG-1 Audio Layer 3 Sampling frequencies: Up to 48 kHz...
- Page 12 Playable media BD-R/RE/-R DL/ Playable files RE DL/-R LTH, File specifications (Extensions) DVD-R/RW/-R DL/ USB devices Network +R/+RW/+R DL, CD-R/RW Maximum resolution: Up to 1 920 x 1 080 Video: WMV9, WMV9AP (VC-1) (.wmv) Audio: WMA Maximum resolution: Up to 1 920 x 1 080 ...
-
Page 13: Part Names And Functions
Part Names and Functions Remote Control 12 TOP MENU – Press to display the top menu of the BD-ROM or DVD-Video. 13 /// – Use to select items, change settings and move the cursor. ENTER – Press to execute the selected item or enter a setting that has been changed, etc. -
Page 14: Front Panel
Front Panel STANDBY/ON – Press to turn the power on and Remote control sensor – Point the remote control to off. this, then operate it within approximately 7 m. Disc tray The player may have trouble capturing remote control signals if there is a fluorescent light nearby. -
Page 15: Connecting Up
Chapter 2 Connecting up Be sure to turn off the power and unplug the power cord “x.v.Color” is a promotion name given to the products that from the power outlet whenever making or changing have the capability to realize a wide-gamut color space connections. -
Page 16: About Control Function With Hdmi
Cables when using the Caution control function with HDMI. The control function with • Connect the player directly to the Pioneer AV receiver HDMI may not operate properly if other HDMI cables compatible with Sound Retriever Link function. are used. -
Page 17: Connecting A Tv
Connecting a TV Connecting an AV receiver or amplifier Connecting an AV receiver or amplifier on page 17 to connect an AV receiver or amplifier using an HDMI cable. Connect to an AV receiver or amplifier in order to enjoy the surround sound of Dolby TrueHD, Dolby Digital Plus, Caution Dolby Digital, DTS-HD Master Audio, DTS-HD High... -
Page 18: Connecting Audio Cables
Connecting audio Connecting the USB device cables Caution • Be sure to turn the player’s power off before Connecting an AV receiver or connecting or disconnecting USB devices. • When using an external hard disk as the external amplifier using an optical storage device, be sure to turn on the hard disk’s digital audio cable power before turning on the player’s power. -
Page 19: Connecting To The Network Through Lan Interface
Internet service provider is required. For more details, contact your nearest Internet service provider. • Please note that Pioneer will accept no responsibility whatsoever for communications errors or problems related to the user's network connection environment or connected devices. Contact your provider or the Computer manufacturer of your connected devices. -
Page 20: Getting Started
Use / to select, then press ENTER. • Before turning on the power, check that the When a Pioneer TV that is compatible with Control connections between the player and other devices are function is connected to this player’s HDMI OUT correct. -
Page 21: Switching The Output Video Resolution
Switching the output • When 4K/24p, 1080/24p is selected, the signals are output as such, even if your TV is not compatible with video resolution 4K/24p or 1080/24p signals. If the picture is not displayed properly, use HDMI to set an output video resolution at which the video and audio signals are Use the procedure below to switch the output video properly output. -
Page 22: Playback
Chapter 4 Playback Playing discs or files Note • The resume playback function is canceled This section describes the player’s main operations. automatically in the following cases: For the types of discs and files that can be played, see – When the disc tray is opened. page 7. -
Page 23: Forward And Reverse Scanning
• If the set disk is a CD, you can specify the track and • The picture moves a step forward or step reverse each play, even when the Pioneer logo is displayed on the time the button is pressed. -
Page 24: Playing A Specific Section Within A Title Or Track Repeatedly (A-B Repeat)
Playing a specific section Playing in the desired order within a title or track (Programmed Play) repeatedly (A-B Repeat) During playback, press PROGRAM. Use this procedure to play a specific section within a title • The program screen is displayed. or track repeatedly. -
Page 25: Zoom
Zoom Switching the subtitles For discs or files on which multiple subtitles are recorded, During playback, press ZOOM. the subtitles can be switched during playback. • Each time you press ZOOM, the zoom level changes as shown below. Caution [Zoom 2x] ... -
Page 26: Moving Subtitles
Moving subtitles Enjoying BONUSVIEW or BD-LIVE The position of the subtitles displayed while playing BD- ROMs or DVDs can be moved. This player is compatible with BD-Video BONUSVIEW and BD-LIVE. Play the BD-ROM or DVD video and display the subtitles on the TV screen. When using BD-Video discs compatible with BONUSVIEW, you can enjoy such functions as secondary Press and hold the SUBTITLE button for at least 2... -
Page 27: Playback Functions
Playback functions The functions that can be used differ according to the type of disc and file. In some cases, some of the functions cannot be used. Check the usable functions on the table below. Disc/file type DVD-R Function BD-R DVD- Video Image... -
Page 28: Using The Function Menu
Using the FUNCTION FUNCTION menu item list menu Item Description Display the title information for the Title (track) currently playing disc and total number Various functions can be called out according to the of titles on the disc. Also select the title player’s operating status. -
Page 29: Playing From A Specific Time (Time Search)
Continuing playback Playing from a specific time (Time Search) from a specified position (Continued Select Time. Viewing Playback) Use / to select, then press ENTER. Input the time. Use the number buttons (0 to 9) to input the time. This function allows you to continue playback from a position you specify to be played next time, even after •... -
Page 30: Changing The Video Options
Changing the Video options You can adjust the setting of the screen according to your liking. Press VIDEO P. to display the Video Parameter screen. Select the item and change the setting. Use / to select the item, then use / to change the setting. -
Page 31: Playback From Source Function
Chapter 5 Playback from Source function (Digital Media Renderers). This player supports this DMR function. When in the DMR mode, such operations as playing and stopping files can be performed from the external controller. • To play back audio files stored on components on the network, you must turn on the DHCP server function of your router. -
Page 32: Playback File On The Network
“BDMV” folder containing which the files to network connection may be blocked. be played into the “AVCHD” folder. Pioneer is not responsible for any malfunction of the player and/or the Source function features due to Select the title/track or file you want to play. -
Page 33: Playing Back Image Files
Playing back image files Playing the Playlist Press HOME MENU to display the Home Menu About Slideshow screen. A display of the files in the folder switches automatically. Select [SOURCE], and press ENTER. Note Select Playlist. Use / to select, then press ENTER. •... -
Page 34: Connecting By Miracast Tm /Wi-Fi Direct Tm
• Depending on the model, a connection might not be possible even for Miracast/Wi-Fi Direct compatible Note models. • If the Pioneer logo is not displayed, check the • The connection procedure for Miracast/Wi-Fi Direct following: depends on the mobile device. For details, refer to the –... -
Page 35: Connecting By Miracast
Press STANDBY/ON and the power to the unit device is also displayed on the TV. will come on. The Pioneer logo will be displayed on the TV screen. Note Press Miracast to display the Miracast/Wi-Fi • For instructions on operating your mobile devices, Direct mode screen. -
Page 36: Canceling The Miracast/Wi-Fi Direct Connection
Playing a mobile Canceling the Miracast/Wi-Fi Direct connection device’s photos, music or video files While the Miracast/Wi-Fi Direct mode screen is displayed, press RETURN. Send the photos, music or video files from your mobile • The connection is canceled. device to this unit. •... -
Page 37: Playing The Web Contents
• You must connect the player to the Internet suspended, interrupted, or discontinued at any time Connecting to the network through beforehand. See without notice, and Pioneer disclaims any liability in LAN interface on page 19 for the details. connection with such occurrences. -
Page 38: Advanced Settings
Chapter 8 Advanced settings Changing the settings Operating the Initial Setup Select and set Initial Setup. Use / to select, then press ENTER. screen Select the item and change the setting. Use /// to select, then press ENTER. When playback is stopped, display the Home Menu screen. - Page 39 Setting Options Explanation Digital Output Bitstream Select this to output digital audio signals directly. Select this to output digital audio signals converted to 2-channel audio signals. Reencode When a BD containing secondary audio and interactive audio is played, the two audio signals are mixed and converted to Dolby Digital audio or DTS audio for output.
- Page 40 Setting Options Explanation HDMI 3D Auto With 3D discs, the disc is played with 3D images. 3D images are not played. 3D Notice This sets whether or not to display the 3D notice when playing 3D images. IP Address Setting Select this to set the IP address of the player and DNS server (page 43).
- Page 41 Setting Options Explanation Angle Mark Select this to display the angle mark on the TV screen (page 25). Select this if you do not want to display the angle mark on the TV screen. PIP Mark Select this to display the PIP mark on the TV screen. Select this if you do not want to display the PIP mark on the TV screen.
-
Page 42: Language Setting
Changing to other language at Re-input the password. Use the number buttons (0 to 9) to input the number, then language setting press ENTER to set. Use / to move the cursor. Select and set Language. Use / to select, then press ENTER. •... -
Page 43: Wps Setup (Wi-Fi Protected Setup)
Setting the IP address Input IP Address or Server Name. Use the number buttons (0 to 9) to input the number if you Select and set Network IP Address Setting select IP address in step 3. Use / to move the cursor. Next Screen. -
Page 44: Wireless Network Connection
Wireless network PIN Input Connection settings are made by inputting the 8-digit PIN connection code shown on the main display to the access point to which you selected. Follow the instructions shown in Connecting using PIN code configuration on the right. Wireless network setup When performing wireless settings set Initial Setup ... -
Page 45: Software Updating
Select abc, ABC, or !@#$ using /// to Product information on this player is provided on the switch to lower case characters, upper case characters, Pioneer website. Check the website shown on page 6 for or symbols. update and service information on your Blu-ray disc player. -
Page 46: Updating Using Usb Flash Drive
Note Check that the player’s power is turned on. • When an update file is provided on the Pioneer website, use your computer to download it onto a When playback is stopped, display the Home USB flash drive. Carefully read the instructions on Menu screen. -
Page 47: About How Digital Audio Formats Are Output
About how digital audio formats are output Setting Bitstream Re-encode Only the primary audio (the The primary audio, secondary The primary audio, secondary main sound for movies, etc.) is audio and interactive audio are audio and interactive audio are output. The secondary audio converted into PCM audio and converted into PCM audio then Method of... -
Page 48: Additional Information
Chapter 9 Additional information Cautions on use Turn the power off when not using the player Moving the player Depending on the conditions of the TV broadcast signals, striped patterns may appear on the screen when the TV is If you need to move this unit, first remove the disc if turned on while the player’s power is turned on. -
Page 49: Cleaning The Pickup Lens
(condensation) may form on the disc surface. Discs will or dirt, consult your nearest Pioneer authorized service not play properly if there is condensation on them. center. Although lens cleaners for players are... -
Page 50: Troubleshooting
Sometimes the trouble may lie in another component. Inspect the other components and electrical appliances being used. If the trouble cannot be rectified even after checking the points below, ask your nearest Pioneer authorized service center or your dealer to carry out repair work. Playback... - Page 51 Problem Check Remedy Picture freezes and the front • Press STOP to stop playback, then restart playback. panel and remote control • If the playback cannot be stopped, press STANDBY/ON on the buttons stop working. player’s front panel to turn off the power, then turn the power back on. •...
- Page 52 Problem Check Remedy Multi-channel sound is not Is the audio output of the Read the operating instructions for the connected AV receiver or output. connected AV receiver or amplifier and check the audio output settings of the AV receiver or amplifier, etc., properly set? amplifier.
-
Page 53: Control Function
Control function are connected between the Control-compatible device and the player. See page 16. • Even when connected to a Pioneer product compatible with the Control function, some of the functions may not work. Also refer to the operating instructions for the connected device. - Page 54 Problem Check Remedy A message other than Is “Network is FAILED.” • Check that this player and the Ethernet hub (or router with a hub “Networks is OK.” is displayed? functionality) are properly connected. displayed when Connection • If the IP address is obtained using the DHCP server function, check Test is performed.
- Page 55 Problem Check Remedy Video and audio playback are Check whether the audio file was recorded in a format supported by undesirably stopped or this unit. disturbed. Even audio files listed as playable on this unit may sometimes not be played back or displayed. Check whether the folder has been damaged or corrupted.
-
Page 56: Wireless Lan
Wireless LAN Problem Check Remedy Network cannot be accessed This unit and wireless LAN Improve the wireless LAN environment by taking steps such as moving via wireless LAN. router etc. are too far apart, or the unit and wireless LAN router etc. closer together. there is an obstacle between them. -
Page 57: Others
Problem Check Remedy The audio or video is Is there a microwave oven or Improve the wireless LAN environment by taking steps such as moving interrupted (distorted) when other device that generates the unit and mobile devices etc. closer together. using DRM, Wi-Fi Direct, or electromagnetic waves near Miracast. - Page 58 Problem Check Remedy USB (external storage) device Is the USB device properly • Turn the player’s power off, then turn the power back on. does not work with this player connected? • Turn the player’s power off, then reconnect the external storage properly.
-
Page 59: Glossary
Glossary Angle (Multi angle) Dolby TrueHD Up to 9 camera angles can be recorded simultaneously on BD- Dolby TrueHD is an audio format using lossless coding. With BD- ROM or DVD-Video discs, letting you view the same scene from ROMs, up to 8 channels can be recorded at 96 kHz/24 bits, or up different angles. -
Page 60: Parental Lock
Linear PCM USB (Universal Serial Bus) This is referred as the audio signals that are not compressed. USB is the industry standard for connecting peripherals to PCs. MAC (Media Access Control) address VC-1 A hardware identification number assigned specifically to the A video codec developed by Microsoft and standardized by the network device (LAN card, etc.). -
Page 61: Specifications
Specifications Model BDP-180 BDP-180-K BDP-180-S Type Blu-ray 3D PLAYER Rated voltage AC 110 V to 240 V Rated frequency 50 Hz/60 Hz 18 W Power consumption Less than 0.5 W Power consumption (Standby) Power consumption 2.3 W (Standby, Network Standby On, LAN connected) 2.3 W... - Page 62 Kawasaki-shi, Kanagawa http://www.pioneer.eu 212-0031, Japan [*] BDP-180-K, BDP-180-S English: Dansk: Hereby, Pioneer, declares that this [*] is Undertegnede Pioneer erklærer herved, in compliance with the essential at følgende udstyr [*] overholder de requirements and other relevant væsentlige krav og øvrige relevante provisions of Directive 1999/5/EC.
- Page 63 Português: Pioneer declara que este [*] está conforme com os requisitos essenciais e outras disposições da Directiva 1999/5/CE. [*] este in conformitate cu cerintele esentiale si alte prevederi ale Directivei 1999/5/EU. Eesti: 1999/5/EC. sätetele. Polski: Magyar: Norsk: 1999/5/EF. Íslenska: 1999/5/EC...
- Page 64 © 2015 PIONEER HOME ELECTRONICS CORPORATION. All rights reserved. PIONEER HOME ELECTRONICS CORPORATION 1-1, Shin-ogura, Saiwai-ku, Kawasaki-shi, Kanagawa 212-0031, Japan PIONEER ELECTRONICS (USA) INC. P.O. BOX 1540, Long Beach, California 90801-1540, U.S.A. TEL: (800) 421-1404 PIONEER EUROPE NV Haven 1087, Keetberglaan 1, B-9120 Melsele, Belgium TEL: 03/570.05.11 PIONEER ELECTRONICS ASIACENTRE PTE.