Suzuki GSX-S1000 Owner's Manual
Hide thumbs
Also See for GSX-S1000:
- Instructions for mounting & use (19 pages) ,
- Installation instructions manual (108 pages)
Table of Contents
Advertisement
Advertisement
Chapters
Table of Contents

Related Manuals for Suzuki GSX-S1000


Summary of Contents for Suzuki GSX-S1000
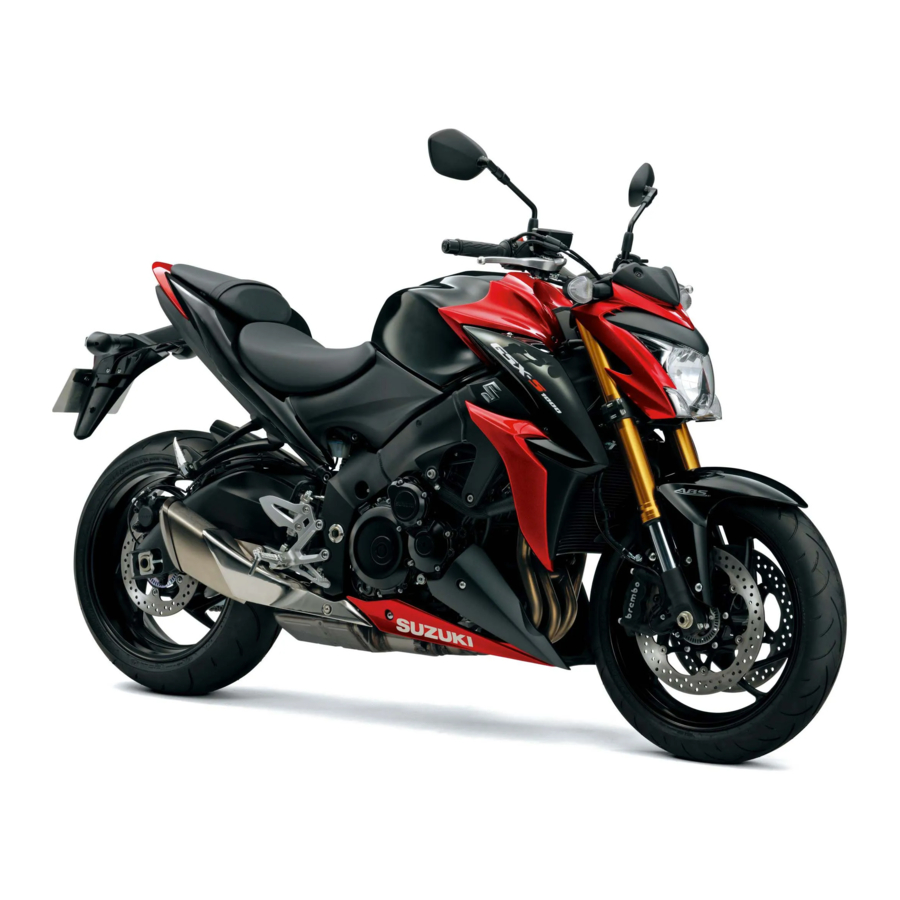
- Page 1 GSX-S1000/A/F/FA OWNER’S MANUAL...
- Page 2 This manual should be considered a permanent part of the motorcycle and should remain with the motorcycle when resold or otherwise transferred to a new owner or operator. The manual contains important safety information and instructions which should be read carefully before operating the motorcycle.
- Page 3 Suzuki parts are WARNING manufactured of high quality materi- als, and machined parts are finished Indicates a potential hazard that to close tolerances.
- Page 4 Your autho- rized Suzuki dealer has experienced technicians that are trained to provide your machine with the best possible service with the right tools and equip- ment.
-
Page 5: Table Of Contents
TABLE OF CONTENTS CONSUMER INFORMATION CONTROLS FUEL, ENGINE OIL AND COOLANT RECOMMENDATIONS BREAK-IN (RUNNING-IN) AND INSPECTION BEFORE RIDING RIDING TIPS INSPECTION AND MAINTENANCE TROUBLESHOOTING STORAGE PROCEDURE AND MOTORCYCLE CLEANING SPECIFICATIONS INDEX... -
Page 7: Consumer Information
CONSUMER INFORMATION ACCESSORY USE AND MOTORCYCLE LOADING ......... 1-2 SAFE RIDING RECOMMENDATION FOR MOTORCYCLE RIDERS ....1-4 LABELS ....................... 1-5 SERIAL NUMBER LOCATION ................1-6 NOISE CONTROL SYSTEM (AUSTRALIA ONLY) ..........1-6... -
Page 8: Accessory Use And Motorcycle Loading
It is not possible for Suzuki to mounted. test each accessory on the market or • Inspect for proper ground clear- combinations of all the available ance and bank angle. - Page 9 LOADING LIMIT LOADING GUIDELINES This motorcycle is primarily intended WARNING to carry small items when you are not riding with a passenger. Follow the loading guidelines below: Overloading or improper loading • Balance the load between the left can cause loss of motorcycle con- and right side of the motorcycle trol and an accident.
-
Page 10: Safe Riding Recommendation For Motorcycle Riders
Motorcycle safety equipment starts vehicle operating condition and sub- with a quality helmet. One of the most sequent accident. Suzuki will not be serious injuries that can happen is a responsible in any way for personal head injury. ALWAYS wear a properly injury or damage to the motorcycle approved helmet. -
Page 11: Labels
KNOW YOUR LIMITS LABELS Ride within the boundaries of your Read and follow all the labels on the own skill at all times. Knowing these motorcycle. Make sure you under- limits and staying within them will help stand all of the labels. Do not remove you to avoid accidents. -
Page 12: Serial Number Location
SERIAL NUMBER LOCATION NOISE CONTROL SYSTEM (AUSTRALIA ONLY) TAMPERING WITH NOISE CONTROL SYSTEM PROHIBITED Owners are warned that the law may prohibit: (a) The removal or rendering inopera- tive by any person other than for purposes of maintenance, repair or replacement, of any device or element of design incorporated into any new vehicle for the pur- pose of noise control prior to its... -
Page 13: Controls
CONTROLS LOCATION OF PARTS ..................2-2 KEY ........................2-5 IGNITION SWITCH ....................2-7 INSTRUMENT PANEL ..................2-10 LEFT HANDLEBAR ................... 2-24 RIGHT HANDLEBAR ..................2-29 FUEL TANK CAP ....................2-32 GEARSHIFT LEVER ..................2-33 REAR BRAKE PEDAL ..................2-33 SEAT LOCK AND HELMET HOLDERS ............2-34 LUGGAGE STRAPS .................. -
Page 14: Location Of Parts
CONTROLS LOCATION OF PARTS GSX-S1000/A 1 Clutch lever 2 Left handlebar switches 3 Instrument panel 4 Front brake fluid reservoir 5 Right handlebar switches 6 Throttle grip 7 Front brake lever 8 Ignition switch 9 Fuel tank cap GSX-S1000F/FA... - Page 15 GSX-S1000/A 0 Battery A Seat lock B Tools C Helmet holders D Side stand E Gearshift lever GSX-S1000F/FA...
- Page 16 GSX-S1000/A F Rear brake pedal GSX-S1000F/FA...
-
Page 17: Key
If the all keys are lost, the ECM locksmith will not work. Ask your should be replaced. (Immobilizer Suzuki dealer if you need to make equipped model) a spare key. • If you loose the key, ask your ... -
Page 18: Immobilizer Indicator
IMMOBILIZER INDICATOR NOTE: (if equipped) • It is impossible to start the engine when the indicator remains blink- ing. • If the indicator remains blinking, it means immobilizer system com- munication error between key and ECM or use of wrong key. Turn off the ignition switch and then turn on to communicate immobilizer system properly. -
Page 19: Ignition Switch
IGNITION SWITCH The ignition switch has 4 positions: “OFF” POSITION All electrical circuits are cut off. The engine will not start. The key can be removed. “ON” POSITION IGNITION The ignition circuit is completed and the engine can now be started. The headlight and taillight will automati- Immobilizer equipped model cally be turned on when the key is in... - Page 20 WARNING If the motorcycle falls down, turn the ignition switch off immedi- Turning the ignition switch to the ately. Ask your authorized Suzuki “P” (PARKING) or “LOCK” posi- dealer to inspect the motorcycle tion while the motorcycle is mov- for unseen damage.
- Page 21 IGNITION The key hole can be covered by turn- ing the lid. IGNITION Align the lid hole position to the key hole position when inserting the key.
-
Page 22: Instrument Panel
TACHOMETER 2 INSTRUMENT PANEL The tachometer indicates the engine speed in revolutions per minute (r/ min). Press and hold the SEL button 1 and 1000r/min turn on the ignition switch. Hold the SEL button 1 for 4 seconds to switch km/h GEAR TRIP... - Page 23 SPEEDOMETER 3 TRACTION CONTROL SYSTEM DISPLAY 5 The speedometer indicates the road speed in kilometers per hour or miles The setting of the traction control sys- per hour. tem is indicated by OFF, 1, 2 or 3. NOTE: Press and hold the ADJ button 7 •...
- Page 24 When the ignition switch is in the does not go out, have your autho- “ON” position but the engine has not rized Suzuki dealer or a qualified been started, the symbol “” 6 in mechanic inspect your motorcy- the display and the indicator light I cle.
- Page 25 9 blinks while cranking your motorcycle to an authorized the engine. Suzuki dealer. If the engine stalls, try restarting the engine after turn- The engine may continue to run in ing the ignition switch off and on.
- Page 26 CLOCK A 1000r/min Time is shown when the ignition km/h GEAR TRIP TRIP RANGE MPGUSIMP km/L/100km switch is in the “ON” position. The clock has a 12-hour display. Follow the procedure below to adjust the clock. To adjust the clock, press and hold the SEL button 1 and the ADJ button 7 simultaneously for 2 seconds until the clock hour display blinks.
- Page 27 ODOMETER/TRIP METER/ NOTE: Press and hold the ADJ button 7 INSTRUMENT PANEL LIGHT • BRIGHTNESS B and turn on the ignition switch. Hold the ADJ button 7 for 4 sec- The display has 4 functions; odome- ter, two trip meters, and instrument onds to switch between km and panel light brightness.
- Page 28 Odometer 1000r/min km/h GEAR TRIP TRIP RANGE MPGUSIMP km/L/100km TRIP To change the display, push the SEL Trip meter A button 1 or left handlebar MODE switch (Up). The display changes in the order below. NOTE: When the traction control sys- TRIP tem select switch is pushed, the dis- play cannot be changed with the left...
- Page 29 TRIP METERS INSTRUMENT PANEL LIGHT The two trip meters are resettable BRIGHTNESS odometers. They can register two Set the meter to instrument panel kinds of distances at the same time. light brightness, then press and hold the ADJ button 7 or MODE switch For instance, trip meter A can register ...
- Page 30 DRIVING RANGE METER/ INSTANTANEOUS FUEL ECONOMY METER/AVERAGE FUEL ECONOMY METER D The display has 3 functions; driving 1000r/min range meter, instantaneous fuel econ- km/h omy meter and average fuel economy GEAR TRIP TRIP RANGE MPGUSIMP km/L/100km meter. When the ignition switch is turned to the “ON”...
- Page 31 To change the display, push the ADJ Driving range meter button 7 or left handlebar MODE The driving range meter displays esti- switch (Down). The display changes mated driving range (distance) based in the order below. on the remaining fuel within the range from 1 to 999 km (mile).
- Page 32 Instantaneous fuel economy meter The instantaneous fuel economy meter displays the fuel consumption value only when the motorcycle is moving. However, when the motorcy- 1000r/min cle is stopping, the fuel economy km/h meter displays “– – . –”. This meter GEAR TRIP TRIP...
- Page 33 COOLANT TEMPERATURE METER “” E NOTICE The coolant temperature is displayed Riding the motorcycle with the by an LCD segment temperature indi- coolant temperature indicator lit cator E, water temperature mark F, can cause serious engine damage and indicator light I. due to overheating.
- Page 34 “ON” and checked authorized goes off after the motorcycle Suzuki dealer as soon as possi- speed exceeds 5 km/h (3 mph). ble. • The indicator comes on and remains on when the traction con-...
- Page 35 If the ABS indicator light does not have the system checked by an come on when the ignition switch is authorized Suzuki dealer as turned on, you should have the sys- soon as possible. tem checked by an authorized Suzuki dealer as soon as possible. 2-23...
-
Page 36: Left Handlebar
DIMMER SWITCH 2 LEFT HANDLEBAR “” position The headlight low beam and taillight turn on. “” position The headlight high beam and taillight turn on. The high beam indicator light also turns on. Headlight flasher switch Press the switch to flash the head- light. - Page 37 MODE SWITCH 3 TURN SIGNAL LIGHT SWITCH “” 5 The MODE SWITCH has the same function as the SELECT switch. Refer Moving the switch to the “” position to the INSTRUMENT PANEL and will flash the left turn signals. Moving TRACTION CONTROL SYSTEM sec- the switch to the “”...
- Page 38 WARNING Relying too much on the traction control system can be hazardous. The traction control system can- not provide control to limit rear wheel spin under certain condi- tions. The system cannot control rear wheel spin resulting from high speed cornering, excessive bank angle, braking operation or engine braking effect.
- Page 39 NOTE: The traction control system can be • When the traction control system set to OFF, Mode 1, Mode 2 or Mode is controlling engine power output, the engine sound and exhaust sound will change. <OFF> • When the front tire is not in full The traction control system does not contact with the road surface due control engine power output even if...
- Page 40 MODE SETTING 2. Press the Mode switch (UP, 1. Press the traction control system DOWN) 3 and change the indica- select switch 6 for mode selec- tion on the traction control system tion. display in the meter cluster to the desired mode.
-
Page 41: Right Handlebar
NOTE: RIGHT HANDLEBAR • Be sure to keep the throttle fully closed when changing the mode. If the change of mode is not possi- ble because the throttle is not fully closed, a segment of the selected mode on the traction control sys- tem display blinks. - Page 42 Front Brake Lever Adjustment The distance between the throttle grip and the front brake lever is adjustable to 6 positions. To change the position, push the brake lever forward and turn the adjuster to the desired position. When changing the brake lever posi- tion, always be sure the adjuster stops in the proper position;...
- Page 43 ELECTRIC STARTER SWITCH “” NOTICE This switch is used for operating the Engaging the starter motor for starter motor. With the ignition switch more than five seconds at a time in the “ON” position, the engine stop can damage the starter motor and switch in “”...
-
Page 44: Fuel Tank Cap
FUEL TANK CAP Fuel level Filler neck WARNING If you overfill the fuel tank, fuel may overflow when it expands due to engine heat or heating by the sun. Fuel that overflows can catch fire. Stop adding fuel when the fuel level reaches the bottom of the filler neck. -
Page 45: Gearshift Lever
GEARSHIFT LEVER REAR BRAKE PEDAL This motorcycle has a 6-speed trans- Depressing the rear brake pedal will mission which operates as shown. To apply the rear disk brake. The brake shift properly, squeeze the clutch light will be illuminated when the rear lever and close the throttle at the brake is operated. -
Page 46: Seat Lock And Helmet Holders
SEAT LOCK AND WARNING HELMET HOLDERS Failure to install the seat properly SEAT LOCK could allow the seat to move and cause loss of rider control. Latch the seat securely in its proper position. The seat lock is located under the left frame cover. -
Page 47: Front Seat Removal
FRONT SEAT REMOVAL To reinstall the front seat, slide the seat hooks into the seat hook retain- 1. Remove the rear seat. Remove ers on the frame and tighten the bolt the bolt 1. securely. WARNING Failure to install the seat properly could allow the seat to move and cause loss of rider control. -
Page 48: Luggage Straps
HELMET HOLDERS LUGGAGE STRAPS The luggage straps are folded under There are helmet holders underneath the seat. Extract the straps from the the rear seat. To use them, remove hooks and reinstall the seat with the the seat, hook your helmet to the hel- straps out. -
Page 49: Side Stand
SIDE STAND WARNING Riding with the side stand incom- pletely retracted can result in an accident when you turn left. Check operation of the side stand/ ignition interlock system before riding. Always retract the side stand completely before starting off. -
Page 50: Suspension Adjustment
SUSPENSION ADJUSTMENT FRONT SUSPENSION Spring Pre-load Adjustment The standard settings for both the front rear suspensions selected to meet various riding condi- tions such as low to high motorcycle speed and light to heavy load on the motorcycle. The suspension settings can be adjusted and fine-tuned according to your preference. - Page 51 WARNING Unequal suspension adjustment can cause poor handling and instability. Adjust the right and left front forks to the same setting. A Position 5 B Position 2.5 C Position 1 2-39...
- Page 52 Damping Force Adjustment The rebound and compression damp- ing force can be individually adjusted by turning the respective adjusters. The rebound damping force adjust- ers 2 are located at the top of the front suspension. The compression damping force adjusters 3 located at the bottom of the front sus- pension.
-
Page 53: Rear Suspension
The spring pre-load is adjust- NOTE: Ask your Suzuki dealer to dis- able to 7 positions. To change the pose of the rear suspension unit. spring pre-load setting, place the motorcycle on the side stand. - Page 54 Damping Force Adjustment The rebound damping force can be adjusted by turning the adjuster 1. The rebound damping force adjuster 1 is located at the bottom of the rear suspension. To adjust the damping force, set the adjuster to the standard setting first and then adjust the adjuster to the desired position.
-
Page 55: Fuel, Engine Oil And Coolant Recommendations
FUEL, ENGINE OIL AND COOLANT RECOMMENDATIONS FUEL OCTANE RATING ..................3-2 OXYGENATED FUEL RECOMMENDATION ............3-2 ENGINE OIL ......................3-4 ENGINE COOLANT SOLUTION ................. 3-5... -
Page 56: Fuel Octane Rating
MTBE content is not greater than 15%. This NOTE: oxygenated fuel does not contain • The GSX-S1000/A/F/FA engine is alcohol. designed premium unleaded gasoline only. Use pre- Gasoline/Ethanol Blends mium unleaded gasoline under all Blends of unleaded gasoline and eth- riding conditions. - Page 57 Suzuki and may not be covered under the Be careful not to spill any fuel New Vehicle Limited Warranty or the when filling the fuel tank.
-
Page 58: Engine Oil
ENGINE OIL JASO T903 The JASO T903 standard is an index Use Suzuki genuine engine oil or to select engine oils for 4-stroke equivalent. If Suzuki genuine engine motorcycle and ATV engines. Motor- oil is not available, select a proper... -
Page 59: Engine Coolant Solution
Energy Conserving ENGINE COOLANT SOLUTION Suzuki does not recommend the use Use “SUZUKI SUPER LONG LIFE “ENERGY CONSERVING” COOLANT” or “SUZUKI LONG LIFE “RESOURCE CONSERVING” oils. COOLANT”. “SUZUKI SUPER Some engine oils which have an API LONG LIFE COOLANT” classification of SH, SJ or SL have an “SUZUKI LONG LIFE COOLANT”... - Page 60 Required amount of water/coolant SUZUKI SUPER LONG LIFE Solution capacity (total): COOLANT (Blue) 2800 ml (6.0/5.0 US/Imp. qt) “SUZUKI SUPER LONG LIFE COOL- ANT” is pre-mixed to the proper ratio. 1400 ml Water (3.0/2.5 US/Imp. qt) Add only “SUZUKI SUPER LONG LIFE COOLANT”...
-
Page 61: Break-In (Running-In) And Inspection Before Riding
BREAK-IN (RUNNING-IN) AND INSPECTION BEFORE RIDING MAXIMUM ENGINE SPEED RECOMMENDATION ..........4-2 VARY THE ENGINE SPEED ................4-2 BREAKING IN THE NEW TIRES ................ 4-2 AVOID CONSTANT LOW SPEED ..............4-2 ALLOW THE ENGINE OIL TO CIRCULATE BEFORE RIDING ......4-3 OBSERVE YOUR FIRST AND MOST CRITICAL SERVICE ...... - Page 62 160 km (100 miles) before attempting ing maximum life and performance maximum performance. Avoid hard from your new Suzuki. The following acceleration, hard cornering, and guidelines explain proper break-in hard braking for the first 160 km (100 procedures.
- Page 63 ALLOW THE ENGINE OIL TO INSPECTION BEFORE RIDING CIRCULATE BEFORE RIDING WARNING Allow sufficient idling time after warm or cold engine start up before apply- Failure to inspect your motorcy- ing load or revving the engine. This cle before riding and to properly allows time for the lubricating oil to maintain your...
- Page 64 Before riding the motorcycle, be sure Drive chain • Correct tension or slack to check the following items. Never ( 6-34) • Adequate lubrication underestimate importance • No excessive wear or damage these checks. Perform all of them before riding the motorcycle. Tires •...
-
Page 65: Riding Tips
RIDING TIPS STARTING THE ENGINE ..................5-2 STARTING OFF ....................5-3 USING THE TRANSMISSION ................5-4 RIDING ON HILLS ....................5-5 STOPPING AND PARKING ................5-6... -
Page 66: Starting The Engine
When the Engine is Cold: RIDING TIPS 1. Close the throttle completely and push the electric starter switch. STARTING THE ENGINE 2. After the engine starts, let the Before attempting to start the engine, engine run until the engine suffi- make sure: ciently warms up. -
Page 67: Starting Off
STARTING OFF WARNING WARNING Exhaust gas contains carbon monoxide, a dangerous gas that is Riding excessive speeds difficult to detect because it is col- increases your chances of losing orless and odorless. Breathing control of the motorcycle, which carbon monoxide can cause death can result in an accident. -
Page 68: Using The Transmission
USING THE TRANSMISSION WARNING The transmission is provided to keep the engine operating smoothly in its Sudden side winds, which can normal operating speed range. The occur when being passed by gear ratios have been carefully cho- larger vehicles, at tunnel exits or sen to meet the characteristics of the in hilly areas, can cause you to engine. - Page 69 WARNING NOTICE Downshifting when engine speed Revving the engine into the red is too high can: zone can cause severe engine • cause the rear wheel to skid and damage. lose traction due to increased engine braking, resulting in an Never allow the engine to rev into accident;...
-
Page 70: Riding On Hills
RIDING ON HILLS STOPPING AND PARKING • When climbing steep hills, the Anti-lock Brake System (ABS) motorcycle may begin to slow (GSX-S1000A/FA) down and show lack of power. At This model is equipped with an Anti- this point you should shift to a lock Brake System (ABS) designed to lower gear so that the engine will help prevent wheel lock up during... - Page 71 WARNING WARNING Inexperienced riders tend Failure to use good judgment with underutilize the front brake. This ABS can be hazardous. ABS can- can cause excessive stopping dis- not make up for bad road condi- tance and lead to a collision. tions, bad judgement, or improper Using only the front or rear brake operation of the brakes.
- Page 72 How the ABS Works Stopping and Parking (GSX-S1000A/FA) 1. Twist the throttle grip away from ABS works by electronically control- yourself to close the throttle com- ling braking pressure. A computer pletely. monitors wheel rotation speed. If the 2. Apply the front and rear brakes computer detects that a braked wheel evenly and at the same time.
- Page 73 5. Park the motorcycle on a firm, flat WARNING surface where it will not fall over. Hard braking on wet, loose, rough, CAUTION or other slippery surfaces can cause wheel skid and loss of con- A hot muffler can cause severe trol.
-
Page 75: Inspection And Maintenance
INSPECTION AND MAINTENANCE MAINTENANCE SCHEDULE ................6-2 TOOLS ......................... 6-6 METER PANEL REMOVAL AND INSTALLATION (GSX-S1000F/FA) ....6-6 FAIRING REMOVAL AND INSTALLATION (GSX-S1000F/FA) ....... 6-10 FUEL TANK LIFT ....................6-15 LUBRICATION POINTS ..................6-18 BATTERY ......................6-19 AIR CLEANER ....................6-21 FUEL HOSE ....................... -
Page 76: Maintenance Schedule
Suzuki dealer to do the nance section. Your Suzuki dealer maintenance. can provide you with further guide- lines. - Page 77 If you have any when electric circuit questions regarding maintenance shorted. intervals, consult your Suzuki dealer or a qualified mechanic. Turn off the ignition switch before servicing the electric parts to avoid short-circuit damage. NOTICE Poorly-made replacement parts can cause your motorcycle to wear more quickly and may shorten its useful life.
-
Page 78: Maintenance Chart
* Throttle valve synchronization – – – “SUZUKI SUPER LONG LIFE Replace every 4 years or 48000 km (29000 miles) COOLANT” (Blue) “SUZUKI LONG LIFE * Engine coolant COOLANT” (Green) ( 6-32) or an engine coolant – – – other than “SUZUKI SUPER LONG LIFE COOLANT”... - Page 79 – * Throttle valve synchronization – “SUZUKI SUPER LONG LIFE – – – – COOLANT” (Blue) “SUZUKI LONG LIFE * Engine coolant COOLANT” (Green) ( 6-32) or an engine coolant – – – other than “SUZUKI SUPER LONG LIFE COOLANT” (Blue) Radiator hose (...
-
Page 80: Tools
TOOLS METER PANEL REMOVAL AND INSTALLATION (GSX-S1000F/FA) REMOVAL 1. Place the motorcycle on the side stand. A tool kit is supplied and located under the rear seat. 2. Remove the fastener 1, bolt 2 and bolt 3 of the right and left meter panels. - Page 81 3. Place a cloth between the meter panel and the fuel tank to prevent damage to the fuel tank. NOTICE When removing the meter panel, the bolt mounting part on the rear end may cause damage to the fuel tank and fairing. 4.
- Page 82 INSTALLATION 5. Pull out the meter panel toward the rear end of the motorcycle (in 1. Install the meter panel starting the direction of the arrow). In from the front end portion. Lightly doing so, the hooks (marked with insert the front end of the meter a dotted circle) also come off.
- Page 83 3. Push the front end of the meter 5. Lightly press the fairing toward panel in the direction of the arrow. outside of the motorcycle (in the direction of the arrow), and insert the mating surface on the rear end of the meter panel under the fair- ing.
-
Page 84: Fairing Removal And Installation (Gsx-S1000F/Fa)
FAIRING REMOVAL AND INSTALLATION (GSX-S1000F/FA) REMOVAL 1. Place the motorcycle on the side stand. 6. Tighten the fastener 1 and bolt 2 on the front end of the meter panel, and tighten the bolt 3 on the rear end of the meter panel in the numbered order. - Page 85 Right 3. Remove the under fairing fas- tener. Unhook the hooks located at the lower part of the left-side fairing. 4. Remove the right and left meter panels by referring to the METER PANEL REMOVAL AND INSTAL- LATION section. Left 5.
- Page 86 8. Unhook the hook, which is fixed on the radiator, from the bottom 6. Remove the bolts, screws, and side of the fairing, and carefully fasteners on the inner side of the pull out the fairing. right and left fairings. 7.
- Page 87 INSTALLATION 1. Align the top part 1 of the fairing (Removal procedure 6. Screw Section). 2. Move the fairing forward using the top part 1 of the fairing as a rota- tional axis, and fit the headlight tightening seating surface 2 into the notch on the inner side of the NOTE: Be careful not to allow the fairing.
- Page 88 3. Lightly press the fairing toward the NOTE: When the insertion of the radi- ator hook 3 is completed, the inner inner side of the motorcycle, and slide it backward to insert it into side of the fairing (Removal proce- the radiator hook 3.
-
Page 89: Fuel Tank Lift
1 to unfasten the fasten- ers. The side frame covers have hooks behind the places marked with circles. Move the side frame cover 1 backward to slip off the hook. (GSX-S1000/A) 4. Remove the right and left bolts and fasteners. 6-15... - Page 90 6. Remove the right and left bolts and fasteners. Pull up the fuel tank upper cover 3. (GSX-S1000/A) 5. Unhook the hooks and remove the right and left frame body covers 2 by sliding the covers forward. (GSX-S1000F/FA) Remove the meter panel and fair-...
- Page 91 Put the circle end of the prop stay on to the steering stem nut. NOTE: A prop stay is available at your Suzuki dealer. The prop stay part number is 44560-23H00. WARNING If you lift up the fuel tank when it...
-
Page 92: Lubrication Points
LUBRICATION POINTS Proper lubrication is important for smooth operation and long life of each working part of your motorcycle and also for safe riding. It is a good practice to lubricate the motorcycle after a long rough ride and after get- ting it wet it in the rain or after wash- ing it. -
Page 93: Battery
BATTERY WARNING The battery is a sealed type battery and requires no maintenance. Have Batteries produce flammable your dealer check the battery’s state hydrogen gas which can explode of charge periodically. if exposed to flames or sparks. The standard charging rate is 1.2A × Keep flames and sparks away 5 to 10 hours and the maximum rate from the battery. - Page 94 BATTERY REMOVAL NOTICE To remove the battery, follow the pro- cedure below: Reversing the battery lead wires 1. Place the motorcycle on the side can damage the charging system stand. and the battery. 2. Remove the front seat by referring to the SEAT LOCK AND HELMET Always attach the red lead to the HOLDERS section.
-
Page 95: Air Cleaner
The recycling element. of materials will help to conserve nat- ural resources. For more detailed Never run the engine without the information about disposing or recy- air cleaner element in place. cling of the used battery, consult your Suzuki dealer. 6-21... - Page 96 NOTICE Failure to inspect the air cleaner element frequently if the vehicle is used in dusty, wet, or muddy con- ditions can damage your motorcy- cle. The air cleaner element can become clogged under these con- ditions, and engine damage may result.
- Page 97 INSPECTION INSTALLATION Reinstall the inspected element or new one in reverse order of removal. Be absolutely sure that the element is securely in position and is sealing properly. NOTICE A torn air cleaner element will allow dirt to enter the engine and can damage the engine.
-
Page 98: Fuel Hose
FUEL HOSE ENGINE OIL Long engine life depends much on the selection of a quality oil and the periodic changing of the oil. Daily oil level checks and periodic changes are two of the most important mainte- nance items to be performed. ENGINE OIL LEVEL CHECK Follow the procedure below to inspect the engine oil level. - Page 99 Be sure the engine oil level is always above the “L” (low) line and not higher than the “F” (full) line. (GSX-S1000/A) 2. Remove the right and left bolts. Remove the under cowlings 1. (GSX-S1000F/FA)
- Page 100 Hot engine oil and exhaust pipes can burn you. Wait until the oil drain plug and exhaust pipes are cool enough to touch with bare hands before draining oil. Available from Suzuki dealer Oil filter wrench (Part No. 09915-40620) 6-26...
- Page 101 5. Turn the oil filter 5 counterclock- 7. Smear a little engine oil around the rubber gasket 7 of the new oil wise and remove it with a Suzuki “cap type” oil filter wrench or a filter. “strap type” filter wrench of the 8.
- Page 102 Engine damage may occur if you Tighten the filter 2 turns or use oil that does not meet to specified torque. Suzuki’s specifications. 9. Mark the top dead center position Be sure to use the oil specified in on the “cap type” filter wrench or the FUEL, ENGINE OIL AND on the oil filter.
-
Page 103: Engine Idle Speed Inspection
Recheck the oil level on the within the specified range, ask your engine oil inspection window while Suzuki dealer or a qualified mechanic holding the motorcycle vertically. If to inspect and repair the motorcycle. it is lower than the “L” mark, add oil until the oil level is between “L”... -
Page 104: Throttle Cable Adjustment
THROTTLE CABLE ADJUSTMENT THROTTLE CABLE BOOTS 2.0 – 4.0 mm (0.08 – 0.16 in) The throttle cable has a boots. Check that the boots are fit securely. Do not apply water directly to the boots when washing. Wipe off dirt from the boots with a wet cloth when the boots are dirty. -
Page 105: Clutch
NOTE: Any maintenance of the clutch play is incorrect, adjust it in the follow- other than the clutch cable play ing way: should be performed by your Suzuki dealer. 1. Turn the clutch lever adjuster 1 clockwise as far as it will go. -
Page 106: Coolant
COOLANT COOLANT LEVEL (GSX-S1000/A) (GSX-S1000/A) (GSX-S1000F/FA) The coolant should be kept between the “F” (FULL) and “L” (LOW) level lines in the reservoir tank at all times. Inspect the level every time before riding with the motorcycle held verti- cally. If the coolant is found lower than the “L”... - Page 107 If to the FUEL, ENGINE OIL AND any defects are found, ask your COOLANT RECOMMENDATIONS Suzuki dealer to replace the radiator section. hose with a new one. NOTE: When installing the filler cap, face the triangle mark to the reservoir tank hose side.
-
Page 108: Drive Chain
We recommend that • Loose pins you take your motorcycle to an autho- • Damaged rollers rized Suzuki dealer or a qualified • Dry or rusted links mechanic if the drive chain needs to • Kinked or binding links be replaced. - Page 109 Chain replacement requires a spe- 5. Lubricate with motorcycle cial riveting tool and a high-qual- sealed drive chain lubricant or ity, non-joint-clip type chain. Ask high viscosity oil (#80 – 90). an authorized Suzuki dealer or a qualified mechanic to perform this work. 6-35...
- Page 110 DRIVE CHAIN ADJUSTMENT NOTICE Adjust the drive chain slack to the proper specification. The chain may Some drive chain lubricant con- require more frequent adjustments tains solvents and additives which than indicated in the periodic mainte- could damage the seal rings in the nance schedule depending upon your drive chain.
- Page 111 To adjust the drive chain, follow the procedure below: CAUTION A hot muffler can burn you. The 20 – 30 mm muffler will be hot enough to burn (0.8 – 1.2 in) you for some time after stopping the engine. 4.
-
Page 112: Brakes
Proper operation of fluid leakage. If any defects are found, brake systems are vital to safe riding. ask your Suzuki dealer to replace the Be sure to perform the brake inspec- brake hose with a new one. tion as scheduled. - Page 113 WARNING WARNING Brake fluid will gradually absorb Brake fluid is harmful or fatal if moisture through the brake hoses. swallowed, and harmful if it comes Brake fluid with high water con- in contact with skin or eyes. Solu- tent lowers the boiling point and tion can be poisonous to animals.
- Page 114 If you need to replace brake pads, have your Suzuki dealer do this work. Inspect and maintain the brake pads as recommended. FRONT WARNING...
- Page 115 Check that the rear brake pedal is 50 – 60 mm (2.0 – 2.4 in) below the top face of the footrest. NOTE: If the rear brake pedal position is incorrect, ask your Suzuki dealer to adjust brake pedal position because this adjustment requires tightening torque control.
-
Page 116: Tires
REAR BRAKE LIGHT SWITCH TIRES WARNING The tires on your motorcycle form the crucial link between your motorcycle and the road. Failure to take the precautions below may result in an accident due to tire failure. • Check tire condition and pres- sure before each ride, and adjust pressure if necessary. -
Page 117: Tire Pressure/Loading
TIRE PRESSURE AND LOADING WARNING Proper tire pressure and proper tire loading are important factors. Over- Failure to perform break-in of the loading your tires can lead to tire fail- tires could cause tire slip and loss ure and loss of vehicle control. of control, which could result in an accident. - Page 118 TIRE CONDITION AND TYPE Proper tire condition and proper tire type affect vehicle performance. Cuts or cracks in the tires can lead to tire failure and loss of vehicle control. Worn tires are susceptible to puncture failures and subsequent loss of vehi- cle control.
- Page 119 Tubeless tires require different service procedures than tube • Ask your Suzuki dealer or a tires. qualified mechanic to perform tire repair, replacement, and bal- • Tubeless tires require an air-...
-
Page 120: Side Stand/Ignition Interlock System
Have your motorcycle inspected by an authorized Suzuki dealer or a qualified service mechanic. 6-46... -
Page 121: Front Wheel Removal
FRONT WHEEL REMOVAL 1. Place the motorcycle on the side stand. 4. Remove the nut 2. 5. Loosen the axle holder bolts 3. 2. Remove the front wheel speed sensor by removing the mounting bolt. 6. Loosen the axle holder bolts 4. 7. - Page 122 9. Draw out the axle shaft. 13. Hold the shaft and tighten the bolt 5 to the specified torque. 14. Tighten the axle holder bolts 6 to the specified torque. 15. Move the steering up and down several times to seat the axle shaft.
- Page 123 Suzuki dealer to stroke and firm feel are restored. check the bolts and nuts. Also check that the wheel rotates freely.
-
Page 124: Rear Wheel Removal
REAR WHEEL REMOVAL 1. Place the motorcycle on the side stand. CAUTION A hot muffler can burn you. Wait until the muffler cools before removing the axle nut. NOTICE Removing the rear wheel without use of an accessory stand can 2. - Page 125 6. Draw out the axle shaft. 9. Pull the rear wheel assembly rear- ward. NOTE: Never depress the rear brake pedal with the rear wheel removed. It is very difficult to force the pads back into the caliper assembly. 10. To replace the wheel reverse the complete sequence listed.
-
Page 126: Light Bulb Replacement
Suzuki dealer or a qualified mechanic do this. Use only the light bulbs shown in the chart as replacement bulbs. Rear axle nut tightening torque: 100 N·m (10.0 kgf-m, 72.5 lbf-ft) - Page 127 HEADLIGHT To replace the headlight bulb, perform the following steps: (GSX-S1000/A) 3. Disconnect the socket 3 from the headlight and remove the rubber cap 4. 1. Remove the bolts. Unhook the hook and remove the meter cover NOTE: When installing the rubber cap, face the “TOP”...
- Page 128 (GSX-S1000F/FA) 1. Remove the right and left meter panels by referring to the METER PANEL REMOVAL AND INSTAL- LATION section. Low beam 4. Unhook the bulb holder spring 5 and pull out the bulb 6. 5. To replace the headlight bulb, reverse the above sequence.
- Page 129 Low beam Low beam High beam High beam 3. Disconnect the socket 2. 4. Unhook the bulb holder spring 3 and pull out the bulb 4. 5. To replace the headlight bulb, reverse the above sequence. 6-55...
- Page 130 The headlight bulb’s life may be necessary. shortened by oil from your fingers if you touch it. When replacing the headlight bulb, be careful not to touch the glass. Grasp the new bulb with a clean cloth. (GSX-S1000/A) 6-56...
- Page 131 TURN SIGNAL LIGHT To replace the turn signal light bulb, follow these directions. 1. Remove the screw and take off the lens. Low beam 2. Push in on the bulb, twisting it to the left, and pull it out. 3. To fit the replacement bulb, push it in and twist it to the right while pushing.
-
Page 132: Fuses
If a blown fuse is found, then the elec- trical problem must be inspected and repaired before replacing the blown fuse with a new fuse. Consult your Suzuki dealer for the electrical system check and repair. 1. Remove the screws 1 and take WARNING off the cover with the lens. - Page 133 (GSX-S1000/F) The main fuse is located under the (GSX-S1000A/FA) front seat. To access the fuse, remove the front seat by referring to the SEAT The fuses are located under the front LOCK AND HELMET HOLDERS sec- seat. Two spare fuses (one 10A and tion.
-
Page 134: Handlebar Fitting
FUSE LIST HANDLEBAR FITTING • 30A MAIN fuse protects all electri- cal circuits. • 10A HEAD-HI fuse protects the headlight high beam and speed- ometer. • 10A HEAD-LO fuse protects the headlight low beam. • 10A IGNITION fuse protects the cooling fan relay, ISC, ignition coils, starter relay, fuel pump relay, solenoid, ECM, oxygen sensor,... -
Page 135: Catalytic Converter
CATALYTIC CONVERTER NOTICE The purpose of the catalytic converter is to minimize the amount of harmful Improper motorcycle operation pollutants your motorcycle’s can cause catalyst or other motor- exhaust. Use of leaded fuel in motor- cycle damage. cycles equipped with catalytic con- verters is prohibited because lead To avoid damage to the catalyst or deactivates... - Page 136 WARNING If you park or operate the motorcy- cle in areas where there are com- bustible materials such as dry grass or leaves, these materials may come in contact with the cat- alytic converter or other hot exhaust components. This can cause a fire.
-
Page 137: Troubleshooting
TROUBLESHOOTING FUEL SUPPLY CHECK ..................7-2 IGNITION SYSTEM CHECK ................7-3 ENGINE STALLING ..................... 7-3... - Page 138 Suzuki dealer. Refer to the “INSTRU- MENT PANEL” section for an explana- NOTICE tion of the malfunction indicator light.
- Page 139 “ON” system, take your machine to an position, the engine stop switch in authorized Suzuki dealer. Refer to the “” position, the transmission the “INSTRUMENT PANEL” sec- in neutral, and the clutch disen- tion for an explanation of the mal- gaged.
-
Page 141: Storage Procedure And Motorcycle Cleaning
STORAGE PROCEDURE AND MOTORCYCLE CLEANING STORAGE PROCEDURE ..................8-2 PROCEDURE FOR RETURNING TO SERVICE ..........8-3 CORROSION PREVENTION ................8-3 MOTORCYCLE CLEANING ................8-4 INSPECTION AFTER CLEANING ............... 8-6... -
Page 142: Storage Procedure
For this reason, Suzuki recom- prevent humidity from entering. mends that you trust this mainte- nance work to your Suzuki dealer. If BATTERY you wish to service the machine for 1. Remove the battery from the... -
Page 143: Procedure For Returning To Service
PROCEDURE FOR CORROSION PREVENTION RETURNING TO SERVICE It is important to take good care of your motorcycle to protect it from cor- 1. Clean the entire motorcycle. rosion and keep it looking new for 2. Remove the oily rags from the air years to come. -
Page 144: Motorcycle Cleaning
If the chips or scratches have or brush. Do not use hard materi- gone through to the bare metal, als which can scratch the paint. have a Suzuki dealer make the 2. Wash the entire motorcycle with a repair. mild detergent or car wash soap •... - Page 145 When replacing the a. Clean all damaged spots and windshield, use a Suzuki replacement allow them to dry. windshield. b. Stir the paint and “touch-up” the damaged spots lightly with a small brush.
-
Page 146: Inspection After Cleaning
WAXING THE MOTORCYCLE INSPECTION AFTER CLEANING After washing the motorcycle, waxing For extended life of your motorcycle, and polishing are recommended to lubricate it according to the “LUBRI- further protect and beautify the paint. CATION POINTS” section. • Only use waxes and polishes of good quality. -
Page 148: Specifications
Wheelbase ............1460 mm (57.5 in) Ground clearance..........140 mm (5.5 in) Seat height ............810 mm (31.9 in) Curb mass ............207 kg (456 lbs) ... GSX-S1000 209 kg (461 lbs) ... GSX-S1000A 212 kg (467 lbs) ... GSX-S1000F 214 kg (472 lbs) ... GSX-S1000FA ENGINE Type..............Four-stroke, liquid-cooled, DOHC... - Page 149 Battery.............12V 36.0 kC(10 Ah)/10 HR Generator ............Three-phase A.C. generator Main fuse............30A Fuse ..............10/10/10/10/10/15A ABS fuse ............20/15A ... GSX-S1000A/FA Headlight ............12V 60/55W (H4) ... GSX-S1000/A 12V 55W (H7) × 2 ... GSX-S1000F/FA Position light ............LED Brake light/Taillight...........LED Turn signal light ..........12V 21W × 4 License plate light..........12V 5W...
- Page 150 INDEX ACCESSORY USE AND FAIRING REMOVAL AND MOTORCYCLE LOADING ....1-2 INSTALLATION AIR CLEANER....... 6-21 (GSX-S1000F/FA) ......6-10 ALLOW THE ENGINE OIL TO FRONT WHEEL REMOVAL ..6-47 CIRCULATE BEFORE RIDING ..4-3 FUEL HOSE ........6-24 AVOID CONSTANT FUEL OCTANE RATING ....3-2 LOW SPEED ........
- Page 151 LABELS ........... 1-5 REAR BRAKE PEDAL....2-33 LEFT HANDLEBAR ....... 2-24 REAR WHEEL REMOVAL .... 6-50 LIGHT BULB REPLACEMENT..6-52 RIDING ON HILLS......5-6 LOCATION OF PARTS ....2-2 RIGHT HANDLEBAR..... 2-29 LUBRICATION POINTS ....6-18 LUGGAGE STRAPS...... 2-36 SAFE RIDING RECOMMENDATION FOR MOTORCYCLE RIDERS ..
- Page 155 Part No. 99011-04K50-01A February, 2015 EN © COPYRIGHT SUZUKI MOTOR CORPORATION 2015 Printed in Japan...