Table of Contents
Advertisement
Quick Links
Advertisement
Table of Contents

Related Manuals for Samsung Galaxy S3 SC-06D docomo


Summary of Contents for Samsung Galaxy S3 SC-06D docomo
- Page 1 INSTRUCTION MANUAL...
- Page 2 Introduction Thank you for purchasing "SC-06D" mobile terminal. Before and during use of your terminal, be sure to thoroughly read this instruction manual to ensure you are able to correctly use your terminal. Manual ■ " クイックスタートガイド (Quick start guide)" (included in basic package) (In Japanese only) Screen view contents and operations of basic function are explained.
- Page 3 Operation descriptions In this manual, the operation steps such as the menu operations are simply described as follows. • "Tap" is an operation of touching lightly the display of the terminal with fi nger (P.77). (Example) For tapping (Applications icon) on the Home screen to display the application menu and then, tapping (Google Search icon), the operation...
-
Page 4: Accessories/Samples And Options
Accessories/samples and options ■ Basic package SC-06D (including the written Back Cover SC07 warranty) Quick start guide Battery Pack SC07 (Japanese) AC Adapter SC04 USB Cable SC02 (With warranty) Assembling... - Page 5 ■ Samples Stereo Headset with microSD card (2GB) Microphone ■ Main options HDMI cable SC03 (with operation manual) Other options → P.429 Assembling...
-
Page 6: Table Of Contents
Contents Accessories/samples and Assembling options ……………………………… 2 Contents …………………………… 4 About usage of this terminal … 8 Safety precautions (Always follow these directions) ……………… 11 Handling precautions ………… 39 Part names and functions … 53 Getting docomo mini UIM card ……… 56 started microSD card ……………………... - Page 7 Making a call …………………… 155 Calling Receiving a call ……………… 160 Operation during a call ……… 164 Call logs ………………………… 167 Making an international call (WORLD CALL) ………………… 172 Call settings …………………… 174 Phonebook ……………………… 185 SD card backup ……………… 197 sp-mode mail ……………………...
- Page 8 …………………………… 324 Application dmarket ………………………… 325 Play Store ……………………… 326 Samsung Apps ………………… 328 Osaifu-Keitai …………………… 329 ToruCa …………………………… 333 1Seg ……………………………… 335 Camera …………………………… 357 Gallery …………………………… 367 Player …………………………… 370 GPS/Navigation ……………… 382 Clock ……………………………… 389 S Planner ………………………… 393 S memo …………………………...
- Page 9 Introduction of options and Appendix/ related devices ………………… 429 Index Sample accessories ………… 431 Troubleshooting ……………… 435 Smartphone Anshin Remote Support ………………………… 450 Warranty and After-Sales Service ……………………………………… 451 Updating software …………… 456 Main specifi cations ………… 459 Specifi c Absorption Rate (SAR) of Mobile Phones ………………...
-
Page 10: Assembling
About usage of this terminal • SC-06D supports LTE, W-CDMA, GSM/GPRS, and wireless LAN. • Because your terminal uses wireless transmission, it may not function in locations where it is diffi cult for radio waves to penetrate, such as tunnels, underground passages and some buildings, in areas where radio waves are weak, or out of Xi service area and FOMA service area. - Page 11 • Note down the information saved in this terminal in a separate note and keep it safely. Note that DOCOMO assumes no responsibility for any loss of saved contents of data resulting from malfunction, repair, changing of the model or other handling of the terminal.
- Page 12 • In this terminal, sounds (video sound, music shutter sound, etc.) other than ringtone and each notifi cation are not muted even when Silent is set. • In this terminal, functions may be added or operation steps may be changed due to upgrading Operating System (OS).
-
Page 13: Safety Precautions (Always Follow These Directions)
Safety precautions (Always follow these directions) ■ Before using your terminal, read the precautions below to ensure safe use and handling. After reading this manual, keep it carefully. ■ These precautions are intended to protect you and others around you. Read and follow them carefully to avoid injury, damage to the product or damage to property. - Page 14 ■ The symbols below show specifi c directions. This symbol denotes that the action is prohibited. Don’ t This symbol denotes that disassembling the phone or its components is not allowed. disassembly This symbol denotes that using phone or its components in a bathroom or other highly humid liquids area is not allowed.
- Page 15 ■ Precautions contain the description below. 1. Handling the terminal, battery pack, adapter and docomo mini UIM card (common) ………………………………………………… P.14 2. Handling the terminal …………………… P.18 3. Handling battery pack …………………… P.24 4. Handling adapter ………………………… P.27 5. Handling docomo mini UIM card ……… P.30 6.
-
Page 16: Handling The Terminal, Battery Pack, Adapter And Docomo Mini Uim Card (Common)
1. Handling the terminal, battery pack, adapter and docomo mini UIM card (common) DANGER Do not use, store, or leave the terminal, battery pack, adapter, or Don’ t docomo mini UIM card in a place subject to high temperature (such as close to fi... - Page 17 Use the battery pack and adapter specifi ed by NTT DOCOMO for the terminal. May cause fi re, burns, injuries, electric shock. WARNING Do not throw the equipment, or give excessive force or hard shock to it. Don’ t May cause fi re, burns, injuries, electric shock.
- Page 18 Turn the terminal OFF and stop charging before entering a place such as a gas station where fl ammable gases are generated. The gas may catch fi re. When using Osaifu-Keitai in a place such as a gas station, turn OFF the terminal before using it.
- Page 19 CAUTION Do not leave the equipment on unstable or sloping surfaces. Don’ t The terminal may fall and cause injuries. Do not store the equipment in extremely humid, dusty or hot areas. Don’ t May cause fi re, burns, electric shock. Children using the equipment should be instructed in proper operation by an adult.
-
Page 20: Handling The Terminal
2. Handling the terminal WARNING Do not lighten the light near eyes. Especially, when you capture babies Don’ t or infants, keep the terminal 1m or more away from babies and infants. Vision disability may result. Accident may result from being shocked. Do not put foreign objects such as liquid like water, metal pieces or Don’... - Page 21 Turn the terminal OFF in areas where use is prohibited, such as in airplanes and hospitals. Failure to do so may cause electronic equipment or electronic medical equipment to fail or malfunction. When using the phone in a medical facility, be sure to observe the regulations of the facility.
- Page 22 When you use electronic medical equipment, check with the equipment manufacturer to determine how the device is aff ected by radio waves before using. May cause harmful eff ect on electronic medical equipment etc. Turn the terminal OFF near high- precision electronic control equipment or electronic equipment using low-power signals.
- Page 23 When the display or camera lens is accidentally broken, be careful of broken glass or exposed internal parts of the terminal. Inside of display is made of impact- resistant resin and surface of camera lens is made of acrylic parts, and they are structured for the glass not to scatter, however, if you mistakenly touch broken or exposed parts, you may be...
- Page 24 CAUTION Do not use damaged terminal. May cause fi re, burns, injuries, electric Don’ t shock. Before using the motion sensor, be sure to check safety around you, Don’ t fi rmly grip your terminal and do not swing it more than necessary. May cause injury or other accidents.
- Page 25 Mobile phones can give some users skin problems such as itching, allergic reactions or rashes. If you develop skin problems, stop using the phone immediately, and see a doctor. For parts materials → P.33 "Material list" When watching the display, take a certain distance from the display in a fully bright place.
-
Page 26: Handling Battery Pack
3. Handling battery pack ■ Check that the battery type matches the type displayed on the battery pack label. Display Battery type Li-ion 00 Li-ion battery DANGER Do not contact a wire or other metal objects to the jack. And, do not carry Don’... - Page 27 Do not nail the battery pack, hit with a hammer or step on it. Don’ t May cause battery pack to ignite, burst, heat or leak. If the battery pack's fl uid etc. contacts eyes, immediately fl ush the eyes with clean water and see a doctor right away.
- Page 28 CAUTION Do not discard old battery packs together with other garbage. Don’ t May cause igniting or environmental destruction. Tape the terminals of old battery packs to insulate them, and then bring them into a sales outlet such as docomo Shop. If your local municipality has a battery recycling program, dispose of them as provided for.
-
Page 29: Handling Adapter
4. Handling adapter WARNING Do not use the adapter cord if it gets damaged. Don’ t May cause fi re, burns, electric shock. Do not use the AC adapter in a bathroom or other highly humid area. Don’ t May cause fi re, burns, electric shock. Always use the DC adapter with a negative-ground vehicle. - Page 30 When you insert and remove AC adapter from power outlet, do not Don’ t contact a metal strap or other metal objects with the jack. May cause fi re, burns, electric shock. Do not touch the adapter cord or outlet with wet hands. No wet May cause fi...
- Page 31 When you connect the AC adapter to an outlet, do not fail to properly connect to the outlet. May cause fi re, burns, electric shock. When you disconnect the power plug from the outlet or cigarette lighter socket, do not pull the adapter cord with excessive force.
-
Page 32: Handling Docomo Mini Uim Card
5. Handling docomo mini UIM card CAUTION Be careful of the cut surface when removing docomo mini UIM card. May cause injuries. Assembling... -
Page 33: Handling Mobile Phones Near Electronic Medical Equipment
6. Handling mobile phones near electronic medical equipment ■ These precautions are based on the guidelines produced at the Electromagnetic Compatibility Conference Japan, regarding the protection of electronic medical equipment from radio waves emitted by mobile phone units. WARNING Obey the following rules inside medical facilities. - Page 34 Turn the terminal OFF in crowded trains or other public places where pacemaker or defi brillator wearers could be nearby. The terminal's signals may aff ect the operation of implanted pacemakers or defi brillators, and other devices. Wearers of the electronic medical equipment such as implanted pacemakers or defi...
-
Page 35: Material List
7. Material list Surface Part Material treatment Display panel Glass − External Front case side deposition (Periphery) Back Multi cover deposition (Pebble Blue) Back Multi cover deposition (Marble White) Side key (Volume key, Power/screen deposition lock key) Home key Aluminum Anodized aluminum processing... - Page 36 Surface Part Material treatment Top part of 1Seg Multi antenna deposition (Marble White) Light Panel Acrylate − Speaker Stainless − steel Earpiece peripheral Stainless Chrome part steel plating Battery Contacts Copper Nickel Pack alloy base plating/ Gold plating Battery − pack Label Coating...
-
Page 37: Handling Samples (Microsd Card (2Gb)/ Stereo Headset With Microphone)
8. Handling samples (microSD card (2GB), Stereo Headset with Microphone) DANGER ■ microSD card (2GB)/Stereo Headset with Microphone (Common) Do not put the equipment into heating cooking device such as microwave Don’ t oven or high-pressure container. May cause fi re, burns, injuries, electric shock. - Page 38 WARNING ■ microSD card (2GB)/Stereo Headset with Microphone (Common) Do not throw the equipment or give a strong force or hard shock to it. Don’ t May cause fi re, burns, injuries, electric shock. ■ Stereo Headset with Microphone Keep conductive materials (metal pieces, pencil lead, etc.) from coming Don’...
- Page 39 CAUTION ■ microSD card (2GB)/Stereo Headset with Microphone (Common) Do not store the equipment in extremely humid, dusty or hot areas. Don’ t May cause fi re, burns, electric shock. Children using the equipment should be instructed in proper operation by an adult.
- Page 40 Do not touch to the metal contact with conductive materials (metal Don’ t pieces, pencil lead, etc.) or short. May cause data loss or malfunction. Do not give vibration/shock, turn the terminal off or remove from the Don’ t equipment while writing/reading data to/from the microSD card.
-
Page 41: Handling Precautions
Handling precautions General ■ Do not expose to water. The terminal, battery pack, adapter and docomo mini UIM card are not waterproof. Do not use them in a humid place such as bathroom or in the rain. If you carry your terminal on your body, perspiration may corrode the internal parts of the terminal and cause malfunction. - Page 42 ■ Clean the jacks occasionally with a dry cotton swab. If the jack is soiled, connection gets worse and it may cause power to be turned off or insuffi cient battery charge, so clean the jack with a dry cotton swab etc. When cleaning, be careful not to damage the terminals.
- Page 43 Terminal precautions ■ Do not press display surface forcibly, or not operate with a sharp-pointed objects such as nail, ballpoint pen, pin, etc. Doing so may cause damage of display. ■ Do not use the terminal in extremely hot or cold places. Use the terminal within a temperature range of 5℃...
- Page 44 ■ The terminal could become warm while in use and charging. This condition is not abnormal. You can continue to use the terminal. ■ Do not leave the camera under direct sunlight. Doing so may cause discoloring or burn-in of materials.
- Page 45 Battery pack precautions ■ The battery pack is a consumable accessory. Replace the battery pack if the terminal has extremely short operation time on a full charge, though it may vary by operating conditions. Purchase the specifi ed battery pack. ■...
- Page 46 Adapter Precautions ■ Charge the battery pack in an environment with the proper ambient temperature (5℃ to 35℃ ). ■ Do not charge in the following places. • Places that is very humid, dusty or exposed to strong vibrations. • Near ordinary phone or TV/radio. ■...
- Page 47 docomo mini UIM card precautions ■ Do not use excessive force to attach/ remove docomo mini UIM card. ■ Note that DOCOMO assumes no responsibility for malfunctions occurring as the result of inserting and using a docomo mini UIM card with another IC card reader/writer.
- Page 48 Bluetooth function precautions ■ To secure the Bluetooth communication security, this terminal supports the security function compliant with Bluetooth standards, but the security may not be suffi cient depending on the settings. Be aware of the communication using the Bluetooth function. ■...
- Page 49 Available channels vary by the country. For use in an aircraft, contact the airline beforehand. ■ Bluetooth cautions The operating frequency band of this terminal is used by industrial, scientifi c, consumer and medical equipment including microwave ovens, premises radio stations for identifying mobile units used in the manufacturing lines of plants (radio stations requiring a license), specifi...
- Page 50 Wireless LAN (WLAN) precautions ■ Wireless LAN uses radio waves to enable communications between compatible devices, thus allowing connection to a local area network from anywhere within range. On the other hand, there is a risk of data interception by malicious third party unless security is established.
- Page 51 ■ 2.4 GHz device cautions The operating frequency band of the WLAN device is used by home electric appliances such as microwave oven, industrial, scientifi c, consumer and medical equipment including premises radio stations for identifying mobile units used in the manufacturing lines of plants (radio stations requiring a license), specifi...
- Page 52 Precautions on FeliCa reader/ writer function • FeliCa reader/writer function of the terminal uses weak waves requiring no licenses for radio stations. • It uses 13.56 MHz frequency band. When using other reader/writers in your surroundings, keep the terminal away suffi...
- Page 53 ● Clean the jack occasionally with a dry cotton swab etc. If the jack is soiled, connection gets worse and it may cause power to be turned off or insuffi cient battery charge, so clean the jack with a dry cotton swab etc. Also, be careful never to damage the jack when cleaning it.
- Page 54 Note ■ Do not deform the terminal. Using an altered device is a violation of the Radio Law. A "Technical Compliance Mark " affi xed on the manufacturer's specifi cation sticker certifi es that the terminal meets technical regulations for specifi ed radio equipment that are based on the Radio Law.
-
Page 55: Getting Started
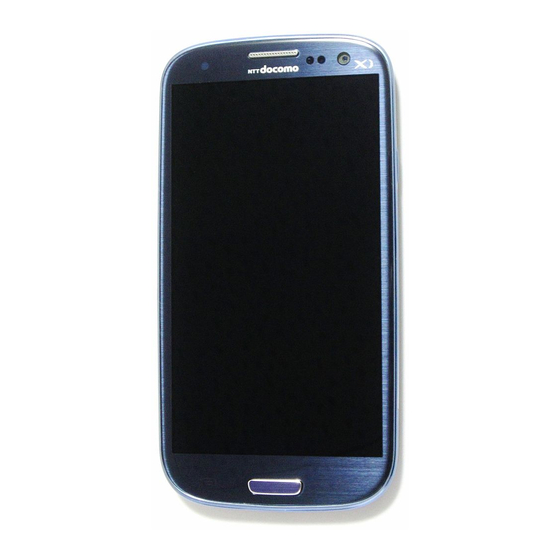
Getting started Part names and functions a Notifi cation LED → P.96 b Earpiece • Hear the other party's voice from here. Volume Key → P.263 Home key • Return to the Home screen during operation. • Press and hold for 1 second or longer to display recently used application list (P.99), then tap “Task manager”... -
Page 56: Proximity Sensor
g Microphone • Upper microphone can be worked only when shooting video. • Lower microphone can be worked for calling, voice recognition, recording in voice recorder, etc. h In-camera i Proximity/Light sensor • Sense a face approaching or ambient brightness to turn off the screen display or adjust brightness of the display automatically. - Page 57 u Speaker • Ringtone sounds. • When talking with hands-free, hear the other party's voice from here. mark w Back cover x FOMA/Xi antenna* * It has a built-in antenna. Covering around antenna may aff ect the quality. Getting started...
-
Page 58: Docomo Mini Uim Card
docomo mini UIM card docomo mini UIM card is an IC card storing user information such as phone numbers. If the docomo mini UIM card is not inserted, you cannot use the terminal for communication such as calling, sending/ receiving Emails, data communication. •... - Page 59 Attaching/Removing docomo mini UIM card Attaching docomo mini UIM card With the IC face down, insert the docomo mini UIM card into the docomo mini UIM card slot in the direction shown on the illustration When you insert it in the correct direction, the docomo mini UIM card is hit lightly to a guide inside of the docomo mini UIM card slot.
- Page 60 Removing the docomo mini UIM card Push the docomo mini UIM card attached to the terminal lightly The docomo mini UIM card is popped out a little. Pull the docomo mini UIM card straight out in direction shown as in illustration Information •...
-
Page 61: Microsd Card
microSD card You can attach microSD card (including microSDHC card and microSDXC card) to the terminal and use it. • This terminal supports microSD card of up to 2 GB, microSDHC card of up to 32 GB and microSDXC card of up to 64 GB (as of June, 2012). - Page 62 Attaching microSD card With the metal contacts facing down, insert the microSD card into the slot in the direction shown in the illustration until it is fi xed When you insert it in the correct direction, the microSD card is hit lightly to a guide inside of the microSD card slot.
- Page 63 Removing microSD card To remove the microSD card, perform "Unmount SD card" (P.273). Push the microSD card attached to the terminal lightly The microSD card is popped out a little. Pull microSD card straight out in direction shown as in illustration Information •...
- Page 64 Formatting microSD card Note that formatting microSD card erases all data in the microSD card. From the Home screen, → "Settings" → "Storage" "Format SD card" → "Format SD card" → "Delete all" Getting started...
-
Page 65: Battery Pack
Battery pack • Attach/Remove the battery pack after turning the power off . • For attaching/removing the back cover, hold the terminal with hand not to damage the display, etc. And be careful not to press with your fi nger or hand. •... - Page 66 With facing the Battery pack mark up, align the tabs of the terminal with groove of the battery pack correctly, press the battery pack to direction a and push to the direction b Check the orientation of the back cover, align the back cover with the terminal, and then attach the back cover pressing fi...
- Page 67 Removing the battery pack Put fi ngernail in notch ① in rear cover, lift up a little in the direction b and remove in the direction c • Be careful not to hurt your nail. Hold the battery pack up using the groove of the terminal with your fi...
-
Page 68: Charging
Charging Use Battery Pack SC07 for this terminal. ■ Battery pack life • The battery pack is a consumable accessory. Each time it is charged, time available with each charging reduces. • When a time available with each charging is reduced to about a half from that of a new battery, replacement of the battery is recommended because it is near the end of life. - Page 69 240V overseas, a conversion plug adapter applicable to the country you are staying is required. Do not charge the battery using a transformer for overseas travel. • When the terminal is turned ON, you can receive a call even while the terminal is charged.
- Page 70 Continuous FOMA/ Stationary (Auto): stand-by Approx. 400 H time Stationary (Auto): Approx. 270 H Stationary (Auto): Approx. 330 H Continuous FOMA/ Approx. 500 min. call time Approx. 600 min. • Continuous call time is an estimate of the operation time for calling when radio wave reception is normal.
- Page 71 • Stationary continuous stand-by time is the estimated average operation time when radio wave reception is normal. ■ Estimate charging time AC Adapter SC04 Approx. 190 min. DC Adapter 03 Approx. 200 min. • Estimate charging time is the time for charging an empty battery pack with the terminal power off...
- Page 72 Charging with the AC Adapter SC04 Charging using AC adapter SC04 and USB cable SC02 is explained here. Power outlet microUSB AC adapter plug SC04 USB plug USB cable SC02 Insert the USB plug of USB cable SC02 with facing printed side up into AC adapter SC04 horizontally and fi...
- Page 73 When charging is completed, pull out the microUSB plug of USB cable SC02 from the terminal horizontally Pull out the USB plug of USB cable SC02 from the AC adapter SC04 horizontally Pull out the power plug of AC adapter SC04 from the outlet horizontally Charging with USB cable SC02 You can charge the terminal with a PC by...
- Page 74 When the battery is almost exhausted Notifi cation tone sounds, a message prompting to charge appears and the display dims. When the battery is exhausted, the power of the terminal automatically turns off . When you tap "Battery use" displayed with a message prompting to charge, functions presently consuming the battery power appear by a list.
-
Page 75: Turning Power On/Off
Turning power ON/OFF Turning power ON Press for 1 second or longer The starting screen appears, and then the Home screen with screen locked appears (P.293). When you turn the power on for the fi rst time Make the initial settings following to the onscreen instructions (P.86). -
Page 76: Changing Screen Display To English
Turning power OFF Press for 1 second or longer Device options screen appears. "Power off " → "OK" After exit screen appears the power turns off . Changing screen display to English From the Home screen, → " 本体設定 (Settings)" → " 言語と文字 入力... - Page 77 Setting/Canceling the screen lock You can set the screen lock to prevent the erroneous operation of the touch screen or keys. • When the display is turned off with "Screen timeout" (P.266) set, the screen lock activates automatically after about 5 seconds. Setting the screen lock Press The display turns off...
-
Page 78: Basic Operation
Information • When notifi cation information for missed calls or sp-mode mail arrives during the screen lock, a number (number of notifi cations) may be appeared to the icon on the unlock screen. When the Home screen is set to "TouchWiz home", an icon of notifi... - Page 79 ballpoint pen, pin etc.). • The touch screen may not work in the following cases. Note that it may cause malfunction. - Operation with gloved hands - Operation with tip of fi ngernail - Operation with a foreign object on the display - Operation with protective sheet or seal, etc.
- Page 80 ■ Drag With pressing with your fi nger, move a displayed item or icon. ■ Swipe Lightly move your fi nger across the surface of the screen. ■ Scroll With pressing a displayed content with your fi nger, move it up/down/right/left or switch the views.
- Page 81 ■ Widen/Narrow two fi ngers' distance With pressing a displayed image or web page with your two fi ngers, widen or narrow the distance to zoom in/out the content. Getting started...
- Page 82 ■ Direct call When SMS list screen or detailed screen of "Contacts" application provided by Samsung is displayed, pick up the terminal and bring it close to your face to call the contact. * The international...
- Page 83 ■ Double tap to top While Email list or contacts list in "Contacts" application provided by Samsung etc. is displayed, double tap the top of the terminal to display the top of the list. ■ Tilt to zoom When displaying...
- Page 84 ■ Pan to move icon If you swing the terminal left or right while you touch and hold an icon, the icon is moved to another page. ■ Pan to browse images When an image is zoomed in, touch and hold the image and shake the terminal up, down, left or right to move...
- Page 85 ■ Turn over to mute/pause While phone ringtone, notifi cation ringtone or alarm is sounding, or music/ video is played, turn over the terminal to mute/pause (except when display is OFF). ■ Palm swipe to capture Swipe the screen from right to left or vice versa with the side of your hand to capture the...
- Page 86 Information • If you activate a feature with which you can use motion functions, a confi rmation screen appears for using functions. Tap "Enable motion" or "Motion activation". to set the function ON. If you mark "Do not show again", the confi rmation screen no longer appears.
- Page 87 Saving the display content as an image Save screen content as image (screen capture). • Screen capture may not be available for some applications. Display a screen you want to save as an image Press and at the same time •...
-
Page 88: Initial Settings
Initial settings When you turn this terminal ON for the fi rst time after purchasing, follow the onscreen instructions to make settings for language, Google account settings, Google location information settings, and initial setting for docomo service. "Start" • To change the language, select "English" →... - Page 89 "Next" • A screen for installing applications collectively appears. • Select "Install" to install applications for service you have already subscribed. To stop installing them, select "Not install". "Next" • An initial setting screen for using Osaifu- Keitai appears. • When you select "Set", tap "Next" and operate according to the onscreen instructions.
- Page 90 "docomo Palette UI" → "OK" • Select "TouchWiz home" to use the Home for the terminal. • From the Home screen, tap → "Settings" → "Home selection" to change the Home. Getting started...
-
Page 91: Display And Icons
Display and icons In the status bar at the top of the display, icons which indicate the terminal status or notifi cation information are displayed. Notifi cation icons appear on the left side of status bar, and status icons appear on the right side of status bar. - Page 92 Notifi cation icon Data downloading/Download completed Data uploading/Upload completed Uploading data to Picasa, etc. completed Messages in Voice Mail service exist Alarm exists Alarm for schedule, etc. exists Playing/Pausing music in the / background Scanning microSD card Canceling microSD card mount USB connecting Error message exists GPS function in operation...
- Page 93 Notifi cation icon USB tethering and Wi-Fi tethering enabled No docomo mini UIM card Update of application installed from Samsung Apps exists Setting/Checking software update Updatable application exists in dmarket Updatable application exists in Google Play Installation of application is completed Hidden notifi...
- Page 94 Notifi cation icon Omakase lock is set Main status icons Status icon Radio wave condition ⇔ (Weak ⇔ Strong) Radio wave condition ⇔ (roaming) (Weak ⇔ Strong) Out of service area In Airplane mode Connected to LTE network (arrow color:gray) LTE network communication in use (arrow color left: orange, right: green)
- Page 95 Status icon FOMA HIGH-SPEED/HSDPA network communication in use (arrow color left: orange, right: green) Connected to GPRS network (arrow color: gray) GPRS network communication in use (arrow color left: orange, right: green) Connected to Wi-Fi network (arrow color: gray) Wi-Fi network communication in use (arrow color left: orange, right: green)
- Page 96 Status icon Charging battery Wi-Fi Direct function ON Wi-Fi Direct connected Notifi cation panel Scroll the status bar downward to display notifi cation panel. You can tap the icons to set function or check the notifi cation information. a Switch ON/OFF for settings. Drag left and right to display icons that are not displayed.
- Page 97 • Wi-Fi: → P.241 • GPS: → P.382 • Sound: → P.260 • Screen rotation: → P.84 • Power saving: → P.272 • Notifi cation: Switch ON/OFF for notifi cation icons. If OFF is set, appears on the status bar and a status icon does not appear.
- Page 98 Notifi cation LED In the state that the screen is off , when notifi cations for missed calls etc. exist or while charging, notifi cation LED lights/blinks to notify about notifi cations or the condition of terminal. Operations Description Lights red* Charging battery Lights green Charging completes...
-
Page 99: Using Quick Search Box
Using Quick search box You can search information including entered word in the terminal or on the Internet. From the Home screen, Tap Quick search box a An entered character appears. b Information or search options saved in the terminal containing the entered characters appear. -
Page 100: Search Menu
Search menu to display following items. Item Selection Settings Searchable Specify target to search in items the terminal. Google Search Google If you set up two or more Account Google accounts, select a Google account to use. Use Web Set whether to display set History up Google account's web history as a candidate. -
Page 101: Opening A List Of Recently-Used Application
Item Selection Settings Google Search Terms of Shows Terms of use of Service Google Search. Open Shows Open source Source license. Licenses Help Shows descriptions on using Google Search. Opening a list of recently- used application Press for 1 second or longer •... -
Page 102: Checking/Ending A Running Application
Checking/Ending a running application Press for 1 second or longer → "Task manager" a Tab "Active applications": Display a list of running applications. → "List by" to change display order of the list. "Downloaded": Check the installed application list and memory usage status. Tap to "Uninstall"... - Page 103 Information • When several applications are running, battery consumption may increase and usage time may shorten. Therefore, ending unused applications is recommended. To end an application, tap "End" on the running application list (P.100) or tap on the running application screen to display the Home screen (P.126).
-
Page 104: Entering Characters
For the keyboards for character entry, there are the following 2 types. • Samsung keyboard • Samsung Japanese keypad Information • You cannot input Japanese with Samsung keyboard. • Use Google voice input to enter characters by voice sound. • Depending on usage condition, the display or operation of each keyboard may diff... - Page 105 Switching keyboard types (input method) While the keyboard is displayed, open the notifi cation panel "Select input method" • "Select input method" screen appears. Tap a input mode you want to use Information • From the Home screen, → "Settings" → "Language and input"...
- Page 106 Entering with Samsung Japanese keypad In Samsung Japanese keypad, you can use two types of keyboards: "3x4 Keypad" and "QWERTY Keyboard". • 3x4 Keypad: it is a keyboard similar to a general mobile phone keyboard (for multi-tap method).Tap a key assigned character you want to enter several times until the target character is entered.
- Page 107 b Display usual conversion options. • If suggestions are not displayed, tap to enter a space. is displayed only when entering Japanese. c Display setting menu or switch keyboards. d Display Emoji/Symbol/Emoticon list. • Tap the tab to switch lists. •...
- Page 108 Information • For voice input, connection by Mobile network is required. Wi-Fi connection may not be available. Switching keypad types While the keypad is displayed, "3x4 key ⇔ QWERTY" Switching text input modes While the keypad is displayed, touch and hold Tap a text input mode you want to use When you switch the character input mode, the key indicator changes to the followings.
- Page 109 Using Wildcard Prediction Wildcard Prediction is a function to narrow down conversion options by entering numbers of the reading of word etc. • It is available when Word Prediction and Wildcard Prediction are set to ON. Example: Entering " 東京都 " When the keypad is displayed, enter "...
- Page 110 Entering with Samsung keyboard In Samsung keyboard, there are two types keypads: "Qwerty", "3x4 keyboard". To switch keypad, perform the following operations. • Entering Japanese is not available. While displaying keyboard , "Portrait keyboard types" → "Qwerty"/"3x4 keyboard" ■ Qwerty It is a keypad whose alignment is the same as a PC keyboard.
- Page 111 Display Samsung keyboard setting menu. : c Switch language each time you tap. • When multiple languages are set for Input language (P.121), you can display them. • Touch and hold to display a language list. d Switch upper/lower case character.
- Page 112 ■ 3x4 keyboard It is a keypad whose entry method is similar to one of general mobile phone (multi-tap type). Tap a key assigned character you want to enter several times until the target character is entered. • To enter number or symbol, tap a key once. •...
- Page 113 Key displays vary depending on the selected icon menu. :Switch to voice input. :Switch to the handwriting keyboard. :Display clipboard to paste texts etc. :Display Samsung keyboard setting menu. g Switch upper/lower case character. • :Lower case input • :Capitalize the fi rst letter •...
- Page 114 Information • For voice input, connection by Mobile network is required. Wi-Fi connection may not be available. Getting started...
- Page 115 (Samsung Japanese keypad) (Samsung keyboard) a Display word suggestions. Tap an option to enter text. b Switch to Samsung Japanese keypad or Samsung keyboard. • When you switch to the handwriting input keypad from Samsung keyboard, the following icon menu is appeared by touching and holding.
- Page 116 Enter spaces. • If handwriting input keypad is displayed from Samsung keyboard and multiple languages are set in Input language ( ), drag left and P.121 right on the key to switch language. f Drag on entry area to enter characters.
- Page 117 Selecting/ Copying/ Cutting/ Pasting text While the keyboard is displayed, touch and hold entered character string / , etc. appears. Drag etc. to move the cursor. Select icon to use Icon Description Select all entered characters. Cut out selected character string. Copy the selected character string.
- Page 118 Information • In horizontal view display, the display may be diff erent. • For some applications, the function may not be available or there may be unavailable functions. And display of icon may be diff erent or icon other than ones in Step 2 may be displayed.
- Page 119 Setting character entry/ conversion function Setting Samsung Japanese keypad You can set entry operations when entering characters using Samsung Japanese keypad, register to the user dictionary, etc. From the Home screen, → "Settings" → "Language and input" → on "Samsung Japanese keypad"...
- Page 120 Item Description Software Keyboard Handwriting Set whether to enter input characters by handwriting. 3x4 Keypad Flick Input Set whether to enter characters by fl icking when keyboard is set to "3x4 Keypad". When ON is set, the popup indicating available characters when you touch the key appears.
- Page 121 Item Description Conversion Input Word Set whether to save a phrase Learning confi rmed at conversion to the learning dictionary. Word Set whether to predictive Prediction conversion ON. Typing Error Set whether to display Correction* correction options in the conversion options fi eld when there is a wrong entry.
- Page 122 User English user dictionary. Dictionary Clear Delete the contents of Learning learning dictionary. Dictionary About IME iWnn Check version of Samsung IME for Japanese keypad. Samsung * It is unavailable when the predictive conversion is set to OFF. Getting started...
- Page 123 Setting Samsung keyboard You can set entry operations when entering characters using Samsung keyboard. From the Home screen, → "Settings" → "Language and input" → on "Samsung keyboard" Tap an item to set Item Description Portrait keyboard types Switch keypad types.
- Page 124 Key-tap sound Set whether to sound entry sound when a key is tapped. Tutorial Display Tutorial of Samsung keyboard to check operation. Reset settings Reset all settings. *1 It is unavailable when Predictive text is set to OFF. *2 Available when "Google voice typing" (P.299) is marked.
- Page 125 Information • Tutorial for Samsung keyboard is displayed in English. Setting Google voice typing From the Home screen, → "Settings" → "Language and input" → on "Google voice typing" Tap an item to set Item Description Select input languages Select language to input with voice sound.
- Page 126 Add to User Register/edit words, etc. Dictionary Show User Display a list for registered Dictionary word etc. Clear History Delete all automatically learned fi xing candidate. Online Help Display Help for 7notes with mazec-T for SAMSUNG. Getting started...
- Page 127 Item Description 7notes with Check version of mazec-T for 7notes with mazec-T for SAMSUNG SAMSUNG. Legal Notices Display copyrights information. * Settings is not available when Auto Feed (for Stroke) is set to OFF. Getting started...
-
Page 128: Docomo Palette Ui
docomo Palette UI Home screen a The current position of the Home screen is displayed. You can toggle the screens by scrolling/fl icking left and right. b Widget (e.g.:Search, i チャネルウィジェット (i-Channel Widget)) • Tap to activate or operate widget (application located on the Home screen). -
Page 129: Managing Home Screen
c Machi-chara (eg. ひつじのしつじくん (Butler Sheep)) • Notify you of information such as mail reception or incoming call. d Shortcut • Tap to activate frequent-used application etc. e Displayed even when the home screen is switched. • Icons other than , shortcuts, folders and groups can be located. - Page 130 Assistive light Turn on light. Clock (digital) Display clock. Clock (funky) Clock (modern) Contact Allocate registered to "Contacts" application provided by Samsung to the Home screen to make calls or send mails. Contents Display recommended Headline music, video, e-books, etc. in dmarket.
- Page 131 Icon Widgets Description Dual clock Display analog clock. (analog) Dual clock Display digital clock. (digital) Email Display the part of the Email Inbox. Gmail Display the part of the Gmail Inbox. Google Display Quick search. Search * Select widget that is suitable design Google for the using Home...
- Page 132 Icon Widgets Description Machi-chara Set characters moving around freely on widgets in the Home screen. Mono audio Switch ON/OFF of monaural play (P.305). Music player Play music. Negative Invert negative/positive colors screen display. Personal area Display personal information. You can view My menu, docomo points, contractual services, charges.
- Page 133 Icon Widgets Description Picture frame Display images. Play Store Display recommended applications. S Bookmarks Select a bookmark saved in the terminal or Google account to browse the web page. S Memo Create memos out of input text and handwriting. S Suggest Check/Download latest applications.
- Page 134 Icon Widgets Description YouTube Display recommended videos. 診断ツール Start 診断ツール (Diagnosis (Diagnosis tool). tool) Information • When "TouchWiz home" is set, available widgets are diff erent. Also, icons of widgets may diff er. Adding folders From the Home screen, touch and hold a wallpaper in which shortcuts or widgets are not displayed "Folder"...
- Page 135 Moving shortcuts, etc. Touch and hold a widget/shortcut Drag to the position you want to move to and release it Deleting shortcuts, etc. from the Home screen Touch and hold a widget/shortcut Drag to at the bottom of screen and release it •...
- Page 136 Changing folder name From the Home screen, touch and hold a folder you want to rename • Folders can be renamed are only created at "New folder". "Edit name" → Enter folder name → "OK" Information • Alternatively, open a folder and touch and hold a folder name to rename.
-
Page 137: Changing Wallpaper
Information • From the Home screen, → "Kisekae" to change. • To delete installed Kisekae theme, on the Kisekae setting screen, select theme you want to delete → "Delete" → "Delete". You cannot delete pre-installed Kisekae themes. • To download from Kisekae site, on the Kisekae setting screen, tap "Search". - Page 138 • If you select Wallpaper gallery or Wallpapers, select a wallpaper and tap "Set wallpaper" Information • For loop display of wallpaper by scrolling/ fl icking the Home screen left or right, from the Home screen, → "Wallpaper loop settings" → Mark "Wallpaper loop". Adding home screens From the Home screen, touch and hold a wallpaper in which shortcuts or...
- Page 139 Touch and hold a thumbnail of Home screen Drag to the position you want to move to and release it Deleting home screen From the Home screen, touch and hold a wallpaper in which shortcuts or widgets are not displayed → "Home screens"...
-
Page 140: Application Screen
Application screen From the Home screen, Application screen appears. a Group • Manage applications by groups. • Tap to show/hide applications in the group. • The number at the right side indicates the number of applications in the group. b Application •... -
Page 141: Application List
Application list • Some applications require subscriptions (charged) to use. Applications in "Application" tab ■ DOCOMO Services Icon Application Description dmenu Shortcut application for "dmenu". You can search easily i-mode compatible contents as well as other useful contents for smart phone. - Page 142 Icon Application Description Phone Make/receive calls or check call logs using "Phone" application provided by DOCOMO. Dial Make/receive calls using the terminal's "Dial" application provided by Samsung. Phonebook Manage contacts using a phonebook application provided by DOCOMO. docomo Palette UI...
- Page 143 Icon Application Description Contacts Manage contacts using the terminal's "Contacts" application provided by Samsung. SD card Transfer/back up data backup such as phonebook, sp-mode mail, bookmark using an e external storage such as a microSD card. For details, refer to P.404.
- Page 144 ■ Entertainment Icon Application Description Media Play music or video. Player MobileTV Watch 1Seg. G ガイド番組 An app for viewing 表 (G-guide terrestrial and BS program) program schedules. Program searching via keywords and genres, 1Seg broadcast viewing and preset recording, and remote recording from outside locations are available.
- Page 145 Create memo quickly by mazec-T handwritten input. ChatON Enjoy group chat with this application. S Suggest Search/download latest applications recommended by Samsung. Voice Record voice sound. recorder My fi les View/Manage data such as still images, videos, music, etc. docomo Palette UI...
- Page 146 Offi ce document. AllShare Share and play/manage Play contents in various devices via the internet. More Download useful services applications. Samsung Download useful Apps applications or update installed applications. ■ Osaifu/Shopping Icon Application Description Osaifu- It allows you to pay...
- Page 147 Icon Application Description 遠隔サポート An application to use (Remote "Smartphone Anshin support) Remote Support". "Smartphone Anshin Remote Support" is a service with which a Call Center staff helps your operation checking your terminal's screens remotely. ® ® Flash Player Perform Adobe Flash Settings Player settings.
- Page 148 Icon Application Description Downloads Check downloaded or downloading data information. Play Store Download applications from Google Play. Music player Play music. YouTube Play/Post videos. Play Movies You can purchase videos from Google Play. Video player Play videos. Maps Check current location or search a destination with Google Maps.
- Page 149 Icon Application Description Messenger Invite multiple friend groups to one simple group chat to enjoy with all members on one page. Applications in "Recommends" tab Icon Application Description Anshin Scan Protect the terminal from the viruses. Detect virus hidden in installed applications or microSD card.
- Page 150 Icon Application Description 地図アプリ Functions such as 地 (Map 図 (Map), お店や施設検索 application) (Shop and facility search), ナビ (Navigation), 乗換 (Transfer function), 訪れた 街 (Visited places) support your outing. Name card Create original name creator card to display on the My profi...
-
Page 151: Managing Applications
Managing applications Adding shortcuts to Home screen On the application list screen, touch and hold an application you want to add to the Home screen "Add" Uninstalling applications On the Application screen, touch and hold an application you want to uninstall "Uninstall"... -
Page 152: Managing Groups
Managing groups Adding groups On the Application list screen, → "Add group" Enter group name → "OK" Sorting groups On the Application list screen, touch and hold a group label Drag to the position you want to move to and release it Editing group name On the Application list screen, touch and hold a group label... - Page 153 Changing group color On the Application list screen, touch and hold a group label "Edit label" → Select label color Adding groups to Home screen On the Application list screen, touch and hold a group label "Add" Deleting groups On the Application list screen, touch and hold a group label "Delete"...
-
Page 154: Searching Applications
Searching applications On the Application list screen, → "Search" Enter application name you want to search → Tap searched application • To search installed applications, on the search screen, → "Settings" → "Searchable items" → Mark "Apps". docomo Palette UI... -
Page 155: Switching Application Screen
Switching Application screen On the Application list screen, → "List format"/"Tile format" Installing "Recommends" applications Applications recommended by DOCOMO are displayed in the "Recommends" tab. To download applications, tap an application icon to display the download screen and follow the onscreen instructions. •... -
Page 156: Home Screen Information
Home screen information You can view the descriptions or instructions, etc. about docomo PaletteUI. From the Home screen, → "Help" Version information On the Application list screen, "Application info" You can view the provider/version information of docomo Palette UI. docomo Palette UI... -
Page 157: Making A Call
Calling Making a call From the Home screen, "Phone" → "Dial" Enter a phone number of the other party • Enter a city code even when the other party is in the same city. a Recent calls: Display call log screen (P.167). - Page 158 • Alternatively, from the Home screen, → Tap "Dial" to activate application provided by Samsung and then tap "Keypad" to make a call. However, available functions etc. of "Phone" application diff ers from the ones provided by DOCOMO. Calling...
-
Page 159: Emergency Call
Emergency call Emergency call Phone number Police Fire and ambulance Marine emergency Information • This terminal supports "Emergency report location notifi cation". When calling to 110, 119, or 118, the information of where you are calling from is automatically informed to the police or other agencies. - Page 160 Information • When calling to 110, 119 or 118 from the terminal, inform them that you are calling from a mobile phone and give your phone number and your current location precisely for checking callback from the police/fi re department. To make sure that you are not cut off...
- Page 161 Menu of dial screen to display the following items. Item Description Caller ID Set whether to notify/not to notifi cation* notify the caller ID. International Make an international call call* (WORLD CALL) (P.172). Add 2-sec Enter ",". Enter a phone pause* number, pause (,) and numbers consecutively and call.
-
Page 162: Receiving A Call
Receiving a call A call is received A reception screen appears. • If call is received when you are at out of service area, incoming call notifi cation arrived via SMS message. Drag to outside of the circle A call screen appears, calling starts. To reject a call Drag to outside of the circle. - Page 163 To reject a call and inform the caller of the reason of the rejection by SMS Drag "Reject call with message" at the bottom of the screen upward and tap "Send" of reject message. • Tap "Create new message" to create SMS. Information •...
- Page 164 Using Stereo Headset with Microphone When you connect Stereo Headset with Microphone (sample), you can answer an incoming call by pressing the switch of Stereo Headset with Microphone. Attaching Stereo Headset with Microphone Insert the connecting plug of Stereo Headset with Microphone to the headphone connection jack of the terminal appears on the status bar.
- Page 165 Receiving a call using Stereo Headset with Microphone When a call is received, press the switch of Stereo Headset with Microphone You can talk when the call is connected. Your voice is sent to the other party from the microphone of Stereo Headset with Microphone.
-
Page 166: Operation During A Call
Operation during a call A call is received A reception screen appears. Drag to outside of the circle A call screen appears, calling starts. Calling... - Page 167 You can operate the following operations on the call screen. Item Description Enable/disable the maximum volume by each tapping. • This operation can be available when “Use extra vol. for calls” (P.179) is marked. Hold * Hold call/Cancel the hold. Unhold * Add call * Make a second call.
- Page 168 Record You can record/stop recording voice * / your current call. Stop • Recorded voice data can be recording * played with Voice recorder (P.401). In-call Set sound quality during a call. sound EQ * *1 Only "Call Waiting" subscribers can operate. *2 Tap to display.
-
Page 169: Call Logs
Call logs In Recent calls, you can check logs of dialed calls, received calls, missed calls by a list. From the Home screen, "Phone" → "Recent calls" Recent calls screen appears. Recent calls screen Calling... - Page 170 a Recent calls list: Recent calls list is displayed. Favorites: contacts list added to the Favorites is displayed (P.190). Dial: Display dial screen (P.155). b Switch logs Switch display between Incoming history and Outgoing history. To return to the original display, tap "Display all history".
- Page 171 • You can back up call logs using SD card backup (P.197). • Alternatively, from the Home screen, → Tap "Dial" to activate "Dial" application provided by Samsung, and then tap "Logs" to check incoming/outgoing call log. However, available function etc. of the application diff ers from "Phone" application provided by DOCOMO.
- Page 172 Menu on Recent calls/Log details screen to display the following items. Item Description Delete all * Delete call logs. Search Check current location of the location * party using imadocokantan search. Call settings * → P.174 Set start-up Set the displayed screen as a screen* default when tapping "Phone"...
- Page 173 Item Description Share * Send contacts via Bluetooth or by mail attachment. Delete * Delete contacts. Set ringtone * Set individual ringtone. Join/ Link related contacts such Separate * as family, company, etc. to put into one joined contact or separate the joined contact.
-
Page 174: Making An International Call (World Call)
Making an international call (WORLD CALL) WORLD CALL is an international telephone service that you can use inside Japan with DOCOMO terminal. If you subscribed to FOMA service, WORLD CALL service is subscribed as well at subscription to FOMA service (Excluding those who decline to use this service). - Page 175 Information • When "0" is touched and held to enter prefi x "+" before "Country code-Area code (City code)-phone number", international dial assist screen appears when making a call. When you tap "Call by WORLD CALL", "+" is changed to an international access code "009130010", and you can make an international call.
-
Page 176: Call Settings
Call settings You can set functions for calling from the Home screen, "Phone" → → "Call settings". Item Description Network service Koe-no-Takuhaibin Koe-no-Takuhaibin is a service of taking voice messages for you. Voice mail service The service takes voice message of the other party for you if you cannot answer an incoming call. - Page 177 Item Description Network service Nuisance call Save caller's number blocking service and set call rejection. Caller ID display Activate/Deactivate request service Caller ID request. Second call Activate/Deactivate settings Set arrival. Call notifi cation Activate/Deactivate missed call notifi cation. English guidance Activate/Deactivate English guidance.
- Page 178 Item Description Roaming settings Restricting Start/Stop barring incoming calls incoming call during International roaming. Incoming Activate/Deactivate notifi cation while Missed call notifi cation roaming for roaming. Roaming guidance Activate/Deactivate Roaming guidance. International dial assist Automatic Set ON/OFF conversion of Automatic conversions.
- Page 179 Item Description Roaming settings Network service Remote Set Remote control. operation (charged) * Caller ID request Set Caller ID request. (charged) * Roaming call Set missed call notifi cation notifi cation for (charged) * roaming. Roaming Set Roaming guidance guidance. (charged) * Voice mail Set Voice mail.
- Page 180 Item Description Call alert Call vibrations → P.181 Call status tones → P.181 Alerts on call → P.181 Call answering/ending Answering key Set whether to answer call by pressing The power key Set whether to end ends calls call by pressing . Auto screen off...
- Page 181 Item Description Accessory settings for call Automatic Set whether to answer answering automatically while connecting to a headset etc. Automatic Set response time for answering timer auto-answering when "Automatic answering" is marked. Outgoing call Set whether to make conditions a call from a Bluetooth headset even when screen is locked.
- Page 182 Item Description Increase volume in Set whether to increase pocket volume of ringtone when there is incoming call while the terminal is in a pocket, bag, etc. Additional settings Auto area code Set whether to add an area code automatically. Additional service Register USSD When a new network...
- Page 183 Notifying the call status by sound From the Home screen, "Phone" → → "Call settings" → "Call alert" Tap an item you want to set Item Description Call Answer Set whether to vibrate vibrations vibration the terminal when the other party answers your call.
- Page 184 Registering reason of rejection for sending via SMS when rejecting call This terminal can reject a reception of call and inform the caller of the reason of rejection by SMS. Up to 6 rejection messages can be registered. • By default, 5 rejection messages are registered.
- Page 185 Rejecting call receptions from specifi ed phone number You can register the phone number you want to reject the calls. Up to 100 phone numbers can be registered. From the Home screen, "Phone" → → "Call settings" → "Call rejection" → "Auto reject list"...
- Page 186 Information • To reject saved phone number, turn on "Auto reject mode" (P.177). Calling...
-
Page 187: Phonebook
Phonebook Registering to Phonebook Manage various contact information such as name, phone number or mail address using "Phonebook" application provided by DOCOMO. From the Home screen, → "Phonebook" By default, contacts list screen appears. "Register" → Select saving location • If you do not set up Google account, a saving location selection screen does not appear. - Page 188 To save contacts to the terminal From the Home screen, → "Contacts" → → "Phone". a Account icon A saving location icon appears. • If you combine contacts in diff erent accounts, two or more account icons appear. b Image fi eld Tap "Setting"...
- Page 189 → "Accounts to display" to change the display settings. Information • Alternatively, from the Home screen, → Tap "Contacts" provided by Samsung to activate "Contacts" application to register or manage contacts. However, available function etc. diff er from "Phonebook" application provided by DOCOMO.
- Page 190 Checking/Editing a contact From the Home screen, → "Phonebook" A contacts list screen appears. When the contacts list is not displayed, tap "Contacts". Contacts list screen a Contacts • Display the contact list screen. b Communication • A log (call, sp-mode mail, SMS) appears, which shows communications to the members registered in Phonebook.
- Page 191 • On the communication screen, tap "Disp. item" to set displayed items (phone/sp- mode mail/SMS). c Registered content • Registered contents are displayed by icons. d Name registered in Phonebook e Photo set in Phonebook f Groups • Select group to display (P.190). g Register •...
- Page 192 • To create a mail, tap a mail address and select an application. • Tap "Communication" to check the call logs or logs for sp-mode mail/SMS with the selected party. To edit a contact Tap "Edit". Adding a contact to favorites Add contacts to "Favorites".
- Page 193 ■ Adding/Editing a group On the Contacts list screen, "Groups" → "Add" tab → Select an account To edit saved groups Touch and hold the group tab you want to edit → Tap "Edit group". Tap an account to create group for →...
- Page 194 Information • Only contacts saved in docomo account or Google account can be added to the group. Making a call from Phonebook On the Contacts list screen, tap the recipient you want to call A profi le screen appears. Tap a phone number → "Call" Registering My profi...
- Page 195 Importing/Exporting contacts You can import/export contacts between SD card or docomo mini UIM card and the terminal. Also, you can send via email as contact data. On the Contacts list screen, → "Others" → "Import/Export" Perform the following operations To Import contacts "Import from SIM card"/"Import from SD card"...
- Page 196 Menu on contacts list screen/profi le screen to display the following items. ■ Contacts screen Item Description Delete * Delete contacts. Help * Check how to use Phonebook or precautions. Others * Import/ → P.193 Export Sync Sync with Backup center with the and back up.
- Page 197 Item Description Sync. deleted Update Recent calls of items * "Phonebook" application provided by DOCOMO, the sent/received log of sp-mode mail and SMS applications to the latest information. Share * Send name card data via Bluetooth, mail, etc. Announcement * Check i-concier information.
- Page 198 ■ Profi le screen Item Description Share Send contacts by Bluetooth, a mail, etc. Delete Delete contacts. Set ringtone Set individual ringtone. Join/Separate Link related contacts such as family, company, etc. to put into one contact or separate it. Sync. deleted Update Recent calls of items* "Phonebook"...
-
Page 199: Sd Card Backup
SD card backup You can move and back up phonebook entries, sp-mode mails, bookmarks, etc. using external media such as microSD card. • For details on SD card backup, see P.404. Calling... -
Page 200: Mail/Web Browser
Mail/Web browser sp-mode mail Send/Receive the mail using i-mode mail address (@docomo.ne.jp). You can use pictogram and Deco-mail. Mails can be received automatically. For details, see Mobile Phone User's Guide (sp-mode). From the Home screen, "sp モードメー ル " (sp-mode mail) Install sp-mode mail according to the onscreen instructions Mail/Web browser... -
Page 201: Sms
You can send and receive text messages up to 70 Full-width characters (160 Half- width alphanumeric characters) to/from the terminal with phone number. Creating and sending SMS From the Home screen, → "Messaging" A thread (sender/recipient of SMS) list appears. An SMS creation screen appears. - Page 202 Enter text in the "Enter message" fi eld To enter a smiley → "Insert smiley" → Tap a smiley you want to enter. To insert saved data → Tap "Add text". To save composing SMS as a draft When a recipient and text are entered and the keypad is not displayed, tap Information •...
- Page 203 Checking received SMS From the Home screen, → "Messaging" A thread (sender/recipient of SMS) list appears. Tap thread you want to read An SMS list appears. • Received SMS is displayed in yellow balloon and sent SMS is displayed in blue balloon.
- Page 204 Item Description Settings * Display Use the Set whether to volume change character size by . Storage Delete old Set whether to settings messages delete automatically when the number of SMS exceeds the specifi ed limit number. Set text Set limit numbers of message SMS.
- Page 205 Item Description Settings * Notifi - Notifi - Set whether to cation cations notify with sound settings and icon when SMS is received. Select Set notifi cation ringtone sound for sounding when an SMS is received. Delete threads * Delete a thread. Call * Call to the other party.
- Page 206 Menu on message screen Touch and hold the sent/received SMS to display the following items. Item Description Delete message Delete SMS. Copy message Copy an SMS text. text Lock message/ Lock/unlock an SMS to Unlock message prevent being deleted. Forward Forward an SMS.
-
Page 207: Email
Email Setting up Email You can set Email account provided by mopera U mail or general service provider that POP3 and IMAP etc. are supported, and send/receive emails. Flow of preparation for using Email ■ Connecting via packet communication Step 1: Subscribe to a provider Step 2: Set an access point (P.257) Step 3: Set Email account (P.206) Step 4: Create and send email (P.212) - Page 208 Information • If you send/receive emails to/from a PC or other device, some pictograms, HTML mails, etc. may not be displayed correctly depending on the usage environment. • If "Sync Email" (P.210) is marked, when the terminal sends/receives an email, synchronization with the mail server is performed.
- Page 209 Enter mail address and password → "Next" Settings of Email account are downloaded automatically. • If the settings are not downloaded automatically and an account type selection screen appears, follow the onscreen instruction to make settings. • "Send email from this account by default" check box appears when setting the second mail account.
- Page 210 Managing Email account From the Home screen, → "Email" An Email list screen appears. → "Settings" → "General preferences"/Tap an account you want to set Tap an item you want to set Item Description General preferences * Display after Set a screen to display deleting after deleting an email.
- Page 211 Item Description Common settings * Account name Set an account name. Your name Change user name. Signature Edit a signature. Default Set whether to use as account default Email account. If you mark it, displayed at the set account in the Email accounts list screen.
- Page 212 Item Description Data usage* Sync Email Set whether to synchronize with email server. Email check Set intervals of checking frequency new emails. Auto download Set whether to attachments * download attached fi les automatically when connecting via Wi-Fi. Size to Set an email size for retrieve emails receiving.
- Page 213 Information • To check received emails for all registered Email accounts by a list, tap an account on the Email list screen → Tap "Combined view". • To delete an Email account, on the Email list screen, → "Settings" → →...
-
Page 214: Creating And Sending An Email
Creating and sending an email From the Home screen, → "Email" • The Email creation screen appears. In To fi eld, enter a mail address to send • To add Cc or Bcc, → Tap "Add Cc/ Bcc". • → Tap "Groups", "Contacts", "Favorites" or "Logs"... - Page 215 Enter a text in the message fi eld To attach/insert an S memo → "S Memo" → Tap an S memo you want to attach or insert. * When you attach an S memo, select a fi le format. When you select "JPG", select an image size and tap "OK".
- Page 216 Checking received emails From the Home screen, → "Email" An Email list screen appears. • When multiple Email accounts are registered, tap an account name to select an account to display, then display the Email list screen. Tap an email you want to read A message screen appears.
- Page 217 Menu on Email list screen/message screen to display the following items. Item Description Search * Search an email. Folders * Switch, delete, add, and rename folders. Sort by * Sort emails by "Date (Most recent)", "Date (Oldest)", "Sender (A to Z)", "Sender (Z to A)", "Read/Unread", "Favorites", "Attachments"...
- Page 218 Item Description Print * Print email using via printer manufactured by Samsung. • As of June, 2012, there are no printers that use this features in Japan. Compose * Compose email. Save as group * Save email as a group.
-
Page 219: Gmail
Gmail You can send/receive emails using Gmail. • To use Gmail, you need to set Google account. When a setting screen of Google account appears, perform the settings according to onscreen instructions and then operate it. Opening Gmail From the Home screen, →... -
Page 220: Switching Accounts
Enter text in "Compose email" fi eld To save draft email → "Save draft" To edit draft email On "Inbox" screen, tap → "Drafts" → Tap draft email you want to edit → Tap Switching accounts From the Home screen, →... -
Page 221: Early Warning "Areamail
Early Warning "AreaMail" Area Mail is a service with which you can receive emergency earthquake fl ash reports delivered by the Meteorological Agency etc. • You can receive Area Mails for free without subscriptions. • Up to 50 Area Mails can be stored. •... - Page 222 Viewing received Area Mail From the Home screen, → "Area Mail" Tap an Area Mail you want to check Setting Early Warning "AreaMail" Set incoming settings and ringtone settings.You can also check receiving operation. From the Home screen, → "Area Mail"...
-
Page 223: Talk
Talk Google Talk is a Google instant message program. You can chat with friends who have a Google account. To use Google Talk, set Google account. Preparation for Google Talk To use Google Talk, log in and add members. However, if you have already set Google account, log-in is not unnecessary. - Page 224 Chatting From the Home screen, → "Talk" Tap account you want to chat with • Chat screen appears. Enter text in the "Type message" fi eld → • Message you entered is sent. Mail/Web browser...
-
Page 225: Web Browser
Web browser Using web browser Using web browser, you can view web pages as PCs. • Some web pages may not be displayed or may not appear properly. Starting web browser From the Home screen, " Internet" Web browser activates and web page set as home page (by default, dmenu (http://smt. - Page 226 d Windows Switch between windows, close and open windows. Tap to view web page in secret mode. Exiting web browser Touch and hold → "Task manager" → "End" of "Internet" → "OK" • Even when you return to the Home screen by pressing or tap on the browser...
- Page 227 Information • The following operations are available (Some operations are not available depending on the web page display). - Zoom in/out: Widen/Narrow the distance between your fi ngers at the point you want to zoom in/out. - Zoom in/out a part framed: Double-tap at the point you want to zoom in/out.
- Page 228 Operating links in web pages On the browser screen, touch and hold a link Tap an item you want to use Item Description Open Open web page. Open in new Open web page in new window window. Save link Save web page to the terminal/microSD card.
- Page 229 Information • Depending on the web pages, some link operation menu may not be displayed or the displayed items may diff er. Menu items on browser screen to display the following items. Item Description Forward Go back to the previous web page when displaying the web page by tapping New window...
- Page 230 Adjust the screen brightness. Downloads Check downloaded or downloading data information. Print Print browser screen via printer manufactured by Samsung. • As of June, 2012, there are no printers that use this features in Japan. Settings → P.233 Mail/Web browser...
- Page 231 Managing history and bookmarks Viewing web pages from the history From the Home screen, "Internet" → "History" A history list appears. • History is displayed in reverse chronological order of view date. • In "Most visited" fi eld, history is displayed in descending order of viewing frequency.
- Page 232 Adding a web page to Bookmarks From the Home screen, "Internet" Display a web page to bookmark → → "Add bookmark" Check or change the name → Tap "Folder" fi eld → Tap a folder you want to register to → "Save" Viewing web pages from a bookmark From the Home screen, "Internet"...
- Page 233 Menu of history/bookmark The following items appear when touching and holding history/bookmark. Item Description Open Open a web page in current window. Open in new Open a web page in a new window window. Remove from Delete a web page saved as Bookmarks * a bookmark in history from bookmark.
- Page 234 Item Description Delete Delete a bookmark. bookmark * Set as Set a web page as home homepage page. *1 Appears only in history list. *2 Appears only in bookmark list. Mail/Web browser...
- Page 235 Setting web browser From the Home screen, "Internet" → "Settings" Tap an item you want to set Item Description General Set home page Set a home page. Form auto-fi ll Set whether to enter contents registered in "Auto-fi ll text" when tapping a web form fi...
- Page 236 Item Description Privacy and security Clear cache Delete cache data. Clear history Delete view history. Show security Display warning for low- warnings security web pages. Accept Permit to save or read cookies Cookies. Clear all cookie Delete saved Cookies. data Remember Save text data entered to form data...
- Page 237 Item Description Privacy and security Remember Store user name/ passwords password entered to a web page. Clear Delete stored username/ passwords password. Enable Set whether to enable notifi cations notifi cation function. Clear Delete notifi cations. notifi cations Accessibility Force zoom Activate "Accessibility"...
- Page 238 Item Description Advanced Select search Set search engine. engine Open in Display a new window background behind the current viewing windows. Enable Enable JavaScript. JavaScript Enable plug-ins Enable plug-ins. Default Set a saving location of storage downloaded data. Website Display detail of the web settings page accessed to location information.
- Page 239 Item Description Advanced Reset to Delete data and reset default settings to return to the default in Browser. Bandwidth management Preload search Set browser to preload results a highly trusted search result in background. Load images Set whether to display images.
-
Page 240: Setting Menu
Settings Setting menu You can set various items such as screen brightness, screen view, ringtone, communication, etc. From the Home screen, → "Settings" Select a menu item and make settings Settings... -
Page 241: Wireless And Network
Wireless and network You can set for wireless network connection. Item Description Wi-Fi → P.240 Bluetooth → P.246 Data usage → P.246 More settings Airplane mode → P.247 Kies via Wi-Fi → P.247 → P.248 Tethering and → P.250 portable hotspot Wi-Fi Direct →... - Page 242 Wi-Fi You can use Wi-Fi function of the terminal to connect to wireless access point of your home or company network. Also, you can connect to Public wireless LAN service access point to use mails and Internet. ■ Reception interference caused by Bluetooth devices The terminal's wireless LAN device and Bluetooth devices use the same frequency...
- Page 243 Enabling Wi-Fi and connecting to network From the Home screen, → "Settings" → "Wi-Fi" Scanning available Wi-Fi networks starts automatically and a list is displayed. Tap a Wi-Fi network you want to connect → "Connect" To connect to a Wi-Fi network protected by security, enter a security key and tap "Connect".
- Page 244 Notifying Wi-Fi open network Set whether to notify when available open network exists near you. From the Home screen, → "Settings" → "Wi-Fi" → "Advanced" Mark "Network notifi cation" Canceling connection of Wi-Fi network From the Home screen, → "Settings" → "Wi-Fi" Tap a connected Wi-Fi network →...
- Page 245 Setting Wi-Fi access point • For information necessary for connection, refer to user manual of wireless LAN access point you use. For connecting to company LAN or using Public wireless LAN service, ask a network administrator or service provider about the required information for connecting. •...
- Page 246 Setting sleep policy of Wi-Fi You can set to disable Wi-Fi when the display of the terminal turns off or to enable when charging. From the Home screen, → "Settings" → "Wi-Fi" "Advanced" "Keep Wi-Fi on during sleep" → Select a sleep policy Selecting frequency band for Wi-Fi Select frequency band to use.
- Page 247 Using static IP address You can set the terminal to connect to Wi-Fi network using the static IP address. From the Home screen, → "Settings" → "Wi-Fi" Tap Wi-Fi network to connect → Mark "Show advanced options" In "IP settings", tap "Static" Set required items For using static IP address, enter the following items.
- Page 248 Bluetooth From the Home screen, → "Settings" → "Bluetooth" → Select item Item Description Device name Edit a device name of the terminal. Visible → P.313 time-out Show Display received fi le. received fi les Information • Mark "SC-06D" to show the terminal from other Bluetooth devices.
-
Page 249: Airplane Mode
• If you mark "Airplane mode", Wi-Fi also turns OFF. However you can turn ON the Wi-Fi while enabling Airplane mode. Connecting to Samsung Kies via Wi-Fi You can connect Samsung Kies (P.318) via Wi-Fi. Start "Samsung Kies" on a PC From the Home screen, tap →... - Page 250 Tap searched device name • If Wi-Fi connection request screen appears, follow onscreen instructions. Information • Connect PC and the terminal to the same Wi-Fi network. Connecting to VPN (Virtual Private Network) VPN (Virtual Private Network) is a technology to connect to the information in a protected local network from another network.
- Page 251 "Add VPN network" To edit VPN Touch and hold VPN to edit → "Edit network" → Set each item → Tap "Save". To delete VPN Touch and hold VPN to delete → Tap "Delete network". Follow the instruction of the network administrator to set required items of VPN settings "Save"...
- Page 252 You can connect to Internet by connecting the terminal to PC via USB cable SC02. • To perform tethering, dedicated driver is required. For details, refer to the URL below. <From a PC> http://www.samsung.com/jp/ support/download.html (In Japanese) Connect the terminal to PC via USB cable SC02 •...
- Page 253 Information • SD card cannot be connected to PC during USB tethering. • Operating environments for USB tethering are as follows. DOCOMO is not liable for the operation after upgrading/adding/ changing OS. Windows XP (Service Pack 3 or later), Windows Vista and Windows 7 Setting Wi-Fi tethering You can use your terminal as a portable hotspot and connect at most 10 devices support...
- Page 254 Adding access point for Wi-Fi tethering From the Home screen, → "Settings" → "More settings" → "Tethering and portable hotspot" → "Portable Wi-Fi hotspot" If the message is displayed, tap Confi rm details of notes → "OK". "Confi gure" Tap "Network SSID" fi eld and input the network SSID •...
- Page 255 Wi-Fi Direct settings You can connect Wi-Fi Direct devices and can exchange data. From the Home screen, → "Settings" → "More settings" → "Wi-Fi Direct" • appears on the status bar. Tap a detected device name • When the connection is accepted on the searched device, the terminal will be connected via Wi-Fi Direct and appears...
-
Page 256: Nearby Devices
Nearby devices Use Wi-Fi function to share and play the terminal media fi les on other client device (DLNA: Digital Living Network Alliance). • To use this function, connect the terminal and device to be accessed to the same Wi-Fi network in advance. - Page 257 Item Description Download to Set a saving location of media fi les that is uploaded to the terminal from the other device. Upload from Set action of the terminal when other devices media fi le is uploaded. * It can be selected only when "Access control" is set to "Only allowed devices".
- Page 258 "OK" The terminal is connected to the accessed device and the device will be added to the Allowed devices list (P.254). • To reject access, tap "Cancel". The device will be added to Not-allowed devices list (P.254). Perform play operation from the accessed device.
- Page 259 Setting an access point Access point for connecting the Internet (sp- mode, mopera U) is already registered. You can add or change it if necessary. By default, sp-mode is set for the usual access point. Checking the access point in use From the Home screen, →...
- Page 260 → "Save" Information • When you changed settings of MMC or MNC and access points are not displayed, perform reset to default or set an access point manually. Initializing an access point By initializing an access point, the settings can be in the default state.
- Page 261 mopera U mopera U is ISP for NTT DOCOMO's Internet connection. By subscribing to mopera U, you can use Internet after making simple settings. mopera U is a service requiring subscription. Setting mopera U From the Home screen, → "Settings" → "More settings" → "Mobile networks"...
-
Page 262: Device
Device Sound You can set ringtone, vibration, etc. Item Description General Silent mode → P.262 Volume → P.263 Vibration intensity Set intensity of vibration. Ringtone and notifi cations Device ringtone → P.264 Device vibration → P.265 Default → P.264 notifi cations Sound and Set ON/OFF of vibration... - Page 263 Item Description System Keytones Set operation sound to ON/OFF for tapping number key on the dial screen. Touch sounds Set operation sound to ON/OFF for tapping or menu items. Screen lock sound Set notifi cation sound for the screen lock to ON/OFF.
- Page 264 Shutting off device ringtone If Silent mode is set to "Vibrate"/"Mute", incoming call ringtones and notifi cation sounds no longer ring. From the Home screen, → "Settings" → "Sound" → "Silent mode" → "OFF"/"Vibrate"/"Mute" • If "Vibrate" is set, appears on the status bar.
- Page 265 Adjusting volume of each sound From the Home screen, → "Settings" → "Sound" → "Volume" A volume bar appears. Item Description Music, Video, Playback sound of Music games, and Player etc. other media Ringtone Ringtone for incoming call Notifi cations Notifi...
- Page 266 Notifying an incoming call/ notifi cation by sound/vibration Set melody of ringtone/notifi cation sound etc. or whether to vibrate. Setting ringtone/notifi cation sound From the Home screen, → "Settings" → "Sound" → "Device ringtone"/"Default notifi cations" Tap a ringtone/notifi cation sound you want to set →...
- Page 267 Setting vibration From the Home screen, → "Settings" → "Sound" → "Device vibration" → Select a pattern you want to set → "OK" • You can adjust the intensity of vibration at "Vibration intensity" (P.260). • Tap "Create" to create a pattern yourself. Settings...
- Page 268 Display You can set screen brightness or display method. Item Description General Brightness → P.268 Screen Set time until screen timeout display turns off . The screen becomes dim a little in approx. 6 seconds before the set time to notify the screen off...
- Page 269 Item Description Font Font style Set font style for the screen. Font size Set font size in the screen. Screen Auto adjust Adjust screen tone screen tone according to the displayed image to reduce the battery. More settings Display battery Set whether to percentage show battery level in...
- Page 270 Adjusting the brightness of the display The brightness of the display is set to auto- adjustment according to the ambient brightness by default. To adjust manually, perform the following operations. From the Home screen, → "Settings" → "Display" → " Brightness" Unmark "Automatic brightness"...
- Page 271 Wallpaper Set wallpapers for the Home screen or lock screen. Item Description Home screen Select a wallpaper for the Home screen from "Gallery"/"Live wallpapers"/ "Wallpapers"/"Wallpaper gallery". Lock screen Select a wallpaper from "Gallery"/"Wallpapers". Home and Select a wallpaper for the lock screens Home screen and lock screen from "Gallery"/"Live...
-
Page 272: Led Indicator
LED indicator Set action of notifi cation LED when the screen display is off . Item Description Charging Set ON/OFF of the notifi cation LED when connecting the terminal to a charger. Low battery Set ON/OFF of notifi cation LED when the battery is low. - Page 273 Motion You can set motion setting which can be operated by detecting tilt, etc. of the terminal. * In some applications provided by DOCOMO and other applications, motion function may not be available. Item Description Motion activation Set whether to activate Motion.
-
Page 274: Power Saving
Power saving Set for power saving mode. Item Description Power saving mode settings CPU power Limit the maximum saving performance of CPU. Screen power Set the display to dim. saving Background Change the background color color in order to save battery power for Email and Internet. - Page 275 Storage You can check memory space of microSD card or the terminal, or format microSD card. Item Description Device memory Total space Display total memory space of the terminal. • Under Total space, amount of stored data such as Apps, Pictures, etc.
-
Page 276: Application Manager
Battery View battery use, battery level, etc. Application manager You can set application view and management. Item Description Downloaded Manage downloaded applications. Running View or manage current services. Manage/Remove installed applications. Disabling applications Disabled application stops its operation and it is not displayed on the Applications screen. - Page 277 Information • If you disable an application, another application linking with the disabled application may not be operated correctly. Enable the application again to operate linked application correctly. To enable again, from the Home screen, → "Settings" → "Application manager" → "All" →...
-
Page 278: Personal
Personal Docomo service You can set functions for docomo service. Item Description Application Check update checker, etc. manager Wi-Fi Set up & manage Wi-Fi settings for docomo service. docomo apps Set password for docomo apps. password AUTO-GPS AUTO-GPS function setting, history of positioning location. -
Page 279: Accounts And Sync
You can switch home applications for the Home screen. Item Description docomo → P.126 Palette UI TouchWiz Set Home screen provided by home Samsung. Accounts and sync You can set synchronization of each application or online service. Item Description Add account → P.278 Sync all/ Synchronize registered Cancel sync accounts/Stop synchronizing. - Page 280 Setting account From the Home screen, → "Settings" → "Accounts and sync" "Add account" → Tap an account you want to add Set according to the onscreen instructions • For the online services requiring log in such as Facebook, enter mail address, password, etc.
- Page 281 Samsung account Set up Samsung account to set SIM change alert. Operating the terminal remotely using SamsungDive is also available. • Tap "Account and sync" in setting menu screen → "Add account" → "Samsung account" → follow the onscreen instruction to make Samsung account settings.
- Page 282 Setting accounts such as Facebook Online service accounts such as Facebook, Google can be created on the terminal and you can synchronize or send/receive data between the terminal and each online service server. • You can set a Microsoft Exchange ActiveSync account to synchronize with Microsoft Exchange Server 2007 (or former).
- Page 283 Deleting account When registered account is deleted, the account data saved to the terminal (messages, contacts, settings, etc.) is also deleted. • The data stored on the server is not deleted. From the Home screen, → "Settings" → "Accounts and sync" Tap an account to delete →...
-
Page 284: Location Services
Location services You can set for location services. Item Description → P.382 wireless networks Use GPS → P.382 satellites Location → P.382 logs Location → P.382 and Google search Settings... - Page 285 Security You can set for security. Item Description Screen security Screen lock → P.293 With swipe lock → P.294 Lock screen → P.295 options Improve facial Shoot you in various recognition conditions such as in the light, in the dark, wearing glasses, etc.
- Page 286 Item Description Screen security Lock Set time from when the automatically screen display turns off till when the screen lock activates. • It appears when you set screen unlock method to "Face unlock"/ "Pattern"/"PIN"/ "Password". Lock instantly Set to activate screen with power key lock by pressing •...
- Page 287 Item Description Encryption Encrypt device* Set to ask to enter password each time you turn ON the terminal. Encrypt SD Encrypt a microSD card* card to prevent it from being used with other terminals or PCs. Settings...
- Page 288 Item Description Find my mobile Remote controls Allow remote phone lock, wipe data and phone tracking. For details, refer to http:// www.samsungdive.com. → P.298 SIM change alert Send SMS to other mobile phone when docomo mini UIM card is changed (P.297). SamsungDive Display the homepage web page...
- Page 289 Item Description Device administration Device Set whether to enable administrators Device administrators. Unknown Set whether to sources permit installation of applications other than ones provided by Google Play. Credential storage Trusted Display trusted credentials certifi cates. Install from Install encrypted device storage certifi...
- Page 290 Security codes used on the terminal Some functions provided for convenient use of the terminal require the security code to use them. Besides a password for screen lock of the terminal, a network security code necessary for the network services etc. are available. Make use of the terminal using an appropriate security code according to the purpose.
- Page 291 ■ Notes on the security codes • Avoid using a number that is easy to guess, such as "birth date", "part of your phone number", "street address number or room number", "1111", and "1234". Make sure to make a note of the security code you set lest you should forget it.
- Page 292 PIN/password for screen lock The security code is used for lock function of the terminal. Network security code The network security code is a 4-digit number necessary for identifi cation or using the docomo Network Services at reception of your request in docomo Shop or at docomo Information Center.
- Page 293 PIN code You can set security code, named PIN, for the docomo mini UIM card. This code are set to "0000" at the time of subscription. They can be changed by yourself. PIN is a 4- to 8-digit number (code) that must be entered for user confi...
- Page 294 PUK code The PUK code is an 8-digit number for canceling the locked PIN code. The PUK code cannot be changed by yourself. • If you enter a incorrect PUK code 10 consecutive times, the docomo mini UIM card is locked. If it locked, please contact a docomo Shop.
- Page 295 Setting unlock method for the screen lock You can set to require unlock operation which specifi ed in advance to unlock the screen lock. From the Home screen, → "Settings" → "Security" → "Screen lock" Select unlock method → Enter according to onscreen instructions •...
- Page 296 Information • To set the screen lock to OFF, from the Home screen, → "Settings" → "Security" → "Screen lock" → Operate/Enter unlocking method that is set → "None". • When you fail entering unlock pattern, PIN or password 5 times*, a message indicating re-entry after 30 seconds appears.
- Page 297 Lock screen options Set shortcuts, clock, etc. to be displayed on the unlock screen. Set unlock method to "Swipe/ Touch", or set other than "None" and mark "With swipe lock" to select. • This function is enabled on the unlock screen when the home selection is set to "TouchWiz home".
- Page 298 Item Description Ripple eff ect Set ripple eff ect (eff ect that wave pattern appears when touching the screen) to be displayed. • If "Live wallpaper" is set to the unlock screen, Ripple eff ect is disabled. Help text Set to display help text on the unlock screen.
- Page 299 "Settings" → "Security" → "SIM change alert" Set Samsung account • Follow the onscreen instructions. • Sign in if you have already had a Samsung account. "Alert message" → Enter message displayed in SMS → "OK" "Create" → Enter the phone number for SMS recipient →...
- Page 300 Lock and track the device, or delete the data remotely. Set Google account Set Samsung account • Set Samsung account according to the onscreen instructions. • Sign in if you have already had a Samsung account. From the Home screen, → "Settings" → "Security" → "Remote controls"...
-
Page 301: Language And Input
Text-to-speech function. Item Description Language Set language to use. Keyboards and input methods Default Set input method. Google voice → P.123 typing Samsung → P.117 Japanese keypad Samsung → P.121 keyboard Speech Voice search Language Set language to enter for Google voice search. - Page 302 Description Speech Text-to-speech output Google Text- Set a sound to-speech synthesizing engine for Engine* reading text. Samsung Set Samsung TTS TTS* Speech rate Set text reading speed. Listen to an Playback sample of example audio synthesis. Mouse/trackpad Pointer speed Set a pointer speed when using mouse/ trackpad.
-
Page 303: Back Up And Reset
Back up and reset You can set back up or restoration of Google application or reset the terminal. Item Description Backup and restore Back up my Back up the settings, data data etc. of Google application to Google server. Backup Set an account for backup. -
Page 304: System
System Dock Item Description Dock sound Set whether to sound when attaching/removing the terminal to/from the dock. Audio output mode Set to enable external speakers when the terminal is connected to the doc. Desk home screen Set to show the desk display home screen when the terminal is connected to... -
Page 305: Date And Time
Date and time By default, "Automatic" (download date and time information from network automatically and adjust) is set. To set date and time manually, unmark "Automatic date and time" in advance. Item Description Automatic date Adjust date and time and time automatically according to online settings. - Page 306 Accessibility You can set User support applications which sounds or vibrates according to operation for ending calls or user's operation. Item Description System Auto-rotate Switch to portrait/ screen landscape view according to orientation of the terminal automatically. Speak Set whether to read out passwords entered password using TalkBack.
- Page 307 Item Description Services TalkBack Enable user accessibility such as service with which sound or vibration responds to your operations and text- reading service. Vision Install Web Set whether to install scripts script which allows you to easily access web contents from an application.
- Page 308 Information • You can download compatible applications such as Kick back, Sound back from Google Play to set. • If allow the use of "Services"(TalkBack), note that private informations such as credit card number or user interface will be recorded. NTT DOCOMO is not liable for any loss of the registered data or information.
-
Page 309: Developer Options
Developer options You can set options for application development. About device You can check information such as phone number, battery level, legal information, etc. Item Description Software update → P.456 Status View battery level, phone number, etc. Legal information Open source Check license agreement licences of open source. -
Page 310: Checking Your Own Phone Number
Checking your own phone number From the Home screen, → "Settings" → "About device" → "Status" Your phone number is displayed in "My phone number". Checking DivX® VOD register DivX® VOD register key is a registration key to be required for playing DivX® VOD (Video on Demand) fi... -
Page 311: File Management
File management My fi les You can display or manage various data such as still images, videos, music or document saved on the terminal or microSD card. From the Home screen, → "My fi les" Tap a folder you want to use → Tap a fi... - Page 312 Menu of My fi les The following items appear when tapping Item Description Create folder Create new folders. Delete Delete folders/fi les. Search Search for fi les. View by Set display mode in list. Sort by Change order in list. Share via Share fi...
-
Page 313: Bluetooth
Bluetooth You can transfer data between the terminal and Bluetooth device wirelessly. • For Bluetooth compatible version or profi le, see "Main specifi cations" (P.461). • For setting or operations, refer to the user manual of Bluetooth device to connect. •... - Page 314 ■ Reception interference caused by wireless LAN devices This terminal's Bluetooth device and wireless LAN devices use the same frequency band (2.4GHz). If you use the terminal near a wireless LAN device, reception interference may occur or the communications speed may lower.
- Page 315 Enabling Bluetooth function and making your terminal detectable From the Home screen, → "Settings" → "Bluetooth" "Visible time-out" → Select an item • Your terminal can be detectable by another Bluetooth device within a set time. • When "Never timeout" is set, your terminal can be detectable always by another Bluetooth device.
- Page 316 Pairing/Connecting with a Bluetooth device To transfer data between your terminal and other Bluetooth device, perform paring with the device and register it to the terminal beforehand. And then perform connection. • Depending on Bluetooth device, only pairing may be performed or pairing and connection may be performed successively.
- Page 317 When the other device requests for pairing • When pairing request for Bluetooth communication screen appears, tap "OK" or enter a pass code (PIN) → "OK". Canceling the connection • On the Bluetooth device list, tap a connected device → Tap "OK". Canceling the pairing From the Home screen, →...
- Page 318 Sending/Receiving data via Bluetooth • Set the Bluetooth function to ON beforehand to be detectable. Sending data via Bluetooth You can send data of Contacts (contact data in vcf format) or fi les such as still images or videos, etc. to a device (PC etc.) compatible with Bluetooth.
-
Page 319: Pc Connection
Connecting with USB cable SC02 When you connect the terminal with PC via USB cable SC02, you can synchronize data with "Samsung Kies" (P.318) on a PC, or recognize the terminal as media device (P.319). Insert microUSB plug of USB cable... - Page 320 Data such as contacts, music, video can be synchronized with the terminal, and the software of the terminal can be updated by using Samsung Kies. • You can download Samsung Kies from Samsung's homepage and install it into your computer. For more information, see Samsung's homepage.
- Page 321 Start up "Samsung Kies" on a PC • For how to use Samsung Kies, refer to "Kies チュートリアル "(Kies Tutorial) of the help menu. Using as media device Connect the terminal and a PC with USB cable SC02. The terminal is recognized as a media device (MTP) and you can transfer media fi...
- Page 322 Using as camera device Connect the terminal and a PC with USB cable SC02 and turn to camera (PTP) mode. You can transfer still images and videos to the PC. • Use Camera (PTP) mode for transferring data to a PC etc. that is not compatible to MTP. Connect the terminal and a PC with USB cable SC02.
-
Page 323: Allshare Play
→ "AllShare Play" → "Start" • If a notifi cation screen about mobile networks appears, tap "OK". • If your Samsung account is not set, tap "Sign in" to sign in to your Samsung account. → "Settings" → Set the followings... - Page 324 Item Description Video quality Set whether to play settings videos in quality most suitable to the device. Lock AllShare Play Lock AllShare Play. Language Select language. About Display detail information of AllShare Play. Contact Us Connect to the Inquiries. Uploading fi les in the terminal to online storage or other device From the Home screen, →...
- Page 325 Playing fi les in online storage or other compatible device with the terminal From the Home screen, → "AllShare Play" From "Web storages" or "Devices", tap a storage or device for playback • If any storage or device is not displayed, →...
-
Page 326: Dmenu
Application dmenu In the dmenu, you can quickly access DOCOMO recommended sites and useful applications. From the Home screen, → "dmenu" • The browser is activated and "dmenu" is displayed. Information • To use dmenu, Internet connection by packet communication (LTE/3G/GPRS) or Wi-Fi is required. -
Page 327: Dmarket
dmarket You can pick up useful and interesting contents which meet your needs at dmarket. • For details of dmarket, refer to NTT DOCOMO's website. From the Home screen, → "dmarket" • For the fi rst activation, an agreement appears. Read the contents and then mark "Agree"... -
Page 328: Play Store
Play Store • To use Google Play, you need to set Google account. Installing an application From the Home screen, → "Play Store" • When you activate for the fi rst time, the Terms of Service appears. Tap "Accept". Search for an application you want to download, then tap it →... - Page 329 Information • Be sure to check the security of application, and then install it at your own risk. The terminal may be infected with a virus and the data may be damaged. • NTT DOCOMO is not liable for malfunctions, if any, caused by the application you installed.
-
Page 330: Samsung Apps
Information • Samsung Apps may not available depending on the country or region. For details, on the Samsung Apps screen, → Tap "Information" → "Samsung Apps" to refer to the support page in the Samsung Apps site. Application... -
Page 331: Osaifu-Keitai
Osaifu-Keitai Osaifu-Keitai equipped with IC card is a function which allows you to pay money or to use coupon, stamp-rally, etc. only by holding the terminal over an IC card reader in stores etc. You can access a site or website, obtain the latest coupon, check credit or payment of electronic money, etc. - Page 332 • If the data in the IC card is lost, modifi ed or damaged by any means related to Osaifu- Keitai compatible service such as malfunction or model change, DOCOMO assumes no responsibility for the loss of data. • If the terminal is stolen or misplaced, immediately contact Osaifu-Keitai compatible service provider for an advice.
- Page 333 Holding Osaifu-Keitai over IC card reader You can exchange data by holding mark over an IC card reader. mark IC card reader Please note the followings when holding Osaifu- Keitai over an IC card reader • Do not hit the terminal on the IC card reader •...
- Page 334 Locking Osaifu-Keitai function You can lock to prevent using Osaifu-Keitai service. If you lock, you cannot obtain data with the IC card reader. From the Home screen, → "Osaifu- Keitai" "Lock Settings" → Enter a new password → Enter the password again →...
-
Page 335: Toruca
ToruCa ToruCa is an electronic card that can be obtained to mobile terminals. It can be obtained from the IC card reader or site as store information, coupon ticket, etc. Obtained ToruCas are saved to the "ToruCa" application, which can be displayed, searched, and updated using "ToruCa"... - Page 336 • Some ToruCa which can display a map from ToruCa (details) may not display a map from the ToruCa list depending on the IP settings. • While using Osaifu-Keitai lock settings, you cannot obtain ToruCa with an IC card reader. •...
-
Page 337: 1Seg
1Seg 1Seg is a terrestrial digital TV broadcasting service for mobile devices and enables these devices to receive data broadcasts in addition to video and audio broadcasts. It allows users to obtain more detailed information about TV programs and to readily participate in quiz shows and enjoy TV shopping and other contents. - Page 338 Airwaves 1Seg is a broadcasting service that operates on radio waves (airwaves) diff erent from those for the FOMA service. Therefore, you cannot receive the 1Seg service in locations that airwaves cannot reach or during hours when program is not available, regardless of whether you are outside of inside the FOMA service area.
- Page 339 1Seg antenna Do not change the direction of the antenna with excessive force. Change direction without applying excessive force Extend all the way Information • When using the 1Seg antenna, pull the antenna out fully. The antenna may be broken if excessive force is applied without fully pulled out.
- Page 340 Watching 1Seg From the Home screen, → "Mobile TV" Watching screen (P.340) appears. • If the operation screen appears, tap any of TV preview, channel, and "TV full view" to display watching screen. • When the fi rst activation or if the channel area is not registered, set channel area (P.352).
- Page 341 Transferring to Bluetooth headset On the watching screen, tap → "Transfer to BT headset" • If Bluetooth function is OFF, a notifi cation for turning Bluetooth ON appears. Tap "OK" to turn ON. Tap a device to connect • If the device is not visible, "Scan" → Tap the device to connect.
- Page 342 Watching screen Watching screen a Image • Channel can be switched by fl icking to the left or right. • Details of the program displays by touching and holding the image. b Subtitle • → "Settings" → "Display Settings" → Mark "Caption"...
- Page 343 e TV operation panel • Channel can be switched with • "Ch. list" tab of the operation screen appears by tapping the number of the channel. • Adjust the volume with f Operation panel for broadcast data • Adjust the cursor with and select an item tap "Select"...
- Page 344 Operation screen On the watching screen, tap a channel number Tap a tab at the top of the screen Ch. list Operation screen (Ch. list tab) a Tab • Switch the operating target by tapping the tab. b Preview image •...
- Page 345 d Channel list • Watching screen appears by tapping the channel. • Channel can be deleted from the Channel list by touching and holding the channel → Tap "Delete". e Program list • The watching program list appears by tapping it. f TV full view •...
- Page 346 a Tab • Switch the operating target by tapping the tab. b Schedule list : Recording schedule (including the completed schedule) : Watching schedule (including the completed schedule) : Failed recording schedule : Failed watching schedule • Change the schedule by tapping the unexecuted schedule.
- Page 347 TV fi les tab Operation screen (TV files tab) Playing file screen a Tab • Switch the operating target by tapping the tab. b TV fi le list • Play or display TV fi le by tapping it. Application...
- Page 348 c Image • TV fi le to be played can be switched by fl icking to the left or right. d Play time, slider • Tap video screen to display. • Change any time point of the fi le to be viewed with e Broadcast data f Channel/Program name...
- Page 349 TV link tab Operation screen (TV link tab) a Tab • Switch the operating target by tapping the tab. b TV link • Connect to registered site (P.354). Application...
-
Page 350: Playing Recorded Programs
Recording 1Seg On the watching screen, → "Record" • To stop recording, tap "Stop". Information • According to the airwave status, the images and sounds may be interrupted. • During recording, channel cannot be changed. • If you activate any other application during recording, the program may not be recorded correctly. - Page 351 Capturing the watching screen On the watching screen, → "Capture" • Captured images can be checked in "TV fi les" tab on the operation screen. Reserving to record or watch 1Seg Reserving from channel schedule On the watching screen, tap a channel number •...
- Page 352 Reserving from G-Guide program list On the watching screen, → "Launch EPG" • For the fi rst activation, an agreement appears. Read the contents and then tap " 利用規約に同意する (Agree with Terms of Use)". Then perform " 地域設定 (Select regions)". Select a program from the G-Guide program list, "...
- Page 353 Scheduling manually On the watching screen, tap a channel number • "Ch. list" tab of the operation screen appears. "Schedule" tab → "Schedule manually" Enter each items on New program reservation screen Deleting reservations On the watching screen, tap a channel number •...
-
Page 354: Setting Channels
Setting channels Setting area information On the watching screen, tap a channel number • "Ch. list" tab of the operation screen appears. → "Set area information" → Select the area to be registered Select regions → Select province → Select local area Channels are searched and the selected area is registered to the channel list. - Page 355 Deleting area information On the watching screen, tap a channel number • "Ch. list" tab of the operation screen appears. → "Set area information" → Touch and hold the area to be deleted "Reset" Application...
-
Page 356: Using Tv Link
Using TV link Registering TV link Operate broadcast data and select the item which can be registered to TV link The registration method of TV link varies depending on each program. Information • TV link may not be registered depending on each link. - Page 357 Deleting TV link On the watching screen, tap a channel number • "Ch. list" tab of the operation screen appears. "TV link" tab Touch and hold the TV link to be deleted "Delete" → "OK" Setting Mobile TV On the watching screen, →...
- Page 358 Item Description Audio Audio Select audio eff ects from Settings eff ects 5 options. Audio Set sound to be heard language for sound multiplex programs. 5.1 Ch Set whether to watch with 5.1 channel audio. Save to Set a saving location of recorded or captured data.
-
Page 359: Camera
Camera Copyrights and portrait rights Avoid copyright infringements when you handle photos taken with your terminal, e.g. copy/alter/edit except for the purpose of personal use. Please refrain from unauthorized use of portraits or names of other persons that may infringe on portrait rights. Note that capturing or recording a stage performance, entertainment or exhibition may be prohibited even if for personal use. - Page 360 • Still images or videos shot by Camera may diff er from actual subjects in color and brightness. • When attempting to take a photo of a strong light source such as the sun or a lamp, images may become dark or degraded. •...
- Page 361 Shooting screen From the Home screen, → "Camera" Still Image Capture Screen Video Recording Screen a Switch between In-camera and Out-camera b Set Flash c Switch shooting mode for still images d Set Eff ects Application...
- Page 362 e Setting f Focus g Saving location h Switch capturing still image mode and capturing video mode i Shutter j Thumbnail • Tap to activate Gallery. k Switch recording mode for video l Shooting time of videos m Data amount of shot video (bytes)/Available memory (bytes) Information •...
- Page 363 Setting before shooting From the Home screen, → "Camera" On the still image/video shooting screen, → Set required items Some items may not be set together. Item Description Edit shortcuts Add up to 4 shortcuts for frequently used setting menus on the left. Self-portrait* Capture image with in-camera.
- Page 364 Item Description Shooting mode * Single shot Capture still images. Burst shot Shoot continuously. • Storage for the shot images are switched to "Phone". • Set Best photo to "On" to shoot 8 images by one tap of shutter. Touch and hold an image from among the 8 thumbnails to display →...
- Page 365 Item Description Shooting mode * Cartoon Add an eff ect of illustration and capture. Share shot Share shot images with the other party connected via Wi- Fi Direct. Buddy photo Detect an object from a share shot image to send email if the detected person is registered in Phonebook.
- Page 366 Item Description White balance Select lighting condition on shooting to correct color shade. ISO * Set ISO sensitivity. Metering * Set photometry. Anti-Shake Set anti-blur function to be valid/invalid. Auto contrast * Set auto-adjustment of contrast to be valid/invalid. Guidelines Set whether to display a guideline on the shooting screen.
-
Page 367: Shooting Still Images
Shooting still images From the Home screen, → "Camera" Still image capture screen appears. On the sill image shooting screen, point Camera at an object • You can adjust zooming by pressing or widening/narrowing your fi ngers distance on the display. Shutter sound sounds and then an image is shot. -
Page 368: Shooting Videos
Shooting videos From the Home screen, → "Camera" Still image shooting screen appears. Drag Mode is switched to video shooting mode. Point Camera at an object → Start sound sounds and shooting video starts. • You can adjust zooming by pressing or widening/narrowing your fi... -
Page 369: Gallery
Gallery You can view or organize still images/ videos saved to this terminal or microSD card. Supported format are as follows. However, even if in the following fi le format, some images or some videos may not be displayed/played. Type Format Still image JPEG, PNG, GIF, BMP, WBMP,... -
Page 370: Playing Video
Viewing still image On the data list screen, tap a still image to display The still image is zoomed in. • To switch still images, scroll the screen to the left or right. • The following icons appear when tapping the screen. - Page 371 • If playing with "Video player", see "Using Video player" (P.372) for icons or operations. Menu of Gallery When you tap on the folder/data list screen, the following items appear. Item Description Select album * Tap multiple folders/data Select item * to select, and then operate collectively.
-
Page 372: Player
Information • On the data list screen, tap a still image/ video → Tap to show the operation menu. Player Using Media Player You can play music or videos saved on the terminal or microSD card. Available fi le formats for playing are as follows. However, even if in the following fi... - Page 373 • If you tap "Store", dmarket activates and you can purchase contents such as music, videos, etc. Tap a music or a video to play Playing music or video starts. Item Description Indicate the current play position. Drag left and right to change the play position.
-
Page 374: Using Video Player
Using Video player You can play videos saved on your terminal or microSD card. Available fi le formats for playing are as follows. However, even if in the following fi le format, some videos may not be played. File format H.263, H.264, MPEG-4, Divx, WMV, VC-1, VP8 From the Home screen, →... - Page 375 Item Description Decrease the playing screen size. You can play videos while operating other applications. * This function is available only when playing video with "Video player". Play/Pause. Tap to skip to data previous/next data. Touch and hold to rewind/ fast forward.
- Page 376 ■ List screen Item Description Share via Share videos in online service or send via Bluetooth or by mail attachment etc. Delete Delete videos. Search Search videos. video List by Change order of the list. Auto play Set whether or not all videos next automatically play back.
-
Page 377: Using Music Player
Item Description Details Display details of data. Using Music player You can play music saved on your terminal or microSD card. Available fi le formats for playing are as follows. However, even if in an available fi le format, some tune may not be played. - Page 378 Item Description Set repeat mode (All repeat/ Repeat the track/No repeat). Display music square. • Music square automatically creates playlists analyzing characteristics of songs. Tap the square at the top of the screen to play songs having similar characteristics. • If a playlist is not created automatically, tap →...
- Page 379 Information • When Stereo Headset with Microphone (sample) is connected (P.162), press switch to activate "Music player" and play music. While the "Music player" is activated, you can switch play/pause each time you press the switch. Volume can be adjusted with the volume key. •...
- Page 380 Creating playlist From the Home screen, → "Music player" → "Playlists" → "Create playlist" Enter a playlist name → "OK" "Add music" or → "Add" Song list appears. Mark a song to add → "Done" Song is added to created playlist. Editing playlist From the Home screen, →...
- Page 381 → "Add to quick list" Registered tune is added to "Quick list" of "Playlists". To register as playlist From the quick list screen, → "Save as playlist" → Enter playlist name → "OK" Menu of Music player When you tap on tab screen for selecting the music classifi...
- Page 382 Item Description Change horizontal axis Change horizontal axis type of Music square. Settings Set SoundAlive or playing speed etc. Exit Music player application. * Available functions vary by tab screen. ■ Play screen Item Description Add to quick list Add a song to quick list. •...
- Page 383 Item Description Settings Set SoundAlive, Play speed, etc. Exit Music player application. Application...
-
Page 384: Gps/Navigation
GPS/Navigation Enabling location information If you use an application that uses location information, you need to enable GPS function in advance. You can set for detecting location information more accurately using Wi-Fi/Mobile network or the motion sensor. From the Home screen, →... - Page 385 Precautions on using GPS • Use the GPS system with great care. DOCOMO is not liable for any damage caused by abnormality of the system. • Note that DOCOMO shall have no liabilities for any purely economic loss including those due to missing a chance to check the measurement (communication) results because of external factors (including the running out of the battery), such as a failure,...
- Page 386 • Some wireless communications products (mobile phone, data detectors and some others) block satellite signals and also cause instability of signal reception. • Some map displays based on location information (latitude/longitude information) may be not accurate due to some countries' or regions' regulations.
-
Page 387: Using Google Maps
Using Google Maps By using Google Maps, you can search for the current location or other locations, or obtain guide information to destination. • To use Google Maps, enable data connection (LTE/3G/GPRS) or connect to Wi-Fi. • Google Maps does not cover the whole world or region. -
Page 388: Using Latitude
Tap the locomotion strategy ( ) icon • If is tapped, select search condition from "Best root", "Fewer transfers", "Less walking". "NAVIGATION"/"GET DIRECTIONS" Using Latitude You can check where a friend is on the map and vice versa or send a mail. You can also make a call and search the route to the friend's current location. -
Page 389: Using Navigation
Using Navigation You can check route to the destination using Google Maps. From the Home screen, → "Navigation" • For the fi rst activation, a usage precaution screen appears. Read it and tap "Accept". "Type destination" → Enter name of destination, etc. -
Page 390: Using Places
Using Places You can search restaurants, sightseeing spots, etc. in the current location area using Google Maps. From the Home screen, → "Places" Tap a category you want to search → Tap information to check If there is no category you want to search, at the top of the screen, and enter desired search categories or shop names, etc. -
Page 391: Clock
Clock You can use Alarm, World clock, Stopwatch, Timer or Desk clock. From the Home screen, → "Clock" Tap a tab at top of the screen Tapping switches screen of each function. Using Alarm On the "Alarm" screen, "Create alarm" Enter time, Alarm repeat, Alarm type, volume, Alarm tone, Snooze, Smart alarm, Name →... - Page 392 Information • Snooze is a function which stops the alarm and sets it to ring again at a short time later. • To delete registered alarm, on the "Alarm" screen, tap → "Delete" → Mark an alarm to delete → Tap "Done". Alternatively, touch and hold an alarm →...
-
Page 393: Using World Clock
Using World clock You can check date and time of registered to country/region by a list. On the "World clock" screen, "Add city" Tap a country/region to register To sort country/region by time diff erence to search → "By time zone". To return to the city name sort, tap →... -
Page 394: Using Stopwatch
Using Stopwatch On the "Stopwatch" screen, "Start" Measurement starts. To measure lap time Tap "Lap". To stop the measurement, "Stop" To restart the measurement, tap "Restart" and tap "Reset" to re-measure. Using Timer On the "Timer" screen, set hour, minute, and second → "Start" The timer starts. -
Page 395: S Planner
S Planner Display Calendar to register event and task. Set up a Google account to synchronize with Google calendar and check events and tasks registered from a PC. From the Home screen, → "S Planner" • If a screen related to Google calendar synchronization appears, check and tap "Done". -
Page 396: S Memo
S memo You can create memos and draw pictures. Add photos, or pictures to memos, also save recorded sound in memos. Creating memos From the Home screen, → "S Memo" S memo list screen appears. , or select a template to use from the list →... - Page 397 a Enter title • Enter title. b Toolbar :Save entered content and go into the view mode. :Select pen type, thickness and color. :Use keypad to create memos. :Change eraser setting or completely erase memo. :Undo. :Restore. :Record audio attached to memos. c Cancel •...
- Page 398 Information • To mark a specifi c memo as a favorite, tap a memo to mark in S memo list screen → Tap Menu of S Memo on S memo list screen/S memo creation screen to show the following items. ■...
- Page 399 Apply PIN lock so that others cannot check or edit contents. Unlock Unlock PIN for S memo. Print Using a printer manufactured by Samsung to print S memo. • As of June, 2012, there are no printers that use this features in Japan. Application...
- Page 400 Item Description Settings Auto sync Set whether to perform auto-synchronization. Change PIN Set so that the terminal cannot be used unless PIN is input. Screen timeout Set time until screen display goes blank. Handwriting Update languages which language can convert handwriting update character to text.
- Page 401 ■ S memo creation screen Item Description Rename Rename created S memos. Share via Share S memos using online services, send memos via Bluetooth or attaching to mail. Handwriting- Convert hand-written characters, to-text symbols or numbers into text. • By default, only hand-written characters of symbols, numbers, alphabets, Korean, Japanese can be converted...
- Page 402 Set as Save as contact images, and home screen/home screen lock wallpapers. Print Using a printer manufactured by Samsung to print S memo. • As of June, 2012, there are no printers that use this features in Japan. Application...
-
Page 403: Voice Recorder
Voice recorder Recording voice sound From the Home screen, → "Voice recorder" Recording starts. • To pause the recording, tap , or to start the recording, tap • To cancel the recording, tap → "OK". • When is tapped while recording, the recorded content until the tapping are saved and then the Voice recorder ends. - Page 404 • To crop voice sound, while playing voice sound, → "OK" → Drag the slider to the position you want to crop → → Select save method for cropped data → Tap "OK". • To adjust volume, tap Menu of Voice recorder When you tap on the list screen/playing screen, the following items appear.
-
Page 405: Calculator
Calculator You can four arithmetic operations (+, -, × , ÷ ), percent calculus, functional calculus, etc. From the Home screen, → "Calculator" Turning the terminal sideways switches to the alpha calculator. • Tap to display history. Menu of calculator to display the following items. -
Page 406: Backing Up Sd Card
Backing up SD card You can move and back up phonebook entries, sp-mode mails, bookmarks, etc. using external media such as microSD card. • Do not remove the battery pack or micro SD card from the terminal while backing up or restoring data. -
Page 407: Backing Up Data
Backing up data You can back up data such as phonebook entries, sp-mode mails, media fi les. From the Home screen, → "SD card backup" • For the fi rst activation, an agreement appears. Read the contents and then tap "Agree". - Page 408 Google account or the terminal to docomo account Contacts saved in Google account phonebook and in "Contacts" application provided by Samsung can be copied to docomo account. From the Home screen, → "SD card backup" "Phonebook account copy" → "Select"...
-
Page 409: Youtube
Select a repeat task → Set an execution time → "Enter" "Set" → Enter password → "OK" → "OK" YouTube YouTube is a free online video streaming service. You can view or post video. Playing video From the Home screen, →... - Page 410 Posting video You can post video you shot from the terminal. • To post videos to YouTube, you need to log in YouTube via Google account or YouTube account. From the Home screen, → "YouTube" → Shoot video → "Save" Uploading video screen appears.
-
Page 411: Dictionaries
Dictionaries Use three foreign language dictionaries (Japanese, English, Korean) to search for words and phrases. The following dictionaries are included at time of purchase. • 旺文社英和辞典 (Obunsha English-Japanese Dictionary) • 旺文社和英辞典 (Obunsha Japanese-English Dictionary) • ニューエース韓日辞典 (NEW-ACE KOREAN- JAPANESE DICTIONARY) •... - Page 412 a Dictionary currently in use b Change dictionary • :Switch type of dictionary. • : Switch between "ENG-JPN"/"JPN-ENG" or "JPN-KOR"/"KOR-JPN". c Search candidates list d Keyword input fi eld e Voice search f Words and text • Tap text or drag it to the left of the screen and search candidates list does not show.
- Page 413 Dictionary menus to show the following items. Item Description Search* Return to dictionary screen. Flashcards Show saved vocabulary lists. History Show search histories. Settings Customize fonts. Help Check dictionary app usage methods, notation rules, and product information. * Appears fl ashcard and history screens. Application...
-
Page 414: Polaris Offi Ce
Polaris Offi ce You can display/edit Offi ce document etc. or create new one on the terminal. If you have a Dropbox account, you can manage document online. Compatible fi le types and versions are as follows. • Some fi les with password are available only for viewing. -
Page 415: Creating A New Document
Type Version Create, edit View Text (.txt) (.txt, .asc, .rtf) − (.zip) Creating a new document From the Home screen, → "Polaris Offi ce" • The Polaris Offi ce screen appears. • For the fi rst activation, user registration screen appears. To register, enter your mail address →... - Page 416 Displaying/Editing document From the Home screen, → "Polaris Offi ce" • "Recent documents": Search from recently used documents. • "Browser": Search a document from a saving location. • "Clouds": Search documents saved in online storage. • "Form type": Search by document type. •...
-
Page 417: International Roaming
International roaming Overview of international roaming (WORLD WING) The international roaming (WORLD WING) is a service that allows you to use the same phone number and Email address as ones used in Japan within the service area of overseas network operator that is associated with DOCOMO. -
Page 418: Available Services
Information • For country codes/international call access codes/universal number international prefi x, supported countries/areas and network operators, refer to "Mobile Phone User's Guide [International Services]" or the DOCOMO International Services website. Available services ( ○ : Available × : Unavailable) Main Communication (GPRS) -
Page 419: Before Using The Terminal
Before using the terminal Checking before leaving Japan Check the following for using terminal overseas before leaving Japan. ■ Subscription • Confi rm your application status of WORLD WING. For details, contact "docomo Information Center" on the last page of this manual. - Page 420 Preset ■ Network service If you subscribed to network services, Voice mail service, Call forwarding service and Caller ID request service are available from overseas. However, some network services may not be used. • To use network services overseas, you need to activate "Remote operation settings"...
- Page 421 ■ Display A network type in use is displayed on the status bar. Icon Network type International roaming in use (Radio signal reception Weak/Strong) GPRS network Usable/communicating 3G network Usable/communicating HSDPA network Usable/communicating • Connected network operators are viewable on the notifi cation panel. ■...
- Page 422 ■ About inquiries • If the terminal or the docomo mini UIM card is misplaced or stolen overseas, immediately contact DOCOMO from the spot and request for suspension of usage. Please see the last page of this manual for contact information. Be careful that you are charged also for calls and/or communications, if any, occurring after misplacement or stealage.
-
Page 423: Making/Receiving Calls In The Country You Stay
Making/Receiving calls in the country you stay Making a call to outside country you stay (including Japan) You can make a call from the country you stay to other country using the international roaming service. • For information of available countries or network operators, see DOCOMO International Services website. - Page 424 Making a call within the country you stay You can make a call to a land-line phone or mobile phone in the same way as in Japan. From the Home screen, "Phone" → "Dial" Enter a phone number of the other party When the call ends, "End call"...
- Page 425 Receiving a call in the country you stay You can receive a call in the same way as in Japan. Information • When you received a call during the international roaming, regardless of which country the call is from, it is forwarded internationally from Japan.
- Page 426 Making a call from the other party ■ To have the other party in Japan call you overseas Have the other party dial a phone number in the same way as in Japan. ■ To have the other party make a call from the outside Japan to the country you stay Regardless of countries, you will receive a call via Japan.
-
Page 427: Setting For Overseas Network
Setting for overseas network connection When you use the terminal overseas, switching to network available in the country you stay is required. By default, the terminal is set to automatically search and switch to an available network. You can also change the settings manually. - Page 428 Checking an available network operator and setting it manually From the Home screen, → "Settings" → "More settings" → "Mobile networks" → "Network operators" A list of searched network operator's name appears. • When an information screen appears, tap "OK". •...
-
Page 429: Setting Data Roaming
Selecting an available network operator automatically From the Home screen, → "Settings" → "More settings" → "Mobile networks" → "Network operators" • When an information screen appears, tap "OK". "Select automatically" • When an information screen appears, tap "OK". Setting data roaming →... -
Page 430: After Returning To Japan
After returning to Japan When you return to Japan, the terminal automatically searches a network and is connected to docomo's network. If you do not connect it, set the followings. • Set "Network mode" of "Mobile networks" to "GSM/3G/LTE (auto mode)" (P.425). •... -
Page 431: Introduction Of Options And Related Devices
Appendix/Index Introduction of options and related devices Combining the terminal with optional accessories supports a wide variety of uses from personal use to business use. Some products are unavailable depending on the area. For details, contact a sales outlet such as a docomo Shop. - Page 432 • Micro USB Cable 01 • DC adapter 03 *1 FOMA Charging Adapter for microUSB SC01 is required to connect to the terminal. *2 When using the adapter overseas, a conversion plug adapter applicable to the country you are staying is required. *3 You can connect to the terminal via Bluetooth communication.
-
Page 433: Sample Accessories
Sample accessories • Sample accessories are not covered by the warranty for free cost of repair. • Specifi cation or appearance of samples is subject to change without prior notice for performance upgrade. microSD card (2GB) ■ Notes on use •... - Page 434 observing the descriptions in the manual on request from the third party/handling the product • Loss or damage of data occurred by using the product - DOCOMO does not restore/recover data. • Loss occurred by malfunction caused by combination with connecting device or software ■...
-
Page 435: Stereo Headset With Microphone
Stereo Headset with Microphone ■ How to use Insert the connecting plug of Stereo Headset with Microphone to the headphone connection jack of the terminal. • While displaying the Home screen etc., press the switch to play music. While incoming call, press to receive a call. Adjust the volume level with Volume Key. - Page 436 ■ Main specifi cations Connector 3.5 mm stereo mini plug shape Impedance 32 Ω Maximum input 40 mW (1.13V) Maximum 95dB output Size Length: Approx. 1244.2 mm Weight Approx. 11.9 g (only main unit) Appendix/Index...
-
Page 437: Troubleshooting
Troubleshooting Troubleshooting • First, check if software update is needed and if it is necessary, update the software (P.456). • When problems do not improve after checking the following items, contact the phone number given in "Repairs" on the last page (in Japanese only) or DOCOMO-specifi... - Page 438 Trouble Check and remedy Cannot charge • Are the accessory USB the terminal. Cable SC02 and the terminal set correctly? • When using USB Cable SC02, does the power of the PC turn on? • If you execute calls, communications or other operation for a long time while charging, the terminal may become hot and...
- Page 439 Trouble Check and remedy The operation • Is the terminal left for a time is short. long time out of service area? Staying outside of the service area may consume much power to search available radio waves for communication. • The operating time of the battery pack varies depending on the operating environment and the secular...
- Page 440 Trouble Check and remedy No operation • Is the screen locked? Unlock is performed the screen by pressing even tap the touch screen. → P.75 The touch • It may be occurred when screen reacts large amount of data is slowly when saved in the terminal or transferring large-size data...
- Page 441 • To start Safe Mode Press when power is OFF, while the Samsung logo screen is displayed, Tap continuously every second. * When start Safe Mode, "Safe Mode" appears on the lower left corner of Home screen.
- Page 442 Trouble Check and remedy Terminal • Confi rm the internal memory reacts slowly/ usage of the terminal and Behaviours obtain memory by ending become some activated programs. unstable/ → P.100 Some of the program cannot activate. Data is not • Try "Factory data reset". displayed →...
- Page 443 Trouble Check and remedy Application • Are there any applications does not being disabled? Enable the work properly disabled applications and try (cannot again. activate, → P.274 errors occur frequently, etc.) ■ Calling Trouble Check and remedy Cannot • Is the docomo mini UIM card make a call installed to the terminal even though...
- Page 444 Trouble Check and remedy Cannot • Turn the power off and on, or connect calls. remove and attach the battery ("out of area" pack or docomo mini UIM card. does not → P.57, P.63, P.73 disappear • Due to the radio wave types, even if you making/receiving calls change the...
- Page 445 ■ Display Trouble Check and remedy The display is • Is the elapsed time before dimmed. display turned off set? → P.266 • Do you adjust the brightness of the display? → P.268 • Is Power saving mode set? → P.272 •...
- Page 446 ■ Camera Trouble Check and remedy Still images • Check if clouds or dirt attach and videos to the lens of camera. shot with the • Set face detection to ON camera are when you take a portrait. blurred. • Capture still images with Anti Shake set to ON.
- Page 447 ■ International roaming Trouble Check and remedy Cannot use ■ If the signal meter is the terminal displayed overseas • Do you subscribe to WORLD WING? Check the subscription of WORLD WING. ■ If "out of area" is displayed • Are you out of the service area of the international roaming service or in weak radio wave area?
- Page 448 Trouble Check and remedy Cannot • Set data roaming to ON. use data (→ P.427) communication overseas The terminal • Is the limit of maximum cannot be charges for use exceeded? used suddenly A limit of maximum charges while you use it for use is set beforehand overseas.
- Page 449 No operation is • For Windows XP, upgrade performed even to Windows XP Service by connecting Pack 3 or later. the terminal to a • Install Samsung Kies 2.0 or later or Windows Media Player 10 or later to a PC. Appendix/Index...
- Page 450 ■ Bluetooth Trouble Check and remedy Cannot connect • The Bluetooth device to Bluetooth (commercial item) device/ is needed to be in Bluetooth device registration stand-by cannot be found state. If you register by scanning the device again after deleting the registration, delete the registrations on both Bluetooth communication device...
-
Page 451: If Error Message Appears Mentioned Below
If error message appears mentioned below Error message Cause and remedy Page The application Appears when an error − XXXX (process is occurred in the XXXX) has terminal or function. stopped Tap "Force close"/"OK" unexpectedly. and then retry. / XXXX (XXXX)has stopped* Airplane mode... -
Page 452: Smartphone Anshin Remote
Smartphone Anshin Remote Support By sharing screens of your terminal with NTT docomo, you can receive technical support to make settings. • This service is not available if your docomo mini UIM card is not inserted, during international roaming, or in Airplane mode. •... -
Page 453: Warranty And After-Sales Service
Warranty and After-Sales Service Warranty • This terminal is provided with a written warranty. Make sure that you receive it. Check the written contents and items such as " 販売店名・お買い上げ日 (Shop name/date of purchase)" and keep it in a safe place. If it does not contain the necessary information, immediately contact the shop where you bought it. - Page 454 After-Sales Service When problems occur Before requesting repair, read the section on "Troubleshooting" in this manual. If the problem still persists, contact "Repairs" on the last page of this manual (in Japanese only). If the result of inquiries indicates that a repair is required Take your terminal to DOCOMO-specifi...
- Page 455 ■ Repairs may not be possible in the following cases. • When corrosion due to moisture, condensation, perspiration, etc. is detected, or if any of the internal boards are damaged or deformed (repairs may not be possible if external connection jack/headphone connection jack or the display is damaged, or the terminal outer case is lifted) * Even in case that a repair is possible, since...
- Page 456 Notes • Do not modify terminal or its accessories. - Doing so may cause fi re, injury or damage. - Modifi ed terminals etc. are repaired only after the customer accepts that the modifi ed parts are to be restored to the condition at the time of purchase.
- Page 457 • When the repair is executed, MAC address of Wi-Fi/Bluetooth address in the terminal may be changed regardless of repaired part. • Magnetic components are used in the parts that are described below. Do not allow cash cards or other devices that are vulnerable to magnetism to come into contact with the phone.
-
Page 458: Updating Software
Internet and update the software. For software update, there are two methods; connecting to the network directly on the terminal and using "Samsung Kies" (P.318) installed to a PC. Precautions on software update Software update can be done with the data saved to the terminal remained. - Page 459 • During installing the update fi les for software update, all functions including making/ receiving phone call are not available. • When you cannot perform any operations because of the failure of the software update, please take your terminal to DOCOMO- specifi...
- Page 460 Updating software only with the terminal You can update the software of the terminal by connecting network with the terminal. Set Google account From the Home screen, → "Settings" → "About device" → "Software update" → "Update" If you permit downloading a fi le only when connecting via Wi-Fi, mark "Wi-Fi only".
-
Page 461: Main Specifi Cations
Main specifi cations ■ Phone Product name SC-06D Size Approx. 137 mm (H) x 71 mm (W) x 9.0 mm (T) (Maximum thickness: Approx. 9.4 mm) Weight Approx. 139 g (with battery) Memory ROM 32GB RAM 2GB Continuous FOMA/3G Stationary (Auto): stand-by Approx. - Page 462 Display Type AMOLED section Size Approx. 4.8 inches Number 16,777,216 colors of colors Number 720 (W) dots x 1,280 (H) of dots dots Image Type External: CMOS pickup Internal: CMOS device Size External: 1/3.2 inches Internal: 1/6.0 inches Number of eff ective External: pixels Approx.
- Page 463 Continuous 1Seg Approx. 310 min. watching time Wireless LAN IEEE802.11a/ b/g/n compliant (IEEE802.11n: 2.4GHz/5GHz) Version * Bluetooth Bluetooth standard function Ver.4.0+LE Output Bluetooth standard Power Class 1 Vistaed Within approx. 10 m communication distance * Compatible Object Push Profi le profi...
- Page 464 *1 It is confi rmed that the terminal and all Bluetooth devices are compliant with Bluetooth standards designated by Bluetooth SIG, and they are authenticated. However, procedures may diff er or data transfer may not be possible depending on the device's characteristics or specifi...
-
Page 465: File Format
off . For charging with the terminal power on, it takes longer. ■ Battery Pack Product name Battery pack SC07 Battery used Li-ion battery Nominal voltage 3.8V Nominal capacity 2100mAh File format Still images and videos taken with the terminal will be saved in following fi... - Page 466 Shooting time of videos (estimate) Shooting SC-06D microSD card size (Phone)* (1GB) 640 x 480 Up to approx. Up to approx. 1,100 min. 43 min. (up to approx. (up to approx. 60 min. per 1 43 min. per 1 video) video) Estimated value in both video quality: normal is set.
-
Page 467: Specifi C Absorption Rate (Sar)
Specifi c Absorption Rate (SAR) of Mobile Phones This model [SC-06D] mobile phone complies with Japanese technical regulations and international guidelines regarding exposure to radio waves. This mobile phone was designed in observance of Japanese technical regulations regarding exposure to radio waves (*1) and limits to exposure to radio waves recommended by a set of equivalent international guidelines. - Page 468 The actual SAR of this mobile phone while operating can be well below that indicated above. This is due to automatic changes to the power level of the device to ensure it only uses the minimum required to reach the network. Therefore in general, the closer you are to a base station, the lower the power output of the device.
- Page 469 Association of Radio Industries and Businesses Website: http://www.arib-emf.org/index02.html (in Japanese only) NTT DOCOMO, INC. Website: http://www. nttdocomo.co.jp/english/product/sar/ SAMSUNG Website: http://www.samsung.com/sar/sarMain.do (In Japanese) *1 Technical regulations are defi ned by the Ministerial Ordinance Related to Radio Law (Article 14-2 of Radio Equipment Regulations).
-
Page 470: Fcc Notice
FCC notice • This device complies with part 15 of the FCC Rules. Operation is subject to the following two conditions: (1) This device may not cause harmful interference, and (2) this device must accept any interference received, including interference that may cause undesired operation. - Page 471 1. Reorient/relocate the receiving antenna. 2. Increase the separation between the equipment and receiver. 3. Connect the equipment into an outlet on a circuit diff erent from that to which the receiver is connected. 4. Consult the dealer or an experienced radio/TV technician for help.
-
Page 472: Fcc Rf Exposure Information
FCC RF exposure information Your handset is a radio transmitter and receiver. It is designed and manufactured not to exceed the emission limits for exposure to radio frequency (RF) energy set by the Federal Communications Commission of the U.S. Government. The guidelines are based on standards that were developed by independent scientifi... -
Page 473: Body-Worn Operation
Body-worn operation This device was tested for typical body-worn operations with the back of the handset kept 1.0 cm from the body. To maintain compliance with FCC RF exposure requirements, use accessories that maintain a 1.0 cm separation distance between the user's body and the back of the handset. -
Page 474: European Rf Exposure
European RF Exposure Information Your mobile device is a radio transmitter and receiver. It is designed not to exceed the limits for exposure to radio waves recommended by international guidelines. These guidelines were developed by the independent scientifi c organization ICNIRP and include safety margins designed to assure the protection of all persons, regardless of age and health. -
Page 475: Declaration Of Conformity
Declaration of Conformity Samsung Electronics declare under our sole responsibility that the product GSM WCDMA BT/Wi-Fi Mobile Phone: SC-06D to which this declaration relates, is in conformity with the following standards and/or other normative documents. SAFETY EN 60950-1 : 2006 +A1 : 2010... - Page 476 (place and date of issue) Joong-Hoon Choi/Lab Manager (name and signature of authorised person) * It is not the address of Samsung Service Centre. For the address or the phone number of Samsung Service Centre, see the warranty card or contact the retailer where you purchased your product.
-
Page 477: Export Administration
Export Administration Regulations This product and its accessories may be under coverage of the Export Administration Regulations of Japan ("Foreign Exchange and Foreign Trade Control Laws" and the related laws and regulations). And, they are also under coverage of Export Administration Regulations of the U.S. -
Page 478: Intellectual Property Right
Intellectual Property Right Copyrights The works and copyright of music, video picture, computer program, data base, etc. are protected their right by copyright law. Copying such copyrighted works can be permitted only for the purpose of personal use or use at home. If you copy (including conversion of data format), alter, hand over of duplication, distribute on network, etc. - Page 479 Portrait rights Portrait rights are claimable rights against taking photos by others, publishing or using the taken photos without any permission. In Portrait rights, there are moral right authorized to everyone and property right (publicity right) focused on economic benefi t of talent etc. Therefore, taking photos of others or talent, publishing or distributing the photos without any permission are illegal act.
- Page 480 ® • Wi-Fi Certifi ed and its logo are registered trademark or trademark of Wi-Fi Alliance. • "Catch Phone (Call waiting service)" is a registered trademark of Nippon Telegraph and Telephone Corporation. • "Google", "Google" logo, "Android", "Android" logo, "Google Play", "Google Play" logo, "Gmail", "...
- Page 481 ® ® • DivX , DivX Certifi ed and associated logos are trademarks of Rovi Corporation or its subsidiaries and are used under license. ® ABOUT DIVX VIDEO: DivX is a digital video format created by DivX, LLC, a subsidiary of Rovi ®...
- Page 482 • Rovi, G-GUIDE, G-GUIDE MOBILE and G-Guide related logos are trademarks or registered trademarks of Rovi Corporation and/or its subsidiaries in Japan. • "Facebook" is a trademark or registered trademark of Facebook, Inc. • DLNA, DLNA CERTIFIED are trademarks of Digital Living Network Alliance.
- Page 483 Others ® ® • This product have Adobe Flash Player technologies of Adobe Systems Incorporated. © Adobe Flash Player Copyright 1996-2012 Adobe Systems Incorporated. All rights reserved. Adobe, Flash are the trademarks or registered trademarks of Adobe Systems Incorporated in the United States and other countries.
- Page 484 • This product is licensed based on MPEG-4 Visual Patent Portfolio License. The use of MPEG-4 Video Codec function is allowed for personal and nonprofi t use only in the cases below. - Recording moving pictures that conform to MPEG-4 Visual Standard (hereinafter referred to as MPEG-4 Video) - Playing MPEG-4 Videos recorded personally by consumers not engaged in profi...
-
Page 485: Canceling Sim Lock
Canceling SIM Lock The SIM lock for this terminal can be unlocked. Non-DOCOMO SIM can be used with this terminal, once SIM Lock is unlocked. • Please come to docomo Shop to unlock SIM lock. • Handling fee for unlocking SIM lock occurs. •... -
Page 486: Index
Index About device …………………………………… 307 AC Adapter …………………………………… 70 Charging ……………………………………… 70 Accessibility …………………………………… 304 Access point …………………………………… 257 Initializing …………………………………… 258 Setting ………………………………………… 257 Accounts and sync ………………………… 277 Additional service …………………………… 180 Adjusting ringtone volume ………………… 263 Airplane mode ………………………………… 247 AllShare Play …………………………………... - Page 487 Bluetooth ……………………………… 246, 311 Brightness ……………………………………… 268 Calculator ……………………………………… 403 Caller ID notifi cation ………………………… 174 Call forwarding service …………………… 174 Call settings …………………………………… 174 Call waiting …………………………………… 174 Camera ………………………………………… 357 Setting before shooting ………………… 361 Shooting screen …………………………… 359 Shooting still images ………………………...
- Page 488 Double-tap ……………………………………… 77 Drag ……………………………………………… 78 Email ……………………………………………… 205 Checking received ………………………… 214 Creating and sending …………………… 212 Managing account ………………………… 208 Setting up …………………………………… 205 Entering characters ………………………… 102 Samsung Japanese keypad …………… 104 Samsung keyboard ………………………… 108 Appendix/Index...
- Page 489 Switching the input method …………… 103 Flick ……………………………………………… 78 Gallery …………………………………………… 367 Google Latitude ……………………………… 386 Google Maps …………………………………… 385 Google Play …………………………………… 326 Google Talk …………………………………… 221 GPS ……………………………………………… 382 Home selection ……………………………… 277 Initialize ………………………………………… 301 International call (WORLD CALL) ……… 172 International roaming (WORLD WING) …...
- Page 490 Language and input ………………………… 299 LED indicator ………………………………… 270 List of running applications ……………… 100 Location services …………………………… 282 Lock screen options ………………………… 295 Mail ……………………………………………… 198 Email …………………………………………… 205 Gmail …………………………………………… 217 sp-mode mail ………………………………… 198 Making a call …………………………………… 155 Call logs ………………………………………...
- Page 491 Navigation ……………………………………… 387 Notifi cation panel …………………………… 94 Number of running applications ………… 100 Osaifu-Keitai …………………………………… 329 Pasting ………………………………………… 115 Phonebook ……………………………………… 185 Favorites ……………………………………… 190 Group ………………………………………… 190 Making a call ………………………………… 192 Registering …………………………………… 185 PIN code ………………………………………… 291 Player ……………………………………………...
- Page 492 Set reject messages ……………………… 182 Remote function ……………………………… 298 Reset …………………………………………… 301 Samsung Apps ………………………………… 328 Samsung Japanese keypad ……………… 104 Switching keypad types ………………… 106 Switching text input modes …………… 106 Wildcard Prediction ………………………… 107 Samsung keyboard ………………………… 108 Samsung Kies …………………………………...
- Page 493 Setting menu items ………………………… 238 Setting network operator (overseas) … 426 Setting ringtone/notifi cation sound …… 264 Setting vibrator ……………………………… 265 SIM change alert ……………………………… 297 S memo ………………………………………… 394 Checking received ………………………… 201 Creating and sending …………………… 199 Sound …………………………………………… 260 Specifi...
- Page 494 ToruCa …………………………………………… 333 Touch and hold ………………………………… 77 Touch screen ………………………………… 76 Turning power ON/OFF …………………… 73 Updating software …………………………… 456 Video Playing ………………………………… 368, 372 Shooting ……………………………………… 366 Video player …………………………………… 372 Voice mail service …………………………… 174 Voice recorder ………………………………… 401 Volume setting Media sound …………………………………...
- Page 495 YouTube ………………………………………… 407 Numeric "186" (notify)/"184" (not notify) ……… 156 Appendix/Index...
- Page 496 Please ask checking/changing subscription detail, application of various services and request of various information materials online. From sp-mode dmenu ⇒ " お客様サポートへ (To Customer support)" ⇒ " 各種お申 込・お手続き (Various application/ Procedures)" [Packet communication charge free] (In Japanese only) From a PC My docomo (http://www.mydocomo.
- Page 497 ■ When you are in a place where you may be near to people with implantable cardiac pacemakers or implantable cardioverter defi brillators, such as in a crowded train The terminal may exert a harmful eff ect on implantable cardiac pacemakers and implantable cardioverter defi...
- Page 498 Respect privacy Please be considerate of the privacy of individuals around you when taking and sending photos using camera-equipped mobile phones. Functions for maintaining good manners in public places There are some advanced setting such as not answering incoming call or muting sound, etc. ■...
- Page 499 Loss or theft of terminal or payment of cumulative cost overseas <docomo Information Center> (available 24 hours a day) From DOCOMO mobile phones International call -81-3-6832-6600* access code for the (toll free) country you stay * You are charged a call fee to Japan when calling from a land-line phone, etc.
- Page 500 Failures encountered overseas <Network Support and Operation Center> (available 24 hours a day) From DOCOMO mobile phones International call -81-3-6718-1414* access code for the (toll free) country you stay * You are charged a call fee to Japan when calling from a land-line phone, etc.
- Page 501 Shop etc. near you searched on the NTT DOCOMO website. NTT DOCOMO website http://www.nttdocomo.co.jp/english/ Inquiries for sample accessories ■Samsung Electronics Co., Ltd. 072-830-6075 (In Japanese only) Business hours: 9:00 a.m. to 5:00 p.m. (except for Saturday, Sunday, year-end through New Year holidays, public holidays) ●Please confirm the phone number before you dial.