Table of Contents
Advertisement
Quick Links
Advertisement
Table of Contents

Related Manuals for Motorola IT.6T


Summary of Contents for Motorola IT.6T
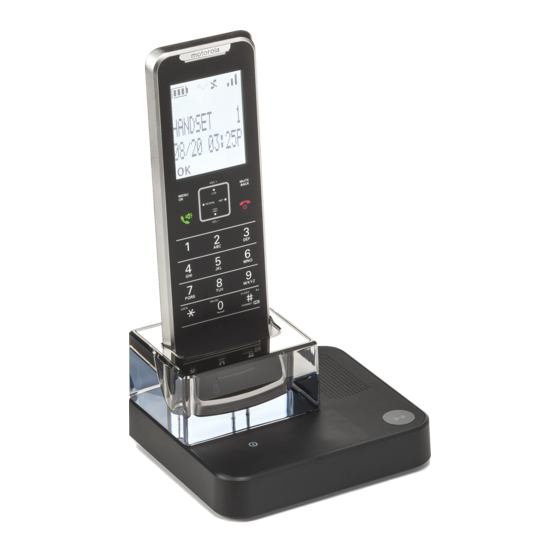
- Page 1 Digital Cordless Telephone with Answering Machine Mobile Connectivity with Bluetooth ® Wireless Technology Motorola IT.6T For IT.6.1T, IT.6.2T, IT.6.3T and IT.6.4T Warning: The Call Bar feature should not be used in Australia. Charge the handset for 24 hours before use.
-
Page 2: Need Help
IT.6T handset (USB cable not included). • While already on a call using the home line or mobile network, use the IT.6T handset to answer a second call from the other line (mobile network / home line) and hold a 3-way call between all 3 callers. - Page 3 • Cordless base • Power adaptor for the base • Telephone line cord If you have purchased a IT.6T multiple pack you will also have the following additional items: • Cordless handset & charger • Power adaptor for the charger ECOMOTO: a convergence of efforts by marketing, design, research, engineering and supply chain management that leads to better products for everyone.
-
Page 4: Table Of Contents
1. Getting started ..............8 2. Getting to know your phone ..........13 3. Bluetooth ................20 Bluetooth wireless technology ..............20 Pair your IT.6T with your mobile ..............20 Manage your devices ..................21 Change the Bluethooth PIN ................21 Set the phones Bluetooth name ..............21 Pair a Bluetooth headset ................21... - Page 5 Paging / Find handset ...................28 5. Phonebook .................29 Store a name and number ................29 View the details or dial an entry ..............30 Search an entry ....................31 Edit a name and number ................31 Assign a ringtone ...................31 Assign a quickdial number ................32 Clear a quickdial number ................32 Access the phonebook during a call .............32 Assign a birthday or anniversary ..............32...
- Page 6 Set ring delay ....................42 Set the frequency...................42 9. Call block ................43 Add a number ....................43 View a number ....................43 Delete a number ....................43 Delete all numbers ..................43 10. Call Bar ................44 10.1 Turn Call Bar on / off ..................44 10.2 Add or edit a number ..................44 10.3 Set the Call Bar PIN ..................44...
- Page 7 13.5.3 Set the auto prefix ................52 14.5.4 Recall mode ..................53 14.5.5 Dialling mode ..................53 14.5.6 Switch auto clock on / off ..............53 14.5.7 Set the outgoing line................53 14.6 Switch call alert on / off ..................54 14.7 Restore default settings .................54 14.8 Registration ....................54 14.8.1 Manually register an additional handset ..........54...
-
Page 8: Getting Started
The mobile phone must be within 10m of the IT.6T base. If you go out of range when making a call on the IT.6T, handset using the mobile network, you will hear a double beep. -
Page 9: Connecting The Base
Switch on the mains power. IMPORTANT When the IT.6T is plugged into the power, all the base icons will illuminate while it powers up. This will take a few seconds. -
Page 10: Connecting The Handset And Charger
INTELLIGENT CHARGING Your IT.6T supports Intelligent Charging, this means when the handset is fully charged, the base will automatically detect this and stop drawing power from the mains to charge the handset, saving unnecessary power usage. - Page 11 The handset may become warm during charging. This is normal. All talk and standby times are approximate and depend on features selected and usage pattern. Setting up your IT.6T Welcome screen 1. The Welcome screen will briefly appear, then a list of countries is displayed.
- Page 12 NOTE The date and time is retained during a power failure or when the battery is discharged. You can also set the time and date format, see page 61. Your IT.6T is now ready for use. Getting started...
-
Page 13: Getting To Know Your Phone
2. Getting to know your phone Overview of your handset A Earpiece B Display See page 15 for an overview of the display icons. C Phonebook / Scroll up / Volume up In standby mode, press to open phonebook menu. Scroll up through lists and menus. - Page 14 G * / Intercom Dial a *. Press to make an internal call. H Hands-free Activate and deactivate hands-free during a call. IMPORTANT Hands-free activation can suddenly increase the volume in the earpiece to a very high level. Make sure the handset is not too close to your ear. Redial / Clear / Right softkey In standby press to enter the redial list.
-
Page 15: Handset Lcd Display
Handset LCD Display Steady when the handset is registered and within range of the base. Flashes when handset is out of range or searching for the base. Displays when ECO mode is on. Displays when ECO PLUS is on. Bluetooth function is activated. Bluetooth headset is paired. -
Page 16: Overview Of The Base
Overview of the base A Delete Press to delete recorded messages during playback. B Answering machine on / off Switches the answering machine on / off. C Bluetooth 1 LED D Bluetooth 2 LED E Skip back Press to skip backward through your answering machine messages. F Volume Up Increase playback volume. -
Page 17: Navigating The Menu
Bluetooth LED - illuminates when the corresponding mobile is connected. Navigating the menu Your IT.6T has an easy to use menu system on the handset. Each menu has a list of options, which you can see on the menu map on the following page. -
Page 18: Menu Map
Menu map Phonebook If no entry is stored press Level Options: Press Options: Medium All Calls Add Entry High Missed Calls Show Details Received Calls Edit Entry Alarm Dialled Calls Search Create alarm Delete All Enter name Answer Machine Sort by Play Once an alarm is Delete All... - Page 19 Base Ringer Rename Enter Date Find Headset Enter Time Settings Reminder Note Mobile settings Reminder Ring ECO PLUS Mobile 1 Delete Handset Name Enter PIN Display Note Pad Disp. Contrast In Range If no Note is Backlight PIN code stored: Call Settings Mobile 2 Add Note...
-
Page 20: Bluetooth
The IT.6T base has a USB socket (USB cable not provided) to charge your mobile phone while taking mobile calls on the IT.6T handset. This helps to ensure the mobile is within the 10 metre range of the IT.6T base. -
Page 21: Manage Your Devices
Manage your devices 1. Press Menu, scroll to Bluetooth and press OK. Devices is highlighted, press OK. 3. Scroll to select the device you want to manage and press Options. 4. You then have the option to Connect / Disconnect, Delete Delete All. -
Page 22: Manage The Mobile Phonebook Privacy Settings
Up to 500 contacts can be downloaded from each of the 2 connected mobiles. Manage the mobile phonebook privacy settings Once your mobile phonebook is synced with the IT.6T you can set the mobile phonebook to different privacy settings. 1. Press Menu, scroll to Mobile Settings and press OK. -
Page 23: Using The Phone
Calls Once you have paired your IT.6T with your mobile, you can make calls over the home line or mobile network using the IT.6T handset, to pair the IT.6T with your mobile, see page 20. -
Page 24: Call A Second External Line
When you are on a call using the home line / mobile network, you can also answer a second call through the other line (mobile network / home line). 1. During the external when another call comes in you will hear a double beep in the earpiece of the IT.6T, press Options. Using the phone... -
Page 25: Adjust The Earpiece Volume
2. Scroll to the other line you want to answer and press Your first call is put on hold. 3. To switch or end the calls from the home line and / or mobile network, select from Options. Adjust the earpiece volume During a call, scroll to the required volume level. -
Page 26: 3-Way Conference Call
4.5.4 3-way conference call You can hold a 3-way conference call between 2 internal callers and 1 external caller. During a call with an external caller: 1. Press and hold if only 2 handsets are registered the other handset will ring. 2. -
Page 27: Copy A Redial List Number To The Phonebook
4. Press to dial the entry or press Back to return to standby. NOTE If the caller’s number exactly matches an entry stored in the phonebook, the name is displayed. Press Options scroll to Show Details and press to see the caller’s number. 4.7.2 Copy a Redial list number to the phonebook 1. -
Page 28: Paging / Find Handset
1. Press and hold Keys Locked is displayed. 2. To unlock the keypad, press and hold again. Paging / Find handset You can alert a handset user that they are wanted or locate a missing handset. Paging calls cannot be answered by a handset. 1. -
Page 29: Phonebook
Store a name and number If the IT.6T is connected to a switchboard, you may need to enter a pause in a number. This gives the switchboard time to find an outside line. A pause is normally stored after the switchboard access code (e.g. -
Page 30: View The Details Or Dial An Entry
CHARACTER MAP Case Assigned characters and symbols L / U 1 @ _ # = < > ( ) & € £ $ ¥ [ ] { } ¤ § … a b c 2 à â æ á ã ä å ç A B C 2 À... -
Page 31: Search An Entry
6. Press to dial or press to return to standby. Search an entry 1. Press UP or press Menu, Phonebook is highlighted, press OK. 2. Scroll to the phonebook list you want to view, either 3. Press Options and scroll to Search. Press OK. 4. -
Page 32: Assign A Quickdial Number
Assign a quickdial number 1. Press UP. The first entry is highlighted on the display. 2. Enter the first letter of the name to search alphabetically then scroll to the exact entry. Press Options. 3. Scroll to Quickdial and press OK. 4. -
Page 33: Assign A Phonebook Entry To The Call Block List
5.10 Assign a phonebook entry to the Call block list 1. Press UP. The first entry is highlighted on the display. 2. Enter the first letter of the name to search alphabetically then scroll to the exact entry. Press Options. 3. -
Page 34: Calls List
If you have subscribed to Caller ID service, and provided the identity of the caller is not withheld, the number of the caller will be displayed together with the date and time of the call (if provided by the network). You can also sync your mobile calls list to your IT.6T, see page 22. -
Page 35: Dial A Number In The Calls List
Dial a number in the Calls list 1. Press Menu, scroll to Calls List and press OK. 2. Scroll to the home line or mobile line calls list ( ) you want. 3. The most recent number or name (if stored in the phonebook) is displayed. 4. -
Page 36: Delete An Entry
4. Scroll to the entry you want and press Options. 5. Scroll to Call Block and press OK. 6. Scroll to and press OK. 7. Press to return to standby. Delete an entry 1. Press Menu, scroll to Calls List and press OK. -
Page 37: Using The Answering Machine
7. Using the answering machine The IT.6T answering machine records unanswered calls when it is activated. It can store up to 59 messages within the maximum recording time of 60 minutes. Each message can be up to 3 minutes long. Your personalised outgoing messages can be up to 3 minutes long. -
Page 38: Play Your Personalised Ogm
4. Scroll to Record and press OK. 5. The display shows Recording. 6. After the tone, speak your message clearly into the handset then press to end recording. 7. Your OGM is played back. 8. Press to return to standby. Play your personalised OGM Deleting a personalised outgoing message automatically reinstates the pre-recorded outgoing message, if you have set the personalised outgoing message as your... -
Page 39: Delete All Old Messages
You must delete old messages before the IT.6T can record new messages. 7.10 Answer delay Answer delay sets the number of times the IT.6T will ring before the answering machine picks up your call and starts playing the OGM. You can change this setting to between 3 - 8 Rings or Time Saver. -
Page 40: Incoming Message Sound Quality
Remote access allows you to operate your answering machine and listen to your messages by calling the IT.6T from another phone. The default setting is Off. 1. Call your IT.6T. When you hear the announcement, press #. 2. Enter your 4 digit remote access PIN (default setting = 0000). NOTE You should change this code for additional security, see page 41. -
Page 41: Switch Remote Access On / Off
PIN code. If you enter an incorrect PIN code you will hear “Incorrect security code or three beeps (error beeps). You can try entering the code again. If it is still incorrect the IT.6T will hang 7.14 Switch remote access on / off 1. -
Page 42: Do Not Disturb
8. Do Not Disturb Your IT.6T can be set to Do Not Disturb (DND) mode for a designated time period. Once activated when you receive an incoming call the phone will not ring, unless a contact has been set as an exception, (see page 33) or the Allow setting has been set to On. -
Page 43: Call Block
9. Call block You can set the IT.6T so that when certain phone numbers call the phone does not ring. Contacts can be blocked through the phonebook menu, (see page 33) or though the Call block menu. You can store up to 49 numbers in the Call block list. -
Page 44: Call Bar
10. Call Bar You can set the IT.6T so that it will block outgoing calls to numbers that start with certain digits. Up to 4 numbers can be set in the Call Bar list and each number can be up to 4 digits long. -
Page 45: Room Monitor
11. Room Monitor You can use your IT.6T handset to monitor the sounds in another room. If the sounds reach a certain level the handset will automatically dial out to a pre-set external number or to another handset. When the Room Monitor is set to On, the handset will display Room Monitor On and only the microphone will be active to monitor the sound levels in the room. -
Page 46: Change The Monitor Level
2. The phonebook is displayed, either scroll to the entry you want to use or search alphabetically and press OK. 3. Scroll to the number you want to set and press OK. 4. Press to return to standby. NOTE When Room Monitor is switched on and the sound level reaches a certain level the receiver unit will be automatically dialled. -
Page 47: Alarm
12. Alarm The IT.6T has a built in alarm facility. 12.1 Create an alarm 1. Press Menu, scroll to Alarm and press OK. Create alarm is highlighted, press OK. 3. Using the keypad enter the name and press OK. 4. Press... -
Page 48: Set The Alarm Ring
When the alarm rings: Press to turn the alarm off. Press Snooze for the alarm to repeat after 5 minutes. After pressing Snooze 3 times the alarm will automatically turn off. 12.5 Set the alarm ring 1. Press Menu, scroll to Alarm and press OK. -
Page 49: Sounds
13.4 Key beep When you press a button on the IT.6T handset, you will hear a beep. You can switch it on or off. 1. Press Menu, scroll to Sounds and press OK. -
Page 50: Base Beep
OK. 4. Press to return to standby. 13.5 Base beep When you replace the IT.6T handset on the base, you will hear a beep. You can switch it on or off. 1. Press Menu, scroll to Sounds and press OK. -
Page 51: Settings
14.3 Handset name If you are using more than one handset with the IT.6T base, you can give each handset a personalised name to easily distinguish between the handsets. A name can be up to 14 characters long. -
Page 52: Set The Backlight
14.5 Call settings 14.5.1 Auto conferencing If more than one IT.6T handset is registered to your base a second handset can join the call automatically by just pressing This feature can be set to Auto or Off. -
Page 53: Recall Mode
OK. 5. Press to return to standby. 14.5.5 Dialling mode The IT.6T is preset to Tone dialling. It is unlikely that you need to change this setting. 1. Press Menu, scroll to Settings and press OK. 2. Scroll to Call Settings and press OK. -
Page 54: Switch Call Alert On / Off
14.7 Restore default settings You can restore the IT.6T to its default (original) settings. You can choose to keep or remove data when resetting you phone. If you choose to keep data the phonebook, calls list and incoming messages will be saved, if you choose to remove data, all data will be removed. -
Page 55: De-Register A Handset
6. Enter the system PIN and press OK. 7. The base station will automatically assign the handset number. 8. When registration is successful you hear a confirmation beep. NOTE If registration is not successful the first time, please repeat the process again in case the base registration period ran out of time. -
Page 56: Default Settings
14.9 Default settings Handset Name Motorola Key Beep Ringtone Home Melody 7 Mobile Melody 6 Ringer Volume Earpiece Volume Phonebook Keep data - Unchanged Remove data - Changed Calls List Keep data - Unchanged Remove data - Changed Redial Keep data - Unchanged... -
Page 57: Calendar
15.1 Add a new event Use the IT.6T to remind you of details of events such as birthdays, anniversaries or appointments. The IT.6T can store up to 15 events in total. Up to 50 characters can be entered as the subject. -
Page 58: Edit An Event
15.3 Edit an event 1. Press Menu, scroll to Calendar and press OK. 2. Stored events are displayed scroll to the event you want to edit and press OK. 3. Enter and edit the required option and press OK. 4. Press Save to store the Event. -
Page 59: Note Pad
16. Note pad You can leave a note that will be displayed on the screen of the handset. 16.1 Create a note 1. Press Menu, scroll to Note Pad and press OK. Add Note is highlighted, press OK. 3. Using the keypad enter the text and press OK. 4. -
Page 60: Wallpaper
17. Wallpaper Select from 10 different wallpapers for your handset or set to no wallpaper. 17.1 Set a wallpaper 1. Press Menu, scroll to Wallpaper and press OK. Select Wallpaper is highlighted, press OK. 3. Scroll to the wallpaper you want and press OK. 4. -
Page 61: Date & Time
18. Date & Time If you have subscribed to your network’s Caller ID service, the base automatically sets the date and time of all handsets when you receive the first call (this function can be switch off, see page 53). You can also manually set the time on the individual handsets. 18.1 Date and time 1. -
Page 62: Help
Turn the Bluetooth function on the mobile off and on and try again. • If the problem persists reset the IT.6T to its default settings, see page 54. I cannot make / receive calls on the IT.6T via the mobile network •... -
Page 63: Handset Does Not Ring
Cannot register a handset to the base • You can register up to a maximum of 5 handsets to a IT.6T base. You must de-register a handset in order to register a new one, see page 56. • Check that you have entered the correct PIN code (default = 0000). -
Page 64: General Information
20. General information IMPORTANT This equipment is not designed to make emergency telephone calls when the power fails. Alternative arrangements should be made for access to emergency services. This product is intended for connection to analogue public switched telephone networks and private switchboards in Australia. -
Page 65: Installation Guidelines
Installation Guidelines • Read and understand all instructions and save them for future reference. • Follow all warnings and instructions marked on the product. • Do not install this product near a bath tub, sink, or shower. • Operate this phone using only the power source that is indicated on the marking label. If you are unsure of the power supply to your home, consult with your dealer or local power company. -
Page 66: Product Disposal Instructions
Product disposal instructions When the IT.6T reaches its end of life, it needs to be disposed of according to local laws and regulations, please contact the customer service helpline found in this user guide for information on how to dispose of the product free of charge. - Page 67 Motorola or SUNCORP are excluded from coverage. Use of Non-Motorola branded Products and Accessories. Defects or damage that result from the use of Non-Motorola branded or certified Products or Accessories or other peripheral equipment are excluded from coverage. Unauthorized Service or Modification. Defects or damages resulting from service,...
-
Page 68: Technical Information
Your IT.6T has a REN of 1. A total REN of 3 is allowed. If the total REN of 3 is exceeded, the telephones may not ring. With different telephone types, there is no guarantee of ringing, even when the REN is less than 3. - Page 69 <This page has been intentionally left blank>...
- Page 70 <This page has been intentionally left blank>...
- Page 71 <This page has been intentionally left blank>...
- Page 72 Manufactured, distributed or sold by Suncorp Technologies Ltd., official licensee for this product. MOTOROLA and the Stylized M Logo are trademarks or registered trademarks of Motorola Trademark Holdings, LLC. and are used under license. The Bluetooth trademarks are owned by their proprietor and used by Suncorp Technologies Ltd.