Table of Contents
Advertisement
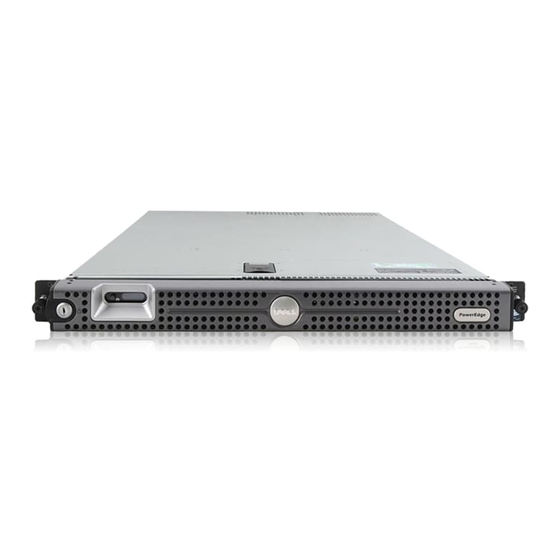
Dell™ PowerEdge™ SC1425 Systems Installation and Troubleshooting
Guide
Introduction
Indicators, Messages, and Codes
Finding Software Solutions
Running the System Diagnostics
Troubleshooting Your System
Installing System Components
Installing Drives
Getting Help
Jumpers, Switches, and Connectors
I/O Connectors
Service-Only Parts Replacement Procedures
Notes, Notices, and Cautions
NOTE:
A NOTE indicates important information that helps you make better use of your computer.
NOTICE:
A NOTICE indicates either potential damage to hardware or loss of data and tells you how to avoid the problem.
CAUTION:
A CAUTION indicates a potential for property damage, personal injury, or death.
Abbreviations and Acronyms
For a complete list of abbreviations and acronyms, see the Glossary in your User's Guide.
Information in this document is subject to change without notice.
© 2004 Dell Inc. All rights reserved.
Reproduction in any manner whatsoever without the written permission of Dell Inc. is strictly forbidden.
Trademarks used in this text: Dell, the DELL logo, Inspiron, Dell Precision, Dimension, OptiPlex, PowerApp, PowerEdge, PowerConnect, PowerVault, DellNet, Axim, Latitude, and Dell
OpenManage are trademarks of Dell Inc.; Intel and Pentium are registered trademarks of Intel Corporation.
Other trademarks and trade names may be used in this document to refer to either the entities claiming the marks and names or their products. Dell Inc. disclaims any
proprietary interest in trademarks and trade names other than its own.
Initial release: 15 Sept 2004
Advertisement
Table of Contents
Troubleshooting

Related Manuals for Dell PowerEdge SC1425


Summary of Contents for Dell PowerEdge SC1425
- Page 1 OpenManage are trademarks of Dell Inc.; Intel and Pentium are registered trademarks of Intel Corporation. Other trademarks and trade names may be used in this document to refer to either the entities claiming the marks and names or their products. Dell Inc. disclaims any proprietary interest in trademarks and trade names other than its own.
-
Page 2: Jumpers, Switches, And Connectors
Back to Contents Page Jumpers, Switches, and Connectors Dell™ PowerEdge™ SC1425 Systems Installation and Troubleshooting Guide Jumpers—A General Explanation System Board Jumpers System Board Connectors Riser Board Connectors Disabling a Forgotten Password This section provides specific information about the system jumpers. It also provides some basic information on jumpers and switches and describes the connectors on the various boards in the system. -
Page 3: System Board Connectors
Table A-1. System Board Jumper Settings Jumper Setting Description PASSWD The password feature is enabled. (default) The password feature is disabled. NVRAM_CLR The configuration settings in NVRAM are retained at system boot. (default) The configuration settings in NVRAM are cleared at next system boot. jumpered ... -
Page 4: Disabling A Forgotten Password
Damage due to servicing that is not authorized by Dell is not covered by your warranty. Read and follow the safety instructions that came with the product. - Page 5 1. Turn off the system and attached peripherals, and disconnect the system from the electrical outlet. 2. Open the system. See "Opening the System" in "Troubleshooting Your System." 3. Remove the password jumper plug. Figure A-2 to locate the password jumper on the system board. If necessary, remove the riser card insulator to improve access to the jumper.
-
Page 6: Serial Connector
Back to Contents Page I/O Connectors Dell™ PowerEdge™ SC1425 Systems Installation and Troubleshooting Guide Serial Connector PS/2-Compatible Keyboard and Mouse Connectors Video Connector USB Connectors Integrated NIC Connectors Network Cable Requirements I/O connectors are the gateways that the system uses to communicate with external devices, such as a keyboard, mouse, printer, or monitor. This section describes the various connectors on your system. -
Page 7: Video Connector
Table B-2. Serial Connector Pin Assignments Signal Definition Data carrier detect Serial input SOUT Serial output Data terminal ready Signal ground Data set ready Request to send Clear to send Ring indicator Shell N/A Chassis ground PS/2-Compatible Keyboard and Mouse Connectors The PS/2-compatible keyboard and mouse cables attach to 6-pin, miniature DIN connectors. -
Page 8: Usb Connectors
Signal Definition Red video GREEN Green video BLUE Blue video No connection 5–8, 10 GND Signal ground No connection DDC data out O Monitor detect data HSYNC Horizontal synchronization VSYNC Vertical synchronization No connection USB Connectors The system's USB connectors support USB-compliant peripherals such as keyboards, mice, and printers and may also support USB-compliant devices such as diskette drives and optical drives. -
Page 9: Network Cable Requirements
Data out (+) TD– Data out (–) Data in (+) No connection No connection RD– Data in (–) No connection No connection Network Cable Requirements The NIC supports a UTP Ethernet cable equipped with a standard RJ45-compatible plug. Observe the following cabling restrictions. NOTICE: To avoid line interference, voice and data lines must be in separate sheaths. -
Page 10: Recommended Tools
Damage due to servicing that is not authorized by Dell is not covered by your warranty. Read and follow the safety instructions that came with the product. -
Page 11: Removing The System Board Assembly
Damage due to servicing that is not authorized by Dell is not covered by your warranty. Read and follow the safety instructions that came with the product. -
Page 12: Installing The System Board Assembly
Damage due to servicing that is not authorized by Dell is not covered by your warranty. Read and follow the safety instructions that came with the product. - Page 13 NOTE: When installing the cooling shroud, ensure that the two tabs on the cooling shroud are inserted into the two retaining slots in the mid- chassis wall. 16. Close the system. See "Closing the System" in "Troubleshooting Your System." Back to Contents Page ...
-
Page 14: Other Documents You May Need
NOTE: Always check for updates on support.dell.com and read the updates first because they often supersede information in other documents. Release notes or readme files may be included to provide last-minute updates to the system or documentation or advanced technical reference material intended for experienced users or technicians. -
Page 15: System Status Indicators
Back to Contents Page Indicators, Messages, and Codes Dell™ PowerEdge™ SC1425 Systems Installation and Troubleshooting Guide Front-Panel Indicators and Features Warning Messages Back-Panel Features and Indicators Diagnostics Messages NIC Indicators Alert Messages System Messages Baseboard Management Controller Messages System Beep Codes The system, applications, and operating systems can identify problems and alert you to them. Any of the following can indicate when the system is not operating properly: System indicators... - Page 16 Hard-drive indicator The green hard-drive activity indicator flashes when the SATA hard drives are in use. NOTE: It does not flash when SCSI hard drives are in use. NMI button The NMI button is used to troubleshoot software and device driver errors when using certain operating systems. This button can be pressed using the end of a paper clip.
-
Page 17: Back-Panel Features And Indicators
Possible system board resource and/or See "IRQ Assignment Conflicts" in "Finding Software Solution." If the problem persists, see system board hardware failure. "Getting Help." Possible expansion card failure. See "Troubleshooting Expansion Cards" in "Troubleshooting Your System." Other failure. Ensure that the diskette drive, optical drive, and hard drives are properly connected. See "Troubleshooting Your System"... -
Page 18: System Messages
Yellow 1000-Mbps connection Orange 100-Mbps connection Green 10-Mbps connection System Messages System messages appear on the screen during system boot to notify you of a possible problem with the system. Table 2-4 lists the system messages that can occur and the probable cause and corrective action for each message. NOTE: If you receive a system message that is not listed in Table 2-4, check the documentation for the application that is running when the message appears or the operating system's documentation for an explanation of the message and recommended action. - Page 19 Remove the memory modules in bank 3. See "System Memory slots DIMM3_A and DIMM3_B Memory" in "Installing System Components." must be empty if Dual Rank memory DIMMs are in slots DIMM2_A and DIMM2_B. Faulty keyboard controller (faulty system board). "Getting Help."...
-
Page 20: System Beep Codes
"Installing System Components." detected Utility partition is not available on the hard disk Create a utility partition on the boot hard drive. See "Using Utility partition not available the Dell™ OpenManage™ Server Assistant" in your User's Guide. Micro code update failed. Update the BIOS firmware. See "Getting Help."... -
Page 21: Warning Messages
Code Cause Corrective Action 1-1-2 CPU register test failure "Troubleshooting the Processors" in "Troubleshooting Your System." 1-1-3 CMOS write/read failure; faulty system board Faulty system board. See "Getting Help." 1-1-4 BIOS error Reflash the BIOS. 1-2-1 Programmable interval-timer failure; faulty system Faulty system board. -
Page 22: Alert Messages
Alert Messages Systems management software generates alert messages for your system. Alert messages include information, status, warning, and failure messages for drive, temperature, fan, and power conditions. Baseboard Management Controller Messages The Baseboard Management Controller (BMC) enables you to configure, monitor, and recover systems remotely. BMC uses the system's serial port and integrated NIC1 to support fault logging and SNMP alerting. -
Page 23: Finding Software Solutions
Back to Contents Page Finding Software Solutions Dell™ PowerEdge™ SC1425 Systems Installation and Troubleshooting Guide Before You Begin Troubleshooting Errors and Conflicts Software problems can be caused by: Improper installation or configuration of an application Application conflicts Input errors Interrupt assignment conflicts Ensure that you are installing the software application according to the software manufacturer's recommended procedures. If a problem occurs after you install the software, you might need to troubleshoot your software application and your system. - Page 24 IRQ2 Interrupt controller 1 to enable IRQ8 through IRQ15 IRQ3 Available IRQ4 Serial port 1 (COM1 and COM3) IRQ5 Available IRQ6 Available IRQ7 Reserved IRQ8 Real-time clock IRQ9 ACPI functions (used for power management) IRQ10 Available IRQ11 Available IRQ12 PS/2 mouse port unless the mouse is disabled through the System Setup program IRQ13 Math coprocessor IRQ14...
-
Page 25: Running The System Diagnostics
Running the System Diagnostics The system diagnostics can be run either from the utility partition on your hard drive or from a set of diskettes that you create using the Dell OpenManage Server Assistant CD. To use diskettes you must attach a USB diskette drive to your system. -
Page 26: System Diagnostics Testing Options
1. Create a set of diagnostics diskettes from the Dell OpenManage Server Assistant CD. See "Using the Dell OpenManage Server Assistant" in your User's Guide for information on creating the diskettes. 2. Obtain a USB diskette drive and connect it to the system. - Page 27 Back to Contents Page ...
-
Page 28: Troubleshooting Your System
Damage due to servicing that is not authorized by Dell is not covered by your warranty. Read and follow the safety instructions that came with the product. -
Page 29: Troubleshooting External Connections
1. Check the system and power connections to the monitor. 2. Run the appropriate online diagnostic test. See "Using Dell Diagnostics" in "Running System Diagnostics." If the tests run successfully, the problem is not related to video hardware. See "Finding Software... -
Page 30: Troubleshooting Basic I/O Functions
2. If the problem is confined to a particular application, see the application documentation for specific port configuration requirements that the program may require. 3. Run the appropriate online diagnostic test. See "Using Dell Diagnostics" in "Running System Diagnostics." If the tests run successfully but the problem persists, see "Troubleshooting a Serial I/O Device."... -
Page 31: Troubleshooting A Nic
NIC cannot communicate with network. Action 1. Run the appropriate online diagnostic test. See "Using Dell Diagnostics" in "Running System Diagnostics." 2. Check the appropriate indicator on the NIC connector. See "NIC Indicators" in "Indicators, Messages, and Codes."... -
Page 32: Opening The System
Damage due to servicing that is not authorized by Dell is not covered by your warranty. Read and follow the safety instructions that came with the product. -
Page 33: Closing The System
Damage due to servicing that is not authorized by Dell is not covered by your warranty. Read and follow the safety instructions that came with the product. -
Page 34: Troubleshooting A Damaged System
Damage due to servicing that is not authorized by Dell is not covered by your warranty. Read and follow the safety instructions that came with the product. -
Page 35: Troubleshooting The Power Supply
1. Re-enter the time and date through the System Setup program. See "Using the System Setup Program" in your User's Guide. 2. Turn off the system and disconnect it from the electrical outlet for at least one hour. ... -
Page 36: Troubleshooting System Memory
Damage due to servicing that is not authorized by Dell is not covered by your warranty. Read and follow the safety instructions that came with the product. -
Page 37: Troubleshooting An Optical Drive
Damage due to servicing that is not authorized by Dell is not covered by your warranty. Read and follow the safety instructions that came with the product. - Page 38 Damage due to servicing that is not authorized by Dell is not covered by your warranty. Read and follow the safety instructions that came with the product.
-
Page 39: Troubleshooting Expansion Cards
Damage due to servicing that is not authorized by Dell is not covered by your warranty. Read and follow the safety instructions that came with the product. -
Page 40: Troubleshooting The Processors
Damage due to servicing that is not authorized by Dell is not covered by your warranty. Read and follow the safety instructions that came with the product. - Page 41 22. Close the system. See "Closing the System." 23. Reconnect the system to the electrical outlet, and turn on the system and attached peripherals. If the problem persists, see "Getting Help." Back to Contents Page ...
-
Page 42: Installing System Components
Damage due to servicing that is not authorized by Dell is not covered by your warranty. Read and follow the safety instructions that came with the product. - Page 43 Damage due to servicing that is not authorized by Dell is not covered by your warranty. Read and follow the safety instructions that came with the product.
- Page 44 Damage due to servicing that is not authorized by Dell is not covered by your warranty. Read and follow the safety instructions that came with the product.
-
Page 45: Removing A Power Supply
Damage due to servicing that is not authorized by Dell is not covered by your warranty. Read and follow the safety instructions that came with the product. -
Page 46: Installing The Power Supply
Damage due to servicing that is not authorized by Dell is not covered by your warranty. Read and follow the safety instructions that came with the product. -
Page 47: Removing An Expansion Card
Damage due to servicing that is not authorized by Dell is not covered by your warranty. Read and follow the safety instructions that came with the product. -
Page 48: Installing The Riser Card
Damage due to servicing that is not authorized by Dell is not covered by your warranty. Read and follow the safety instructions that came with the product. - Page 49 If only one memory module is installed, it must be installed in socket DIMM1_A. If two or more memory modules are installed, they must be installed in pairs of matched memory size, speed, and technology. The system supports both single-ranked and dual-ranked memory modules. If you install both single-ranked and dual-ranked memory modules, the dual-ranked memory modules must be installed in bank 1.
-
Page 50: Installing Memory Modules
Damage due to servicing that is not authorized by Dell is not covered by your warranty. Read and follow the safety instructions that came with the product. -
Page 51: Replacing The Processor
Damage due to servicing that is not authorized by Dell is not covered by your warranty. Read and follow the safety instructions that came with the product. - Page 52 the processor. Do not pry the heat sink off of the processor. 6. Lift the heat sink off of the processor and set the heat sink upside down so as not to contaminate the thermal grease. 7. Pull the socket-release lever straight up until the processor is released from the socket. See Figure 6-12. Figure 6-12.
- Page 53 See your User's Guide for instructions about using the System Setup program. 16. Run the system diagnostics to verify that the new processor operates correctly. "Using Dell Diagnostics" for information about running the diagnostics and troubleshooting processor problems. Back to Contents Page...
-
Page 54: Removing The Optical Drive
Damage due to servicing that is not authorized by Dell is not covered by your warranty. Read and follow the safety instructions that came with the product. -
Page 55: Scsi Configuration Information
Damage due to servicing that is not authorized by Dell is not covered by your warranty. Read and follow the safety instructions that came with the product. - Page 56 Remove the CD drive if you are removing hard drive 0. See "Removing the Optical Drive." 3. Disconnect the power and interface cables from the hard drive. The interface cables for SATA hard drives are connected to the system board. See Figure A-3 for the location of the system board connectors.
-
Page 57: Installing A Hard Drive
Damage due to servicing that is not authorized by Dell is not covered by your warranty. Read and follow the safety instructions that came with the product. -
Page 58: Getting Help
Dell's Express Service Code system may not be available in all countries. When prompted by Dell's automated telephone system, enter your Express Service Code to route the call directly to the proper support personnel. If you do not have an Express Service Code, open the Dell Accessories folder, double-click the Express Service Code icon, and follow the directions. -
Page 59: Dell Enterprise Training And Certification
Product Information If you need information about additional products available from Dell, or if you would like to place an order, visit the Dell website at www.dell.com. For the telephone number to call to speak to a sales specialist, see the contact information for your region. -
Page 60: Before You Call
Toll-free numbers are for use within the country for which they are listed. When you need to contact Dell, use the electronic addresses, telephone numbers, and codes provided in the following table. If you need assistance in determining which codes to use, contact a local or an international operator. - Page 61 11 4515 7139 City Code: 11 Customer Care Fax 11 4515 7138 Aruba General Support toll-free: 800-1578 E-mail (Australia): au_tech_support@dell.com E-mail (New Zealand): nz_tech_support@dell.com Australia (Sydney) Home and Small Business 1-300-65-55-33 Government and Business toll-free: 1-800-633-559 International Access Code: 0011 Preferred Accounts Division (PAD) toll-free: 1-800-060-889...
- Page 62 Country Code: 420 02 2186 27 14 TechFax 02 2186 27 28 City Code: 2 Switchboard 02 2186 27 11 Website: support.euro.dell.com E-mail Support (portable computers): den_nbk_support@dell.com E-mail Support (desktop computers): den_support@dell.com E-mail Support (servers): Nordic_server_support@dell.com Denmark (Copenhagen) Technical Support 7023 0182 International Access Code: 00 Customer Care (Relational) 7023 0184...
- Page 63 09 253 313 99 Switchboard 09 253 313 00 Website: support.euro.dell.com E-mail: support.euro.dell.com/fr/fr/emaildell/ Home and Small Business Technical Support 0825 387 270 Customer Care 0825 823 833 Switchboard 0825 004 700 France (Paris) (Montpellier) Switchboard (calls from outside of France) 04 99 75 40 00 International Access Code: 00 Sales 0825 004 700 0825 004 701 Country Code: 33 Fax (calls from outside of France) 04 99 75 40 01...
- Page 64 81-44-556-4162 Technical Support (Dimension™ and Inspiron™) toll-free: 0120-198-226 Technical Support outside of Japan (Dimension and Inspiron) 81-44-520-1435 Technical Support (Dell Precision™, OptiPlex™, and Latitude™) toll-free:0120-198-433 Technical Support outside of Japan (Dell Precision, OptiPlex, and Latitude) 81-44-556-3894 Technical Support (Axim™) toll-free: 0120-981-690 Japan (Kawasaki) Technical Support outside of Japan (Axim) 81-44-556-3468 International Access Code: 001...
- Page 65 Customer Service (Penang, Malaysia) 604 633 4949 Country Code: 853 Transaction Sales toll-free: 0800 581 Malaysia (Penang) Technical Support (Dell Precision, OptiPlex, and Latitude) toll-free: 1 800 88 0193 Technical Support (Dimension and Inspiron) toll-free: 1 800 88 1306 International Access Code: 00 Customer Service 04 633 4949 Country Code: 60 Transaction Sales toll-free: 1 800 888 202...
- Page 66 Website: support.euro.dell.com E-mail: swe_support@dell.com E-mail Support for Latitude and Inspiron: Swe-nbk_kats@dell.com Sweden (Upplands Vasby) E-mail Support for OptiPlex: Swe_kats@dell.com E-mail Support for Servers: Nordic_server_support@dell.com International Access Code: 00 Technical Support 08 590 05 199 Country Code: 46 Relational Customer Care 08 590 05 642...
- Page 67 DellNet™ Service and Support (1-877-335-5638) Employee Purchase Program (EPP) Customers toll-free: 1-800-695-8133 Financial Services website: www.dellfinancialservices.com Financial Services (lease/loans) toll-free: 1-877-577-3355 Financial Services (Dell Preferred Accounts [DPA]) toll-free: 1-800-283-2210 Business U.S.A. (Austin, Texas) Customer Service and Technical Support toll-free: 1-800-822-8965 Employee Purchase Program (EPP) Customers toll-free: 1-800-695-8133...
- Page 68 Spare Parts Sales toll-free: 1-800-357-3355 Extended Service and Warranty Sales toll-free: 1-800-247-4618 toll-free: 1-800-727-8320 toll-free: 1-877-DELLTTY Dell Services for the Deaf, Hard-of-Hearing, or Speech-Impaired (1-877-335-5889) U.S. Virgin Islands General Support 1-877-673-3355 Venezuela General Support 8001-3605 Back to Contents Page ...
-
Page 69: Notes, Notices, And Cautions
OpenManage are trademarks of Dell Inc.; Intel and Pentium are registered trademarks of Intel Corporation. Other trademarks and trade names may be used in this document to refer to either the entities claiming the marks and names or their products. Dell Inc. disclaims any proprietary interest in trademarks and trade names other than its own.