Miele CVA 4070 Operating And Installation Instructions
Hide thumbs
Also See for CVA 4070:
- Operating and installation instructions (64 pages) ,
- Installation instructions manual (6 pages) ,
- Dimensions (3 pages)

Related Manuals for Miele CVA 4070


Summary of Contents for Miele CVA 4070
- Page 1 Operating and Installation Instructions Coffee System CVA 4070 To prevent accidents and machine damage read these instructions before installation or use. M.-Nr. 06 911 520...
-
Page 3: Table Of Contents
Contents IMPORTANT SAFETY INSTRUCTIONS ....... . . 5 Guide to the machine..........8 First steps to use . - Page 4 Contents Setting the serving sizes......... . . 34 Cleaning and Care .
-
Page 5: Important Safety Instructions
IMPORTANT SAFETY INSTRUCTIONS When using electrical appliances basic safety precautions should always be followed, including the following: Read all instructions before installation or use of the coffee system. Be certain your appliance is Please read these instructions properly installed and grounded by carefully to prevent accidents and a qualified technician. - Page 6 Do not touch hot surfaces. Use the appliance malfunctions or has been handles or knobs. damaged in any manner. Contact Miele. Rinse the lines and the froth dispenser, and clean the unit Always attach the cord to the before the first use.
- Page 7 Do not fill anything but ground Only use the descaling tablets coffee or a cleaning tablet (for the provided by Miele. Take care to brew unit) in the funnel for ground use the correct mixture of water and coffee, otherwise it will get damaged.
-
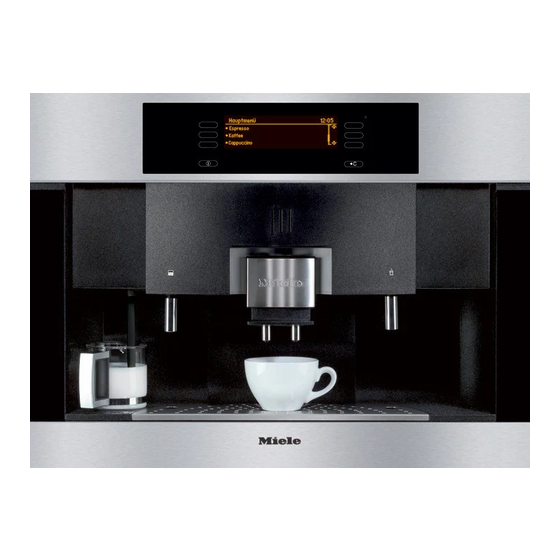
Page 8: Guide To The Machine
Guide to the machine Front view a Touch controls g Bottom lighting (lowest control "On/Off" button) h Plastic drip tray b Display i Metal drip tray c Touch controls j Coffee dispenser (lowest control "Clear" button) (height adjustable) d Top lighting k Froth dispenser e Door grip (removable for better cleaning) - Page 9 Guide to the machine Interior view a Main switch b Cover for ground coffee funnel c Funnel for ground coffee d Grind control lever e Coffee bean container f Drip tray with no-spill grid for transport g Water tank h Brew unit i Waste unit...
-
Page 10: First Steps To Use
First steps to use Touch controls Turning on ^ Select "On/Off" to turn the coffee Select a touch control with your fingertip to use the machine. system on. The display shows the clock. See Display "Settings - Clock - Setting the time of day"... -
Page 11: Filling Water, Beans Or Ground Coffee
Filling water, beans or ground coffee Before using the coffee system for the first time, clean the appliance. See "Cleaning and Care". Filling the water tank The beans and the water quality is important for a good espresso or ^ Open the appliance door by coffee. -
Page 12: Filling The Beans Container
Filling water, beans or ground coffee Filling the beans container Filling ground coffee A funnel for ground coffee is provided Only fill espresso or coffee beans in in case you would like to prepare a the beans container. Anything else - different coffee type, e.g. -
Page 13: Making Coffee
Making coffee Turning on The lines must be rinsed daily before ^ Select the "On/Off" touch control. the first use. This will happen automatically if "Rinse automatic" is A reminder to fill the water tank with set to "On" (see "Settings - Rinse fresh water is displayed. -
Page 14: Prewarming Cups
Making coffee Prewarming cups Adjust the dispenser height All beverages should be made in a Depending on the cup height, the warm cup, to develop the aroma. The coffee dispensers can be adjusted so smaller the amount of coffee or that the coffee and espresso have a espresso and the thicker the cups, the shorter distance to the cup, do not cool... -
Page 15: Espresso And Coffee Made From Coffee Beans
Making coffee Espresso and coffee made Preparing two cups at the same time from coffee beans ^ Set a cup under each coffee ^ Set a cup under the coffee dispenser. dispenser. ^ Select "Espresso" or "Coffee". The drink is dispensed through both dispensers at the same time. -
Page 16: Espresso And Coffee Made From Ground Coffee
Making coffee Espresso and coffee made Preparing two cups at the same time from ground coffee When using ground coffee, only one portion at a time can be prepared. The After filling the funnel with ground unit uses the whole portion of ground coffee (see "Filling water, beans or coffee which was filled in the funnel to ground coffee - Filling ground coffee"),... -
Page 17: Cappuccino And Milk Froth
Making coffee Cappuccino and milk froth When using for the first time or using after descaling The lines were completely drained before the unit left the factory. They will also be drained when the machine is descaled. Before preparing cappuccino or froth, the lines must be ^ Set a cup under the cappuccino filled with water. - Page 18 Making coffee Cappuccino Milk froth To prepare a cappuccino you need a If you need additional milk froth, large ceramic or porcelain cup and a prepare cold skim milk in a stainless small mug (supplied) of milk. steel mug which narrows towards the top.
-
Page 19: Adjusting The Coffee Grinder
Adjusting the coffee grinder The amount of ground coffee To adjust the grinder setting determines the strength of the coffee and the quality of the crema. The amount of ground coffee can be adjusted in the main menu. See "Settings - Grind amount". To prevent machine damage adjust ^ Push the slide control to the left for a the coffee grinder one notch at a... -
Page 20: Settings
Settings Language The coffee system can be customized to suit individual preferences. To show the displays in the desired language, select the language before the first use. Preheating + DESCALING + USER PROFILES: STANDARD + SETTINGS F ... ^ Select "Settings" from the main menu during the pre-heating phase or, + back SETTINGS F ... -
Page 21: Clock
Settings Clock Clock display size The size of the clock display can be adjusted. The options are "normal" or + back SETTINGS F ... ~ "large". + CARE ... + USER PROFILES ^ Select the "Size" touch control. ^ Select "Settings". The selected size is highlighted in the SETTINGS display. -
Page 22: Timer
Settings Timer Turn on at A specific time of day can be set to turn Setting a timer the machine on, e.g. for breakfast. ^ Select "Turning on at". + back SETTINGS F ... ~ ^ Set the hours to when the appliance + CARE ... - Page 23 Settings Turn off after Turn off at The machine will turn off automatically A specific time of day can be set to turn to save energy after a programmed the coffee system off. period of time. Time periods between ^ Select "Turning off at". 15 minutes and 6 hours can be ^ Set the hour when the appliance selected.
- Page 24 Settings Activating a timer The timer function "Turning on at" or "Turning off at" can be activated or deactivated. + back SETTINGS ~ ^ Select "Activate". + CARE ... + USER PROFILES ^ Select "On" to activate the desired ^ Select "Settings". function.
-
Page 25: Grind Amount
Settings Grind amount Pre-brewing The grind amount can be set, During pre-brewing a small amount of depending on the coffee type, between water is released onto the ground 0.2 ounces and 0.5 ounces coffee. After a short time the remaining (6 - 14 grams). -
Page 26: Temperature
Settings Temperature Rinse automatic Five temperatures are available for It is important to flush out any residual each beverage, three for hot water. coffee from the lines when starting to Maximum is the highest temperature, use the machine for the day. If minimum the lowest. -
Page 27: Steam System
Settings Steam system Lighting The appliance has two heating Lighting sets the type of light used systems. They allow for independent when the appliance is turned on. The preparation of froth/cappuccino or lighting can be turned on/off espresso/coffee. The second heating automatically or dimmed to the desired system can be turned off to save brightness. -
Page 28: Total No. Coffees
Settings Total no. coffees System Lock ^ Select "Total coffee" to check the The coffee system can be locked so number of previously dispensed that it cannot be used by children or espresso, coffee and cappuccino. those not familiar with the operating instructions. -
Page 29: Water Hardness
Settings Water hardness To set the correct water hardness: The hardness of the water used in the coffee system must be determined and + back SETTINGS J... ~ programmed into the appliance. The + CARE ... water hardness will determine how + USER PROFILES frequently the unit must be descaled to ^ Select "Settings"... -
Page 30: User Profiles
Settings User profiles Creating a user profile ^ Select "Settings" and then "more" Up to 10 different user profiles can be entered to accommodate different twice. tastes i.e. different grind amounts, ^ Select "User profiles". temperature, pre-brewing, portion sizes. The upper display line shows which user profile is currently set, if different profiles were already created. -
Page 31: Selecting A User Profile
Settings Change name Change ^ If you would like to change a name, The appliance can be set so that it touch "Change name" and then the changes back automatically to the touch control next to the name to be standard profile or that the once set changed. -
Page 32: Display
Settings Display Tone options The display contrast and brightness A tone can be selected to confirm the can be adjusted. selection of a touch control. ^ Select "Settings" and then select ^ Select "Settings" and then "more" "more" three times. three times. -
Page 33: Reset
Settings Reset To select the factory defaults select in the submenu to "Reset all" (all settings back to default: timer, rinse automatic, steam system, lighting, System Lock, water hardness, display, last selected coffee type and all standard profile settings), or the "User profiles". If you select one of these options ^ Select "Yes"... -
Page 34: Setting The Serving Sizes
Setting the serving sizes ^ Set the desired cup size under the The flavor of the coffee depends on the coffee and quantity of water used. To coffee dispenser. For a cappuccino ensure the machine uses exactly the size, set the cup under the froth amount of water to suit your taste and dispenser first. -
Page 35: Cleaning And Care
Cleaning and Care Allow the coffee system to cool before cleaning. Danger of burns! + back SETTINGS J... ~ + CARE ... Do not clean the unit with a steam + USER PROFILES cleaner. Never use cleaners ^ In the main menu touch "more" until containing chlorides, sand, soda or "Care"... -
Page 36: Water Tank
Cleaning and Care Water tank Waste unit Empty the water tank daily and refill The display shows a message to empty before preparing the first drink with the waste unit. Clean the waste unit fresh, cold tap water. daily. Coffee waste can mold if there is water in the waste unit from the rinse Check if the valve is clean. -
Page 37: Drip Tray
Cleaning and Care ^ Wash the drip tray in the dishwasher Drip tray or by hand with hot water and liquid The trip tray contains a sensor which dish soap, then dry with a soft cloth. causes the display to show when the tray is full and needs to be emptied. - Page 38 Cleaning and Care Drip catch with metal insert Bean container The bean container must be cleaned by hand with hot water and liquid dish soap. ^ Pull the bean container out and push the lid back. ^ Wash the bean container by hand with hot water and liquid dish soap, then dry with a soft cloth.
- Page 39 Cleaning and Care Coffee dispenser connector Interior and door ^ Once all movable parts are removed clean the interior with a solution of hot water and liquid dish soap. Dry ground coffee can be vacuumed. A connector between the brew unit and coffee dispenser is located on the inner door.
- Page 40 Cleaning and Care Brew unit Manually clean the brew unit weekly. The movable parts are lubricated and the gaskets will get damaged in the dishwasher. ^ Take out the water tank, waste unit and the cover for the ground coffee funnel.
- Page 41 The cleaning tablets can ^ Take out the funnel cover and open be purchased from Miele. the funnel lid. As a reminder the display shows "Cleaning must be started" after 200 cups and then until the machine is cleaned.
- Page 42 Cleaning and Care Froth dispenser/Intake hose Clean the froth dispenser after each use, otherwise they may become blocked with dried milk and hard to clean. Rinsing does not replace cleaning in the dishwasher. ^ Select "Care". ^ Pull all pieces apart. Remove the ^ Select "Rinse system".
- Page 43 Cleaning and Care ^ Reassemble the parts as shown. ^ Push the froth dispenser into the machine from underneath, a, and Take care that the raised parts (see arrow) point downwards and, turn the cover above the spout to the right, b.
- Page 44 Cleaning and Care Exterior Stainless steel surfaces The front of the appliance can be Stainless steel surfaces can be cleaned cleaned with a sponge and a solution of using a non-abrasive stainless steel warm water and non abrasive liquid cleaner. dish soap.
-
Page 45: Descaling The Appliance
This is a safety feature to The descaling tablets can be ensure the process will be purchased from Miele. completed. It is important for best Other agents may damage the results and the longevity of the machine and affect the taste of machine. - Page 46 Descaling the appliance ^ The display will prompt you through ^ Please fill with fresh water: Take the the next steps: water tank out, rinse out any descaling residues thoroughly with – to fill the descaling agent into the water. Fill with fresh water to the k water tank mark.
-
Page 47: Frequently Asked Questions
– Is the unit locked? – Is the lighting turned off? – See "Settings - Lighting". If not, the light bulb has burnt out. Contact Miele's Technical Service Department. The heating phase takes a long time. When the door is opened during the Keep the door closed during the heating heating up phase, e.g. - Page 48 – The unit is locked until the water has high. cooled. – There could be pebbles within the – Call Miele's Technical Service coffee beans. The unit shuts off Department. after 20 secs. to avoid damages. – Is the machine plugged in? –...
- Page 49 The grinding sounds louder than usual. There could be pebbles within the Turn off the unit immediately. coffee beans. Contact the Miele's Tech. Service. The grinding is quieter than usual. The coffee bean container is empty. Wait until no sound is heard and refill the The respective message appears in coffee bean container.
- Page 50 Frequently asked questions The steam heating system is turned off but steam can still dispensed. Steam can be dispensed as long as the steam heating system is heated. Once it has cooled, steam can only be dispensed once the steam system has heated. The coffee dispensing is interrupted.
- Page 51 Frequently asked questions The machine does not rinse when turned on although the automatic rinse feature is set to "On". When the machine is still at a temperature of about 140°F (60°C). The machine will not rinse when it's too hot. The water dispensing stops when programming the serving size.
- Page 52 Frequently asked questions The brew unit or waste unit could not be pulled from the machine. – The brew unit is not in the basic – Close the door. The brew unit position. automatically gets into the basic position. – The door was opened during grinding or brewing.
- Page 53 Frequently asked questions "F" messages The message F 10 or F 17 shows in the display. No water is dispensed. – The water tank is not inserted properly. Take it out and reinsert correctly. – The water tank was not filled correctly during the descaling process.
-
Page 54: After Sales Service
Miele’s Service department, Extended Service Contracts offered by other providers for Miele products will not be recognized by Miele. Our goal is to prevent unauthorized (and untrained) service personnel from working on your Miele products, possibly doing further damage to them, you and/or your home. -
Page 55: Installation Instructions
Installation Instructions... -
Page 56: Caring For The Environment
Caring for the environment Disposal of packing material Disposal of an old appliance The cardboard box and packing Old appliances may contain materials materials protect the appliance during that can be recycled. Please contact shipping. They have been designed to your local recycling authority about the be biodegradable and recyclable. -
Page 57: Electrical Connection
If there is any question concerning the electrical connection of this appliance to your power supply, please consult a licensed electrician or contact Miele’s Technical Service Department. See back page for contact information. WARNING: THIS APPLIANCE MUST BE... -
Page 58: Installation
Installation Installation options The coffee system is designed to be built into cabinetry. A combination with other Miele built in appliances is possible. If the machine is installed in combination with other appliances, it should be installed with a protective base between the appliance and the unit (exception: installation with a built-in plate warmer). - Page 59 Installation ^ If your cabinet has 3/4" (19 mm) side Installation walls, drill four holes for the Make sure power is not supplied to mounting. the appliance while installation or ^ Center the unit and turn the screws a maintenance work is performed. little bit in and then out again.
-
Page 60: Adjusting The Door Hinges
Installation Adjusting the door hinges The door hinges can be adjusted if the door cannot be opened easily. ^ To adjust the door sideways, a, turn screw a. ^ To adjust the door to the front or back, b, turn screw b. - Page 64 Alteration rights reserved / 2906 M.-Nr. 06 911 520 / 00 en - USA / CDN CVA 4070...