Table of Contents
Advertisement
Quick Links
MDポータブルレコーダー
取 扱 説 明 書
エ ム デ ィ ー
エ ム
エ ム
エ ム
エ ム
デ ィ ー
デ ィ ー
デ ィ ー
デ ィ ー
エ ム テ ィ ー
エ ム
エ ム
エ ム
エ ム
テ ィ ー
テ ィ ー
テ ィ ー
テ ィ ー
MD-MT770
ENGLISH OPERATION MANUAL .... Page 97
お買いあげいただき、まことにありがとうございました。
この取扱説明書をよくお読みのうえ、正しくお使いください。
ご使用の前に、 「 安全に正しくお使いいただくために」 を必ずお読み
ください。
この取扱説明書は、保証書とともに、いつでも見ることができる
所に必ず保存してください。
Advertisement
Table of Contents

Related Manuals for Sharp MD-MT770


Summary of Contents for Sharp MD-MT770
- Page 1 デ ィ ー デ ィ ー デ ィ ー エ ム エ ム エ ム テ ィ ー エ ム エ ム テ ィ ー テ ィ ー テ ィ ー テ ィ ー MD-MT770 ENGLISH OPERATION MANUAL ..Page 97...
-
Page 2: Table Of Contents
1章 お使いになる前に 4章 いろいろな再生 ページ ページ 安全に正しくお使いいただくために ..04 頭出しをする ..........38 聞きたい所をさがす ........39 おもな特長 ......... 10 ランダム再生やリピート再生をする ....40 付属品について ......11 イントロ再生をする ........42 各部のなまえ ......12 2倍速早聞き再生をする ....... 43 2章 準 備 5章 いろいろな録音 充電する ........16 再生側に合わせて、録音を始める... - Page 3 9章 便利な使いかた 7章 表示内容の確認 ページ ページ 誤動作防止について ........77 録音残り時間・総再生時間を確認する ..... 57 初期設定を変える ........78 各曲の再生時間を確認する ......57 外部機器と接続する ........80 経過時間・残り時間を確認する ...... 58 電池残量を確認する ........58 10章 ご参考に 8章 MDの編集 充電池について ..........83 「故障かな?」と思ったら ......84 録音したMDにタイトルをつける ....59 こんな表示がでたら...
-
Page 4: 安全に正しくお使いいただくために
MD-MT770 安全に正しくお使いいただくために この取扱説明書には、安全にお使い 図記号の意味 いただくためにいろいろな表示をして 充電池について います。 漏液・発熱・発火・破裂などを避ける その表示を無視して誤った取り扱いを ため、 必ず次のことを守ってください。 することによって生じる内容を、 次の ように区分しています。 この記号は 内容をよく理解してから本文をお読み ・・・・・・・・・・ 気をつける必要があることを表して になり、記載事項をお守りください。 います。 火の中へ入れたり、 分解・加熱しない 釘を刺したり、ハン 人が死亡または重傷を マーでたたいた り 、 負うおそれが高い内容 踏みつけたり、ハン この記号は を示しています。 ・・・・・・・ ダ付しない してはいけないことを表しています。 充電池に貼ってある外 人が死亡または重傷を 装カバー(被覆)をは... - Page 5 MD-MT770 安全に正しくお使いいただくために(続き) 本機について 指定以外の AC アダプター や充電スタンド、カー電源 ネックレスやクリップなどの金属 アダプターなどを使用しない 自動車やバイク、自 類と一緒に携帯・保管しない 転車などの運転中は、 火災・事故の原因となります。 ヘッドホンを絶対に 使わない、MD ポー タブルレコーダーの 操作をしない 交通事故の原因となります。 キャビネットを分解 ・ 改造しない 火災 ・ 感電 ・ けがの原因となります。 歩行中は、 周囲の音が聞こえなく また、レーザー光が目に当たると 充電池を持ち運んだ なるほど、音量を上げすぎない 目を痛める原因となります。 り、 保管するときは、 (特に、 踏切や横断歩道などでは、 内部の点検・調整・修理は、 販売店に 付属の充電池ケース...
- Page 6 MD-MT770 安全に正しくお使いいただくために(続き) 充電池について AC アダプターについて AC100V 以外の電圧 コードが傷ついたときは (芯線 充電の際に所定の充電時間を で使用しない の露出、断線など) 、販売店に こえても充電が完了しない場合 100V 200V 交換をご依頼ください には、充電をやめてください 火災・感電の原因となります。 発熱・破裂・発火の原因となります。 コードを傷つけたり、 無理に曲 充電池が漏液したり、 異臭がする げたり、ねじったり、加工した ときには、直ちに火気より遠ざ り、重い物を乗せたり、加熱し たり、引っぱったりしない けてください 漏液した電解液に引火し、発火・ 破裂する原因となります。 充電池の使用中や充電中、 保管時 雷が鳴りだしたら… 破損により、火災・感電の原因と に異臭を感じたり、発熱・変色・ 安全のため、 早めにACアダプター なります。 変形など、 今までと異なることに...
- Page 7 MD-MT770 安全に正しくお使いいただくために(続き) 異常が起きたら AC アダプターについて コンセントから抜くときは、 次のようなときは、A C アダ 濡れた手で抜き差ししない コードを引っぱらない プターをコンセントから抜き、 充電池などをはずしてから販売店 に修理を依頼してください ■ 内部に水や異物などが入ったとき 感電の原因となることがあります。 コードが傷つき、 火災・感電の原因 ■ 本機を落としたり、 衝撃を与え となることがあります。 たり、 キャビネットを破損した とき(特に充電池ブタが破損した コードを熱器具に近づけない り、はずれた場合、フタをつけ コンセントへの差し込みがゆる コードの被覆がとけて、 火災・感電の ず に 使 用 しないでください。 ) くぐらついていたり、プラグや 原因となることがあります。 ■ AC アダプター、充電スタンド、...
- Page 8 MD-MT770 安全に正しくお使いいただくために(続き) 本機について 充電池について 充電池は誤った使いかたをしますと、 発 熱・破裂・発火・破損・充電池の性能や 寿命を低下させる原因となることがあり ます。 必ず、 次のことを守ってください。 極端に寒い所や火気 使用中はあたたかくなります の近くに置かない ので、直接肌に触れたままで 長時間使用しない 火災 ・ 事故の原因となることがあります。 強い衝撃を与えたり、 投げつけたり やけどの原因となることがあります。 しない 直射日光が長時間あたる所 ズボンなどの後ろの (特に密閉した自動車内)や、 直射日光の強い所や炎天下の車内 ポ ケ ッ ト に 入 れ て など、 高温の場所で使用したり、 暖房器具の近くに置かない 放置しない 座ったり、満員電車...
- Page 9 MD-MT770 安全に正しくお使いいただくために(続き) 乾電池について 長期間ご使用にならないとき 乾電池は誤った使いかたをしますと、 感電・破裂・発火の原因となることがあり ます。 必ず、 次のことを守ってください。 安全のため、 必ずACアダプター 乾 電 池 が 使 え な く な っ た り 、 をコンセントから抜き、充電池 長期間使わないときは、 乾電池 などをはずしてください ケースから取り出してください 火災の原因となることがあります。 充電したり、分解しない 液もれをして機器を腐食させたり、 手や衣類などを汚す原因となること 大切な録音をする前に、 あらかじめ試 金属小物(かぎ・ネックレス・ し録音をして、正常に録音されること があります。 コイン等 ) と い っ し ょ に...
-
Page 10: おもな特長
MD-MT770 おもな特長 簡単・便利 MD のグループ録音・再生 な充電スタンド グループ 充電スタンドに置くだけで、 充電することができます。 歌手やアルバムごとに、 に分けて録音する ことができます。 グループ その MD は、 を選んで再生することが 光る 液晶リモコン できます。 バックライト により暗いところでもリモコンの また、録音済みの MD に、アルバム名などをつける 液晶表示が見れます。 ことができます。 リフレッシュ 機能搭載 充電池 のメモリー効果が起こらないように、 自動的 リフレッシュ に充電池を します。 ( P.17) 2 倍・4 倍長時間... -
Page 11: 付属品について
MD-MT770 付属品について 付属品がすべてそろっているか、お確かめください。 ヘッドホン× 1 AC アダプター× 1 リモコン× 1 充電スタンド× 1 乾電池ケース× 1 (インピーダンス 32 Ω) 取扱説明書× 1 保証書× 1 キャリング 充電池× 1 充電池ケース× 1 接続コード× 1 ケース× 1 AC アダプターの形は、イラストと異なることがあります。... -
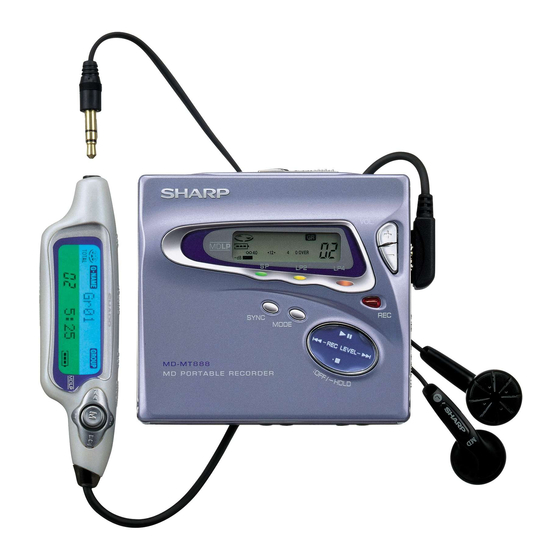
Page 12: 各部のなまえ
MD-MT770 各部のなまえ 本 体 表示部 16 17 18... - Page 13 MD-MT770 曲を移動する シンクロ録音ボタン【44】 電池残量表示 モード切換ボタン【27, 40, 46】 動作表示 (録音モード/再生モード) 音量調整ボタン【35】 シンクロ録音表示 録音ボタン【27, 50】 (曲番追加) 録音表示 再生/一時停止/停止/電源切/誤動作防止/ TOC 表示 早戻し/早送りボタン 【27, 28, 30, 35, 38, 39, 59, 77】 グループ表示 (曲番選択/録音レベル調整) 充電池ブタ【16】 リピート表示 DC 2V IN 端子【18, 81】 ランダム表示 光/ライン入力端子【22, 23】 レベルメーター...
- Page 14 MD-MT770 各部のなまえ(続き) リモコン 表示部 (裏面) ヘッドホン端子【34】 動作表示 リピート表示 録音ボタン【27, 50】 グループネーム表示 録音モード表示 (曲番追加) ディスクネーム表示 曲番表示部 音量調整ボタン【35】 グループ表示 文字情報表示部 モード/表示切換ボタン【27, 40, 57】 総曲数表示 電池残量表示 (録音モード/再生モード) シンクロ録音表示 グループ/クリアーボタン【25, 30】 録音表示 メニューボタン 【27, 28, 30, 35∼39, 42, 59】 ランダム表示 ホールド 誤動作防止スイッチ(HOLD) 【 77】...
- Page 15 MD-MT770 曲を移動する メニューボタンの使いかた メニュー表示について メニューモードに入ったときの表示は、1 行目に リモコンのメニューボタンは上下左右に動かしたり、 各メニューの頭文字を表示し、 2行目に選択されている 押したりすることでいろいろな操作をすることができ メニューの内容が表示されます。 ます。 選択されているメニューの頭文字が点滅します。 メニューの頭文字 上方向に動かすと… 〈例〉 N→NAME 再生、一時停止、文字選択 ......E→EDIT G→GROUP 左方向に動かすと… B→BASS 早戻し、曲番選択、メニュー選択、設定項目選択、 メニューの内容 S→SETUP カーソル移動、録音レベル調整、文字選択 ..右方向に動かすと… 早送り、曲番選択、メニュー選択、設定項目選択、 メニューの頭文字は、 使用状況に応じて表示内容が お カーソル移動、録音レベル調整、文字選択 ..変わります。 知 下方向に動かすと… ら (停止中、再生中、一時停止中、デジタル録音、...
-
Page 16: 充電する
MD-MT770 充電する お買いあげ時は、充電池は充電されていません。 お使いになる前に、必ず充電してください。 無理に開け − 側から すぎないで 入れる 充電池を入れる。 ください AC アダプターをつなぐ。 本体を充電スタンドに置く。 動作中や、 停止中など本体に電源が入っているときは、 家庭用コンセントへ 充電されません。 (AC 100V、50/60Hz) 充電中は操作できません。 充電中に操作すると、 “CH”と表示されます。 充電中や充電後、 充電スタンドや本体が暖かくなること 前面を手前にして、 がありますが、異常ではありません。 上から押さえる。 DC IN 5V 端子へ 充電池についてのご注意 AD-N55BT 以外の充電池は、使用しないでください。 充電池の外装カバー(被覆)は、 最後まで はがさないでください。 確実に 発熱・発火・破裂の原因となります。... - Page 17 MD-MT770 電池残量表示について 充電時間について 本体を充電スタンドに置くと、 本体の電池残量表示で動作 約3時間すると充電が完了し、 電池残量表示が消えます。 状態が確認できます。 このとき、充電の約 90% が完了しています。 さらに約2時間そのままにしておけばフル充電されます。 表示内容 動作状態 充電は5℃∼35℃の範囲で行ってください。 充電中です。 上記以外の温度では、正常に充電状態に入らないこと があります。 この製品は、0℃∼40℃の場所でお使いください。 スクロール 充電が完了したあと、そのまま充電状態にしておいて すでに充電が完了しています。 も差しつかえありません。 または、本体が充電スタンドに 正しく置かれていないときや、 デモモードについて 充電端子が汚れていたり、異物が ついていると、充電状態になり 充電池が入っていない状態で本体を充電スタンドに置くと、 消灯 ません。(接点を綿棒でからぶき デモモードになります。 デモモードを解除するには、 停止 してください。 P.93) または再生ボタンを押してください。 充電池をリフレッシュ (放電) して...
-
Page 18: Acアダプターで使う
MD-MT770 AC アダプターで使う 本体差込用コードを取り出す。 本体差込用コード ミゾに入れる 本体差込用コードを本体 (DC IN 2V 端子) に つなぐ。 AC アダプターをつなぐ。 家庭用コンセントへ (AC 100V、50/60Hz) AC アダプターで長時間ご使用にならないときは、 ご 安全のため、 必ずACアダプターをコンセントから 注 抜いてください。 意 DC IN 2V 各プラグは最後まで確実に差し込んでください。 端子へ AC アダプターを使って再生しているときに停電に DC IN 5V お なったときは、 ACアダプターをコンセントから抜いて 端子へ... -
Page 19: 乾電池で使う
MD-MT770 乾電池で使う 乾電池は、 単3形アルカリ乾電池 (LR6) を使用してください。 乾電池で使うときは、本体に充電池を必ず入れておいて 開ける。 ください。 (乾電池のみで使用すると、 動作状態によっては 電圧が急激に下がることがあるため、 録音や再生が正しく できないことがあります。 ) 押す。 乾電池ケースに乾電池を入れる。 と を間違え ないように入れる。 乾電池ケースを本体に取り付ける。 本体裏面 回してしっかり固定する。 乾電池ケースには、充電池(ニカド電池等)を使用 ご しないでください。 注 RELEASE LOCK 意... -
Page 20: Mdを入れる
MD-MT770 MD を入れる MDを入れて、ふたを閉める 1 MD取出しつまみを矢印の方向に 動かして、ふたを開ける 録音するときは、 誤消去防止 つまみを閉じて おいてください... - Page 21 MD-MT770 MD を入れる MD 挿入時・取出し時の注意 MD を入れるときは、 ふたを無理に開けたり、 MD を 無理に押し込まないでください。 故障の原因となります。 また、MD をホルダーの下に入れないでください。 MDが入りにくいときや、 ふたが確実に閉まらないとき は、一度 MD を取り出し、再度入れ直してください。 ホルダーの下に入れない MDを取り出すときは、 電源を切ったあとに行ってくだ さい。 トック エディット TOC (本体表示部)や“T-EDIT” (リモコン表示部)を 表示中は、 ふたがロックされ、 開けることはできません。 無理にMD取出しつまみを動かすと、 故障の原因となり ます。 電源が入っているときは開けない...
-
Page 22: 録音する機器をつなぐ
MD-MT770 録音する機器をつなぐ (録音するときは、このようにつないでください。 ) ステレオやラジカセなどのオーディオ機器での再生音(アナログ信号)を録音する方法です。 ヘッドホン端子へ 市販の3.5 mmステレオ ミニプラグコード 付属の接続コード オプティカル ライン イン DC IN 2V OPTICAL/LINE IN端子へ 端子へ 赤:右 (R) DC IN 5V端子へ 家庭用コンセントへ (AC 100V、50/60Hz) 白:左 (L) アナログ出力端子へ プラグは、最後まで確実に差し込んでください。 マイク イン ステレオや CD プレーヤーなどから録音するときは、MIC IN 端子には何も接続しないでください。 ラジカセなどのヘッドホン端子につないで録音する場合は、その機器の音量を大きくしないと録音レベルが大きく ならないことがあります。... - Page 23 MD-MT770 機器をつなぐ CD や MD のデジタル信号を、デジタルのまま録音する方法です。 アナログに比べて、高音質での録音ができます。 光出力端子 OPTICAL OUT (丸型) へ など デジタルケーブル (別売:AD-M2DC) デジタルケーブル オプティカル ライン イン DC IN 2V OPTICAL/LINE IN端子へ (別売:AD-M1DC) 端子へ DC IN 5V端子へ 家庭用コンセントへ (AC 100V、50/60Hz) 光出力端子 DIGITAL OUT (角型) へ など 本機はサンプリングレートコンバーター内蔵のため、CS/BS チューナーや DAT デッキなどサンプリング周波数の違う...
-
Page 24: 長時間録音・グループ録音について
MD-MT770 長時間録音・グループ録音について ■ 長時間録音について ■ グループ録音について この MD ポータブルレコーダーは、4 倍の 歌手やアルバムごとに、 グループに分けて 録音することができます。 長時間録音ができるので、1 枚の MD に その MD は、グループを選んで再生する たくさんの曲を録音することができます。 ことができます。 (MDLP 対応) アルバム 4 枚など 1枚のMDに最大320分 (80分ディスク使用時) の録音可能 グループ1 グループ2 グループ3 シングル数十枚など A曲 B曲 C曲 D曲 E曲 F曲... - Page 25 MD-MT770 MDに録音する グループモードを設定して録音すると グループモードを設定する グループ1 グループ2 グループ3 を 2 秒以上押す。 A 曲 B 曲 C 曲 D 曲 E 曲 F 曲 G 曲 H 曲 I 曲 J 曲 K 曲 L 曲 グループごとに曲番が 1 から始まります。 録音の一時停止状態になります。 を 1 秒以上押して、 “...
-
Page 26: Mdに録音する
MD-MT770 MDに録音する 録音を始める前に… ホールドが解除されているか 確認する。 ( P.77) 解除 リモコンのプラグは、最後まで確実に 差し込んでください。 REMOTE 端子へ... - Page 27 MD-MT770 リモコンをつなぐ。 を または 方向に動かして、 録音レベルを調整する。 ( P.29) MD を入れる。 ( P.20) 本体の または を押しても操作できます。 録音する機器をつなぐ。 ( P.22、P.23) 接続した機器を再生の一時停止状態にする。 (録音したい曲の頭出しをしておく。 ) を 2 秒以上押す。 をくり返し押して、 録音モードを選ぶ。 録音の一時停止状態になります。 ( P.46) 本体の は押すだけで、録音の一時停止状態に なります。 (ステレオ録音) (2倍長時間録音) グループ録音するときは、 (モノラル録音) (4倍長時間録音) を1秒以上押して、 新しいグループになり 本体の...
- Page 28 MD-MT770 MDに録音する(続き) 停止する を 方向に動かす。 録音中に、 停止後そのままにしておくと、 約2分後に電源が自動的に 切れます。 本体の を押しても操作できます。 録音の残り時間を確かめる 録音中または、録音の一時停止中に、 を 1 秒以上押す。 もう一度、 を1秒以上押すと、 元の表示に戻ります。 電源を切る 一時停止する を 方向に動かす。 停止中に、 を 方向に動かす。 録音中に、 このとき、曲番が1つ増えます。 TOC情報を記録 ( P.31) したあと、 電源が切れます。 本体の を押しても操作できます。 もう一度、 を 方向に動かすと、 録音が始まります。 本体の...
- Page 29 MD-MT770 録音レベルについて ■ アナログ録音やマイク録音のとき 本体表示部で確認できます。 −4dB 最も大きなレベルのとき、 −4dBから0dBの間に振れる ように調整します。 録音するときは、AC アダプターで使用することを お おすすめします。 このとき、 充電済みの電池を入れて 知 ■ デジタル録音のとき おいてください。 万一停電になっても、 電源は自動的 ら リモコン表示部で確認できます。 せ に充電池に切り換わります。 録音中に音量を調整しても、 録音には影響ありません。 録音中には低音の調整はできません。 −12dB ∼ +12dB グループ フル グループ数が 99 を超えると“G-FULL”と表示さ − 12dB から +12dB の範囲で、1dB ごとの調整が...
- Page 30 MD-MT770 MDに録音する(続き) グループを選んで録音するには を 2 秒以上押す。 を または 方向に動かして、追加 録音の一時停止状態になります。 録音したいグループを選んで を押す。 を 1 秒以上押して “ ”を点灯させる。 NEWGr 新しいグループにするとき Gr01 すでにあるグループに追加するとき を押す。 Gr02 (グループ名が記録されていると、 メニュー選択モードになります。 Gr03 “Gr01” などのかわりに、 グループ名が ⋮ 表示されます。 ) メニューの頭文字 を または NonGr グループにしないとき 方 向 に 動 か し て 、 “ G グループ セレクト...
- Page 31 MD-MT770 トック TОC(Table of Contents)について TOC とは、曲番や録音場所など、曲を認識するための目次 本体表示部に TOC (TOCの内容が変更中)やリモコン 情報です。 トック エディット 表示部に“T-EDIT”(新しいTOCの内容を書き込み中)が 再生時の頭出しがすばやくできたり、 空いている場所に録音 表示されているときは、次のことに注意してください。 できるのは、 このTOCでMD全体を管理しているからです。 TOCが正しく記録されずに、録音や編集した内容が消え 録音や編集 ( P.59) をすると、 本体表示部に TOC が ます。 表示されます。 ・本体に衝撃を与えない。 TOC の表示について ・ACアダプターや本体差込用コードを抜かない。 ・充電池や乾電池を抜かない。 <本体表示部> 表示 録音や編集をすると、本体表示部に TOC が表示されます。...
-
Page 32: グループ再生・3色光サインについて
MD-MT770 グループ再生・3 色光サインについて ■ グループ再生について グループ録音された MD を使用すると、設定されたアルバムごとやアーチストごとなど、好みのグループ別に再生する ことができます。 グループ録音された MD の再生動作について グループにしなかった曲は、 「ノングループ」になります。 グループ録音例: このようにグループ分けしたMDの場合 ノン グループ (“Non-Gr”と表示) グループ1 グループ2 グループ3 ノングループ A 曲 B 曲 C 曲 D 曲 E 曲 F 曲 G 曲 H 曲 I 曲... - Page 33 MD-MT770 ■ 3 色光サインについて グループモードを設定する グループ録音した MD を入れると、自動的に グリーン グループモードになります。 イエロー (最初のグループを表示します。 ) オレンジ 点灯 グリーンが点滅 ステレオ再生またはモノラル再生 ア ル ハ ム ゛ イエローが 2 回点滅 2 倍長時間再生(ステレオ) オレンジが 4 回点滅 4 倍長時間再生(ステレオ) グリーンから 早送り 順番に点滅 MD を取り出すと、グループモードは解除され オレンジから 早戻し...
-
Page 34: Mdを聞く
MD-MT770 MDを聞く R 右用 L 左用 ヘッドホン端子へ 解除 REMOTE リモコンのプラグは、最後まで確実に 端子へ 差し込んでください。 再生を始める前に… ホールドが解除されているか 確認する。 ( P.77)... - Page 35 MD-MT770 MDを聞く 音量を調整する 本体にリモコンとヘッドホンをつなぐ。 または を押して、音量を調整します。 MD を入れる。 ( P.20) “0”から“30”の範囲で調整できます。 グループ録音されたMDを入れると、 自動的にグループ モードになります。 低音を調整する を 方向に動かして、再生を始める。 を押す。 再生専用MDや誤消去防止状態にしたMDを入れた メニュー選択モードになります。 ときは、 を 方向に動かさなくても、 再生 (再生中は“B” が自動的に始まります。 (オートプレイ P.78) を または 方向 (のみ表示します。) 本体の を押しても操作できます。 バス に動かして、 “B(BASS)”を メニューの頭文字 最後の曲の再生が終わると、自動的に停止します。...
- Page 36 MD-MT770 MD を聞く(続き) 停止する を 方向に動かす。 再生中に、 停止後そのままにしておくと、 約2分後に電源が自動的 に切れます。 本体の を押しても操作できます。 電源を切る を 方向に動かす。 停止中に、 本体の を押しても操作できます。 リジューム機能について 再生を停止したあと、 MDを 停止 一時停止する 取り出さずに再び再生する 1曲目 止めた曲 と、止めた位置から再生が を 方向に動かす。 再生 再生中に、 始まります。 もう一度、 を 方向に動かすと、 再生が始まります。 停止 ただし、 MDを取り出すと、 一時停止後、 そのままにしておくと、 約5分後に停止状態...
- Page 37 MD-MT770 音のひずみについて 聞きたいグループをさがすには 低音を強調しているときに音量を上げすぎると、曲によっては を押して、 “ ” を点滅させる。 音がひずむことがあります。このときは、低音の強調レベル を下げるか、音量を下げてください。 点滅 音量レベルを“23”以上に設定しているときは、音のひずみを 少なくするために、低音の強調レベルが自動的に調整されます。 ア ル ハ ム ゛ 音とびについて グループモードにしたときの曲番は、 グループ内の この製品は振動に対して、音とびしにくくなっていますが、 曲番が表示されます。 ジョギングなど連続した振動に対しては、音がとぎれる ことがあります。 を または 方向に動か 5 秒以内に、 して、聞きたいグループを選ぶ。 音のエチケット 停止中に操作したときは を 方向に動かして ヘッドホンからもれる「シャカシャカ」という音は、周囲の 再生を始めてください。 人にとって気になるものです。 特に電車やバスの中などの密集した場所では音量を下げ、 他人の迷惑にならないように注意しましょう。...
-
Page 38: 頭出しをする
MD-MT770 頭出しをする 今聞いている曲の頭から再生するには 再生中に、 を 方向に一回動かす。 次の曲の頭から再生するには 再生中に、 を 方向に一回動かす。 前の曲番を選ぶには 停止中に、 を 方向に一回動かす。 動かしたままにすると、曲番が連続して変わります。 次の曲番を選ぶには 停止中に、 を 方向に一回動かす。 動かしたままにすると、曲番が連続して変わります。 停止中に聞きたい曲番を表示させたあと を 方向に動かすと、 その曲の頭から再生が始まります。 本体の または を押しても操作できます。... -
Page 39: 聞きたい所をさがす
MD-MT770 聞きたい所をさがす 曲を早く送るには(早送り) 再生中に、 を 方向に動かし続ける。 指を離すと再生に戻ります。 MD の最後の曲の終わりまで行くと、一時停止状態 になります。 曲を早く戻すには(早戻し) 再生中に、 を 方向に動かし続ける。 指を離すと再生に戻ります。 MDの最初の曲の頭まで行くと、 再生状態になります。 本体の または を押し続けても操作できます。 一時停止中に、早送り・早戻しの操作をすると、 再生中の操作よりも早くさがせます。 このとき、 音は出ませんので、 表示時間を目安にして ください。 指を離すと、その位置で一時停止状態になります。... -
Page 40: ランダム再生やリピート再生をする
MD-MT770 ランダム再生やリピート再生をする 再生中に、 をくり返し押して、 再生モードを選ぶ。 (ランダム再生) (ランダムリピート再生)(全曲リピート再生) (通常再生) (1グループ再生/1曲リピート再生) 停止中に操作したときは、 再生モードを選んだあと、 再生を始めてください。 本体表示部に TOC 表示がでているときは、再生 モードの変更はできません。 このとき、再生モードの変更をしようとすると、 トック リモコン表示部に“TOC!”と表示されます 。 それぞれのリピート再生は、 再生を止めるまで続きます。 切り忘れに注意してください。 ランダム再生・ランダムリピート再生・1 曲リピート 再生中は、聞いている曲をこえて早送り・早戻しは できません。 ランダム再生 ・ ランダムリピート再生のときは、 聞いて いる曲以前への頭出しはできません。... - Page 41 MD-MT770 ランダム再生やリピート再生をする(続き) リモコン表示 グループモードに設定したとき ( “ ” 点灯時) グループモードを解除したとき ( “ ” 消灯時) 全曲を順不同に再生したあと、 自動的に停止 グループ内で順不同に再生し、 全曲再生後 自動的に停止します。 します。 RANDOM グループ1 グループ2 ノングループ (ランダム再生) A曲 B曲 C曲 D曲 H曲 I曲 J曲 K曲 E曲 F曲 G曲 A曲 B曲 C曲 D曲 H曲...
-
Page 42: イントロ再生をする
MD-MT770 イントロ再生をする 各曲を順に、約 5 秒ずつ聞くことができます。 停止中または一時停止中に、 を 方向に 2 秒以上動かす。 再生モードが、ランダム再生・ランダムリピート 再生・ 1曲リピート再生に設定されているときは、 イントロ再生はできません。 このときは、通常の再生を始めます。 一時停止中に操作したときは、次の曲からイントロ 再生を始めます。 本体の を 2 秒以上押しても操作できます。 通常の再生に戻すには を 方向に動かす。... -
Page 43: 2倍速早聞き再生をする
MD-MT770 2倍速早聞き再生をする モノラルモードで録音された MD なら、2 倍速で または を メニューの頭文字 聞くことができます。 (モノラル録音 P.46) ファースト 方向に動かして、 “ F(FAST)” を選んで を押す。 メニューの内容 早聞き再生中に、ステレオ モードで録音された曲番に なったときは、早聞き再生 が解除されます。 録音内容によっては、 聞き取 りにくいことがあります。 メニューの選択は、25 秒以内に行ってください。 操作中に、 を押すと1つ前の表示に戻ります。 再生中に、 を押す。 操作を中止するには、 を 方向に動かしてください。 メニュー選択モードになります。 または メニューの頭文字 を 早聞き再生を一時停止する... -
Page 44: 再生側に合わせて、録音を始める
MD-MT770 再生側に合わせて、録音を始める (シンクロ録音) 接続した機器の音を検知して、 自動的に録音を開始 を 2 秒以上押す。 したり、一時停止します。 録音の一時停止状態になります。 本体の は押すだけで、 録音の一時停止状態に なります。 グループ録音するときは、 を1秒以上押して、 “ ”を点灯させる。 グループ録音しないときは、 を1秒以上押して “ ”を消灯させてください。 接続した機器を再生する。 を または 方向に動かして、録音 レベルを調整する。 ( P.29) 本体の または を押しても操作できます。 接続した機器を再生の一時停止状態にする。 (録音したい曲の頭出しをしておく。 ) をくり返し押して、録音モードを 選ぶ。 ( P.46)... - Page 45 MD-MT770 一時停止について を押す。 メニュー選択モードになります。 接続した機器を停止すると一時停止になります。 本体の を押しても、操作できます。 再び再生すると、続けて録音できます。 (そのときは、 操作8∼9を行う必要はありません。 ) オーディオ機器からの無音状態が3秒以上続くと自動的に 一時停止になります。 を または メニューの頭文字 (録音開始後、約 10 秒間は一時停止しません。 ) 再び音声が入ると、 曲番が1つ増え自動的に録音が始ま 方向に動かして、 ります。 シンクロ オーディオ機器からの再生信号によっては、 正確な位置で “S ( S Y N C ) ”を選んで 録音開始や一時停止しないことがあります。 を押す。 メニューの内容 このようなときは、 手動による録音を行ってください。...
-
Page 46: 長時間録音する
MD-MT770 長時間録音する 2 倍・4 倍長時間録音 録音の一時停止中に、 をくり返し押して、 ステレオ録音で2倍または、 4倍の長時間録音ができます。 録音モードを選ぶ。 モノラル録音 押すたびに切り換わります。 モノラルでステレオ録音 (SP) の約 2 倍の時間、 録音でき ます。 モノラルモードで録音すると、通常再生の 2 倍の早さで (ステレオ録音) 聞くことができます。 (2 倍速早聞き再生 P.43) (2倍長時間録音) (4倍長時間録音) (モノラル録音) 録音を開始する。 録音モードは、次に変更するまで変わりません。... - Page 47 MD-MT770 録音モードについて 4倍長時間録音(LP4)についてのご注意 4 倍長時間録音(LP4)は、特殊な圧縮方式によって、 録音する際の録音モードをステレオ録音、 2倍長時間録音、 長時間のステレオ録音を実現しているため、 ごくまれに 4 倍長時間録音、モノラル録音から選ぶことができます。 録音モードにより録音可能時間が異なります。 雑音が録音される場合があります。 音質を重視する録音を行うときは、ステレオ録音(SP) 80 分の MD に録音する場合は、以下のようになります。 または 2 倍長時間録音(LP2)をおすすめします。 表示 録音モード 録音時間 ステレオ録音 最大 80 分 2 倍長時間録音(ステレオ) 最大 160 分 ATRAC(音声圧縮技術)について 4 倍長時間録音(ステレオ) 最大 320 分 MONO モノラル録音...
-
Page 48: 自動で曲番をつける
MD-MT770 自動で曲番をつける アナログ録音のとき 録音の一時停止中または録音中に、 を押す。 メニュー選択モードになります。 メニューの頭文字 を または 方向に動かして、 マーク “M(MARK)”を選んで メニューの内容 を押す。 メニューの頭文字 を または 方向に動かして、 オート “A ( A U T O ) ”を選んで を押す。 メニューの内容 メニューの選択は、25 秒以内に行ってください。 操作中に、 を押すと1つ前の表示に戻ります。 操作を中止するには、 を 方向に動かしてくだ さい。... - Page 49 MD-MT770 オート デジタル録音のとき [オートマーク“A(AUTO) ” ] 1 秒以上の無音があると、自動的に曲番がつきます。 CD や MD から録音するときは、CD や MD について 約1秒 いる曲番と同じ所に、曲番がつきます。 1曲目 2曲目 再生側 A曲 無音状態 B曲 1曲目 2曲目 3曲目 再生側 A曲 B曲 C曲 1曲目 2曲目 録音側 A曲 B曲 1曲目 2曲目 3曲目 録音側...
-
Page 50: 手動で曲番をつける
MD-MT770 手動で曲番をつける デジタル録音に関するご注意 録音中に、手動で曲番をつけることができます。 デジタル入力で録音したMDを、 さらに別のMDやDATな どにデジタル録音(コピー)することはできません。 これは、 SCMS (シリアルコピーマネージメントシステム) により定められた規格です。 なお、 アナログ入力にはこの ような制限はありません。 CDプレーヤー MDプレーヤー デジタル信号 などの デジタル機器 録音中に、曲番をつけたい所で を押す。 デジタル接続 曲番が 1 つ増えます。 デジタル信号を デジタルで録音 曲番の制限 一定の時間内に 10 回以上曲番をつけようとすると、 ソーリー デジタル接続 “Sorry”が表示され、操作を受けつけなくなります。 そのときは、しばらく待ってから操作してください。 録音できません ステレオ録音のとき 40 秒以内 デジタル録音したMDを、... -
Page 51: マイクを接続して、録音を始める
MD-MT770 マイクを接続して、録音を始める タイピンマイク (別売品:MC-TP2) バウンダリーマイク マイク イン (別売品:MC-BD1) MIC IN 端子へ ワンポイントステレオマイク (別売品:MC-TS1)... - Page 52 MD-MT770 マイクを接続して、録音を始める(続き) MD を入れる。 を 方向に動かす。 ( P.20) 本体の を押しても操作できます。 マイクをつなぐ。 ( P.51) を 2 秒以上押す。 録音の一時停止状態になります。 一時停止する 本体の は押すだけで、 録音の一時停止状態に を 方向に動かす。 なります。 もう一度動かすと、録音が始まります。 グループ録音するときは、 を1秒以上押して、 このとき、曲番が1つ増えます。 本体の を押しても操作できます。 “ ”を点灯させる。 グループ録音しないときは、 を1秒以上押して 停止する “ ”を消灯させてください。 を または 方向に動かして、...
- Page 53 MD-MT770 接続するマイクについて 曲番について マイクは、 必ずプラグインパワー方式に対応したものを マイクから録音するときは、 一定間隔で曲番がつくように ご使用ください。 なっています。 (お買いあげ時は、約 5 分間隔) プラグインパワー方式に対応したものであれば、 市販の (タイムオートマーク P.56) ステレオマイクも使用できます。 プラグインパワー方式に対応していないマイクを接続 すると、 正しく動作しなかったり、 故障の原因となり 曲番1 曲番2 曲番3 曲番4 ます。 プラグインパワー方式に対応したマイクとは 5分 5分 5分 マイクには、 動作用の電源を必要とするものと、 必要と 録音中にタイムオートマークの設定を変更したときは、 しないものがあります。 電源を必要とするマイクの中に そのときからの時間になります。 は、 電池を内蔵するものと、 本体から電源が供給される...
-
Page 54: 音声に合わせて、録音を始める
MD-MT770 音声に合わせて、録音を始める (シンクロ録音) マイクからシンクロ録音するとき、 マイクからの無音状態 MD を入れる。 ( P.20) が3秒以上続くと自動的に一時停止になります。 このとき、 曲番がつきます。 (録音開始後、 約10秒間は一時停止しま マイクをつなぐ。 ( P.51) せん。 )再び音声が入ると、自動的に録音が始まります。 を 2 秒以上押す。 録音の一時停止状態になります。 本体の は押すだけで、 録音の一時停止状態に なります。 グループ録音するときは、 を1秒以上押して、 “ ”を点灯させる。 グループ録音しないときは、 を1秒以上押して “ ”を消灯させてください。 を または 方向に動かして、 録音レベルを調整する。... - Page 55 MD-MT770 を押す。 を または メニューの頭文字 方向に動かして、 メニュー選択モードになります。 シンクロ “S ( S Y N C ) ”を選んで メニューの頭文字 を または を押す。 メニューの内容 方向に動かして、 マイク シンクロ レベル “M(MIC SYNC LEVEL)” を押す。 メニューの内容 を選んで を押す。 シンクロ録音の一時停止状態 を または メニューの頭文字 になります。 方向に動かして、マイク マイクから音声が入ると、 自動的に録音が始まる。...
-
Page 56: タイムオートマーク
MD-MT770 曲番のつく間隔を変える 音声に合わせて、 録音を始める ( 続き) (タイムオートマーク) (シンクロ録音) 曲番について を押す。 録音の一時停止中または録音中に、 メニュー選択モードになります。 3秒以上の無音状態で自動的に一時停止して、 曲番がつき ます。 メニューの頭文字 を または 方向に動かして、 曲番1 曲番2 曲番3 タイム マーク “T(TIME MARK)”を メニューの内容 選んで を押す。 3秒以上の無音状態 3秒以上の無音状態 メニューの頭文字 を または 方向に動かして、タイム タイムオートマークを設定しているときは、 3秒以上の無音 状態でつく曲番に加えて、一定間隔での曲番もつきます。... -
Page 57: 録音残り時間・総再生時間を確認する
MD-MT770 録音残り時間・総再生時間を確認する 各曲の再生時間を確認する を1秒以上押す。 を または 方向に 停止中に、 停止中に、 動かして、曲番や曲名を選ぶ。 押すたびに切り換わります。 曲番 ” 消灯時 “ ヘ スト ッ ヒ ディスク名 ゛ 総再生時間 曲名 ” 点灯時 “ グループ名 を1秒以上押す。 選んだグループの 再生時間 総再生時間 録音残り時間 再生時間を表示したあとは、曲番を選ぶだけで選んだ 曲の再生時間が確認できます。 再生専用 MD では、録音残り時間は表示されません。 グループモードでの曲番はグループ内での曲番が表示 録音残り時間は、 設定されている録音モードによって... -
Page 58: 経過時間・残り時間を確認する
MD-MT770 経過時間・残り時間を確認する 電池残量を確認する 電池残量は、 充電池または乾電池で動作中に表示されます。 を1秒以上押す。 再生中または一時停止中に、 電池残量表示のみかた 押すたびに切り換わります。 点滅 曲名 充電完了時 充電必要 再生中の曲の (充電しなおすか、新しい 経過時間 アルカリ乾電池と交換) 再生中の曲の ロー バッテリー 完全に消耗すると、 “LoBATT”が表示されたあと、 残り時間 電源が切れます。 充電池や乾電池でお使いの場合、 電源を入れたときに電池 の容量を確認するために、 約20秒間は電池残量表示が 安定しないことがあります。 ノー ネーム 曲名が記録されていないときは、 “NoNAME” と表示 動作内容によって目盛が増減することがあります。 されます。 付属のACアダプターで使用するときは、 電池残量表示は この製品は、 MDの標準規格に従ったカタカナ文字の でません。... -
Page 59: 録音したMdにタイトルをつける
MD-MT770 録音した MD にタイトルをつける 名前をつけたい MD を入れてください。 を 方向に動かして、 ディスク名をつけるには 文字の種類を選ぶ。 停止中、動作表示が か確認してください。 動作表示が のときは を 方向に動かしてください。 アルファベット アルファベット カタカナ 数字・記号 (大文字) (小文字) アイウ を押す。 停止中に、 をくり返して押しても操作できます。 メニュー選択モードになります。 を または 方向に動かして、 を または メニューの頭文字 入れたい文字を選ぶ。 方向に動かして、 ネーム 入れたい文字が表示されたら、 アイウエオ “N ( N A M E ) ”を選んで... - Page 60 MD-MT770 録音した MD にタイトルをつける(続き) グループ名をつけるには 曲名をつけるには グループモードを設定してください。 を押す。 曲名をつけたい曲の一時停止中に、 メニュー選択モードになります。 を押す。 停止中に、 メニューの頭文字 を または メニュー選択モードになります。 ネーム 方向に動かして、 “ N(NAME)” メニューの頭文字 を または を選んで を押す。 ネーム 方向に動かして、 “ N(NAME)” メニューの内容 を選んで を押す。 を押す。 メニューの内容 文字の入力状態になります。 メニューの頭文字 を または グループ 方向に動かして、 “G(GROUP)”...
- Page 61 MD-MT770 だく だく スペース(空白)を入れるとき 濁音や半濁音を入れるとき 濁音や半濁音つきの文字( 「ぺ」や「パ」など)は、1 文字 文字の種類からスペースを選んで入力することもできます で入れることはできません。 濁音や半濁音をつけたい文字 が、 を押すと、 カーソルが右に移動して、 その部分 を入れたあと、次の文字として濁音(゛)や半濁音(゜) がスペースになります。 を入れます。 1 枚のディスクには、 ディスク名を 1 つ、グループ ア ア お 名を最大99グループ分、 曲名を最大255曲分つけ 知 スペース ることができます。 ディスク名、 グループ名、 曲名 ら には、それぞれ最大 4 0 文字入れられ、合計約 せ...
- Page 62 MD-MT770 録音した MD にタイトルをつける(続き) ■ 文字を追加するとき ■ 文字を削除するとき 例) 「ヘスト」→「ベスト」 例) 「BESUT」→「BEST」 文字の入力状態にする。 文字の入力状態にする。 ディスク名を修正するとき P.59 操作 1 ∼ 3 ディスク名を修正するとき P.59 操作 1 ∼ 3 グループ名を修正するとき P.60 操作 1 ∼ 4 グループ名を修正するとき P.60 操作 1 ∼ 4 曲名を修正するとき P.60 操作 1 ∼ 3 曲名を修正するとき ...
-
Page 63: 他のMdからタイトルをスタンプする
MD-MT770 他の MD からタイトルをスタンプする ■ スタンプする前に ■ 文字情報をスタンプする 次のような、 同じ曲を録音したMDが2枚あるときは、 マスターMD マスター MD を入れる。 1枚目の MD (マスター MD) の文字情報 (ディスク名、 マスターMD グループ名、 曲名) を同時に、 もう1枚のMD (スタンプ用 マスター MD とスタンプ用 MD MD)に、スタンプすることができます。 の区別をつけておいてください。 1. マスター MD とは マスター MD 曲および文字情報の を押す。... - Page 64 MD-MT770 他の MD からタイトルをスタンプする(続き) マスターMD スタンプ用MD メニューの頭文字 を または スタンプ用MDを 入れる。 方 向 に 動 か ネーム して、 “N(NAME スタンプ メニューの内容 STAMP)” を選んで スタンプ用MD を押す。 (情報を記録してよいか どうかの確認表示です) を押す。 (情報を読み込んで 情報の記録が終わり、 よいかの確認表示です) 停止状態になります。 を押す。 (情報を読み込んでいます) (完了) マスターMDとスタンプ用MDの総曲数 (トラック数)が一致 していないときは、次のように表示され、電源が切れます。 このようなときは、編集操作で チェンジ...
-
Page 65: 1曲を消す(トラックイレース
MD-MT770 1 曲を消す (トラックイレース) 1 曲ずつ消すことができます。 を押す。 消したい曲の再生中に、 曲が消えます。 を 方向に動かして、一時停止にする。 消した曲以降の曲番は、 1つ ずつ小さくなります。 停止中に、 を または 方向に動かして、 選ぶこともできます。 メニューの選択は、25 秒以内に行ってください。 を押す。 操作中に、 を押すと1つ前の表示に戻ります。 メニュー選択モードになります。 操作を中止するには、 を 方向に動かしてください。 メニューの頭文字 を または 方向に動かして、 続けて他の曲を消すには エディット “E(EDIT)”を選んで 操作 1 ∼ 5 をくり返します。... -
Page 66: すべての曲を消す(オールイレース
MD-MT770 すべての曲を消す (オールイレース) 全曲を消すことができます。 を押す。 を押す。 停止中に、 すべての曲が消えます。 メニュー選択モードになります。 メニューの選択は、25 秒以内に行ってください。 メニューの頭文字 を または 操作中に、 を押すと1つ前の表示に戻ります。 方向に動かして、 操作を中止するには、 を 方向に動かしてくだ エディット “E ( E D I T ) ”を選んで さい。 を押す。 メニューの内容 を または メニューの頭文字 方向に動かして、 オール イレース “A(ALL ERASE)”を... -
Page 67: 曲を分ける(デバイド
MD-MT770 曲を分ける (デバイド) 1 つの曲を 2 つに分けることができます。 を押す。 再生中に、曲を分けたいところで、 曲が分けられ、 うしろの曲の を 方向に動かして、一時停止にする。 頭で一時停止状態になります。 分けた曲以降の曲番は、 1つ を押す。 ずつ大きくなります。 メニュー選択モードになります。 メニューの選択は、25 秒以内に行ってください。 メニューの頭文字 を または 操作中に、 を押すと1つ前の表示に戻ります。 方向に動かして、 操作を中止するには、 を 方向に動かしてくだ エディット さい。 “E(EDIT)”を選んで メニューの内容 を押す。 メニューの頭文字 を または 分ける曲に曲名がついているとき 方向に動かして、... -
Page 68: 曲をつなぐ(コンバイン
MD-MT770 曲をつなぐ (コンバイン) 連続した 2 つの曲を 1 つにつなぐことができます。 を押す。 つなぐ後ろの曲を再生中に、 曲がつながり、 つながった曲の頭で一時停止状態になります。 を 方向に動かして、 一時停止にする。 (操作 1 を停止中に行ったときは、停止状態になります。 ) 停止中に、 を または 方向に動かして、 つないだ曲以降の曲番は、 1つずつ小さくなります。 選ぶこともできます。 メニューの選択は、25 秒以内に行ってください。 操作中に、 を押すと1つ前の表示に戻ります。 を押す。 操作を中止するには、 を 方向に動かしてください。 メニュー選択モードになります。 メニューの頭文字 つなぐ曲に曲名がついているとき を または 曲名は、前の曲のものになります。ただし、前の曲に曲名... -
Page 69: 曲を移動する(ムーブ
MD-MT770 曲を移動する (ムーブ) 曲を希望する位置に移動することができます。 を または 移動したい曲の再生中に、 方向に動かして、 移動先を を 方向に動かして、 一時停止にする。 選ぶ。 停止中に、 を または 方向に動かして、 移動先の曲番(確認表示です) 選ぶこともできます。 を押す。 を押す。 曲が移動し、 その曲の頭で一時停止状態になります。 メニュー選択モードになります。 (1の操作を停止中に行ったときは、 停止状態になります。 ) を または 移動した曲以降の曲番は、 自動的に新しい曲番に メニューの頭文字 変わります。 方向に動かして、 エディット メニューの選択は、25 秒以内に行ってください。 “E(EDIT)”を選んで 操作中に、 を押すと1つ前の表示に戻ります。... -
Page 70: グループ録音したMdでは、さらにこんな編集ができます
MD-MT770 グループ録音した MD では、さらにこんな編集ができます グループネーム グループアレンジ ( P.60) ( P.75) グ ル ー プ 録 音 さ れ た グループ名をつけて探しやすくすることができます。 ノングループ ノン グループ1 グループ2 MDで、 ノングループの もちろんディスク名や曲名も入ります。 A曲 B曲 C曲 D曲 E曲 F曲G曲 H曲 I曲 J曲 K曲 P曲 曲が途中にあった場合 グループチェンジ... -
Page 71: 曲を別のグループに移動する(グループチェンジ
MD-MT770 曲を別のグループに移動する (グループチェンジ) ちがうグループに曲を移動することができます。 を または 移動したい曲の再生中に、 方向に動かして、移動先 を 方向に動かして、 一時停止にする。 のグループを選ぶ。 移動先のグループ(確認表示です) 停止中に、 を または 方向に動かして、 選ぶこともできます。 を押す。 を押す。 メニュー選択モードになります。 ちがうグループの最後に曲が移動し、 移動した曲の頭で メニューの頭文字 を または 一時停止状態になります。 ( 操作1を停止中に行ったとき は、停止状態になります。 ) 方向に動かして、 グループ “G(GROUP)”を選んで メニュー選択中は、 25秒以内に操作を行ってください。 を押す。 操作中に、 を押すと1つ前の表示に戻ります。 メニューの内容... -
Page 72: グループトップムーブ
MD-MT770 グループを先頭に移動する (グループトップムーブ) 録音したグループをMDの先頭に移動することができます。 を押す。 移動したいグループを選ぶ。 停止中に、 ( P.37) を押す。 グループが MD の先頭に移動します。 メニュー選択モードになります。 メニュー選択中は、 25秒以内に操作を行ってください。 メニューの頭文字 を または 操作中に、 を押すと1つ前の表示に戻ります。 方向に動かして、 操作を中止するには、 を 方向に動かしてくだ グループ さい。 “G(GROUP)”を選んで を押す。 メニューの内容 メニューの頭文字 を または 方向に動かして、 グループ トップムーブ “T(GrTOPMOVE)”を 選んで を押す。 メニューの内容 グループ名が記録されていると、グループトップ... -
Page 73: グループを消す(グループイレース
MD-MT770 グループを消す (グループイレース) グループ内の曲をまとめて消すことができます。 を押す。 消したいグループを選ぶ。 停止中に、 ( P.37) を押す。 選んだグループが消えます。 消したグループ以降のグループにグループ名がついて メニュー選択モードになります。 いないときは、グループ番号が 1 つずつ小さくなり メニューの頭文字 を または ます。 方向に動かして、 メニュー選択中は、 25秒以内に操作を行ってください。 グループ “G(GROUP)”を選んで 操作中に、 を押すと1つ前の表示に戻ります。 を押す。 操作を中止するには、 を 方向に動かしてくだ メニューの内容 さい。 を または メニューの頭文字 方向に動かして、 グループ アンド トラックイレース... -
Page 74: グループリザーブ
MD-MT770 録音する前にグループを作成する (グループリザーブ) あらかじめグループを作成し、 あとからそのグループの中 を 1 秒以上押す。 に録音することができます。 を押す。 停止中に、 メニュー選択モードになります。 メニューの頭文字 を または 作成したグループが表示され 方向に動かして、 ます。 グループ “G(GROUP)”を選んで メニューの選択は、25 秒以内に行ってください。 を押す。 メニューの内容 操作中に、 を押すと1つ前の表示に戻ります。 操作を中止するには、 を 方向に動かしてください。 メニューの頭文字 を または 方向に動かして、 グループ リザーブ 作成したグループに録音するには “R(GrRESERVE)”を 選んで を押す。 「グループを選んで録音するには」 (... -
Page 75: ノングループの曲をグループの後に移動する(グループアレンジ
MD-MT770 ノングループの曲をグループの後に移動する (グループアレンジ) グループ録音された MD で、ノングループの曲が途中に を押す。 あった場合は、ノングループの曲をグループの後に移動 することができます。 を押す。 停止中に、 ノングループの曲がグループの後に移動します。 メニュー選択モードになります。 メニューの頭文字 を または メニューの選択は、25 秒以内に行ってください。 操作中に、 を押すと1つ前の表示に戻ります。 方向に動かして、 グループ 操作を中止するには、 を 方向に動かしてくだ “G(GROUP)”を選んで さい。 を押す。 メニューの内容 メニューの頭文字 を または 方向に動かして、 グループ アレンジ “A(GrARRANGE)”を 選んで を押す。 メニューの内容 グループアレンジをすると、 ノングループの曲... -
Page 76: グループ情報を消去する(グループキャンセル
MD-MT770 グループ情報を消去する (グループキャンセル) グループ情報を全て消去することができます。 を押す。 グループ情報を消去すると、 グループ録音していないMDに なります。 を押す。 停止中に、 グループ情報がすべて消去されます。 メニュー選択モードになります。 メニューの選択は、25 秒以内に行ってください。 メニューの頭文字 を または 操作中に、 を押すと1つ前の表示に戻ります。 方向に動かして、 操作を中止するには、 を 方向に動かしてくだ グループ “G(GROUP)”を選んで さい。 を押す。 メニューの内容 メニューの頭文字 を または 方向に動かして、 グループ キャンセル “C(GrCANCEL)”を 選んで を押す。 メニューの内容 グループキャンセルすると全てのグループ情報 ご が消去されます。... -
Page 77: 誤動作防止について
MD-MT770 誤動作防止について 混雑した電車などで、誤って操作ボタンが押されても、現在の状態が変わらないようにすることができます。 (本体とリモコンは別々に機能します。 ) 本 体 リモコン ホールド HOLDスイッチを矢印の方向にずらす。 を 2 秒以上押す。 オレンジ色の印が 見えます。 ホールド設定 ホールド設定 ホールド解除 解除するには 電源が OFF の状態でも電池または AC アダプターが 矢印と反対の方向にずらします。 つながっている状態であれば設定できます。 解除するには 電源を切った状態でホールド設定をすれば、 誤って電源が 入ることなく、電池の消耗を防ぐことができます。 ホールド設定の状態で を 2 秒以上押す。... -
Page 78: 初期設定を変える
MD-MT770 初期設定を変える メニュー 設定項目 MD を入れる。 ( P.20) ビープ B(BEEP) Y(YES)※ N(NO) 停止中に、 を押す。 キータッチ音 鳴らす 消す オート プレイ メニュー選択モードになります。 A(AUTO PLAY) Y(YES)※ N(NO) オートプレイ 設定 解除 メニューの頭文字 を または パワー セーブ P(PowerSave) Y(YES)※ N(NO) 方向に動かして、 オートパワー 設定 解除 セットアップ “S ( S E T U P ) ”を選んで... - Page 79 MD-MT770 キータッチ音 デジタル録音レベルモード 操作したときに “ピッ” という音を鳴らさないようにする 「D.L 1」 :デジタル録音レベルを一度調整すると、 設定内容は、 ことができます。 録音を停止しても保持されます。 「D.L 2」 :録音を停止するごとに、 デジタル録音レベルは、 オートプレイ 「D.L 0dB」に戻ります。 MD を入れても、自動再生しないようにすることができます。 3 色 LED の照明および、 オートパワーセーブ リモコンのバックライト 振動が多い所で使用するときは、 解除すると音とびをしに 本体の3色LEDやリモコンの照明パターンを変更すること くくすることができます。 ができます。 (電池持続時間は短くなります。 ) 「NORM」 : 3 色 LED 常に点滅...
-
Page 80: 外部機器と接続する
MD-MT770 外部機器と接続する ステレオやラジカセで聞く 市販のヘッドホンで聞く 赤:右 (R) 白:左 (L) ライン入力 端子へ 付属の 直径3.5mm 接続コード ミニプラグ付 ヘッドホン 使用するヘッドホンによって、 電池持続時間が変わります。 他の機器で録音するときは、 この製品のキータッチ音を、 消しておいてください。 ( P.78) ヘッドホンは、直接本体につなぐこともできます。 キータッチ音を消さないと、 キータッチ音も録音され ます。 録音は、アナログ録音になります。 文字情報は記録されません。 別売品の光デジタルケーブルとデジタルサウンドカード お を使うと、 パソコンの音楽データをMDに録音すること 知 ができます。 ら せ... - Page 81 MD-MT770 外部機器と接続する カーステレオで聞く カー電源アダプターについて カ−電源で使用するときは、 別売のカー電源アダプター (AD-CA55X)が必要です。 指定以外のカー電源アダプターは使用しないでください。 カー電源アダプターで使用するときは、 充電池を取り 出してください。 充電池が入っていると、再生中に車のエンジンを“切” 別売の にしても再生が続き、本体の電源は切れません。 別売のカセット カー電源 アダプター アダプター (AD-CT13) ■ AD-CA55Xを使用すればこのような使いかたができ (AD-CA55X) ます。 1.再生中に車のエンジンキーを “切” にすると、 この 製品の電源も切れます。 (一部、切れない車種もあります。 ) 2.このあと、 エンジンキーを “入” にすると、 止めた DC IN 2V端子へ 曲の頭から再生が始まります。 音量は、 この製品とカーステレオの両方で調整してください。...
- Page 82 MD-MT770 外部機器と接続する(続き) パソコンで MD 本体を操作する 別売の MD-パソコン接続キットを使うことによって、 文字情報の書き込みや編集など、 MD本体の操作をパソコンで行う ことができます。 オプティカル ライン イン OPTICAL/LINE IN 端子へ 端子へ USB端子へ MD - パソコン 接続キット (別売品:AD-PCR3) 接続可能なパソコンの仕様は、あらかじめカタログなどでご確認ください。 パソコンで操作中は、本体表示部に“PC”と表示され、本体では操作できません。 パソコンでの操作を中止するときは、本体の停止ボタンを 1 秒以上押すと、本体で操作できるようになります。 接続や操作方法などくわしくは、 「AD-PCR3」の取扱説明書をごらんください。...
-
Page 83: 充電池について
充電池について MD-MT770 ニッケル水素充電池の特性について リサイクルご協力のお願い 充電式電池は、ニッケル水素電池を使用しています。 付属の充電池は、ニッケル水素充電池です。 この電池は、リサイクル可能な貴重な資源です。 はじめて充電するときや、長期間使用しなかったあと 電池の交換、 廃棄に際しては、 リサイクルにご協力くだ では、電池持続時間が短くなることがあります。 通常の使用時間に戻すには、充電と再生を 4 ∼ 5 回 さい。 くり返してください。 完全に消耗せずに充電をくり返すと、 電池持続時間が ニッケル水素電池の 短くなります。このことをメモリー効果といいます。 通常の使用時間に戻すために、 この製品では充電時に リサイクルマークです。 メモリー効果を読み取り、 必要に応じて自動的に充電池 を放電させることができます。 ( リフレッシュ P.17) Ni-MH 充電は5℃∼35℃の範囲で行ってください。 0℃以下では、充電状態に入らないことがあります。 ご使用済みの電池は、 「 当店は充電式電池のリサイクルに 協力しています。 」 のステッカーを貼ったシャープ商品... -
Page 84: 故障かな?」と思ったら
MD-MT770 「故障かな?」と思ったら 次のような場合は故障でないことがありますので、 修理を MD が取り出せない 依頼される前に、もう一度お調べください。 曲番や文字情報などの書き込み中では それでも具合の悪いときは、 94ページの 「保証とアフター エディット ありませんか。 ( “ T-EDIT” 表示) P.31 サービス」をごらんのうえ修理を依頼してください。 録音中、または編集中ではありませんか。 電源が入らない AC アダプターがはずれていませんか。 P.18 録音や編集ができない 電池が消耗していませんか。 P.16 MD が誤消去防止状態になっていませんか。 誤動作防止状態になっていませんか。 P.77 P.20 「つゆつき現象」がおきていませんか。 P.85 録音レベルが調整されていますか。 P.29 衝撃や静電気などの影響を受けていませんか。 P.85 他の機器と正しく接続されていますか。 P.22 録音中または編集中に、AC アダプターが... - Page 85 MD-MT770 「故障かな?」と思ったら 異常が起きたら つゆつき現象について この製品を使用中に、 衝撃、 過大な静電気、 または落雷に 次のような場合には、内部のレンズやディスクにつゆ よってコンセントから異常な電圧が流れた場合や、 誤った (水滴) がつくことにより、 正常な動作をしなくなること 操作をした場合などに、操作を受けつけなくなるなどの があります。 異常が発生することがあります。 暖房をつけた直後 このようなときには、次のようにしてください。 湯気や湿気が立ちこめている部屋に置いてあるとき 冷えた所から急に暖かい所に移動したとき AC アダプターをコンセントからはずす。 電池をはずす。 約 30 秒間そのままにしておく。 AC アダプターをコンセントにつないで操作する。 この製品をテレビ、スピーカーなど磁気の帯びた つゆを取るには ご ものの近くで使用したり、 放置しないでください。 注 MD を取り出して約 1 時間くらい置いておけば、つゆが 故障の原因となります。...
-
Page 86: こんな表示がでたら
MD-MT770 こんな表示がでたら 表 示 意 味 表 示 意 味 BLANK 音楽や文字情報が記録されていない Can'tSTAMP スタンプできない [録音された MD と取り換えてくだ [曲数を確かめてください] さい] Can'tW TOC 情報を正しく MD へ記録でき busy 曲を移動中 ない Can'tC コピー禁止のものから録音しようと 充電中に操作をしようとした した (本体に表示) 音楽以外(データなど)の信号を D-FULL MD に録音できる空きがない 録音しようとした DEFECT ディスクにキズがある [アナログ入力で録音してください] [再生した音が異常であれば録音を Can'tE 編集できない やり直すか他の録音用MDと取り換... - Page 87 MD-MT770 こんな表示がでたら 表 示 意 味 表 示 意 味 N-FULL ディスク名・グループ名・曲名が40 T Form ※ ディスクへ記録した情報に異常がある [すべての曲を消し、 録音をやり直して 文字をこえている ください] [ディスク名 ・ グループ名 ・ 曲名を短く してください] T-FULL 文字情報 (ディスク名・ グループ名・ 曲名など) または曲番情報を記録す NoDISC MD が入っていない る空きがない noSIG. デジタルケーブルの接続不良 TEMP! 温度が高くなりすぎた 再生する機器から出力信号が出ていない [電源を切ってしばらく休ませてくだ [再生する機器は AC 電源を使って...
-
Page 88: Mdのシステム上の制約
MD-MT770 MD のシステム上の制約 MDは録音方法や編集のしかたによって、 次のような症状が でることがありますが、故障ではありません。 MDに録音した時間と残りの時間の合計が最大録音 時間に一致しないことがある フル MD の最大録音時間に満たなくても“D-FULL” フル または“T-FULL”が表示されることがある 通常は、1 クラスタ(約 2 秒)を録音の最小単位と して録音されます。 これに満たない曲でも約 2 秒間 のスペースを使います。 録音時間に関係なく、 曲数が最大 (255 曲) になる たとえば、3 秒の曲でも 2 クラスタ(約 4 秒)の と録音できなくなります。 スペースを使います。 また、録音・編集をくり返した MD や MD にキズが... -
Page 89: 音楽著作権について
MD-MT770 音楽著作権について 放送やレコード、 ディスク、 テープなどの音楽作品は、 著作 権法によって保護されています。 録音された曲を早戻し・早送りすると、 音のとぎれ したがって、次のような場合には権利者の許諾が必要です。 が長いことがある ■放送やレコード、ディスク、テープなどから録音した テープ、MD を売る、配る、譲る、貸すときなど 録音・編集をくり返して行ったMD では、1 つの曲が ■営利 (店の BGMなど) のために、 レコード、 ディスク、 分散して記録されることがあるため、 早戻し・早送り テープなどを演奏するとき 中に音がとぎれることがあります。 くわしい内容や申請、 その他の手続きについては 「音楽 著作権協会」 の本部またはもよりの支部へお問い合わせ ください。 曲の途中で曲番がつくことがある この商品の価格には、著作権法の定めにより、 私的録音補償金が含まれています。 録音するMDにゴミやキズがあると、 曲番がつくこ お問い合わせ先: (社)私的録音補償金管理協会... -
Page 90: Mdについて
MD-MT770 MD について MD 自体はカートリッジに収納されていますので、 保管場所について ホコリ ・ キズ ・ 指紋などがつきにくく手軽に取り扱え 必ず専用ケースに入れて保管してください。 ます。 次のような所に置かないでください。 ただし、 カートリッジのすき間から入る砂ボコリや 直射日光が長時間あたる場所 (特に密閉した自動車内等) カートリッジのよごれなどが誤動作の原因となる 温度や湿度の高い所 こともありますので、 次のことに注意してください。 カートリッジの中に砂やホコリが入りやすい場所 (海辺 や砂地等) 取り扱いについて ■シャッターを開けてディスクに直接触れないで! ラベルを貼り付けるときのお願い ■MD は絶対に分解しないで! MD カートリッジにラベルを正しく貼り付けないと、MD ディスク が内部につまって取り出せなくなることがあります。 シャッター カートリッジ ラベルは指定の場所 (エリア内) に正しく貼ってくだ さい。... -
Page 91: 仕様について
MD-MT770 仕様について 仕様変更などにより、内容が一部異なることがあります。ご了承ください。 形式 ミニディスクデジタルオーディオシステム 録音方式 磁界変調オーバーライト方式 読み取り方式 非接触光学式読み取り方式(半導体レーザー使用) 回転数 約 400 ∼ 1,350rpm エラー訂正方式 アドバンスド クロス インターリーブ リードソロモン コード(ACIRC) ATRAC / ATRAC 3( Adaptive TRansform Acoustic Coding )24 ビット演算方式 音声圧縮伸長方式 チャンネル数 ステレオ 2 チャンネル/モノラル 1 チャンネル サンプリング周波数 44.1kHz (32kHz・48kHz は、44.1kHz に変換して録音)... - Page 92 MD-MT770 仕様について(続き) 電池持続時間 モード ステレオ 2 倍長時間 4 倍長時間 使用電池 付属充電池(フル充電)使用時 連続録音 連続再生 連続録音 連続再生 連続録音 連続再生 AD-N55BT 約 8 時間 約 13.5 時間 約 11 時間 約 16 時間 約 14 時間 約 18.5 時間 市販高容量単 3 アルカリ乾電池 連続録音...
-
Page 93: 別売品について
MD-MT770 別売品について お手入れについて この製品を正しく動作させるために、 別売品は指定のものをお使いください。 やわらかい布で軽くふきます。 汚れがひどいときは、 水にひたした布をよくしぼってふき AC アダプター 100V ∼ 240V ワールドワイド対応 取り、乾いた布で仕上げてください。 (AD-SS70AP) (コードの長さ:約 1.8m) 光デジタルケーブル 角形プラグ⇔ 3.5mm 丸形プラグ 接続端子やプラグが汚れていると接触不良の原因となります。 (AD-M1DC) (コードの長さ:約 1m) 定期的に綿棒で空拭きしてください。 光デジタルケーブル 3.5mm 丸形プラグ⇔ 3.5mm 丸形プラグ (水やアルコールは絶対に使わないでください。 ) (AD-M2DC) (コードの長さ:約 1m) デジタルサウンドカード ― (AD-AJ2)... -
Page 94: 保証とアフターサービス
MD-MT770 保証とアフターサービス 保証書(別添) 修理を依頼されるときは 持込修理 保証書は 「お買いあげ日・販売店名」 等の記入をお確か 「故障かな?」と思ったら(84 ∼ 85 ページ)を調べて めのうえ、販売店から受け取ってください。 ください。それでも異常があるときは、使用をやめて、 保証書は内容をよくお読みの後、 大切に保存してくだ 必ず AC アダプタ−をコンセントから抜き、充電池など さい。 をはずしてから、 お買いあげの販売店にご連絡ください。 保証期間 保証期間中 お買いあげの日から1年間です。 保証期間中でも有料に 修理に際しましては保証書をご提示ください。 なることがありますので、 保証書をよくお読みください。 保証書の規定に従って販売店が修理させていただきます。 補修用性能部品の保有期間 保証期間が過ぎているときは 当社は、 MDポータブルレコーダーの補修用性能部品を 製造打切後、8年保有しています。 修理すれば使用できる場合には、 ご希望により有料で修理 補修用性能部品とは、 その製品の機能を維持するために させていただきます。... -
Page 95: お客様ご相談窓口一覧表
シャープエンジニアリング株式会社 MD-MT770 シャープ製品の修理・お取扱い・お手入れについて 拠点名 電話番号 所 在 地 担当地域 C S セ ン タ ー のご相談ならびにご依頼はお買いあげの販売店へ ( 0 3 ) 5 6 9 2 - 7 7 2 2 群 馬 県 * 群 馬 前橋市問屋町1-3-7 ( 0 2 7 ) 2 5 2 - 4 7 0 6 なお、... - Page 96 修理ご相談窓口 修理ご相談窓口 シャープエンジニアリング株式会社 MD-MT770 所 在 地 担当地域 拠点名 電話番号 シャープエンジニアリング株式会社 C S セ ン タ ー ( 0 8 8 ) 8 8 2 - 4 0 2 1 高 知 県 担当地域 拠点名 電話番号 所 在 地 知 高知市高須960-1 *高 ( 0 8 8 ) 8 8 2 - 4 6 3 5 C S セ...
- Page 97 Do not insert a rechargeable battery (such as nickel-cadmium ACCESSORIES ( page 11) rechargeable battery) into the battery case. AC Adaptor x 1 Carrying Case x 1 Headphones x 1 Rechargeable Battery x 1 INSERTING A MINIDISC ( pages 20 – 21) Remote Control Unit x 1 Rechargeable Battery 1.
- Page 98 5. To perform group recording, hold down the GROUP button for 1 To turn off the power second or more. “GROUP” appears. Move the M button toward while in the stop mode. When the group recording is not performed, hold down the The unit is turned off after TOC information is recorded.
- Page 99 Playback of a group-recorded MD depends on the group mode To adjust the bass: settings shown below. 1. Press the M . When the group mode is selected The unit enters the menu select mode. (“GROUP” lights up.) 2. Move the M button toward 5 or 4 to select “B (BASS)” Playback of every group starts from the first track of the group.
- Page 100 To select a previous track number: 1 group/1 track repeat playback (1R R R R R ) While in the stop mode, move the M button toward 5 once. When the group mode is selected (“GROUP” lights up), the se- To select a following track number: lected group is played back repeatedly.
- Page 101 4. Move the M button toward 5 or 4 to adjust the recording 3. Move the M button toward 5 or 4 to select “A(AUTO)” and level. press it. 5. Set the connected equipment to the pause mode. Select the menu within 25 seconds. 6.
- Page 102 Changing intervals between tracks (Time Auto Mark) 7. Move the M button toward 06 . Be sure to use a plug-in power type microphone. 1. Press the M button while recording is paused or recording. A microphone which is activated by the power from the main The unit enters the menu select mode.
- Page 103 2. Hold down the MODE/-DISP button for 1 second or more. 5. Move the M button toward 5 or 4 to select the character The playing time of the selected track will be displayed. you want to enter. After displaying the playing time in step 2, just select the track 6.
- Page 104 To add a character: 5. After “READ OK” is displayed, press the M button. 1. Set the unit to the character input mode. 6. Make sure that “CHANGE MD” is displayed and remove the 2. Press the – or + to select the character on the right of the master MiniDisc from the unit.
- Page 105 4. Press the M button again. To cancel the operation, move the M button toward Select the menu within 25 seconds. Moving a track (MOVE) If you press the CLEAR button during this operation, the previ- You can move a track to the desired position. ous display appears.
- Page 106 If you press the CLEAR button during this operation, the previ- 2. Move the M button toward 5 or 4 to select “G (GROUP)” ous display appears. and press it. To cancel the operation, move the M button toward 3. Move the M button toward 5 or 4 to select “R (GrRESERVE)”...
- Page 107 3. Move the M button toward 5 or 4 to select “C (GrCANCEL)” Menu Item and press it. B(BEEP) Y(YES) N(NO) 4. Press the M button again. Key-touch sound Beep on Beep off Select the menu within 25 seconds. A(AUTO PLAY) Y(YES) N(NO) If you press the CLEAR button during this operation, the previ-...
- Page 108 お問い合わせは 北海道支店消費者相談室 近畿支店消費者相談室 この製品についてのご意見・ 札幌市西区二十四軒1条7丁目3-17 大阪市平野区加美南3-7-19 ご質問は、シャープ消費者 (011) 642-4649 (06)6794-7041 相談室、またはお客様ご相談 中国支店消費者相談室 窓口へお申し付けください。 広島市安佐南区西原2-13-4 東北支店消費者相談室 (くわしくは、95∼96ページ (082) 874-4649 仙台市若林区卸町東3-1-27 をごらんください。) (022) 288-9147 首都圏支店消費者相談室 東京都北区東田端2-13-17 九州支店消費者相談室 (03) 3893-4649 福岡市博多区井相田2-12-1 (092) 572-4655 沖縄消費者相談室 四国支店消費者相談室 中部支店消費者相談室 那覇市曙2-10-1 高松市朝日町6-2-8 名古屋市中川区山王3-5-5 (098)861-0866 (087)823-4901 (052) 332-4649 9906 本 ...