Table of Contents
Advertisement
Quick Links
Download this manual
See also:
Reference Manual
Advertisement
Table of Contents

Related Manuals for NEC INTELLIGENT L2 SWITCH N8406-022A


Summary of Contents for NEC INTELLIGENT L2 SWITCH N8406-022A
- Page 1 N8406-022A 1Gb Intelligent L2 Switch Application Guide Part number: 856-126757-106-00 First edition: July 2008...
- Page 2 © 2008 NEC Corporation. The information contained herein is subject to change without notice. The only warranties for NEC products and services are set forth in the express warranty statements accompanying such products and services. Nothing herein should be construed as constituting an additional warranty.
-
Page 3: Table Of Contents
Default configuration ... 10 User configuration ... 10 View based configurations ... 11 Configuring SNMP trap hosts... 12 Secure access to the switch ... 14 Setting allowable source IP address ranges ... 14 RADIUS authentication and authorization... 14 TACACS+ authentication ... 18 Secure Shell and Secure Copy ... - Page 4 Configuring Port Mirroring (AOS CLI example)... 91 Configuring Port Mirroring (BBI example) ... 92 Other network troubleshooting techniques ... 94 Console and Syslog messages... 94 Ping ... 94 Trace route... 94 Statistics and state information ... 94 Accessing the switch 4...
- Page 5 Customer support tools ... 94 Accessing the switch 5...
-
Page 6: Accessing The Switch Introduction
Accessing the switch Introduction This guide describes how to use and configure the switch on the Layer2 switch mode. For the information of how to use on the SmartPanel mode, see the SmartPanel Reference Guide. For the information of SSH, RADIUS, and TACACS+ on the SmartPanel mode, this guide will help you. -
Page 7: Management Network
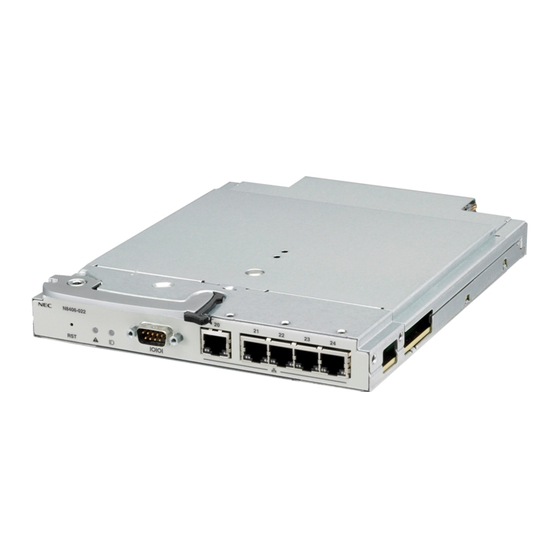
Connecting through the console port Using a null modem cable, you can directly connect to the switch through the console port. A console connection is required in order to configure Telnet or other remote access applications. For more information on establishing console connectivity to the switch, see the User’s Guide. -
Page 8: Using The Command Line Interfaces
Configuring an IP interface An IP interface address must be set on the switch to provide management access to the switch over an IP network. By default, the management interface is set up to request its IP address from a DHCP server on the Enclosure Manager Card. -
Page 9: Using The Browser-Based Interface
The SNMP manager should be able to reach the management interface or any one of the IP interfaces on the switch. For the SNMP manager to receive the traps sent out by the SNMP agent on the switch, the trap host on the switch should be configured with the following command: /cfg/sys/ssnmp/snmpv3/taddr For more details, see “Configuring SNMP trap hosts”. -
Page 10: Snmp V3.0
For more information on SNMP MIBs and the commands used to configure SNMP on the switch, see the Command Reference Guide. Default configuration The switch software has two users by default. Both the users 'adminmd5' and 'adminsha' have access to all the MIBs supported by the switch. username 1: adminmd5/password adminmd5. Authentication used is MD5. -
Page 11: View Based Configurations
" 1.3.6.1.4.1.11.2.3.7.11.33.1.2.1.2" /c/sys/ssnmp/snmpv3/view 21 name "oper" tree " 1.3.6.1.4.1.11.2.3.7.11.33.1.2.1.3" /c/sys/ssnmp/snmpv3/view 22 name "oper" tree " 1.3.6.1.4.1.11.2.3.7.11.33.1.2.2.2" /c/sys/ssnmp/snmpv3/view 23 name "oper" tree " 1.3.6.1.4.1.11.2.3.7.11.33.1.2.2.3" /c/sys/ssnmp/snmpv3/view 24 name "oper" tree " 1.3.6.1.4.1.11.2.3.7.11.33.1.2.3.2" /c/sys/ssnmp/snmpv3/view 25 name "oper" tree " 1.3.6.1.4.1.11.2.3.7.11.33.1.2.3.3" Accessing the switch 11... -
Page 12: Configuring Snmp Trap Hosts
Configure an access group and group table entries for the user. The command /c/sys/ssnmp/snmpv3/access <x>/nview can be used to specify which traps can be received by the user. In the example below the user will receive the traps sent by the switch. /c/sys/ssnmp/snmpv3/access 10 name "v1trap"... -
Page 13: Snmpv2 Trap Host Configuration
/c/sys/ssnmp/snmpv3/taddr 11 name v3trap addr 47.81.25.66 taglist v3trap pname v3param /c/sys/ssnmp/snmpv3/tparam 11 name v3param uname v3trap level authNoPriv /c/sys/ssnmp/snmpv3/notify 11 name v3trap tag v3trap For more information on using SNMP, see the Command Reference Guide. Accessing the switch 13... -
Page 14: Secure Access To The Switch
If the source IP address of the host or hosts is within this range, it is allowed to attempt to log in. Any packet addressed to a switch IP interface with a source IP address outside this range is discarded. -
Page 15: How Radius Authentication Works
Using Authentication/Authorization protocol, the switch sends the request to the authentication server. The authentication server checks the request against the user ID database. Using RADIUS protocol, the authentication server instructs the switch to grant or deny administrative access. Configuring RADIUS on the switch (AOS CLI example) To configure RADIUS on the switch, do the following: Turn RADIUS authentication on, and then configure the Primary and Secondary RADIUS servers. - Page 16 Configuring RADIUS on the switch (BBI example) Configure RADIUS parameters. Click the Configure context button. Open the System folder, and select Radius. Open Select Enter the IP address of the primary and secondary RADIUS servers, and enter the RADIUS secret for each server.
-
Page 17: Radius Authentication Features
Retries = 1-3 • The switch will time out if it does not receive a response from the RADIUS server in one to three retries. The switch will also automatically retry connecting to the RADIUS server before it declares the server down. -
Page 18: Tacacs+ Authentication
Authentication is the action of determining the identity of a user, and is generally done when the user first attempts to log in to a device or gain access to its services. Switch software supports ASCII inbound login to the device. PAP, CHAP and ARAP login methods, TACACS+ change password requests, and one-time password authentication are not supported. - Page 19 (user, oper, admin, none). If the remote user is authenticated by the authentication server, the switch verifies the privileges of the remote user and authorizes the appropriate access. When both the primary and secondary authentication servers are not reachable, the administrator has an option to allow backdoor access via the console only or console and Telnet access.
- Page 20 Configuring TACACS+ authentication on the switch (AOS CLI example) Turn TACACS+ authentication on, then configure the Primary and Secondary TACACS+ servers. >> Main# /cfg/sys/tacacs >> TACACS+ Server# on Current status: OFF New status: ON >> TACACS+ Server# prisrv 10.10.1.1 Current primary TACACS+ server: 0.0.0.0 New pending primary TACACS+ server: 10.10.1.1...
- Page 21 Configuring TACACS+ authentication on the switch (BBI example) Configure TACACS+ authentication for the switch. Click the Configure context button. Open the System folder, and select Tacacs+. Open Select Enter the IP address of the primary and secondary TACACS+ servers, and enter the TACACS+ secret.
- Page 22 Configure custom privilege-level mapping (optional). Click Submit to accept each mapping change. Apply, verify, and save the configuration. 1. Apply 2. Verify 3. Save Accessing the switch 22...
-
Page 23: Secure Shell And Secure Copy
Telnet does not provide this level of security. The Telnet method of managing a switch does not provide a secure connection. SSH is a protocol that enables remote administrators to log securely into the switch over a network to execute management commands. By default, SSH is disabled (off) on the switch. -
Page 24: Using Ssh And Scp Client Commands
<user>@<switch IP address> For example: >> # ssh admin@205.178.15.157 Downloading configuration from the switch using SCP Enter the following command to download the switch configuration using SCP. You will be prompted for a password: scp <user>@<switch IP address>:getcfg <local filename> For example: >>... -
Page 25: Ssh And Scp Encryption Of Management Messages
SSH and SCP encryption of management messages The following encryption and authentication methods are supported for SSH and SCP: • Server Host Authentication — Client RSA authenticates the switch at the beginning of every connection • Key Exchange — RSA •... -
Page 26: Generating Rsa Host And Server Keys For Ssh Access
To support the SSH server feature, two sets of RSA keys (host and server keys) are required. The host key is 1024 bits and is used to identify the switch. The server key is 768 bits and is used to make it impossible to decipher a captured session by breaking into the switch at a later time. -
Page 27: User Access Control
User access control The switch allows an administrator to define end user accounts that permit end users to perform limited actions on the switch. Once end user accounts are configured and enabled, the switch requires username/password authentication. For example, an administrator can assign a user who can log into the switch and perform operational commands (effective only until the next switch reboot). -
Page 28: Ports And Trunking Introduction
Ports and trunking Introduction The first part of this chapter describes the different types of ports used on the switch. This information is useful in understanding other applications described in this guide, from the context of the embedded switch/server environment. -
Page 29: Statistical Load Distribution
In a configured trunk group containing more than one port, the load distribution is determined by information embedded within the data frame. For IP traffic, the switch will calculate the trunk port to use for forwarding traffic by implementing the load distribution algorithm on value equals to modulus of (XOR of last 3 bits of Source and last 3 bits of Destination IP address). -
Page 30: Port Trunking Example
Port trunking example In this example, the Gigabit uplink ports on each switch, and the crosslink ports are configured into a total of five trunk groups: two on each switch, and one trunk group at the crosslink between the two switches. All ports operate at Gigabit Ethernet speed. -
Page 31: Configuring Trunk Groups (Aos Cli Example)
Connection problems could arise when using automatic trunk group negotiation on the third-party device. Examine the trunking information on each switch using the following command: >> /info/l2/trunk Information about each port in each configured trunk group will be displayed. Make sure that trunk groups consist of the expected ports and that each port is in the expected state. -
Page 32: Configuring Trunk Groups (Bbi Example)
Configuring trunk groups (BBI example) Configure trunk groups. Click the Configure context button on the Toolbar. Open the Layer 2 folder, and select Trunk Groups. Open Select Click a Trunk Group number to select it. Ports and trunking 32... - Page 33 Enable the Trunk Group. To add ports, select each port in the Ports Available list, and click Add Click Submit. Apply, verify, and save the configuration. Examine the trunking information on each switch. Click the Dashboard context button on the Toolbar. 1. Apply 2.
-
Page 34: Configurable Trunk Hash Algorithm
Configurable Trunk Hash algorithm This feature allows you to configure the particular parameters for the switch Trunk Hash algorithm instead of having to utilize the defaults. You can configure new default behavior for Layer 2 traffic and Layer 3 traffic, using the CLI menu cfg/l2/thash. -
Page 35: Link Aggregation Control Protocol
In the configuration shown in the table above, Actor switch ports 20 and 21 aggregate to form an LACP trunk group with Partner switch ports 1 and 2. At the same time, Actor switch ports 22 and 23 form a different LACP trunk group with a different partner. -
Page 36: Configuring Lacp
Configuring LACP Use the following procedure to configure LACP for port 20 and port 21 to participate in link aggregation. Set the LACP mode on port 20. >> # /cfg/l2/lacp/port 20 >> LACP port 20# mode active Define the admin key on port 20. Only ports with the same admin key can form a LACP trunk group. >>... -
Page 37: Vlans Introduction
With network segmentation, each switch port connects to a segment that is a single broadcast domain. When a switch port is configured to be a member of a VLAN, it is added to a group of ports (workgroup) that belongs to one broadcast domain. -
Page 38: Viewing And Configuring Pvids
>> Port 22# Each port on the switch can belong to one or more VLANs, and each VLAN can have any number of switch ports in its membership. Any port that belongs to multiple VLANs, however, must have VLAN tagging enabled. See the “VLAN tagging”... - Page 39 Figure 3 Port-based VLAN assignment As shown in the following figure, the untagged packet is marked (tagged) as it leaves the switch through port 5, which is configured as a tagged member of VLAN 2. The untagged packet remains unchanged as it leaves the switch through port 7, which is configured as an untagged member of VLAN 2.
- Page 40 Figure 5 802.1Q tag assignment As shown in the following figure, the tagged packet remains unchanged as it leaves the switch through port 5, which is configured as a tagged member of VLAN 2. However, the tagged packet is stripped (untagged) as it leaves the switch through port 7, which is configured as an untagged member of VLAN 2.
-
Page 41: Vlans And Ip Interfaces
For example, if all IP interfaces are left on VLAN 1 (the default), and all ports are configured for VLAN 2, and then switch management features are effectively cut off. To remedy this, keep all ports used for remote switch management on the default VLAN and assign an IP interface to the default VLAN. -
Page 42: Multiple Vlans With Tagging
Multiple VLANS with tagging The following figure shows only those switch port to server links that must be configured for the example. While not shown, all other server links remain set at their default settings. Figure 7 Multiple VLANs with VLAN tagging... -
Page 43: Configuring The Example Network
Server 1 and PC 3. Via VLAN 2, it can communicate with Server 1, PC 1, and PC 3. The Layer 2 switch port to which it is connected is configured for both VLAN 1 and VLAN 2 and has tagging enabled. - Page 44 Configuring ports and VLANs on Switch 2 (AOS CLI example) To configure ports and VLANs on Switch 2, do the following: On Switch 2, enable VLAN tagging on the necessary ports. Port 4 (connection to server 2) remains untagged, so it is not configured below.
- Page 45 To configure ports and VLANs on Switch 1, do the following: On the switch 1, enable VLAN tagging on the necessary ports. Click the Configure context button on the Toolbar. Open the Switch folder, and select Switch Ports (click the underlined text, not the folder). Open Select...
- Page 46 Click a port number to select it. Enable the port and enable VLAN tagging. Click Submit. VLANs 46...
- Page 47 Configure the VLANs and their member ports. Open the Virtual LANs folder, and select Add VLAN. Open Select Enter the VLAN name, VLAN ID number, and enable the VLAN. To add ports, select each port in the Ports Available list and click Add. Since all ports are configured for VLAN 1 by default, configure only those ports that belong to VLAN 2.
-
Page 48: Fdb Static Entries
Static entries in the Forwarding Database (FDB) allow the switch to forward packets without flooding ports to perform a lookup. A FDB static entry is a MAC address associated with a specific port and VLAN. The switch supports 128 static entries. Static entries are manually configured, using the /cfg/l2/fdb/static command. -
Page 49: Spanning Tree Protocol Introduction
If the ports are tagged, each port sends out a special BPDU containing the tagged information. The generic action of a switch on receiving a BPDU is to compare the received BPDU to its own BPDU that it will transmit. -
Page 50: Spanning Tree Group Configuration Guidelines
Default Spanning Tree configuration In the default configuration, a single STG with the ID of 1 includes all ports except Port 19 on the switch. It is called the default STG. All other STGs (except the default STG) are empty, and VLANs must be added by the user. -
Page 51: Adding And Removing Ports From Stgs
The following figure shows a simple example of why we need multiple Spanning Trees. This example assumes that port 17 and 18 are not part of Trunk Group 1. Two VLANs (VLAN 1 and VLAN 2) exist between Switch 1 and Switch 2. -
Page 52: Vlan Participation In Spanning Tree Groups
VLAN participation in Spanning Tree Groups The following table shows which switch ports participate in each Spanning Tree Group. By default, server ports (ports 1-16) do not participate in Spanning Tree, even though they are members of their respective VLANs. - Page 53 Configuring Switch 1 (AOS CLI example) Configure port and VLAN membership on Switch 1 as described in the “Configuring ports and VLANs on Switch 1 (AOS CLI example)” section, in the “VLANs” chapter of this guide. Add VLAN 2 to Spanning Tree Group 2.
-
Page 54: Port Fast Forwarding
Enter the Spanning Tree Group number and set the Switch Spanning Tree State to on. To add a VLAN to the Spanning Tree Group, select the VLAN in the VLANs Available list, and click Add. VLAN 2 is automatically removed from Spanning Tree Group 1. -
Page 55: Configuring Port Fast Forwarding
Fast Uplink Convergence Fast Uplink Convergence enables the switch to quickly recover from the failure of the primary link or trunk group in a Layer 2 network using Spanning Tree Protocol. Normal recovery can take as long as 60 seconds, while the backup link transitions from Blocking to Listening to Learning and then Forwarding states. -
Page 56: Rstp And Mstp Introduction
There are new STP parameters to support RSTP, and some values to existing parameters are different. RSTP is compatible with devices that run 802.1D Spanning Tree Protocol. If the switch detects 802.1D BPDUs, it responds with 802.1D-compatible data units. RSTP is not compatible with Per VLAN Spanning Tree (PVST) protocol. -
Page 57: Rstp Configuration Guidelines
The other STP Groups (2-32) are turned off. RSTP configuration example This section provides steps to configure Rapid Spanning Tree on the switch, using the Command Line Interface (CLI) or the Browser-based Interface (BBI). Configuring Rapid Spanning Tree (CLI example) Configure port and VLAN membership on the switch, as described in the “Configuring ports and VLANs (CLI... - Page 58 Open the MSTP/RSTP folder, and select General. Open Select Select RSTP mode, and set the MSTP/RSTP state to ON. Click Submit. Apply, verify, and save the configuration. 1. Apply 2. Verify 3. Save RSTP and MSTP 58...
-
Page 59: Multiple Spanning Tree Protocol
The Common Internal Spanning Tree (CIST) provides a common form of Spanning Tree Protocol, with one Spanning Tree instance that can be used throughout the MSTP region. CIST allows the switch to interoperate with legacy equipment, including devices that run IEEE 802.1D (STP). - Page 60 >> Spanning Tree Group 2# apply Configuring Multiple Spanning Tree Protocol (BBI example) Configure port and VLAN membership on the switch, as described in the “Configuring ports and VLANs (BBI example)” section in the “VLANs” chapter of this guide. Configure MSTP general parameters.
- Page 61 Configure Common Internal Spanning Trees (CIST) bridge parameters. Open the MSTP/RSTP folder, and select CIST-Bridge. Open Select Enter the Bridge Priority, Maximum Age, and Forward Delay values. Click Submit. RSTP and MSTP 61...
- Page 62 Configure Common Internal Spanning Tree (CIST) port parameters. Open the MSTP/RSTP folder, and select CIST-Ports. Open Select Click a port number to select it. RSTP and MSTP 62...
- Page 63 Enter the Port Priority, Path Cost, and select the Link Type. Set the CIST Port State to ON. Click Submit. Apply, verify, and save the configuration. 1. Apply 2. Verify 3. Save RSTP and MSTP 63...
-
Page 64: Igmp Snooping Introduction
The switch currently supports snooping for IGMP version 1 and version 2. The switch can sense IGMP Membership Reports from attached host servers and act as a proxy to set up a dedicated path between the requesting host and a local IP Multicast router. After the pathway is established, the switch blocks the IP Multicast stream from flowing through any port that does not connect to a host member, thus conserving bandwidth. -
Page 65: Igmp Filtering
IGMP Snooping. A total of eight static Mrouters can be configured on the switch. A port that belongs to a trunk group cannot accept a static Mrouter, only Mrouters learned through IGMP Snooping. - Page 66 View dynamic IGMP information. >> /info/l3/igmp >> IGMP Multicast# dump >> Switch-A - IGMP Multicast# dump Group ----------- 238.1.0.0 238.1.0.1 >> IGMP Multicast# mrouter >> IGMP Multicast Router# dump VLAN ---------- These commands display information about IGMP Groups and Mrouters learned through IGMP Snooping.
- Page 67 >> Static Multicast Router# cur >> Static Multicast Router# save Configuring IGMP Snooping (BBI example) Configure port and VLAN membership on the switch, as described in the “Configuring ports and VLANs (BBI example)” section in the “VLANs” chapter. Configure IGMP Snooping.
- Page 68 Enable IGMP Snooping. Click Submit. Apply, verify, and save the configuration. 1. Apply 2. Verify 3. Save IGMP Snooping 68...
- Page 69 Configuring IGMP Filtering (BBI example) Configure IGMP Snooping. Enable IGMP Filtering. Click the Configure context button. Open the IGMP folder, and select IGMP Filters (click the underlined text, not the folder). Open Select Enable IGMP Filtering globally. Click Submit. IGMP Snooping 69...
- Page 70 Define the IGMP Filter. Select Layer 3 > IGMP > IGMP Filters > Add Filter. Open Select Enable the IGMP Filter. Assign the range of IP multicast addresses and the filter action (allow or deny). Click Submit. IGMP Snooping 70...
- Page 71 Assign the filter to a port and enable IGMP Filtering on the port. Select Layer 3 > IGMP > IGMP Filters > Switch Ports. Open Select Select a port from the list. IGMP Snooping 71...
- Page 72 Enable IGMP Filtering on the port. Select a filter in the IGMP Filters Available list, and click Add. Click Submit. Apply, verify, and save the configuration. 1. Apply 2. Verify 3. Save IGMP Snooping 72...
- Page 73 Configuring a Static Multicast Router (BBI example) Configure Static Mrouter. Click the Configure context button. Open the Switch folder and select IP Menu > IGMP > IGMP Static MRouter. Enter a port number, VLAN ID number, and IGMP version number. Click Submit.
-
Page 74: Remote Monitoring Introduction
Creates and triggers alarms for user-defined events Overview The RMON MIB provides an interface between the RMON agent on the switch and an RMON management application. The RMON MIB is described in RFC 1757. The RMON standard defines objects that are suitable for the management of Ethernet networks. The RMON agent continuously collects statistics and proactively monitors switch performance. - Page 75 Configuring RMON Statistics (BBI example) Configure ports. Click the Configure context button. Select Switch Ports (click the underlined text, not the folder). Open Select (Select Port 23 Stats) 7305626 48686 4380 6612 27445 12253...
- Page 76 Select a port. Enable RMON on the port. Remote monitoring 76...
-
Page 77: Rmon Group 2 - History
Ethernet statistics, and places them into a bucket. History data buckets reside in dynamic memory. When the switch is re-booted, the buckets are emptied. Requested buckets (/cfg/rmon/hist x/rbnum) are the number of buckets, or data slots, requested by the user for each History Group. - Page 78 Configure RMON History (BBI example) Configure an RMON History group. Click the Configure context button. Open the Switch folder, and select RMON > History > Add History Group. Open Select Configure RMON History Group parameters. Click Submit. Apply, verify, and save the configuration.
-
Page 79: Rmon Group 3 - Alarms
For example, you can configure the switch to issue an alarm if more than 1,000 CRC errors occur during a 10-minute time interval. The switch supports up to 30 RMON Alarm groups. - Page 80 >> RMON Alarm 5# apply >> RMON Alarm 5# save This configuration creates an RMON alarm that checks icmpInEchos on the switch once every minute. If the statistic exceeds 200 within a 60 second interval, an alarm is generated that triggers event index 5.
- Page 81 Configure RMON Alarm Group parameters to check ifInOctets on port 19 once every hour. Enter a rising limit of two billion, and a rising event index of 6. This configuration creates an RMON alarm that checks ifInOctets on port 19 once every hour. If the statistic exceeds two billion, an alarm is generated that triggers event index 6. Click Submit.
- Page 82 200, and a rising event index of 5. This configuration creates an RMON alarm that checks icmpInEchos on the switch once every minute. If the statistic exceeds 200 within a 60 second interval, an alarm is generated that triggers event index 5.
-
Page 83: Rmon Group 9 - Events
The RMON Event group allows you to define events that are triggered by alarms. An event can be a log message, an SNMP trap message, or both. The switch supports up to 30 RMON Event groups. When an alarm is generated, it triggers a corresponding event notification. Use the /cfg/rmon/alarm x/revtidx and /fevtidx commands to correlate an event index to an alarm. - Page 84 Configuring RMON Events (BBI example) Configure an RMON Event group. Click the Configure context button. Open the Switch folder, and select RMON > Event > Add Event Group. Open Select Configure RMON Event Group parameters. This configuration creates an RMON event that sends a SYSLOG message each time it is triggered by an alarm.
-
Page 85: High Availability Introduction
The following figure shows a basic UFD configuration, with a Failure Detection Pair (FDP) that consists of one LtM (Link to Monitor) and one LtD (Link to Disable). When the switch detects a link failure in the LtM, it disables the ports in the LtD. -
Page 86: Failure Detection Pair
Spanning Tree Protocol with UFD If Spanning Tree Protocol (STP) is enabled on ports in the LtM, then the switch monitors the STP state and the link status on ports in the LtM. The switch automatically disables the ports in the LtD when it detects a link failure or STP Blocking state. -
Page 87: Monitoring Uplink Failure Detection
The port 1 of the NIC on the CPU blade server 1 and the CPU blade server 2 are connected to port 1 and port 2 on the Switch 1. The port 2 of the NIC on the CPU blade server 1 and the CPU blade server 2 are connected to port 1 and port 2 on the Switch 2. - Page 88 >> Uplink Failure Detection# apply (Make your changes active) >> Uplink Failure Detection# save When a link failure or Spanning Tree blocking occurs on trunk group 2, Switch 2 disables port 1 and port 2. Configuring Uplink Failure Detection (BBI example) Configure Uplink Failure Detection.
- Page 89 Enable the FDP. Select ports in the LtM Ports Available list, and click Add to place the ports into the Link to Monitor (LtM). Select ports in the LtD Ports Available list, and click Add to place the ports into the Link to Disable (LtD).
-
Page 90: Troubleshooting Tools Introduction
As shown in the following figure, port 20 is monitoring ingress traffic (traffic entering the switch) on port 23 and egress traffic (traffic leaving the switch) on port 1. You can attach a device to port 20 to monitor the traffic on ports 23 and 1. -
Page 91: Configuring Port Mirroring (Aos Cli Example)
Configuring Port Mirroring (AOS CLI example) To configure Port Mirroring for the example shown in the preceding figure: Specify the monitoring port. >> # /cfg/pmirr/monport 20 Select the ports that you want to mirror. >> Port 20 # add 23 >>... -
Page 92: Configuring Port Mirroring (Bbi Example)
Configuring Port Mirroring (BBI example) Configure Port Mirroring. Click the Configure context button. Open the Switch folder, and select Port-Based Port Mirroring (click the underlined text, not the folder). Open Select Click a port number to select a monitoring port. - Page 93 Enter a port number for the mirrored port, and select the Port Mirror Direction. Click Submit. Apply, verify, and save the configuration. Verify the Port Mirroring information on the switch. 1. Apply 2. Verify 3. Save Troubleshooting tools 93...
-
Page 94: Other Network Troubleshooting Techniques
Statistics and state information The switch keeps track of a large number of statistics and many of these are error condition counters. The statistics and state information can be very useful when troubleshooting a LAN or Real Server problem. For more information about available statistics, see one of the following: •...