Table of Contents
Advertisement
HP StorageWorks
X9300 Network Storage Gateway
Administrator Guide
Abstract
This guide describes tasks related to cluster configuration and monitoring, system upgrade and recovery, hardware component
replacement, and troubleshooting. It does not document X9000 file system features or standard Linux administrative tools and
commands. For information about configuring and using X9000 Software file system features, see the HP StorageWorks X9000
File Serving Software File System User Guide.
This guide is intended for system administrators and technicians who are experienced with installing and administering networks,
and with performing Linux operating and administrative tasks.
HP Part Number: AW539-96006
Published: April 201 1
Edition: Sixth
Advertisement
Table of Contents
Troubleshooting

Related Manuals for HP StorageWorks x9300


Summary of Contents for HP StorageWorks x9300
- Page 1 It does not document X9000 file system features or standard Linux administrative tools and commands. For information about configuring and using X9000 Software file system features, see the HP StorageWorks X9000 File Serving Software File System User Guide.
- Page 2 The information contained herein is subject to change without notice. The only warranties for HP products and services are set forth in the express warranty statements accompanying such products and services. Nothing herein should be construed as constituting an additional warranty. HP shall not be liable for technical or editorial errors or omissions contained herein.
-
Page 3: Table Of Contents
Contents 1 Product description..................9 HP X9300 Network Storage Gateway features................9 System components........................9 HP X9000 Software features....................10 High availability and redundancy.....................10 2 Getting started..................12 Setting up the X9300 Network Storage Gateway................12 Installation steps........................12 Additional configuration steps.....................12 Management interfaces......................13 Using the GUI........................13 Customizing the GUI......................16... - Page 4 Identifying standby-paired HBA ports................32 Turning HBA monitoring on or off..................32 Deleting standby port pairings..................32 Deleting HBAs from the configuration database..............32 Displaying HBA information....................32 Checking the High Availability configuration.................33 5 Configuring cluster event notification............35 Setting up email notification of cluster events................35 Associating events and email addresses................35 Configuring email notification settings..................35 Turning email notifications on or off..................35...
- Page 5 Viewing operating statistics for file serving nodes................51 9 Maintaining the system................53 Shutting down the system......................53 Shutting down the X9000 Software..................53 Powering off the hardware....................53 Starting the system........................53 Starting the X9000 Software....................53 Powering file serving nodes on or off..................54 Performing a rolling reboot......................54 Starting and stopping processes....................55 Tuning file serving nodes and X9000 clients................55 Migrating segments........................56...
- Page 6 Starting the recovery.......................88 Configuring a file serving node using the original template............89 Completing the restore on a file serving node................92 Configuring a file serving node manually...................93 17 Support and other resources..............102 Contacting HP........................102 Related information.......................102 HP websites........................103 Rack stability........................103 Customer self repair......................103 Product warranties........................103...
- Page 7 1 GbE (AW539A) ......................107 1 GbE (AW539B) ......................108 10 GbE spare parts......................109 10 GbE (AW540A) ......................109 10 GbE/IB (AW540B) .....................110 IB (AW541A) ........................111 Base rack (AW546A) ......................112 C Warnings and precautions..............114 Electrostatic discharge information..................114 Grounding methods......................114 Equipment symbols.......................114 Rack warnings and precautions....................115 Device warnings and precautions...................115 D Regulatory compliance and safety............117 Regulatory compliance identification numbers................117...
- Page 8 Lithuanian notice......................125 Polish notice........................125 Portuguese notice......................125 Slovakian notice......................126 Slovenian notice......................126 Spanish notice.........................126 Swedish notice........................126 Glossary....................127 Index.......................129 Contents...
-
Page 9: Product Description
1 Product description The HP X9300 Network Storage Gateway is a flexible, scale-out solution that brings feature-rich gateway file services to HP MSA, EVA, P4000, or 3rd-party arrays or SANs. HP X9300 Network Storage Gateway features The X9300 Network Storage Gateway provides the following features:... -
Page 10: Hp X9000 Software Features
104). HP X9000 Software features HP X9000 Software is a scale-out, network-attached storage solution composed of a parallel file system for clusters, an integrated volume manager, high-availability features such as automatic failover of multiple components, and a centralized management interface. X9000 Software can be deployed in environments scaling to thousands of nodes. - Page 11 Network interface. The IP address of a failed network interface is transferred to a standby network interface until the original network interface is operational again. Storage connection. For servers with HBA-protected Fibre Channel access, failure of the HBA triggers failover of the node to a designated standby server. High availability and redundancy...
-
Page 12: Getting Started
IMPORTANT: Do not modify any parameters of the operating system or kernel, or update any part of the X9300 Network Storage Gateway unless instructed to do so by HP; otherwise, the X9300 Network Storage Gateway could fail to operate properly. -
Page 13: Management Interfaces
File allocation. Use this feature to specify the manner in which segments are selected for storing new files and directories. For more information about these file system features, see the HP StorageWorks File Serving Software File System User Guide. Management interfaces Cluster operations are managed through the X9000 Software management console, which provides both a GUI and a CLI. - Page 14 The GUI dashboard opens in the same browser window. You can open multiple GUI windows as necessary. See the online help for information about all GUI displays and operations. The GUI dashboard enables you to monitor the entire cluster. There are three parts to the dashboard: System Status, Cluster Overview, and the Navigator.
- Page 15 System Status The System Status section lists the number of cluster events that have occurred in the last 24 hours. There are three types of events: Alerts. Disruptive events that can result in loss of access to file system data. Examples are a segment that is unavailable or a server that cannot be accessed.
-
Page 16: Customizing The Gui
Navigator The Navigator appears on the left side of the window and displays the cluster hierarchy. You can use the Navigator to drill down in the cluster configuration to add, view, or change cluster objects such as file systems or storage, and to initiate or view tasks such as snapshots or replication. When you select an object, a details page shows a summary for that object. -
Page 17: Adding User Accounts For Gui Access
The administrative commands described in this guide must be executed on the management console host and require root privileges. The commands are located in $IBRIXHOME bin. For complete information about the commands, see the HP StorageWorks X9000 File Serving Software CLI Reference Guide. -
Page 18: X9000 Software Manpages
Status. Shows the client’s management console registration status and mounted file systems, and provides access to the IAD log for troubleshooting. Registration. Registers the client with the management console, as described in the HP StorageWorks File Serving Software Installation Guide. - Page 19 file. For example, you will need to lock specific ports for rpc.statd, rpc.lockd, rpc.mountd, and rpc.quotad. It is best to allow all ICMP types on all networks; however, you can limit ICMP to types 0, 3, 8, and 1 1 if necessary. Be sure to open the ports listed in the following table.
-
Page 20: Hp Insight Remote Support Software
HP, which will initiate a fast and accurate resolution, based on your product’s service level. Notifications may be sent to your authorized HP Channel Partner for on-site service, if configured and available in your country. -
Page 21: Configuring Virtual Interfaces For Client Access
Although the cluster network interface can carry traffic between file serving nodes and clients, HP recommends that you configure one or more user network interfaces for this purpose. Typically, bond1 is created for the first user network when the cluster is configured. -
Page 22: Configuring Nic Failover
Identify the VIF: # ibrix_nic –a -n bond1:2 –h node1,node2,node3,node4 Set up a standby server for each VIF: # ibric_nic –b –H node1/bond1:1,node2/bond1:2 # ibric_nic –b –H node2/bond1:1,node1/bond1:2 # ibric_nic –b –H node3/bond1:1,node4/bond1:2 # ibric_nic –b –H node4/bond1:1,node3/bond1:2 Configuring NIC failover NIC monitoring should be configured on VIFs that will be used by NFS, CIFS, FTP, or HTTP. -
Page 23: Configuring Link State Monitoring For Iscsi Network Interfaces
FTP. When you add an FTP share on the Add FTP Shares dialog box or with the ibrix_ftpshare command, specify the VIF as the IP address that clients should use to access the share. HTTP. When you create a virtual host on the Create Vhost dialog box or with the ibrix_httpvhost command, specify the VIF as the IP address that clients should use to access shares associated with the Vhost. -
Page 24: Configuring Failover
4 Configuring failover This chapter describes how to configure failover for agile management consoles, file serving nodes, network interfaces, and HBAs. Agile management consoles The management console maintains the cluster configuration and provides graphical and command-line user interfaces for managing and monitoring the cluster. Typically, one active management console and one passive management console are installed when the cluster is installed. -
Page 25: Viewing Information About Management Consoles
The failed-over management console remains in maintenance mode until it is moved to passive mode using the following command: ibrix_fm -m passive A management console cannot be moved from maintenance mode to active mode. Viewing information about management consoles To view mode information, use the following command: ibrix_fm –i NOTE: If the management console was not installed in an agile configuration, the output will... -
Page 26: Setting Up Automated Failover
If your cluster includes one or more user network interfaces carrying NFS/CIFS client traffic, HP recommends that you identify standby network interfaces and set up network interface monitoring. If your file serving nodes are connected to storage via HBAs, HP recommends that you set up HBA monitoring. - Page 27 1.) Use the following command: <installdirectory>/bin/ibrix_hostpower -a -i SLOTID -s POWERSOURCE -h HOSTNAME For example, to identify that node s1.hp.com is connected to slot 1 on APC power source ps1: <installdirectory>/bin/ibrix_hostpower -a -i 1 -s ps1 -h s1.hp.com Updating the configuration database with power source changes...
-
Page 28: Turning Automated Failover On And Off
For example, to identify that node s1.hp.com has been moved from slot 3 to slot 4 on APC power source ps1: <installdirectory>/bin/ibrix_hostpower -m -i 3,4 -s ps1 -h s1.hp.com Dissociating a file serving node from a power source You can dissociate a file serving node from an integrated power source by dissociating it from slot 1 (its default association) on the power source. -
Page 29: Failing Back A File Serving Node
A failback might not succeed if the time period between the failover and the failback is too short, and the primary server has not fully recovered. HP recommends ensuring that both servers are up and running and then waiting 60 seconds before starting the failback. Use the ibrix_server -l command to verify that the primary server is up and running. - Page 30 To set up a network interface monitor, use the following command: <installdirectory>/bin/ibrix_nic -m -h MONHOST -A DESTHOST/IFNAME For example, to set up file serving node s2.hp.com to monitor file serving node s1.hp.com over user network interface eth1: <installdirectory>/bin/ibrix_nic -m -h s2.hp.com -A s1.hp.com/eth1 To delete network interface monitoring, use the following command: <installdirectory>/bin/ibrix_nic -m -h MONHOST -D DESTHOST/IFNAME...
-
Page 31: Setting Up Hba Monitoring
For example, to delete the standby that was assigned to interface eth2 on file serving node s1.hp.com: <installdirectory>/bin/ibrix_nic -b -U s1.hp.com/eth2 Setting up HBA monitoring You can configure High Availability to initiate automated failover upon detection of a failed HBA. -
Page 32: Identifying Standby-Paired Hba Ports
HBA failure. Use the following command: <installdirectory>/bin/ibrix_hba -m -h HOSTNAME -p PORT For example, to turn on HBA monitoring for port 20.00.12.34.56.78.9a.bc on node s1.hp.com: <installdirectory>/bin/ibrix_hba -m -h s1.hp.com -p 20.00.12.34.56.78.9a.bc To turn off HBA monitoring for an HBA port, include the -U option: <installdirectory>/bin/ibrix_hba -m -U -h HOSTNAME -p PORT... -
Page 33: Checking The High Availability Configuration
-b argument. To view results only for file serving nodes that failed a check, include the -f argument. <installdirectory>/bin/ibrix_haconfig -l [-h HOSTLIST] [-f] [-b] For example, to view a summary report for file serving nodes xs01.hp.com and xs02.hp.com: <installdirectory>/bin/ibrix_haconfig -l -h xs01.hp.com,xs02.hp.com Host... - Page 34 The -v option produces detailed information about configuration checks that received a Passed result. For example, to view a detailed report for file serving nodes xs01.hp.com: <installdirectory>/bin/ibrix_haconfig -i -h xs01.hp.com...
-
Page 35: Configuring Cluster Event Notification
SMTP server will reject the email. <installdirectory>/bin/ibrix_event -m on|off -s SMTP -f from [-r reply-to] [-t subject] The following command configures email settings to use the mail.hp.com SMTP server and to turn on notifications: <installdirectory>/bin/ibrix_event -m on -s mail.hp.com -f FM@hp.com -r MIS@hp.com -t Cluster1 Notification... -
Page 36: Testing Email Addresses
To turn off all Alert notifications for admin@hp.com: <installdirectory>/bin/ibrix_event -d -e ALERT -m admin@hp.com To turn off the server.registered and filesystem.created notifications for admin1@hp.com and admin2@hp.com: <installdirectory>/bin/ibrix_event -d -e server.registered,filesystem.created -m admin1@hp.com,admin2@hp.com Testing email addresses To test an email address with a test message, notifications must be turned on. If the address is valid, the command signals success and sends an email containing the settings to the recipient. -
Page 37: Configuring The Snmp Agent
Associating event notifications with trapsinks (all SNMP versions) View definition (V3 only) Group and user configuration (V3 only) X9000 Software implements an SNMP agent on the management console that supports the private X9000 Software MIB. The agent can be polled and can send SNMP traps to configured trapsinks. Setting up SNMP notifications is similar to setting up email notifications. -
Page 38: Associating Events And Trapsinks
on and off. The default is on. For example, to create a v2 trapsink with a new community name, enter: ibrix_snmptrap -c -h lab13-116 -v 2 -m private For a v3 trapsink, additional options define security settings. USERNAME is a v3 user defined on the trapsink host and is required. -
Page 39: Configuring Groups And Users
The subtree is added in the named view. For example, to add the X9000 Software private MIB to the view named hp, enter: ibrix_snmpview -a -v hp -o .1.3.6.1.4.1.18997 -m .1.1.1.1.1.1.1 Configuring groups and users A group defines the access control policy on managed objects for one or more users. All users must belong to a group. -
Page 40: Configuring System Backups
6 Configuring system backups Backing up the management console configuration The management console configuration is automatically backed up whenever the cluster configuration changes. The backup takes place on the node hosting the active management console (or on the Management Server, if a dedicated management console is configured). The backup file is stored at <ibrixhome>/tmp/fmbackup.zip on the machine where it was created. -
Page 41: Configuring Ndmp Parameters On The Cluster
Configuring NDMP parameters on the cluster Certain NDMP parameters must be configured to enable communications between the DMA and the NDMP Servers in the cluster. To configure the parameters on the management console GUI, select Cluster Configuration from the Navigator, and then select NDMP Backup. The NDMP Configuration Summary shows the default values for the parameters. -
Page 42: Starting, Stopping, Or Restarting An Ndmp Server
To cancel a session, select that session and click Cancel Session. Canceling a session kills all spawned sessions processes and frees their resources if necessary. To see similar information for completed sessions, select NDMP Backup > Session History. To view active sessions from the CLI, use the following command: ibrix_ndmpsession –l To view completed sessions, use the following command. -
Page 43: Ndmp Events
NDMP events An NDMP Server can generate three types of events: INFO, WARN, and ALERT. These events are displayed on the management console GUI and can be viewed with the ibrix_event command. INFO events. These events specify when major NDMP operations start and finish, and also report progress. -
Page 44: Creating Hostgroups For X9000 Clients
7 Creating hostgroups for X9000 clients A hostgroup is a named set of X9000 clients. Hostgroups provide a convenient way to centrally manage clients using the management console. You can put different sets of clients into hostgroups and then perform the following operations on all members of the group: Create and delete mountpoints Mount file systems Prefer a network interface... -
Page 45: Adding An X9000 Client To A Hostgroup
<installdirectory>/bin/ibrix_hostgroup -m -g GROUP -h MEMBER For example, to add the specified host to the finance group: <installdirectory>/bin/ibrix_hostgroup -m -g finance -h cl01.hp.com Adding a domain rule to a hostgroup To set up automatic hostgroup assignments, define a domain rule for hostgroups. A domain rule restricts hostgroup membership to clients on a particular cluster subnet. -
Page 46: Deleting Hostgroups
Additional hostgroup operations are described in the following locations: Creating or deleting a mountpoint, and mounting or unmounting a file system (see “Creating and mounting file systems” in the HP StorageWorks X9000 File Serving Software File System User Guide Changing host tuning parameters (see “Tuning file serving nodes and X9000 clients”... -
Page 47: Monitoring Cluster Operations
Events are written to an events table in the configuration database as they are generated. To maintain the size of the file, HP recommends that you periodically remove the oldest events. See “Removing events from the events database table” (page 48) for more information. -
Page 48: Viewing Events
You can set up event notifications through email (see “Setting up email notification of cluster events” (page 35)) or SNMP traps (see “Setting up SNMP notifications” (page 36)). Viewing events The dashboard on the management console GUI specifies the number of events that have occurred in the last 24 hours. -
Page 49: Health Check Reports
Health check reports The summary report provides an overall health check result for all tested file serving nodes and X9000 clients, followed by individual results. If you include the -b option, the standby servers for all tested file serving nodes are included when the overall result is determined. The results will be one of the following: Passed. - Page 50 lab15-62 Report =============== Overall Result ============== Result Type State Module Up time Last Update Network Thread Protocol ------ ------ ------------ ------ --------- ---------------------------- ------------ ------ -------- PASSED Server Up, HBAsDown Loaded 3267210.0 Mon Oct 19 14:24:34 EDT 2009 99.126.39.72 true CPU Information =============== Cpu(System,User,Util,Nice)
-
Page 51: Viewing Logs
Viewing logs Logs are provided for the management console, file serving nodes, and X9000 clients. Contact HP Support for assistance in interpreting log files. You might be asked to tar the logs and email them to HP. Viewing operating statistics for file serving nodes Periodically, the file serving nodes report the following statistics to the management console: Summary. - Page 52 1034616 703672 2031608 2031360 ---------CPU----------- HOST User System Nice Idle IoWait Irq SoftIrq lab12-10.hp.com ---------NFS v3-------- HOST Null Getattr Setattr Lookup Access Readlink Read Write lab12-10.hp.com HOST Create Mkdir Symlink Mknod Remove Rmdir Rename lab12-10.hp.com HOST Link Readdir Readdirplus Fsstat Fsinfo Pathconf Commit lab12-10.hp.com...
-
Page 53: Maintaining The System
9 Maintaining the system Shutting down the system To shut down the system completely, first shut down the X9000 Software, and then power off the system hardware. Shutting down the X9000 Software Use the following procedure to shut down the X9000 Software. Unless noted otherwise, run the commands from the dedicated Management Console or from the node hosting the active agile management console. -
Page 54: Powering File Serving Nodes On Or Off
Power on the dedicated Management Console or the node hosting the active agile management console. Power on the file serving nodes (*root segment = segment 1; power on owner first, if possible). Monitor the nodes on the management console and wait for them all to report UP in the output from the following command: ibrix_server -l Mount file systems and verify their content. -
Page 55: Starting And Stopping Processes
/etc/init.d/ibrix_client [start | stop | restart | status] Tuning file serving nodes and X9000 clients The default host tuning settings are adequate for most cluster environments. However, HP Support may recommend that you change certain file serving node or X9000 client tuning settings to improve performance. -
Page 56: Migrating Segments
Contact HP Support to obtain the values for OPTIONLIST. List the options as option=value pairs, separated by commas. To set host tunings on all clients, include the -g clients option. To reset host parameters to their default values on nodes or hostgroups: <installdirectory>/bin/ibrix_host_tune -U {-h HOSTLIST|-g GROUPLIST} [-n OPTIONS]... -
Page 57: Removing Storage From The Cluster
HOSTNAME1 to HOSTNAME2 and update the source host: <installdirectory>/bin/ibrix_fs -m -f FSNAME -H HOSTNAME1,HOSTNAME2 [-M] [-F] [-N] For example, to migrate ownership of all segments in file system ifs1 that reside on s1.hp.com to s2.hp.com: <installdirectory>/bin/ibrix_fs -m -f ifs1 -H s1.hp.com,s2.hp.com... -
Page 58: Maintaining Networks
-q -E -f FSNAME Then remount the file system. To evacuate a segment using the CLI, use the ibrix_rebalance -e command, as described in the HP StorageWorks X9000 File Serving Software CLI Reference Guide. Maintaining networks Cluster and user network interfaces X9000 Software supports the following logical network interfaces: Cluster network interface. -
Page 59: Adding User Network Interfaces
HP recommends that the default network be routed through the base User Network interface. For a highly available cluster, HP recommends that you put NFS traffic on a dedicated user network and then set up automated failover for it (see “Setting up automated failover”... -
Page 60: Setting Network Interface Options In The Configuration Database
Execute this command once for each destination host that the file serving node or X9000 client should contact using the specified network interface (IFNAME). For example, to prefer network interface eth3 for traffic from file serving node s1.hp.com to file serving node s2.hp.com: <installdirectory>/bin/ibrix_server -n -h s1.hp.com -A s2.hp.com/eth3... -
Page 61: Unpreferring Network Interfaces
<installdirectory>/bin/ibrix_hostgroup -n -g HOSTGROUP -A DESTHOST/IFNAME The destination host (DESTHOST) cannot be a hostgroup. For example, to prefer network interface eth3 for traffic from all X9000 clients (the clients hostgroup) to file serving node s2.hp.com: <installdirectory>/bin/ibrix_hostgroup -n -g clients -A s2.hp.com/eth3... -
Page 62: Changing The Cluster Interface
“Changing the cluster interface” (page 62). To delete a network interface, use the following command: <installdirectory>/bin/ibrix_nic -d -n IFNAME -h HOSTLIST The following command deletes interface eth3 from file serving nodes s1.hp.com and s2.hp.com: <installdirectory>/bin/ibrix_nic -d -n eth3 -h s1.hp.com,s2.hp.com Viewing network interface information Executing the ibrix_nic command with no arguments lists all interfaces on all file serving nodes. - Page 63 <installdirectory>/bin/ibrix_nic -l -h HOSTLIST The following table describes the fields in the output. Field Description BACKUP HOST File serving node for the standby network interface. BACKUP-IF Standby network interface. HOST File serving node. An asterisk (*) denotes the management console. IFNAME Network interface on this file serving node.
-
Page 64: 10 Migrating To An Agile Managment Console Configuration
The Management Server machine can be removed from the cluster and used as an X9000 client. (For information about installing an X9000 client, see the HP X9000 File Serving Software User Guide.) The Management Server machine can be removed the cluster and used for other purposes. - Page 65 /etc/init.d/network restart service network restart Verify that you can ping the new local IP address. Configure the agile management console: ibrix_fm -c <cluster_VIF_addr> -d <cluster_VIF_device> –n <cluster_VIF_netmask> -v cluster -I <local_cluster_IP_addr> In the command, <cluster_VIF_addr> is the old cluster IP address for the original management console and <local_cluster_IP_addr>...
- Page 66 ================================================ Command succeeded! 1 1. Verify that there is only one management console in this cluster: ibrix_fm -f For example: [root@x109s1 ~]# ibrix_fm -f NAME IP ADDRESS ------ ---------- X109s1 172.16.3.100 Command succeeded! Install a passive agile management console on a second file serving node. In the command, the -F option forces the overwrite of the new_lvm2_uuid file that was installed with the X9000 Software.
-
Page 67: Removing The Dedicated Management Server
NOTE: If iLO was not previously configured on the server, the command will fail with the following error: com.ibrix.ias.model.BusinessException: x467s2 is not associated with any power sources Use the following command to define the iLO parameters into the X9000 cluster database: ibrix_powersrc -a -t ilo -h HOSTNAME -I IPADDR [-u USERNAME -p PASSWORD] See the installation guide for more information about configuring iLO. - Page 68 x109s3 172.16.3.3 Command succeeded! Remove the Management Server machine from the cluster database: ibrix_server -d -h HOSTNAME To provide high availability for the management console, install a passive agile management console on another file serving node. In the command, the -F option forces the overwrite of the new_lvm2_uuid file that was installed with the X9000 Software.
-
Page 69: 1 Upgrading The X9000 Software
1 1 Upgrading the X9000 Software This chapter describes how to upgrade to the latest X9000 File Serving Software release. The management console and all file serving nodes must be upgraded to the new release at the same time. Note the following: Upgrades to the X9000 Software 5.6 release are supported for systems currently running X9000 Software 5.5.x. -
Page 70: Manual Upgrades
“Upgrading Windows X9000 clients” (page 73). If you received a new license from HP, install it as described in the “Licensing” chapter in this guide. Manual upgrades The manual upgrade process requires external storage that will be used to save the cluster configuration. -
Page 71: Saving The Node Configuration
Save the <hostname>_cluser_config.tgz file, which is located in /tmp, to the external storage media. Performing the upgrade Complete the following steps on each node: Obtain the latest Quick Restore image from the HP kiosk at http://www.software.hp.com/ kiosk (you will need your HP-provided login credentials). -
Page 72: Restoring The Node Configuration
When the following screen appears, enter qr to install the X9000 software on the file serving node. The server reboots automatically after the software is installed. Remove the DVD from the DVD-ROM drive. Restoring the node configuration Complete the following steps on each node, starting with the previous active management console: Log in to the node. -
Page 73: Upgrading Linux X9000 Clients
/etc/init.d/ibrix_client status IBRIX Filesystem Drivers loaded IBRIX IAD Server (pid 3208) running... The IAD service should be running, as shown in the previous sample output. If it is not, contact HP Support. Upgrading Windows X9000 clients Complete the following steps on each client: Remove the old Windows X9000 client software using the Add or Remove Programs utility in the Control Panel. -
Page 74: Troubleshooting Upgrade Issues
If you are using Remote Desktop to perform an upgrade, you must log out and log back in to see the drive mounted. Troubleshooting upgrade issues If the upgrade does not complete successfully, check the following items. For additional assistance, contact HP Support. Automatic upgrade Check the following: If the initial execution of /usr/local/ibrix/setup/upgrade fails, check /usr/local/ibrix/setup/upgrade.log for errors. -
Page 75: Manual Upgrade
Manual upgrade Check the following: If the restore script fails, check /usr/local/ibrix/setup/logs/restore.log for details. If configuration restore fails, look at /usr/local/ibrix/autocfg/logs/appliance.log to determine which feature restore failed. Look at the specific feature log file under /usr/ local/ibrix/setup/logs/ for more detailed information. To retry the copy of configuration, use the command appropriate for your server: A dedicated management console: ◦... -
Page 76: 12 Licensing
Fax the Password Request Form that came with your License Entitlement Certificate. See the certificate for fax numbers in your area. Call or email the HP Password Center. See the certificate for telephone numbers in your area or email addresses. -
Page 77: 13 Upgrading Firmware
13 Upgrading firmware Upgradable firmware The HP X9300 system includes several components with upgradable firmware. The following table lists these components and specifies whether they can be upgraded online and in a nondisruptive manner. Component Online and Nondisruptive? DL380 Nondisruptive if done one server at a time... -
Page 78: 14 Troubleshooting
The collected information is collated into a tar file and placed in the directory /admin/platform/ diag/support/tickets/ on the active management console. Send this tar file to HP Support for analysis. The name of the tar file is ticket_<name>/tgz. In the filename, <name> is a number, for example, ticket_0002.tgz. -
Page 79: Support Ticket States
Support ticket states Support tickets are in one of the following states: Ticket State Description COLLECTING_LOGS The data collection operation is collecting logs and command output. COLLECTED_LOGS The data collection operation has completed on all nodes in the cluster. CREATING The data collected from each node is being copied to the active management console. -
Page 80: Viewing Software Version Numbers
The file system and IAD/FS output fields should show matching version numbers unless you have installed special releases or patches. If the output fields show mismatched version numbers and you do not know of any reason for the mismatch, contact HP Support. A mismatch might affect the operation of your cluster. -
Page 81: Windows X9000 Clients
To maintain access to a file system, file serving nodes must have current information about the file system. HP recommends that you execute ibrix_health on a regular basis to monitor the health of this information. If the information becomes outdated on a file serving node, execute ibrix_dbck -o to resynchronize the server’s information with the configuration database. - Page 82 NOTE: The ibrix_dbck command should be used only under the direction of HP Support. To run a health check on a file serving node, use the following command: <installdirectory>/bin/ibrix_health -i -h HOSTLIST If the last line of the output reports Passed, the file system information on the file serving node and management console is consistent.
-
Page 83: 15 Replacing Components
In the materials shipped with a CSR component, HP specifies whether the defective component must be returned to HP. In cases where it is required, you must ship the defective part back to HP within a defined period of time, normally five business days. The defective part must be returned with the associated documentation in the provided shipping material. -
Page 84: Additional Documentation
On the Manuals page, clock Servers > ProLiant ml/dl and tc series servers. For file serving node procedures, select HP Proliant DL380 G6 Server series or HP Proliant DL380 G7 Server series. The following documents contain the replacement procedures:... -
Page 85: Replacing A Nic Adapter
-f -h <server_name> Power down the server. Replace the NIC adapter. For a file serving node, see the HP Proliant DL380 G6 Server Maintenance and Service Guide. For an X9300 Management Server, see the HP Proliant DL360 G6 Server Maintenance and Service Guide. - Page 86 Power down the server. Replace the Fibre Channel HBA. For a file serving node, see the HP Proliant DL380 G6 Server Maintenance and Service Guide or HP Proliant DL380 G7 Server Maintenance and Service Guide. If you are using WWPN/WWNN zoning, write down the WWPN/WWNN of the new HBA and update the zoning.
- Page 87 Fail back the server using the GUI or CLI: On the GUI, select Servers from the Navigator pane, and then select the appropriate server from the Servers pane. Next, select the server name in the left pane, and click Failback. On the CLI, execute the following command: ibrix_server -f –U –h <server_name>...
-
Page 88: 16 Recovering A File Serving Node
To remove the monitor, use the following command: ibrix_nic -m -h MONITORHOST -D DESTHOST/IFNAME For example: ibrix_nic -m -h titan16 -D titan15/eth2 Obtain the latest Quick Restore image from the HP kiosk http://www.software.hp.com/kiosk (you will need your HP-provided login credentials). Burn the ISO image to a DVD. -
Page 89: Configuring A File Serving Node Using The Original Template
The server reboots automatically after the software is installed. Remove the DVD from the DVD-ROM drive. When your cluster was configured initially, the installer may have created a template for configuring file serving nodes. To use this template to configure the file serving node undergoing recovery, go to “Configuring a file serving node using the original template”... - Page 90 The Configuration Wizard attempts to discover management consoles on the network and then displays the results. Select the appropriate management console for this cluster. NOTE: If the list does not include the appropriate management console, or you want to customize the cluster configuration for the file serving node, select Cancel. Go to “Configuring a file serving node manually”...
- Page 91 NOTE: If you select Reject, the wizard will exit and the shell prompt will be displayed. You can restart the Wizard by entering the command /usr/local/ibrix/autocfg/bin/menu_ss_wizard or logging in to the server again. If the specified hostname already exists in the cluster (the name was used by the node you are replacing), the Replace Existing Server window asks whether you want to replace the existing server with the node you are configuring.
-
Page 92: Completing The Restore On A File Serving Node
If you configured a passive management console, enter the following command to verify the status of the console: ibrix_fm -i Next, complete the restore on the file serving node. Completing the restore on a file serving node Complete the following steps: Ensure that you have root access to the node. -
Page 93: Configuring A File Serving Node Manually
If Insight Remote Support was previously enabled on this file serving node, run the following command to start Insight Remote Support services each time the node is rebooted: chkconfig hp-snmp-agents on To start Insight Remote Support services now, run the following commands:... - Page 94 The Configuration Wizard attempts to discover management consoles on the network and then displays the results. Select Cancel to configure the node manually. (If the wizard cannot locate a management console, the screen shown in step 4 will appear.) The file serving node Configuration Menu appears. Recovering a file serving node...
- Page 95 The Cluster Configuration Menu lists the configuration parameters that you will need to set. Use the Up and Down arrow keys to select an item in the list. When you have made your select, press Tab to move to the buttons at the bottom of the dialog box, and press Space to go to the next dialog box.
- Page 96 Select Time Zone from the menu, and then use Up or Down to select your time zone. Select Default Gateway from the menu, and enter the IP Address of the host that will be used as the default gateway. Recovering a file serving node...
- Page 97 Select DNS Settings from the menu, and enter the IP addresses for the primary and secondary DNS servers that will be used to resolve domain names. Also enter the DNS domain name. 1 1. Select NTP Servers from the menu, and enter the IP addresses or hostnames for the primary and secondary NTP servers.
- Page 98 Select Networks from the menu. Select <add device> to create a bond for the cluster network. You are creating a bonded interface for the cluster network; select Ok on the Select Interface Type dialog box. Enter a name for the interface (bond0 for the cluster interface) and specify the appropriate options and slave devices.
- Page 99 When the Configure Network dialog box reappears, select bond0. Configuring a file serving node manually...
- Page 100 To complete the bond0 configuration, enter a space to select the Cluster Network role. Then enter the IP address and netmask information that the network will use. Repeat this procedure to create a bonded user network (typically bond1 with eth1 and eth2) and any custom networks as required.
- Page 101 IMPORTANT: Configure a passive agile management console only if the agile management console is enabled and an active agile management console is configured. If you configured a user network, enter a VIF IP address and netmask for the network. If you configured a passive management console, enter the following command to verify the status of the console: ibrix_fm -i IMPORTANT:...
-
Page 102: 17 Support And Other Resources
HP ProLiant DL380 G6 Server User Guide HP ProLiant DL380 G6 Server Maintenance and Service Guide On the Manuals page, select servers > ProLiant ml/dl and tc series servers > HP ProLiant DL380 G7 Server series or HP ProLiant DL380 G6 Server series. -
Page 103: Hp Websites
HP customer self repair (CSR) programs allow you to repair your StorageWorks product. If a CSR part needs replacing, HP ships the part directly to you so that you can install it at your convenience. Some parts do not qualify for CSR. Your HP-authorized service provider will determine whether a repair can be accomplished by CSR. -
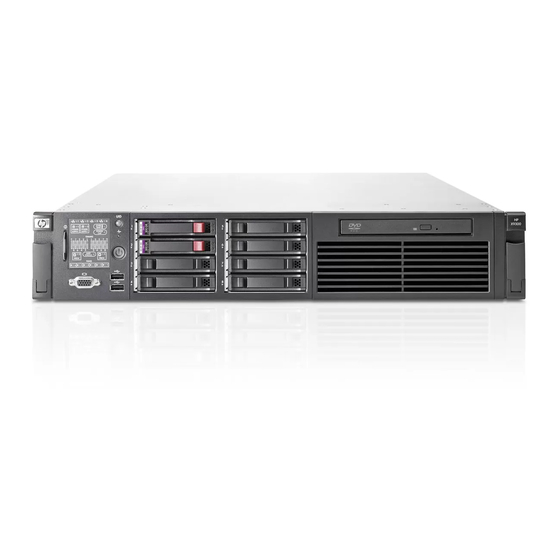
Page 104: A Component Diagrams
A Component diagrams Front view of file serving node Item Description Quick-release levers (2) HP Systems Insight Manager display Hard drive bays SATA optical drive bay Video connector USB connectors (2) Rear view of file serving node Item Description PCI slot 5... - Page 105 Item Description NIC 1 connector NIC 2 connector Mouse connector Keyboard connector Serial connector iLO 2 connector NIC 3 connector NIC 4 connector Rear view of file serving node 105...
- Page 106 Server PCIe card PCI slot HP SC08Ge 3Gb SAS Host Bus Adapter NC364T Quad 1Gb NIC empty SATA 1Gb empty empty empty HP SC08Ge 3Gb SAS Host Bus Adapter empty empty SATA 10Gb NC522SFP dual 10Gb NIC empty empty HP SC08Ge 3Gb SAS Host Bus Adapter...
-
Page 107: B Spare Parts List
Optional. Parts for which customer self repair is optional. These parts are also designed for customer self-repair. If, however, you require that HP replace them for you, there may or may not be additional charges, depending on the type of warranty service designated for your product. -
Page 108: Gbe (Aw539B)
Description Spare part number Customer self repair SPS-DIMM,8GB 501536-001 Optional PC3- 1 0600R,512MX4,ROHS SPS-DRV,HD,146GB,15K 2.5" DP HP 504334-001 Mandatory SPS - HW PLASTICS KIT DL180 G6 507260-001 Mandatory SPS-DRV,ODD, SLIM SATA DVD RW 481429-001 Optional SPS-TRAY, DVD 532390-001 Mandatory SPS-POWER SUPPLY, 750W... -
Page 109: 10 Gbe Spare Parts
Description Spare part number Customer self repair SPS-DRV,HD,146GB,10K 2.5" DP HP 507283-001 Mandatory 6G SAS SPS - HW PLASTICS KIT DL180 G6 507260-001 Mandatory SPS-DRV,ODD, SLIM SATA DVD RW 481429-001 Optional SPS-TRAY, DVD 532390-001 Mandatory SPS-POWER SUPPLY, 750W 51 1778-001... -
Page 110: Gbe/Ib (Aw540B)
Description Spare part number Customer self repair SPS-DRV,HD,146GB,15K 2.5" DP HP 504334-001 Mandatory SPS - HW PLASTICS KIT DL180 G6 507260-001 Mandatory SPS-DRV,ODD, SLIM SATA DVD RW 481429-001 Optional SPS-TRAY, DVD 532390-001 Mandatory SPS-POWER SUPPLY, 750W 51 1778-001 Optional SPS-BD,NC522SFP+ 10... -
Page 111: Ib (Aw541A)
507690-001 Optional SPS-PROC,NEHALEM EP 2.26 GHZ, 490073-001 Optional 8M, 80W SPS-DIMM,8GB 501536-001 Optional PC3- 1 0600R,512MX4,ROHS SPS-DRV,HD,146GB,15K 2.5" DP HP 504334-001 Mandatory SPS - HW PLASTICS KIT DL180 G6 507260-001 Mandatory SPS-DRV,ODD, SLIM SATA DVD RW 481429-001 Optional SPS-TRAY, DVD... -
Page 112: Base Rack (Aw546A)
Description Spare part number Customer self repair SPS-BD,4X QDR,PCIE,G2,DUAL PORT 519132-001 Optional SPS-HARDWARE MTG KIT 574765-001 Mandatory SPS-CORD,AC PWR IEC/IEC 6 FT 142258-001 Mandatory SPS-CARD, RISER 496057-001 Optional Base rack (AW546A) Description Spare part number Customer self repair SPS-CORD,AC PWR IEC/IEC 6 FT 142258-001 Mandatory SPS-BRACKETS,PDU... - Page 113 PWR-CORD OPT-917 3-COND 8121-0919 Mandatory 3-M-LG ROHS PWR-CORD OPT-934 3-COND 8121-0965 Mandatory 3.6-M-LG ROHS PWR-CORD OPT-919 3-COND 8121- 1 035 Mandatory 2.5M-LG ROHS KIT, 2910-24G SMO Support J9145-61001 Mandatory HP PROCURVE 2910AL-24G SWITCH J9145-69001 Mandatory Base rack (AW546A) 1 13...
-
Page 114: C Warnings And Precautions
Use conductive field service tools. Use a portable field service kit with a folding static-dissipating work mat. If you do not have any of the suggested equipment for proper grounding, have an HP-authorized reseller install the part. NOTE: For more information on static electricity or assistance with product installation, contact your HP-authorized reseller. -
Page 115: Rack Warnings And Precautions
WARNING! Power supplies or systems marked with these symbols indicate the presence of multiple sources of power. WARNING! Any product or assembly marked with these symbols indicates that the component exceeds the recommended weight for one individual to handle safely. Rack warnings and precautions Ensure that precautions have been taken to provide for rack stability and safety. - Page 116 WARNING! To reduce the risk of electric shock or damage to the equipment: Allow the product to cool before removing covers and touching internal components. Do not disable the power cord grounding plug. The grounding plug is an important safety feature.
-
Page 117: D Regulatory Compliance And Safety
D Regulatory compliance and safety Regulatory compliance identification numbers For the purpose of regulatory compliance certifications and identification, this product has been assigned a unique regulatory model number. The regulatory model number can be found on the product nameplate label, along with all required approval markings and information. When requesting compliance information for this product, always refer to this regulatory model number. -
Page 118: Declaration Of Conformity For Products Marked With The Fcc Logo, United States Only
Do not operate controls, make adjustments, or perform procedures to the laser device, other than those specified herein. Allow only HP-authorized service technicians to repair the unit. The Center for Devices and Radiological Health (CDRH) of the U.S. Food and Drug Administration implemented regulations for laser products on August 2, 1976. -
Page 119: International Notices And Statements
International notices and statements Canadian notice (Avis Canadien) Class A equipment This Class A digital apparatus meets all requirements of the Canadian Interference-Causing Equipment Regulations. Cet appareil numérique de la classe A respecte toutes les exigences du Règlement sur le matériel brouilleur du Canada. -
Page 120: Korean Notice (A&B)
To forward them to recycling or proper disposal, please use the public collection system or return them to HP, an authorized HP Partner, or their agents. For more information about battery replacement or proper disposal, contact an authorized reseller or an authorized service provider. -
Page 121: Japanese Power Cord Notice
1.00 mm2 or 18 AWG, and the length of the cord must be between 1.8 m (6 ft) and 3.6 m (12 ft). If you have questions about the type of power cord to use, contact an HP-authorized service provider. NOTE: Route power cords so that they will not be walked on and cannot be pinched by items placed upon or against them. -
Page 122: Waste Electrical And Electronic Equipment Directive
NOTE: For more information on static electricity, or for assistance with product installation, contact your authorized reseller. Waste Electrical and Electronic Equipment directive Czechoslovakian notice Danish notice Dutch notice 122 Regulatory compliance and safety... -
Page 123: English Notice
English notice Estonian notice Finnish notice French notice Waste Electrical and Electronic Equipment directive 123... -
Page 124: German Notice
German notice Greek notice Hungarian notice Italian notice 124 Regulatory compliance and safety... -
Page 125: Latvian Notice
Latvian notice Lithuanian notice Polish notice Portuguese notice Waste Electrical and Electronic Equipment directive 125... -
Page 126: Slovakian Notice
Slovakian notice Slovenian notice Spanish notice Swedish notice 126 Regulatory compliance and safety... -
Page 127: Glossary
Domain name system. File Transfer Protocol. Global service indicator. High availability. Host bus adapter. Host channel adapter. Hard disk drive. HP X9000 Software Administrative Daemon. Integrated Lights-Out. Initial microcode load. IOPS I/Os per second. IPMI Intelligent Platform Management Interface. JBOD Just a bunch of disks. - Page 128 Voltaire's Unified Fabric Manager client software. Unit identification. SNMP User Security Model. VACM SNMP View Access Control Model. HP Virtual Connect. Virtual interface. WINS Windows Internet Naming Service. World Wide Name. A unique identifier assigned to a Fibre Channel device.
-
Page 129: Index
IP address, view process status, change network, file systems defined, segments components migrate, returning, contacting HP, customer self repair, grounding methods, 1 14 declaration of conformity, 1 18 document hazardous conditions related information, symbols on equipment,... - Page 130 X9000 client access, shared ssh keys, configure, management console CLI, SNMP event notification, management console GUI SNMP MIB, change password, storage, remove from cluster, customize, Subscriber's Choice, HP, Details page, support tickets, Navigator, symbols open, on equipment, 1 14 view events,...
- Page 131 1 15 Waste Electrical and Electronic Equipment directive, websites customer self repair, HP Subscriber's Choice for Business, Windows X9000 clients, upgrade, X9000 clients add to hostgroup, change IP address, identify a user network interface, interface to management console,...