Table of Contents
Advertisement
Advertisement
Table of Contents

Related Manuals for Nokia 5165


Summary of Contents for Nokia 5165
- Page 1 User Guide...
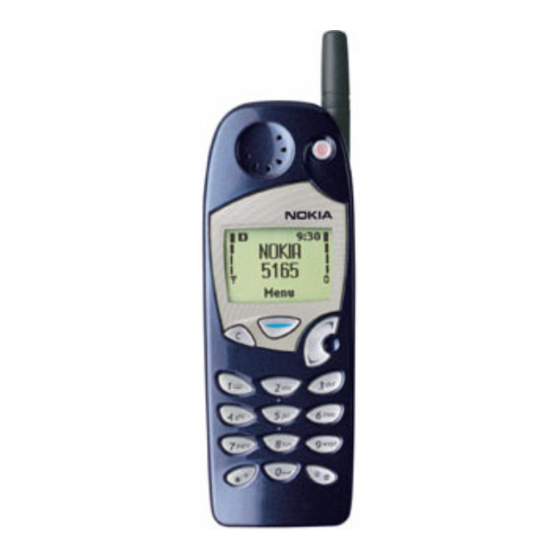
- Page 2 Earpiece See p. 16. Current function of Navi™ key Navi™ key See p. 6. Clear key See p. 7. Voice mail key See p. 34. Power key See p. 6. Menu Menu Emergency 9 key See p. 28. Fixed-length antenna See p.
-
Page 3: Indicators And Icons
Indicators and icons You have an active call. You have one or more new voice messages. You have one or more new text messages. Keyguard is on. Your phone will not accept any keypresses. To turn it off, press Unlock, then The alarm clock is set. -
Page 4: Table Of Contents
Power key....... . 6 Nokia Navi™ key ......6 Scroll keys . - Page 5 5. Settings Automatic redial ......19 Calling card set-up ..... . .19 Clock.
- Page 6 Erasing names and numbers....40 Scrolling view ......40 Checking available memory .
- Page 7 15. Accessories Nokia Xpress-on™ color covers ... . .66 Batteries....... .68 Chargers and other accessories .
-
Page 8: For Your Safety
1. For your safety Read these simple guidelines before using your phone. Failure to comply with these guidelines may be dangerous or illegal. Road Safety Comes First Don’t use a hand-held phone while driving; park the vehicle first. Switch Off In Hospitals Follow any regulations or rules. -
Page 9: Fcc/Industry Canada Notice
Nokia’s World Wide Web site at www.NokiaUSA.com. Interactive manual Now, Nokia has a great new way for you to learn how to use all of your phone features. Go to www.NokiaHowTo.com to access the Nokia Interactive User Guide. It provides an interactive way to get step-by-step instructions for any of your phone's features. -
Page 10: Battery Installation And Charging
2. Battery installation and charging Before you can use your new phone, you need to attach and charge the battery. Attaching the battery To attach the battery, place it on the back of the phone as shown and slide it toward the top of the phone until it clicks into place. -
Page 11: Removing The Battery
restored to its normal operating state. If charging still fails, contact your dealer. When is charging complete? When the charge indicators stop scrolling, your phone is considered fully charged. However, a slight increase in charge may occur if you leave your phone connected to the charger. -
Page 12: Important Battery Information
Important battery information • Note that a new battery’s full performance is achieved only after two or three complete charge and discharge cycles! • The battery can be charged and discharged hundreds of times but it will eventually wear out. When the operating time (talk time and standby time) is noticeably shorter than normal, it is time to buy a new battery. -
Page 13: About The Phone, Keys And Menu
• silence the ringing of an incoming call Nokia Navi™ key Your phone’s Navi™ key below the display. Its current function is indicated by the word that appears above it (for example, Menu). -
Page 14: Clear Key
Use the clear key • delete a character to the left of the cursor • clear all characters from the display (press and hold) • return to the previous menu level • return from the menu to the start screen (press and hold) •... -
Page 15: Menu
Menu Your phone’s menu allows you to easily access the many powerful features in your phone. Scroll bar When you use your phone’s menu, a scroll bar appears at the far right of the screen. This bar indicates where you are in the menu; each tab location on the bar represents a different menu item. -
Page 16: Menu Shortcuts
Menu shortcuts When you select a menu item, numbers appear on the display above the scroll bar. If you become familiar with these numbers, you can use them as shortcuts for accessing different menu items. For example, to access the Phone settings menu, you can simply press Menu 4 2. - Page 17 4 Settings Call settings 411 Emergency key 9 412 Automatic redial 413 Calling card 414 Automatic answer Phone settings 421 Touch tones 422 Language 423 Restore factory settings 424 Lights Security settings 431 Restrict calls 432 Access codes Network services 441 Voice privacy 442 Network feature setting 443 Call forwarding...
-
Page 18: Entering Letters And Numbers
Entering letters and numbers Cursor The cursor is a blinking vertical line that appears on the screen when you are entering text or numbers. Characters you enter appear to the right of the cursor. Pressing the key deletes the character to the left of the cursor. Use the scroll keys to move the cursor to the right ABC mode When your phone is ready for you to enter text, such as a... -
Page 19: Special Characters In Names
There is an extra feature in your phone called Predictive text input. For more information on this special text writing feature, see page 57. Entering numbers To enter numbers while in ABC mode, you can: • press and hold the corresponding key until the number appears, or •... -
Page 20: Keyguard (Locking The Keypad)
Character This character creates a pause. Digits to the right of the p are sent as touch tones after a 2.5-second pause. Use this character to save phone numbers of automated services that require you to enter a password or other information after the call is answered. - Page 21 Notes about Keyguard • When Keyguard is on, the only way to answer a call is to press Answer. • When Keyguard is on, calls may be possible to the emer- gency number programmed into your phone (e.g. 911 or other official emergency number).
-
Page 22: Basic Functions
WARNING! Do not switch on the phone when wireless phone use is prohibited or when it may cause interference or danger. About the antenna Your Nokia phone has a fixed-length antenna. Do not attempt to extend or remove it. Normal position Hold the phone as you would any other telephone, with the antenna pointed up and over your shoulder. -
Page 23: Making A Call
To improve your phone’s reception, try moving your phone slightly. If you’re inside a building, move toward a window. Making a call 1 Enter the area code and phone number. (Menu changes to Call.) 2 Press Call and wait for the other party to answer. -
Page 24: Saving A Name And Number
See ‘Saving names and numbers’ on page 38. Finding a name and number 1 Press to access your phone book. 2 Scroll to the number you want. (To skip ahead quickly in the list, press the number key that corresponds to the first letter of the name.) 3 Press Call. -
Page 25: Silencing An Incoming Call
Call - caller ID unavailable will display when the wireless network does not recognize the calling number. Also, Call - caller ID blocked may display if the calling party has blocked caller ID. Silencing an incoming call To silence the ringing of an incoming call, press briefly. -
Page 26: Settings
5. Settings This section describes some phone settings that allow you to customize your phone to suit your preferences and that you probably won’t change very often. Automatic redial Use Menu 4 1 2 to turn this feature on or off. When this feature is on and the wireless network is busy, your phone will redial a number up to three times. - Page 27 Dialing sequence Access no. Dial 1-800 access number, + phone no. then phone number, then + card no. card number (+ PIN if required) Access no. Dial 1-800 access number, + card no. then card number (+ PIN if + phone no. required), then phone number Prefix...
-
Page 28: Clock
Clock Your phone has an internal clock that can be displayed on the start screen. The clock must be set in order for call times to be recorded (see ‘Call log’ on page 41). If you remove the battery for longer than a couple of seconds, the time will be lost. -
Page 29: Lights
Lights If you’re using your phone with a car kit, use Menu 4 2 4 to set your phone’s lights to On (lights stay on) or Automatic (after 15 seconds, lights turn off until the next key is pressed, phone rings, etc.). For information about turning your phone’s lights on at any time, see page 7. -
Page 30: Tones
• Press Menu 7 3 3 to turn off the time update. • Press Menu 7 2 2 to set the time on your phone. Tones Use Menu 8, My tones, to change the six sound settings in your phone: ringing option, ringing tone, ringing volume, message alert tone, keypad tones, and warning and game tones. -
Page 31: Quick Alert Settings
Ringing volume Use Menu 8 3 to control the volume of your phone’s ringing and of message alert tones. Note: If your phone does not ring loudly enough at maximum volume, try a different ringing tone; some tones are louder than others. Message alert tone Use Menu 8 4 to choose the tone played when you receive a text message. -
Page 32: Voice Mailbox Number
Tip: Instead of using the scroll keys, you can press key repeatedly to scroll through this menu. After you reach the setting you want, press and hold key. Note: If you choose Silent or Quiet, the alarm clock will only sound a quiet beep. My tones Uses the settings you have made in Menu 8, My tones. -
Page 33: Voice Privacy
Voice privacy Available only in digital networks, voice privacy encrypts the voice channel so it is more difficult for anyone to eavesdrop on your conversations. Use Menu 4 4 1 to turn voice privacy on or off. This feature may not be available in all areas; contact your service provider for details. -
Page 34: Emergency Calls
6. Emergency calls 1 If the phone is not on, switch it on. 2 Press and hold the the phone for calls. 3 Key in the emergency number for your present location (e.g. 911 or other official emergency number). Emergency numbers vary by location. -
Page 35: Emergency Key 9
Emergency key 9 Use Menu 4 1 1 to turn on this feature. When this feature is on, the phone attempts to make an emergency call when you: • press and hold the 9 key, or • press 9, then press Call. Note: When Keyguard is active, the only way to make an emergency call is to dial the emergency number, then press Call. -
Page 36: Advanced Functions
7. Advanced functions Network feature setting Call forwarding, call waiting, and send own number are network services available through your service provider. These features do not appear in your phone’s Network services menu until you save the related feature code(s) given to you by your service provider. -
Page 37: Making/Receiving Multiple Calls
in-call menu, press Options. Press to scroll to the last item in the menu. The in-call menu is: Answer Swap New call Connect all Phone book Menu Touch tones Mute/End mute mute/unmute the phone’s microphone Making/receiving multiple calls Making a new outgoing call While you are in a call, select New call from the in-call menu. -
Page 38: Call Waiting
Note: The wireless network does not support ending individual calls when more than one call is in progress. Call waiting Call waiting is a network service that allows you to receive an incoming call when you’re already in a call. Contact your service provider for details. -
Page 39: Call Forwarding
Call forwarding Call forwarding is a network service that lets you forward your incoming calls to another phone number. Check with your service provider for details and feature codes. Activating call forwarding Standard method To activate call forwarding, you must get the call forwarding activation code from your service provider. -
Page 40: 1-Touch Dialing
1-touch dialing This feature allows you to make phone calls quickly and easily with the touch of a button. Once you have assigned a phone number to a number key (2 through 8), you can press and hold that key to dial the number. (You can also press the number key briefly and then press Call.) Note: Keys 1 and 9 are used exclusively for dialing your voice mailbox and for attempting emergency calls, respectively... -
Page 41: Send Own Number
A number assignment module, or NAM, consists of a phone number and network information that the service provider programs into your phone. When you select a NAM, you’re not only selecting a phone number, you’re also selecting a home system in which you will not be charged roaming fees. The two NAMs are not equal. -
Page 42: Calling Card Calls
Before you can make a call using a calling card, you have to enter your calling card information into the phone. See ‘Calling card set-up’ on page 19. To make a call using a calling card: 1 Enter the phone number, including any prefix (such as 0 or 1) that your calling card may require when you make a calling card call. -
Page 43: Automatic Answer
To switch from private to public If you are in a private system and want access to a public system, press and hold Menu when you are not in a call. Your phone will display Search public systems? Press OK and your phone will use the public system for the next outgoing call. -
Page 44: Restore Factory Settings
Setting automatic touch tone length Use Menu 4 2 1 2 to set the length of touch tones sent automatically by the phone to Short (one tenth of a second) or Long (half a second). Saving touch tone strings Touch tone strings can be used for sending and receiving information with your phone. -
Page 45: Phone Book
8. Phone book Your phone allows you to save 100 phone numbers and associated names so they are right at your fingertips for easy dialing. Saving names and numbers Saving a name and number is easy! Just enter the phone number, press , then press Save. -
Page 46: Finding Names And Numbers
Notes about saving names • A name may appear only once in memory. If you try to save a name that already exists in memory, the phone asks if you want to replace the existing name. • If you try to save a phone number and your phone book is full, you are given the option to replace an existing entry. -
Page 47: Editing Names And Numbers
Editing names and numbers To edit phone book entries, press Menu 1 3, scroll to the entry you want to edit, then press Edit. Edit the name and number as needed. Erasing names and numbers Use Menu 1 4 to erase entries from your phone book. One by one lets you select one entry at a time to be erased. -
Page 48: Call Log
9. Call log For your convenience, the call log (Menu 3) saves a list of phone numbers you have dialed, and can show you how much time you have spent on the phone. If you subscribe to the caller ID network service, the call log also records the phone numbers of missed calls and received calls. -
Page 49: Received Calls
Viewing the missed calls list at any time Use Menu 3 1 to view the missed calls list at any time. To dial a number, press Options, then choose Call. Received calls If you subscribe to the caller ID network service, your phone automatically stores the phone numbers of the 10 most recent calls you’ve answered. - Page 50 Last call is the duration of the last call, or current call if applicable. All calls is the duration of all calls since the timers were last reset. Life timer displays the duration of all calls for the life of your phone and cannot be reset.
-
Page 51: Voice Messages
10. Voice messages Voice mail is a network service that allows callers to record a message when you cannot be reached. You can then call your voice mailbox and retrieve your messages. Saving your voice mailbox number When you subscribe to voice mail, your service provider will give you a voice mailbox number. -
Page 52: Text Messages
11. Text messages The text message network service allows you to write, send, forward and reply to text messages. Also, you can receive text messages from a variety of sources, such as a Web page set up by your service provider. Note: The availability of text messages may vary according to your wireless service provider. -
Page 53: Storage Of Incoming Messages
Reply provides a screen where you can write a reply to a message. When you’ve seen the last new message, the indicator disappears. About the Inbox The Inbox holds text messages that have not been deleted or saved. Use Menu 2 1 1 to access the Inbox at any time. You will see a list of message headers. -
Page 54: Writing And Sending Text Messages
You can write a text message using your keypad. Once you have written a message on your screen, you will have options for sending your message. Note: Your 5165 supports writing and sending text messages in English, Hebrew, Portuguese and Spanish. Contact your service provider for details of feature availability. -
Page 55: Forwarding And Replying To A Message
Sending a text message 1 Write a text message and press Options. 2 To send the message, highlight Send and press OK. 3 Enter the phone number (or press Search to locate the number in the phone book), then press Send. Message settings This network feature allows you to mark your text message as urgent, place your number within the text message, or... -
Page 56: Sending And Receiving Business Cards
Forwarding a text message 1 Highlight the message that you want to forward. 2 Press Read, then press Options. 3 Scroll to Forward, press OK. 4 Scroll to either As message or As e-mail, press OK. 5 Send the message as you normally would. Replying to a text message 1 Highlight the message that you want to reply to. - Page 57 1 When your phone displays Business card received, press Options. 2 Select Show and Press OK. 3 Scroll through the available information. Saving a viewed business card 1 After viewing the business card, press Save, then press OK. 2 At the Name prompt, edit the name if you want to, then press OK.
-
Page 58: E-Mail Messages
12. E-mail messages You can use your phone to send and receive e-mail messages. This means you no longer need to be at your computer to send or receive messages. Saving e-mail addresses You can add an e-mail address to a name you already have in your phone book. -
Page 59: Sending E-Mail Messages
5 When prompted E-mail address, enter the e-mail address. To add special characters (@ and . ), press the special character screen. Scroll to the character you need and press Use. 6 Press Save. For more information on saving, editing and erasing phone book entries, see ‘Phone book’... -
Page 60: Forwarding And Replying To E-Mail Messages
Options for a completed message Send Save Erase Exit Dictionary Spell mode Insert number Insert symbol Matches Visible only when dictionary activated Forwarding and replying to e-mail messages 1 If the message is not on the screen, press Menu 2 1 1 2 Scroll to the message you want to use and press Read. -
Page 61: Extra Features
13. Extra features Alarm clock The alarm clock feature is based on your phone’s internal clock and sounds an alert at a time you specify. Setting the alarm clock Use Menu 7 1 to turn the alarm clock on or off. Note that when you’re entering the alarm time, use two digits for both hours and minutes (for example, enter 1:30 as 0130). -
Page 62: Downloading Ringing Tones
• To shut off the alarm, press any key except Snooze. The phone displays Keep the phone on? Press Yes to keep it on or • If you press Snooze, the phone turns itself off for 10 minutes, then the alarm sounds again. REMEMBER! Do not switch on the phone when wireless phone use is prohibited or when it may cause interference or danger. -
Page 63: Games
Games Use Menu 6 to challenge yourself or a friend to the three fun games in your phone. To pause a game, press To resume, choose Continue. REMEMBER! Your phone must be switched on to use this function. Do not switch on the phone when wireless phone use is prohibited or when it may cause interference or danger. -
Page 64: Predictive Text Input
Predictive text input This feature allows you to write text messages by pressing each number key only once for each letter. Your phone has a built-in dictionary that searches for the correct word. You can add words (for example, the names that you use often) into the dictionary. -
Page 65: Insert Symbols
If the word is not correct • Press repeatedly until the desired word appears, then press • Press Options, scroll to Matches, then press OK. Scroll to the correct word and press Use. • Press to confirm the word and to enter a space. •... -
Page 66: Prepaid Service
Prepaid service Your service provider may offer prepaid service. This means that you can sign up to become a prepaid customer and obtain airtime by purchasing a Prepaid card which contains a replenishment value. Contact your service provider for details. Note: Use of the Prepaid menu requires that your service provider have access numbers available to check your balance and replenish your account. - Page 67 1 Press Menu and 2 Select Save access phone numbers. 3 When prompted for the balance number, enter the phone number given to you by your service provider. 4 Press OK. 5 When prompted for the replenish number, enter the phone number given to you by your service provider.
- Page 68 Zero balance on your Prepaid account A zero balance on your Prepaid account during a call ends your call. A zero balance on your Prepaid account before a call prevents both incoming and outgoing calls. You may hear an audio notification about your zero balance when you try to make a call.
-
Page 69: Security Features
14. Security features Access codes overview Access codes consist of the lock code and security code. When you get your phone, you should change these codes from their defaults, write down the new codes, and keep them in a safe place away from the phone. Avoid using access codes that are similar to emergency numbers, such as 911, to prevent accidental dialing of the emergency number. -
Page 70: Restricting Incoming Calls
Restricting incoming calls Choose Restrict incoming calls to prevent your phone from receiving incoming calls. Enter your security code, then press OK. Press Mark, then press change (or to cancel). Note: This feature requires the caller ID network service, and the caller’s ID must be available to the phone in order for the restriction to work. -
Page 71: Phone Lock
3 If you want, give a name of up to 10 characters to the restriction (such as Joey, Long dist, or 1-800 #s), then press OK. The entry is added to your list of restricted numbers. Allowing calls to a number on the list If you later decide to allow calls to a restricted number, press Select to see your list of numbers. - Page 72 Saving the unlocked phone number Use Menu 4 3 2 2 to save a number that may be called even when your phone is locked. You will be required to enter the lock code. Calling the unlocked phone number Press , or manually enter the number exactly as it is saved, then press Call.
-
Page 73: Accessories
Extra covers may be purchased from your authorized Nokia dealer. You can use the new 5165 covers with the 5160 phones. The new cover requires a matching keypad. Also, you can use the 5160 covers with the 5165 phones. -
Page 74: Changing Covers
Changing covers When changing covers, don’t use the phone’s antenna as leverage! 1 Switch off the power and disconnect the phone from the charger or any other device. 2 Using a coin, depress the colored tab on the top of the phone and slide the color cover forward. -
Page 75: Batteries
Batteries Several batteries are available for your phone: • BPS-1 Ultra Slim Li-Polymer 600 mAh • BLS-2N Extended Li-Ion 900 mAh • BMS-2S Extended NiMH 900 mAh • BMS-2V Vibrating NiMH 900 mAh • BLS-4 Ultra Extended Li-Ion 1500 mAh Charging times The table below displays approximate battery charging times These charging times will charge your phone to about 80%... -
Page 76: Chargers And Other Accessories
Also, refer to any accessory options manual that may have been included in your sales package for the entire line of Nokia Original Accessories. Note: When a charger is not in use, disconnect it from the power source. - Page 77 ACP-7U Standard Travel Charger Use this durable and economical charger to charge all battery options. Plug the charger into a wall outlet and connect the connector to the bottom of your phone. Check the charging status on the phone display. Calls can be made during charging, but charging will stop for the duration of the call.
- Page 78 LCH-9 Rapid Cigarette Lighter Charger The multivoltage Rapid Cigarette Lighter Charger allows you to charge your phone when you travel. The small charger's functional design fits well with most car lighters and interiors. Charging times are the same as for the Rapid Travel Charger ACP-9U.
- Page 79 When the phone is charging, no lights are displayed on the stand; check the charging status of the phone battery on the phone display. Charging moves to the rear slot once the front battery is 100% charged. When the spare battery is charging, check the status indicator on the left side of the charging stand.
-
Page 80: Reference Information
16. Reference information Important safety information Traffic safety Do not use a hand-held telephone while driving a vehicle. If using a hand-held phone park the vehicle before conversing. Always secure the phone in its holder; do not place the phone on the passenger seat or where it can break loose in a collision or sudden stop. -
Page 81: Posted Facilities
• Should use the ear opposite the pacemaker to minimize the potential for interference. • If you have any reason to suspect that interference is taking place, switch off your phone immediately. Hearing aids Some digital wireless phones may interfere with some hearing aids. In the event of such interference, you may want to consult your service provider. -
Page 82: Emergency Calls
Vehicles Only qualified personnel should service the phone, or install the phone in a vehicle. Faulty installation or service may be dangerous and may invalidate any warranty which may apply to the unit. Check regularly that all wireless phone equipment in your vehicle is mounted and operating properly. -
Page 83: Radio Frequency (Rf) Signals
If certain features are in use (Keyguard, call restrictions, etc.), you may first need to turn those features off before you can make an emergency call. Consult this document and your local cellular service provider. When making an emergency call, remember to give all the necessary information as accurately as possible. -
Page 84: Care And Maintenance
Your phone is a product of superior design and craftsmanship and should be treated with care. The suggestions below will help you to fulfill any warranty obligations and allow you to enjoy this product for many years. When using your phone, battery, charger, OR any accessory: •... -
Page 85: Technical Information
The right to make changes and improvements to any of the products described in this guide without prior notice is reserved. Phase 5 Issue 2 © 2000 Nokia Mobile Phones. All rights reserved. US Patent No 5818437 and other pending patents. T9 text input software Copyright ©... -
Page 86: Nokia One-Year Limited Warranty
18. NOKIA One-Year Limited Warranty Nokia Mobile Phones, Inc. (“NMP”) warrants that this cellular phone (“Product”) is free from defects in material and workmanship that result in Product failure during normal usage, according to the following terms and conditions: 1. The limited warranty for the Product extends for ONE (1) year beginning on the date of the purchase of the Product. - Page 87 If “a” is not convenient because of distance (more than 50 miles) or for other good cause, the Consumer shall ship the Product prepaid and insured to: Nokia Mobile Phones, Inc. Attn: Repair Department 795 West Nasa Blvd. Melbourne, FL. 32901...
- Page 88 f) If the Product is returned to NMP during the limited warranty period, but the problem with the Product is not covered under the terms and conditions of this limited warranty, the Consumer will be notified and given an estimate of the charges the Consumer must pay to have the Product repaired, with all shipping charges billed to the Consumer.
- Page 89 Telephone: 1-888-NOKIA2U (1-888-665-4228) Facsimile: (813) 249-9619 TTY Users: 1-800-24NOKIA (1-800-246-6542) 17. The limited warranty period for NMP supplied attachments and accessories is specifically defined within their own warranty cards and packaging. © Nokia is a registered trademark of Nokia Corporation.
-
Page 90: Index
19. Index ABC mode 11 access codes 62 accessories 66 batteries 68 chargers 69 covers 66 address e-mail 51 alarm clock 54 alternate formats of User Guide 78 answering a call 17 automatic answer 36 antenna 15 external jack 7 automatic answer 36 automatic redial 19 automatic time update 22... - Page 91 clearing call lists 42 clock 21 alarm clock 54 automatic time update 22 displaying/hiding 21 setting 21 time format 21 conference calls see three- way calling covers, changing 66 cursor 11 dialed calls 42 directory see phone book 38 downloading ringing tones 55 editing names/numbers 40 e-mail messages 51 e-mail gateway number 52...
- Page 92 NAM selection 33 names editing 40 entering 11 erasing 40 finding 17, 38 saving 38 Navi key 6 network feature setting 29 new call 30 numbers editing 40 entering 12 erasing 40 finding 17, 38 saving 38 showing/hiding your own on/off 15 one-touch dialing 33 phone book 38...
- Page 93 technical information 78 text messages 45 business cards 49 forwarding 48 Inbox 46 predictive text input 57 reading 45 replying 49 Saved folder 46, 48 storage 46 writing 47 three-way calling 30 timers 42 tones 23 keypad 24 message alert 24 quick alert settings 24 ringing option 23 ringing tone 23...