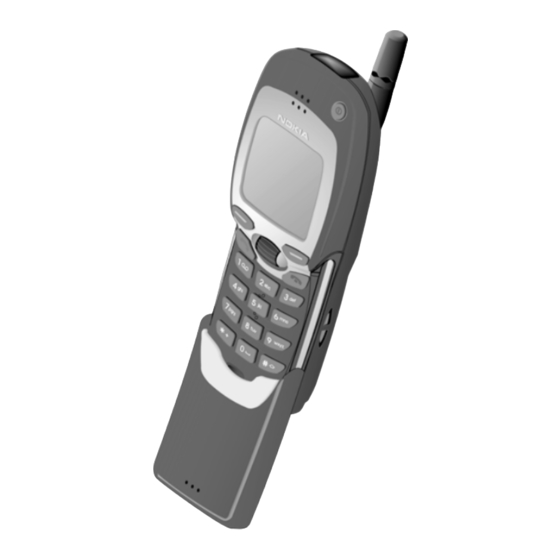
Nokia 7110 User Manual
Nokia cell phone user's guide
Hide thumbs
Also See for 7110:
- Owner's manual (95 pages) ,
- User manual (87 pages) ,
- Upgrade instructions (2 pages)

Related Manuals for Nokia 7110


Summary of Contents for Nokia 7110
- Page 1 Electronic user's guide released subject to "Nokia User's Guides Terms and Conditions, 7th June, 1998". User’s Guide 9352062 Issue 2...
- Page 2 Nokia is a registered trademark of Nokia Corporation, Finland. Navi is a trademark of Nokia Mobile Phones. ©1999. Nokia Mobile Phones. All rights reserved. US Patent No 5818437 and other pending patents. T9 text input software Copyright (C) 1997-1999. Tegic Communications, Inc. All rights reserved.
-
Page 3: Quick And Easy
Quick and easy These first two pages include some basic tips for quick and easy use of your Nokia 7110. For more detailed information read through the user’s guide. Before using your phone: With the battery removed, insert the SIM card, then insert the battery and charge it. -
Page 4: Using The Menu
Quick finding Press Navi Roller once in the standby mode, then roll to the desired name menu shortcut is set to access the list of names as in the default settings). Using the menu Entering a menu Press Menu, roll with Navi Roller to the desired menu function and press Navi Roller. -
Page 5: Table Of Contents
Answering a call... 20 Adjusting the earpiece volume ... 21 Last number redial ... 21 Listening to voice messages... 21 ã 1999 Nokia Mobile Phones. All Rights Reserved. In-call functions ...21 Call waiting...22 Call holding...22 Making a conference call...23 Transferring a call ...23 Call register (Menu 2) ...24... - Page 6 ...78 Access codes ...78 15. Reference information ... 80 Re-attaching the slide ...80 Using batteries and chargers ...81 Accessories and Batteries ...82 Important Safety Information...83 Care and Maintenance ...87 ã 1999 Nokia Mobile Phones. All Rights Reserved.
-
Page 7: For Your Safety
Use only in the normal position (to ear). Don’t touch the antenna unnecessarily. USE QUALIFIED SERVICE Only qualified service personnel must install or repair equipment. ACCESSORIES AND BATTERIES Use only approved accessories and batteries. Do not connect incompatible products. ã 1999 Nokia Mobile Phones. All Rights Reserved. -
Page 8: Network Services
Your phone has labels on it. These are important for service and related purposes, so be careful not to lose the label or the information it contains. key, press ã 1999 Nokia Mobile Phones. All Rights Reserved. . To end a call once to clear Give... -
Page 9: Getting Started
Note: Keep all miniature SIM cards out of the reach of small children. The SIM card and its contacts can easily be damaged by scratches or bending, so be careful when handling, inserting or removing the card. ã 1999 Nokia Mobile Phones. All Rights Reserved. Getting started... -
Page 10: Charging The Battery
• Key in the PIN code, which is displayed as asterisks, and press If the phone asks for a security code: • Key in the security code, which is displayed as asterisks, and press OK. For more information, see “Access codes” on page 78. ã 1999 Nokia Mobile Phones. All Rights Reserved. - Page 11 Contact with the antenna affects call quality and may cause the phone to operate at a higher power level than otherwise needed. ã 1999 Nokia Mobile Phones. All Rights Reserved.
-
Page 12: About Your Phone
In this user guide, the selection keys are indicated by the relevant guiding text appearing in bold (for example, Menu or Names). Using the Nokia Navi™ Roller The Nokia Naviä Roller functions both as a scroll key and as a selection key: Roll to scroll through names and numbers stored in the phone book or through the phone’s menus, submenus and option lists. -
Page 13: Using The Sliding Cover
IR port of your phone. For sending and receiving data via the IR port of your phone, see “Transmitting data via IR” on page 75. ã 1999 Nokia Mobile Phones. All Rights Reserved. About your phone numbers stored... -
Page 14: About Display Indicators
Indicates that the phone’s key pad is locked. Indicates that you have set on the alarm clock or that you have set an alarm for a calendar note. Indicates that you have activated one or more call diverts. ã 1999 Nokia Mobile Phones. All Rights Reserved. -
Page 15: About The Phone Book (Names)
3 Roll to SIM card or Phone and press Navi Roller to select the highlighted memory. Tip: If you want to store more than one number per name, select the option Phone. ã 1999 Nokia Mobile Phones. All Rights Reserved. About your phone... -
Page 16: Setting The Type Of View For Stored Names And Numbers
(for example, Call settings). If the menu contains submenus (for example, Speed dialling), repeat step 3. 4 Roll with Navi Roller to the desired setting option. 5 Press Navi Roller to select the highlighted setting. ã 1999 Nokia Mobile Phones. All Rights Reserved. -
Page 17: Accessing A Menu Function By Its Shortcut
For example, to set on the menu function Speed dialling, press Menu and then key in 2 for Call settings, 3 for Speed dialling and 1 for selecting On. ã 1999 Nokia Mobile Phones. All Rights Reserved. About your phone or close the slide. where 4 is for Settings,... -
Page 18: List Of Menu Functions
4 Call waiting service 5 Line for outgoing calls 6 Summary after call 7 Fax or data call 3 Phone settings 1 Language 2 Cell info display 3 Welcome note 4 Network selection ã 1999 Nokia Mobile Phones. All Rights Reserved. - Page 19 7 Divert all data calls 8 Cancel all diverts Only shown if supported by your SIM card. The name and contents vary depending on the SIM card. ã 1999 Nokia Mobile Phones. All Rights Reserved. About your phone 6 Games 7 Calculator 8 Calendar...
-
Page 20: Call Functions
• To answer an incoming call, open the sliding cover. • To reject an incoming call, close the sliding cover. • To end a call, close the sliding cover. twice) and country code before entering ã 1999 Nokia Mobile Phones. All Rights Reserved. or by... -
Page 21: Adjusting The Earpiece Volume
• Hold or Unhold (to put a call on hold or to unhold a call) • New call (to make a call when you have a call in progress) ã 1999 Nokia Mobile Phones. All Rights Reserved. Call functions once to access the list of the last-... -
Page 22: Call Waiting
3 To end the active call, press . The first call is put on hold. , (or to end both calls at the same . The first call is put on hold. ã 1999 Nokia Mobile Phones. All Rights Reserved. -
Page 23: Making A Conference Call
6 To end the conference call, press Transferring a call When you have one call active and one on hold, this network service allows you to connect these two calls and disconnect yourself from the call. ã 1999 Nokia Mobile Phones. All Rights Reserved. Call functions... -
Page 24: Call Register (Menu 2)
Within this submenu you can view the ten phone numbers that you have most recently called or attempted to call. Tip: To quickly access the list of last dialled numbers, press once when the phone is in the standby mode. ã 1999 Nokia Mobile Phones. All Rights Reserved. -
Page 25: Erase Recent Call Lists (Menu 2-4)
112 may be possible. Note: The actual invoice for calls and services from your service provider may vary, depending upon network features, rounding-off for billing, taxes and so forth. ã 1999 Nokia Mobile Phones. All Rights Reserved. Call functions... -
Page 26: Call Divert (Menu 5)
Cancel to set the divert setting off or Check status to check whether the divert is activated or not. To cancel all diverts, select the submenu Cancel all diverts (Menu 5-8). ã 1999 Nokia Mobile Phones. All Rights Reserved. - Page 27 Divert all voice calls. If you have two phone lines, the divert icon for your first line is for the second line is ã 1999 Nokia Mobile Phones. All Rights Reserved.
-
Page 28: Personalising Your Phone
3 Select Personalise and press OK. 4 Roll to the setting you want to customise (for example, Ringing tone) and press Navi Roller. See “Profile settings”. 5 Roll to the desired option and press OK. phone ã 1999 Nokia Mobile Phones. All Rights Reserved. -
Page 29: Profile Settings
46. • Automatic answer (in Car and Headset profiles only) to set the phone to answer an incoming voice call after a few seconds. ã 1999 Nokia Mobile Phones. All Rights Reserved. Personalising your phone is displayed when the phone... -
Page 30: Renaming Profiles
Within the Clock menu, you can also set the time and choose whether the clock uses the 12-hour or 24-hour format. ã 1999 Nokia Mobile Phones. All Rights Reserved. -
Page 31: Welcome Note
However, you can set the Roller menu to access another function that you often use, for example, the Calendar or Profiles. You can do this in the Roller function submenu (4-3-5), see page 69. ã 1999 Nokia Mobile Phones. All Rights Reserved. -
Page 32: Writing Text
You can also move the cursor by first pressing Options, then pressing Navi Roller at Move cursor. Roll with Navi Roller to the desired location and press Done to move the cursor. ã 1999 Nokia Mobile Phones. All Rights Reserved. . Note that this... -
Page 33: Writing Text By Using Traditional Text Input
Tip: When writing a text message or other text, the phone uses the text case, which automatically writes the first character of a sentence in upper case. ã 1999 Nokia Mobile Phones. All Rights Reserved. ) repeatedly until the desired once. Upper case is to enter the number input... -
Page 34: Writing Text By Using Predictive Text Input
The word changes after each keystroke - do not pay any attention to how the word appears on the display before you have keyed in all its characters. For example, to write Nokia when the English dictionary is selected, press: (for n) (for o) Use for word entry. -
Page 35: Writing Words Using The Predictive Text Input
To add the word to the dictionary, press Spell. See “Adding a new word to the dictionary”. ã 1999 Nokia Mobile Phones. All Rights Reserved. repeatedly until . Press each key only once for one letter. (see also page 37). To... - Page 36 Tip: You can insert a phone number or name stored in the phone book by using the options Insert number or Insert name, respectively. to return to the predictive text input. ã 1999 Nokia Mobile Phones. All Rights Reserved. to enter the...
-
Page 37: Deleting Characters
Tip: You can also accept the first part of the compound word by first adding a space by pressing the space by pressing Clear once. ã 1999 Nokia Mobile Phones. All Rights Reserved. Writing text enters the number input. and then removing... -
Page 38: Setting Predictive Text Input On/Off And Selecting Dictionary Language
Tip: To quickly set the predictive text input on or off, press Menu, press Write and then press and hold Options. Note: Predictive text input is only available for the languages listed in the dictionary option list. ã 1999 Nokia Mobile Phones. All Rights Reserved. -
Page 39: Phone Book Functions
When you select a name from the phone book (for example, to make a call or send a text message), the default number is used unless you select another number. For example, when you ã 1999 Nokia Mobile Phones. All Rights Reserved. Phone book functions... - Page 40 2 Roll to the number you want to set as the default number, press Options and roll to Set as default and press Navi Roller. will be used as the number type. ã 1999 Nokia Mobile Phones. All Rights Reserved.
-
Page 41: Searching And Calling From Phone Book
SIM card. 1 Press Names, then press Options and roll to Service numbers and press Navi Roller. 2 Roll to the desired service number, press ã 1999 Nokia Mobile Phones. All Rights Reserved. Phone book functions to call the number. -
Page 42: Speed Dialling
• If you have set the menu function Speed dialling (Menu 4- 2-3)to on, press and hold the corresponding speed dialling key until the call is started. Tip: Pressing and holding number. to work as a speed dials your voice mailbox ã 1999 Nokia Mobile Phones. All Rights Reserved. -
Page 43: Organising The Phone Book
3 Roll to the phone book you want to erase (SIM card or Phone) and press OK. 4 Press OK at Are you sure?, key in your security code and press ã 1999 Nokia Mobile Phones. All Rights Reserved. Phone book functions... -
Page 44: Copying Names And Numbers
See also “Copying and printing via IR” on page 45 and “Transmitting data” on page 75. When you receive a business card, press Show. Then press Options, select Save or Discard, and press OK. ã 1999 Nokia Mobile Phones. All Rights Reserved. -
Page 45: Copying And Printing Via Ir
Note: You can set the phone to ring only upon receiving calls from names and numbers that belong to a specific caller group by using the Alert for setting under the Profiles menu (see page 28). ã 1999 Nokia Mobile Phones. All Rights Reserved. Phone book functions... -
Page 46: Adding A Name And Phone Number In A Caller Group
The option list includes options for viewing and sending a group graphic via IR. By selecting the option Send graphic you can also send a group graphic as an Over The Air (OTA) message, if supported by your network. ã 1999 Nokia Mobile Phones. All Rights Reserved. -
Page 47: Memory Status
2 Roll to Memory status and press Navi Roller. The phone now displays the status of the SIM card memory. To view the status of the phone’s internal memory, roll down with Navi Roller. ã 1999 Nokia Mobile Phones. All Rights Reserved. Phone book functions... -
Page 48: Text Messages
For forwarding the message, for example to a fax or an email address, see “Special sending options” on page 51. indicator and the ã 1999 Nokia Mobile Phones. All Rights Reserved. -
Page 49: Replying To A Text Message
You can find the list of default templates in the Templates folder of the Messages menu. You can edit the templates to your liking. The original templates are restored when the Restore Factory Settings menu (Menu 4-6) is selected. ã 1999 Nokia Mobile Phones. All Rights Reserved. Text messages... -
Page 50: Writing And Sending Text Messages
The option list includes options for sending, saving, erasing the message you are writing. For sending the message, for example to a fax or an email address, see “Special sending options” on page 51. ã 1999 Nokia Mobile Phones. All Rights Reserved. -
Page 51: Special Sending Options
See “Message settings” on page 53. To send a text message to a fax number: 1 After you have written the message, select Send Options or Forward Options, and then select the option Message profile. ã 1999 Nokia Mobile Phones. All Rights Reserved. Text messages... -
Page 52: Organising Your Text Messages
1 Once in the Messages menu, press Options. 2 Press Navi Roller when Add folder is highlighted. 3 Key in the name of the new folder and press OK. icon indicates that the message ã 1999 Nokia Mobile Phones. All Rights Reserved. -
Page 53: Moving A Text Message
Options and then selecting the option Message settings. There are two kinds of message settings in your phone, message profile specific settings and settings common to all text messages. ã 1999 Nokia Mobile Phones. All Rights Reserved. Text messages icon indicates that the message... -
Page 54: Settings Common To All Text Messages
The message profiles menu is only displayed if your SIM card supports more than one set. Each set appears in its own submenu and may have any name. The number of sets depends on how many sets your SIM card offers. ã 1999 Nokia Mobile Phones. All Rights Reserved. - Page 55 The phone will suggest the number stored under this option as a default number for text message sending when this message profile is selected. Message profile name Allows you to rename each message profile. ã 1999 Nokia Mobile Phones. All Rights Reserved.
-
Page 56: Phone As Your Personal Assistant
Once in the day list, roll to the desired day and press Navi Roller to access the day view. Day view allows you to roll through the notes made for the selected day. ã 1999 Nokia Mobile Phones. All Rights Reserved. -
Page 57: Adding A Calendar Note
Enter the desired phone number (or recall it from the phone book) and press OK. Then enter the note and press OK. Repeat this with the time. ã 1999 Nokia Mobile Phones. All Rights Reserved. Phone as your personal assistant... -
Page 58: Clock (Menu 4-1-2)
Call register (Menu 2), Alarm clock (Menu 4-1-1) and Calendar (Menu 8). Note: If the battery is removed from the phone for a long time, you may need to set the time again. when you view ã 1999 Nokia Mobile Phones. All Rights Reserved. -
Page 59: Alarm Clock (Menu 4-1-1)
Yes to register or No to keep the phone switched off. Do not switch on the phone when wireless phone use is prohibited or when it may cause interference or danger. ã 1999 Nokia Mobile Phones. All Rights Reserved. Phone as your personal assistant indicator in the header... -
Page 60: Calculator (Menu 7)
Note: The calculator has a limited accuracy and rounding errors may occur, especially in long divisions. for a decimal point). three times ( * ); to divide, press . To enter a negative number, ã 1999 Nokia Mobile Phones. All Rights Reserved. twice... -
Page 61: Making A Currency Conversion
(press 2 Press roll to either To domestic or To foreign, Options and press Navi Roller. The phone displays the converted amount. ã 1999 Nokia Mobile Phones. All Rights Reserved. Phone as your personal assistant for a decimal point). -
Page 62: Games (Menu 6)
9. Games (Menu 6) Your Nokia 7110 offers you the following 4 games to play with: Snake II, Rotation, Racket and Opposite. Note: Your phone must be switched on to use this function. Do not switch on the phone when wireless phone use is prohibited or when it may cause interference or danger. -
Page 63: Services (Menu 10)
Activate is highlighted, or roll to Edit and press Navi Roller to edit the connection settings of the connection set. Tip: By selecting the setting Rename, you can rename the connection set name to your personal liking. ã 1999 Nokia Mobile Phones. All Rights Reserved. Services (Menu 10) - Page 64 4 Enter the address of the desired service and press OK. Then enter a title for the service and press OK. Store the desired homepage address Select Continuous or Temporary Select SMS or Data ã 1999 Nokia Mobile Phones. All Rights Reserved.
-
Page 65: Security Certificates
1 Press Menu, roll to the Services menu and press Navi Roller. 2 Roll to Settings and press Navi Roller. 3 Roll to Security certificate and press Navi Roller. ã 1999 Nokia Mobile Phones. All Rights Reserved. Services (Menu 10) - Page 66 (place where the requested resource is stored) is secure. It is up to the service provider to secure the data transmission between the gateway and server. ã 1999 Nokia Mobile Phones. All Rights Reserved.
-
Page 67: Settings (Menu 4)
Call waiting service (Menu 4-2-4) When this network service is activated, the network will notify you of a new incoming call while you have a call in progress. See “Call waiting” on page 22. ã 1999 Nokia Mobile Phones. All Rights Reserved. -
Page 68: Phone Settings (Menu 4-3)
Cell info display (Menu 4-3-2) Within this menu you can set the phone to indicate when it is used in a cellular network based on Micro Cellular Network (MCN) technology (network service). ã 1999 Nokia Mobile Phones. All Rights Reserved. - Page 69 Quick menu (allows you quick access the following menus: Messages, Calendar, Profiles, Phone book and Full menu), Speed dials, Dialled number list, or Profiles. Confirm SIM service actions (Menu 4-3-6) See “SIM services” on page 74. ã 1999 Nokia Mobile Phones. All Rights Reserved.
-
Page 70: Communication Settings (Menu 4-4)
Voice mailbox number (Menu 4-4-3) Within this submenu, you can store and edit your voice mailbox number. Voice mailbox is a network service. For more information and for the voice mailbox number, contact your service provider. ã 1999 Nokia Mobile Phones. All Rights Reserved. -
Page 71: Security Settings (Menu 4-5)
• Incoming calls to bar all incoming calls • Incoming calls when abroad to bar all incoming calls when abroad ã 1999 Nokia Mobile Phones. All Rights Reserved. Settings (Menu 4) - Page 72 You need the security code to set the security level. See “Protecting the phone with the security code” on page 78. Note: When you change the security level, all the recent calls lists are cleared. ã 1999 Nokia Mobile Phones. All Rights Reserved.
-
Page 73: Restore Factory Settings (Menu 4-6)
112, to prevent accidental dialling of the emergency number. Restore factory settings (Menu 4-6) Within this menu you can reset the menu settings to their original values. The security code is needed for this function. ã 1999 Nokia Mobile Phones. All Rights Reserved. Settings (Menu 4) -
Page 74: 12. Sim Services
SIM card vendor (for example, network operator, service provider or other third-party vendor). Note: Accessing these services may involve sending a text message (SMS) or making a phone call for which you may be charged. ã 1999 Nokia Mobile Phones. All Rights Reserved. -
Page 75: 13. Transmitting Data
IR port. • When is not shown, no IR connection exists. • When blinks, your phone is trying to connect to the other device or the IR connection has been lost. ã 1999 Nokia Mobile Phones. All Rights Reserved. Transmitting data... -
Page 76: Over The Air (Ota) Transmission
Tip: If you receive a ringing tone via IR or OTA, you can store five personal ringing tones in the ringing tone list under the ringing tone options Personal 1, 2, 3, 4 or 5. ã 1999 Nokia Mobile Phones. All Rights Reserved. -
Page 77: 14. Security Settings
SIM card is blocked and you need to enter the PUK code to unblock the SIM card. See “Access codes”. ã 1999 Nokia Mobile Phones. All Rights Reserved. within three seconds. To unlock the key within three seconds or press OK. -
Page 78: Protecting The Phone With The Security Code
Some of the access codes are also required for using some functions. The access codes (except PUK and PUK2 codes) can be changed by using the menu 4-5-6. See “Security settings (Menu 4-5)” on page 71. ã 1999 Nokia Mobile Phones. All Rights Reserved. - Page 79 PIN2 code. To use the functions, contact your service provider for a new card. Barring password The barring password is needed for using the Call barring service menu (4-5-2). Contact your service provider for the password. ã 1999 Nokia Mobile Phones. All Rights Reserved.
-
Page 80: Reference Information
3 Press the top part of the slide from both sides to ensure that the two parts of the slide are properly attached. ã 1999 Nokia Mobile Phones. All Rights Reserved. -
Page 81: Using Batteries And Chargers
The performance of NiMH batteries is particularly limited in temperatures below -10 C (14 F). The performance of Li-Ion batteries is particularly limited in temperatures below -0 C (32 F). ã 1999 Nokia Mobile Phones. All Rights Reserved. Reference information Battery low is briefly displayed. -
Page 82: Accessories And Batteries
The use of any other types will invalidate any approval or warranty applying to the phone, and may be dangerous. When you disconnect the power cord of any accessory, grasp and pull the plug, not the cord. ã 1999 Nokia Mobile Phones. All Rights Reserved. -
Page 83: Important Safety Information
Persons with pacemaker: • Should always keep the phone more than 20 cm (6 inches) from their pacemaker when the phone is switched on; • Should not carry the phone in a breast pocket; ã 1999 Nokia Mobile Phones. All Rights Reserved. -
Page 84: Hearing Aids
Users are reminded of the need to observe restrictions on the use of radio equipment in fuel depots (fuel storage and distribution areas), chemical plants or where blasting operations are in progress. ã 1999 Nokia Mobile Phones. All Rights Reserved. -
Page 85: Emergency Calls
Emergency calls may not be possible on all wireless phone networks or when certain network services and/or phone features are in use. Check with local wireless service providers. ã 1999 Nokia Mobile Phones. All Rights Reserved. Reference information... -
Page 86: To Make An Emergency Call
Remember that your wireless phone may be the only means of communication at the scene of an accident - do not cut off the call until given permission to do so. ã 1999 Nokia Mobile Phones. All Rights Reserved. once to... -
Page 87: Care And Maintenance
• If the phone, battery, charger or any accessory are not working properly, take them to your nearest qualified service facility. The personnel there will assist you, and if necessary, arrange for service. ã 1999 Nokia Mobile Phones. All Rights Reserved. Reference information...