Table of Contents
Advertisement
Advertisement
Table of Contents
Troubleshooting

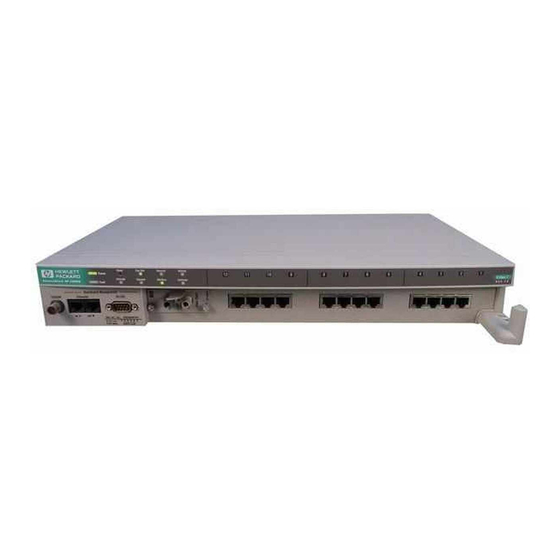
Related Manuals for HP J2600A


Summary of Contents for HP J2600A
- Page 1 HP AdvanceStack Router 210 Module Installation Guide...
- Page 2 Installation Guide HP AdvanceStack Router 210 Module...
- Page 3 Pour plus de détails sur les réglementations applica- Printed in U.S.A. bles, reportez-vous à la section «Regula- tory Statements». Applicable Product HP J2628A Informationen über Kontrollvor- schriften Disclaimer Das in diesem Dokument beschriebene Produkt erfüllt bestimmte internation- The information contained in this ale Kontrollvorschriften.
-
Page 4: About This Manual
About This Manual This manual is both a task-oriented installation guide and a reference describing the hardware aspects of router features, operation, and troubleshooting. The manual is organized as follows: Chapter 1: Installation. Describes how to prepare the network, install the router module, connect the WAN cable, connect a console, and verify that the router module starts up properly. - Page 5 HP AdvanceStack Router 210 Module: An Overview The HP AdvanceStack J2628A Router 210 Module is an auxiliary module for the HP AdvanceStack J2603B Ethernet SNMP Module, which is an optional component of an HP AdvanceStack 10Base-T Hub. The HP AdvanceStack 10Base-T hubs into which the router module can be...
- Page 6 The router module can be configured and managed in various ways: Through the hub’s RS-232 Distributed Management port, connected (locally, or through a modem) to a PC running the HP Stack Manager software supplied with the router module. Through any standard SNMP network management software, such as HP OpenView Interconnect Manager in HP-UX.
-
Page 8: Table Of Contents
Looking at the SNMP Module ....1-5 Using HP Stack Manager ..... . . 1-7 2. - Page 9 A. Cables and Connectors HP Cables ....... . . A-3 Cable and Connector Pin-Outs .
- Page 10 Contents C. SmartBoot Regulatory Statements Index...
-
Page 11: Installation
Installation Summary 1. Check the Version of the SNMP Module. 2. Prepare the Network. 3. Install the Router Module. 4. Connect the WAN Cable. 5. Connect a Console (Optional). 6. Verify That the Router Module Starts Up Properly. Installation... -
Page 12: Installation Summary
The following is a summary of those procedures: 1. Check the Version of the SNMP Module. The HP AdvanceStack 10Base-T Hub in which the HP Router 210 Module is to be installed must also have an HP J2603B Ethernet SNMP Module installed. (The router module will be mounted on the SNMP module.) This SNMP... - Page 13 4. Connect the WAN Cable. For details, refer to page 1-16. 5. Connect a Console. If the router is to be configured, verified, and/or managed from a PC running HP Stack Manager, connect the serial port of the PC to the hub’s RS-232 Distributed Management port, and install the software on the PC.
-
Page 14: Items Included With The Router Module
(which are not supplied with the router module): A Torx T-10 or flat-blade screwdriver A Phillips (cross-head) screwdriver Software: HP Stack Manager Software Kit Documentation: The manuals shipped with the router module are listed in the documentation map or release notes shipped with the... -
Page 15: Check The Version Of The Snmp Module
1. Check the Version of the SNMP Module. The HP AdvanceStack 10Base-T Hub in which the HP AdvanceStack Router 210 Module is to be installed must also have an HP J2603B Eth- ernet SNMP Module installed. (The router module will be mounted on the SNMP module.) This SNMP module must be the HP J2603B version,... - Page 16 HP J2603B version; you can proceed with installing the router module. • If there is no LED there, the module is the HP J2603A version; contact your HP dealer for information about obtaining the HP J2603B version.
-
Page 17: Using Hp Stack Manager
(for example: B.01.00), the installed SNMP module is the HP J2603B version; you can proceed with installing the router mod- ule. If the value begins with “A”, the module is the HP J2603A ver- sion; contact your HP dealer for information about obtaining the... -
Page 18: Prepare The Network
For each WAN link, include the following on the map: • WAN-link type (circuit type) and WAN-link speed • Interface type (X.21, V.35, etc.) • HDLC address (DCE/DTE) for HP Point- to-Point links • X.121 address and connection ID (for X.25 links) • Quality of service (LLC1, LLC2, X.25) •... - Page 19 • The supporting WAN and/or LAN links have been connected between the router module and the central HP router or Bootp server. For more information about automatic SmartBoot configuration, refer to appendix C, “SmartBoot”, and to the User’s Guide, HP Rout- ing Services and Applications, and the Release Notes.
-
Page 20: Install The Router Module
Expansion Slot in the back of the hub. N o t e The HP Ethernet SNMP Module must be the HP J2603B version, not the HP J2603A version. If an Ethernet SNMP module is already installed but you are not sure which version it is, use either of the procedures under “Check the Version of the SNMP Module”, page 1-5, to determine it. - Page 21 Installation 3. Install the Router Module. To install the router module: 1. Using a Torx T-10 or flat-blade screwdriver, loosen the two captured screws holding the cover plate over the hub’s Expansion Slot, then remove the cover plate. Note that the screws are spring-loaded and will release outward when unscrewed far enough.
- Page 22 N o t e Save the original packaging material in case the router module needs to be returned to HP. The nonconducting antistatic material surrounding the router module ensures that the battery on the router module will not short out while being shipped.
- Page 23 Installation 3. Install the Router Module. 6. Position the SNMP module, component-side down, above the router module as shown below. Before mating the modules, make sure that the four standoffs mounted on the router module are aligned with the inner of the two holes in each corner of the SNMP module.
- Page 24 Installation 3. Install the Router Module. ⁄ 8. Insert the supplied -inch number 4-40 screws through the holes in the SNMP module into the standoffs, then secure them using a Phillips (cross-head) screwdriver. Do not overtighten the screws. Figure 1-8. Inserting Screws in Router Module C a u t i o n In the next step, be careful not to damage the router module by scraping it against the edges of the Expansion Slot.
- Page 25 Installation 3. Install the Router Module. 10. Align the edges of the SNMP module in the small slots near the bottom of the Expansion Slot, then push the assembled modules fully into the slot—until you feel the connector on the SNMP module firmly engage its mating connector within the Expansion Slot.
-
Page 26: Connect The Wan Cable
Installation 4. Connect the WAN Cable. 4. Connect the WAN Cable. Connect the WAN cable as described below. Also, if you have not already done so, verify that the network equipment and links (in particular, the WAN-link-terminating equipment) are opera- tional. - Page 27 The maximum length for an RS-232/V.24/V.28 cable connected to the WAN port is 15 meters (50 feet). If an HP 28606-63006 5-meter RS-232/V.24/V.28 cable is connected to the WAN port (and no additional cable, such as a stub cable, is connected between the WAN port and the modem or DSU/CSU), the maximum speed supported on the WAN is 64 Kbit/s.
-
Page 28: Connect A Console (Optional)
The router module can also be configured automatically using a Smart- Boot configuration created on another HP router or a Bootp server. (For more information about SmartBoot, refer to appendix C, “SmartBoot”, and to HP Routing Services and Applications, the User’s Guide, and the Release Notes.) - Page 29 5. Connect a Console (Optional). N o t e You can use the HP Stack Manager software supplied with the hub, provided that the version of that software is A.02.50 or later. The version of the software is indicated on the HP Stack Manager installation disk.
-
Page 30: Verify That The Router Starts Up Properly
Installation 6. Verify That the Router Starts Up Properly. 6. Verify That the Router Starts Up Properly. In this procedure, you will verify that the router module starts up prop- erly by powering up the hub (which boots the router) and checking that: The router module completes its self-test successfully. - Page 31 In addition to the Router Self-test LED, the Fault LED on the front of the hub turns on, and the Exp Slot LED on the front of the hub (labeled “AdvSlot” on some HP AdvanceStack hubs) flashes slowly. The self-test may last for up to 30 seconds. If the hub has not previously been powered on with this SNMP module installed, the self-test is run twice.
- Page 32 Bootp server is on a LAN, or within up to 20 seconds if it is on a WAN. (For more information about SmartBoot, refer to appendix C, “Smart- Boot”, and to HP Routing Services and Applications, the User’s Guide, and the Release Notes.) N o t e If you have not connected a console, skip the remaining steps.
- Page 33 Shift key while you click on the Access button. N o t e If you don’t hold down the Shift key in the preceding step, HP Stack Manager displays a graphical representation of the hub. To connect to the router, click on the Router icon button.
-
Page 34: Setup
Setup Summary Using the Main Menu and NCL 1. Create or Modify a Router Configuration. 2. Set the Time and Date. 3. Specify Manager and User Passwords (Optional). 4. Verify the Network Links. Setup... -
Page 35: Setup Summary
Installation Setup Summary Setup Summary N o t e If you have not connected a console, you will not be able to do the setup procedures described in this chapter. (Connecting a console is neces- sary except as described on page 1-18.) Instead, an operator at another device on the network will need to do them by accessing the router module’s console interface using Telnet. -
Page 36: Using The Main Menu And Ncl
Menu screen and one or more of its menu options—in particular, the Network Control Language Interpreter (NCL). The Main Menu screen appears on the console after you connect to the router module using HP Stack Manager (using the procedure on pages 1-22 – 1-23). System name... - Page 37 Installation Using the Main Menu and NCL Several of the procedures in this chapter require using NCL (Network Control Language Interpreter) commands. To use NCL commands: 1. At the Main Menu screen, press [2 ]. The NCL prompt appears. This prompt matches the current system name.
-
Page 38: Create Or Modify A Router Configuration
You can also use network management software to create or modify a router configuration. (For information about network management software available from Hewlett-Packard, contact your HP dealer.) N o t e s When you create or change a configuration, the new values are not put into effect until you reboot the router module. -
Page 39: Using Quick Configuration
Installation 1. Create or Modify a Router Configuration. Using Quick Configuration The Quick Configuration utility lets you create a ‘‘getting started’’ configuration using a single screen that provides access to the most commonly used router parameters. Some examples of Quick Configuration uses are: Setting a ‘‘getting started’’... -
Page 40: Using The Configuration Editor
Installation 1. Create or Modify a Router Configuration. Using the Configuration Editor The Configuration Editor provides access to a hierarchy of menus and screens that include any parameters you need for customizing the router beyond the ‘‘getting started’’ level. Using this editor, you can customize all parameters needed to integrate the router into your system (includ- ing the subset of parameters you can access through Quick Configura- tion). -
Page 41: Set The Date And Time
Installation 2. Set the Date and Time. 2. Set the Date and Time. The current date and time appear at the top of the router module’s console interface screens. The date and time is recorded with entries in the event log (see page 2-11) and the crash history (which is displayed by the NCL Crash command). -
Page 42: Specify Manager And User Passwords (Optional)
Installation 3. Specify Manager and User Passwords (Optional). 3. Specify Manager and User Passwords (Optional). The router module provides two levels of password protection: The Manager password controls access to the following system manager tasks: • Assigning a user password. •... -
Page 43: Verify The Network Links
Installation 4. Verify the Network Links. 4. Verify the Network Links. To verify that the network links are operational and that all networks can be reached by the router, use the procedures in this section: Examine the event log (page 2-11). Examine the statistics screens (page 2-13). -
Page 44: Examine The Event Log
Installation 4. Verify the Network Links. Examine the Event Log. Events such as enabling circuits and services, changes in spanning tree states, and the occurrence of error conditions are recorded in an event log. Included in the event log are events that indicate the success or failure of the configuration and initialization procedures. - Page 45 Installation 4. Verify the Network Links. For more information on using the event log and understanding the events listed in it, refer to the User’s Guide. The most recent event is also displayed in the event log line (the second line of the console interface).
-
Page 46: Examine The Statistics Screens
Installation 4. Verify the Network Links. Examine the Statistics Screens. The statistics screens provide information useful in verifying that net- work links are operational—namely, that circuits and the bridging and routing services are transmitting and receiving data with zero or few errors. - Page 47 Installation 4. Verify the Network Links. 3. Select and examine the individual statistics screen for each routing and bridging service enabled in the configuration. Verify that the enabled services are exchanging frames or packets as expected. The information listed should match the information on the site survey worksheet and network maps.
- Page 48 Installation 4. Verify the Network Links. AppleTalk Router Statistics: This screen summarizes AppleTalk traffic volume for each circuit group. It shows the number of packets received, forwarded, and dropped. Buffers Usage Statistics: This screen provides information on buffer allocation and use. For more information on the statistics screens, refer to the User’s Guide and the Operator’s Reference.
-
Page 49: Examine The Bridging And Routing Tables
Installation 4. Verify the Network Links. Examine the Bridging and Routing Tables. Use the NCL Rget commands to verify that the bridging and/or routing tables represent the expected network topology. Note that Rget commands are SNMP-based. IP routing or IP host-only service must be enabled to use the Rget commands. - Page 50 RGETDN: Use the Rgetdn command to display the DECnet router level 1 (intra-area) routing table for a local or remote HP router. Verify that the router has learned about all routers and end nodes in its area. Also, trace the paths to the destination nodes to verify that the hop counts and path costs are as expected.
-
Page 51: Test Node Accessibility
Installation 4. Verify the Network Links. Test Node Accessibility. To verify that other nodes can be accessed from the router module, use the NCL Ping command. Ping command can be used on a router with IP routing enabled to test whether particular routers and end nodes can be reached. -
Page 52: Operation
LEDs and Buttons Resetting and Clearing Initialization Sequence Operation... -
Page 53: Leds And Buttons
Operation LEDs and Buttons LEDs and Buttons Status LEDs The status LEDs are located on the router module’s cover plate. Hub (LAN) Router Tx WAN Net Fail Hub (LAN) Router Rx WAN Rx Hub (LAN) Net Fail WAN Tx Router Self-test Router Fault SNMP Mgt (module) Fault Figure 3-1. - Page 54 Operation LEDs and Buttons Table 3-1. Status LEDs Indicates A self-test of the router module is running. This self-test is run whenever the hub is powered on Router Self-test (green) or reset, and whenever the router module is reset (page 3-5) or cleared (page 3-7). (If initiated by powering on or resetting the hub, the test can last up to 30 seconds if the hub had previously been powered on with the SNMP module installed, or up to 60 seconds if the hub had not previously been powered on with the SNMP module installed.
-
Page 55: Reset And Clear Buttons
Operation LEDs and Buttons Reset and Clear Buttons The router Reset and Clear buttons are accessible through the router module’s cover plate. Router Router Reset Clear button button Hub Password Clear button Figure 3-2. Reset and Clear Buttons The router Reset and Clear buttons are used for the following proce- dures (the complete procedures are described on pages 3-5 –... -
Page 56: Resetting And Clearing
Operation Resetting and Clearing Resetting and Clearing Resetting the Router Module The Reset button is recessed to prevent unintentional resets. To reset the router module, use a nonconducting, pointed implement such as a wooden pencil or a toothpick to press and release the recessed Reset button on the router module’s cover plate. -
Page 57: Clearing The Passwords
Operation Resetting and Clearing N o t e s Resetting the router module does not affect any current password(s). Any configuration changes you have not yet saved (in either Quick Configuration or the Configuration Editor) are discarded. After a reset, the router initializes with whatever configuration was last saved. -
Page 58: Clearing The Router Module
Operation Resetting and Clearing Clearing the Router Module You might want to clear the router module (using the procedure on the next page) in situations such as the following: So many parameters in the configuration need to be changed that it would be easier to start over with the factory-default values. - Page 59 (and the router is rebooted with it) only if there is a network link between the router module’s WAN port or internal LAN port and the HP router or Bootp server on which the SmartBoot configuration was set up.
- Page 60 Operation Resetting and Clearing N o t e If, within about 20 seconds after you released the Clear button, the Self- test LED has not turned off (and the Router Fault LED is not on), you waited too long after releasing the Reset button before releasing the Clear button.
-
Page 61: Initialization Sequence
Operation Initialization Sequence Initialization Sequence Whenever the hub is powered on or reset, and whenever the router module is reset (page 3-5) or cleared (page 3-7), the router module goes through the following initialization sequence: 1. A self-test of the router module is run. If initiated by powering on or resetting the hub, the test can last up to 30 seconds (60 seconds if the hub had not previously been powered on with the SNMP module installed). - Page 62 SmartBoot configuration (that is, this initialization sequence is repeated, beginning with step 2). After you connect the console to the router (using HP Stack Manager), the Copyright and Main Menu screens appear. For more information about SmartBoot, refer to appendix C, “Smart- Boot”.
-
Page 63: Troubleshooting
Basic Troubleshooting Tips Interpreting LED Error Patterns Verifying LED Operation Troubleshooting a Failure During Power-On or Reset Self-Test Diagnostic Tests Replacing the Battery Troubleshooting... -
Page 64: Basic Troubleshooting Tips
Basic Troubleshooting Tips W A R N I N G If the router module needs to be returned to HP, use the original packaging. The nonconducting antistatic enclosure surrounding the router module ensures that the battery on the router module will not short out while being shipped. -
Page 65: Interpreting Led Error Patterns
SNMP module installed. During this time, the Fault LED on the front of the hub is turned on, the Exp Slot LED (labeled “AdvSlot” on some HP Advance- Stack hubs) flashes slowly, and the Router Self-test LED on the router module’s cover plate is turned on. - Page 66 Troubleshooting Interpreting LED Error Patterns Table 4-1. LED Error Patterns at End of Power-On or Reset Self-Test LEDs on Router Module’s Cover Plate Router Router SNMP Diagnostic Tips Self-Test Fault (LAN) Net Fail Net Fail Fault Refer to “Router Self-Test LED On, Fault LED On”, page 4-7. Refer to “Router Self-Test LED On, Fault LED Off”, page 4-8.
- Page 67 XCVR Signal Polling is enabled on the internal LAN port.) The failure may be due to faulty or disconnected network hardware, excessive collisions, or excessive deferrals. Call for service from your HP dealer or service provider. *This LED is not important for the diagnosis.
-
Page 68: Verifying Led Operation
Troubleshooting Verifying LED Operation Verifying LED Operation If you suspect a faulty LED—for example, if the LEDs indicate a failure as shown in table 4-1 or table 4-2, or they have some anomalous pattern; but the router nevertheless appears to be operating correctly—you can verify the LEDs by resetting the router using the following procedure. -
Page 69: Troubleshooting A Failure During Power-On Or Reset Self-Test
HP dealer or service provider. It may be necessary to download new operating code to the router. If the router module does not boot, record the failure information and call for service from your HP dealer or service provider. It may be necessary to replace the router module. -
Page 70: Router Self-Test Led On, Fault Led Off
ERROR: Programming ERROR, block # The following three error messages indicate a problem in the router module’s flash memory that might be corrected by downloading new operating code. Contact your HP dealer or service provider for assis- tance. ERROR: Incorrect CRC in FLASH... -
Page 71: Diagnostic Tests
Troubleshooting Diagnostic Tests Diagnostic Tests Testing the Router Module To run a self-test of the router module: 1. Do any of the following: • Power the hub off and on. • Press and release the Reset button on the hub’s front panel. •... -
Page 72: Testing The Router Module's Wan Port
Troubleshooting Diagnostic Tests Testing the Router Module’s WAN Port The following test requires a loopback connector. (For the HP part number and pin-outs of the required loopback connector, refer to “Loopback Connector”, page A-10.) 1. Disconnect the hub’s power cord. -
Page 73: Testing A Link
In addition, the router provides three other specific link tests: Ping, AppleTalk Ping, and Telnet, described on the following pages. Note that you can use HP network management software to test the links (refer to the software’s help screens). The procedures for using these tests require entering NCL commands at the console. - Page 74 Troubleshooting Diagnostic Tests Ping Ping is a network-layer test that sends an Internet Control Message Protocol (ICMP) echo request message to another node that has an IP address and is able to respond to an ICMP echo request message. The router must have IP routing or IP host-only mode configured in order to use this test.
- Page 75 Troubleshooting Diagnostic Tests AppleTalk Ping AppleTalk Ping is a network-layer test that sends an AppleTalk Echo Protocol (AEP) message to another AppleTalk node. The router must have AppleTalk routing configured in order to use this test. 1. At the NCL prompt, enter one of the following commands: atping x.y [Enter] atping x.y wait [Enter] where:...
- Page 76 Telnet is an upper-layer service that allows you to interactively control a remote node’s console. You can establish this virtual terminal connec- tion from an HP router that has Telnet and either IP routing or IP host-only mode configured to a router that has Telnet configured and is suspected of not routing successfully.
-
Page 77: Replacing The Battery
Troubleshooting Replacing the Battery Replacing the Battery If you have made changes to the factory-default configuration but that factory-default configuration is restored when you boot the router, the battery may need to be replaced. To replace the battery: 1. Disconnect the hub from the power source, 2. - Page 78 Troubleshooting Replacing the Battery 8. Using your fingers (or a nonmetallic tool), carefully lift up the battery clip slightly, then slide the battery out of its holder. Figure 4-1. Removing Battery C a u t i o n Replace the battery only with the same type. 9.
-
Page 79: Cables And Connectors
Cables and Connectors... - Page 80 Note that each pin-out does not necessarily match the pin-out for the corresponding HP cable, but cables manufactured to follow the minimum pin-out will function correctly. This appendix also...
-
Page 81: Hp Cables
Cables and Connectors HP Cables HP Cables The following table lists HP cables for the WAN port. For information about cables that can be used to connect a console to the hub’s RS-232 Distributed Management port, refer to the hub’s installation guide. -
Page 82: Cable And Connector Pin-Outs
Cables and Connectors Cable and Connector Pin-Outs Cable and Connector Pin-Outs V.35 WAN Cable—Minimum Pin-Outs WAN link Router CCITT Signal Name and Circuit 34-pin male 62-pin male Signal Ground Ready to Send Clear to Send Data Mode Receiver Ready 108.2 Terminal Ready Reserved Send Data, A... -
Page 83: Rs-232/V.24/V.28 Wan Cable-Minimum Pin-Outs
The maximum length for an RS-232/V.24/V.28 cable connected to the WAN port is 15 meters (50 feet). If an HP 28606-63006 5-meter RS-232/V.24/V.28 cable is connected to the WAN port (and no additional cable, such as a stub cable, is connected between the WAN port and the modem or DSU/CSU), the maximum speed supported on the WAN is 64 Kbit/s. -
Page 84: Wan Cable-Minimum Pin-Outs
Cables and Connectors Cable and Connector Pin-Outs X.21 WAN Cable—Minimum Pin-Outs WAN link end Router end X.21 Signal Name and Circuit 15-pin male 62-pin male Send Data, A Control, A Receive Data, A Indicator, A Send Timing, A Ground Send Data, B Control, B Receive Data, B Indicator, B... -
Page 85: Rs-449/Rs-422/V.36 Wan Cable-Minimum Pin-Outs
Cables and Connectors Cable and Connector Pin-Outs RS-449/RS-422/V.36 WAN Cable—Minimum Pin-Outs WAN link Router end RS-449 Signal Name end 37-pin male 62-pin male and Circuit Send Data, A Send Timing, A Receive Data, A Request to Send, A Receive Timing, A Clear to Send, A Reserved Data Mode, A... -
Page 86: Back-To-Back Test Cable
Cable and Connector Pin-Outs Back-to-Back Test Cable You can use a back-to-back, synchronous test cable to connect any HP router having a (62-pin) synchronous WAN port to another HP router (or an HP Remote Bridge) having the same port type, without using a modem eliminator. - Page 87 Cables and Connectors Cable and Connector Pin-Outs Back-to-Back Test Cable—Minimum Pin-Outs 62-pin male 62-pin male shield shield N o t e In the cable, each of the differential signal pairs (SDA and SDB, RDA and RDB, and so on) must be twisted pairs of wire.
-
Page 88: Loopback Connector
Cables and Connectors Cable and Connector Pin-Outs Loopback Connector HP part number 28606-63007; pin connections: pin 9 to pin 23 pin 10 to pin 27 pin 11 to pin 50 pin 12 (not used) to pin 7 (not used) pin 13 (not used) to pin 49... -
Page 89: Specifications
Specifications... -
Page 90: Power Consumption
Specifications Power Consumption 7.3 watts Environmental Operating Non-Operating Temperature 0°C to 55°C –40°C to 70°C (32°F to 131°F) (–40°F to 158°F) Relative humidity 15% to 95% at 40°C 90% at 65°C (104°F), non-condensing (149°F) Altitude 4.6 km (15,000 ft) 4.6 km (15,000 ft) Electromagnetic Emissions Country Class... -
Page 91: Data Communications Specifications And Certifications
HP advises customers to conduct independent examination to determine suitable levels of compatibility for the customer’s individual needs. For information about the hardware and software/firmware warranties applicable to the HP Router 210 Module, refer to the warranty card shipped with the router module. - Page 92 SmartBoot...
- Page 93 Depending on the response from the networks, the router then does one of the following: If the router module does not receive a response from either an HP router (on which a SmartBoot configuration has been set up using Quick Remote) or a Bootp server within approximately one minute of being cleared, reset, or powered on, the router module bridges in IP host-only mode with an IP address of 127.x.x.x.
- Page 94 1. Disconnect the network link between the router module’s WAN port or internal LAN port and the HP router or Bootp server on which the SmartBoot configuration was set up. Disconnecting the network link will prevent the router module from receiving a SmartBoot configuration when the router module is rebooted (after you clear it in the next step).
- Page 95 For more information about SmartBoot, refer to HP Routing Services and Applications, the User’s Guide, and the Release Notes. For details about SmartBoot Helper, refer to the Release Notes.
-
Page 96: Regulatory Statements
This equipment complies with EN55022 Class A. N o t e The HP Router 210 is a class A product. In a domestic environment, this product may cause radio interference, in which case the user may be required to take adequate measures. - Page 97 Regulatory Statements Declaration of Conformity The following Declaration of Conformity complies with ISO/IEC Guide 22 and EN 45014. It identifies the product, the manufacturer’s name and address, and the applicable specifications that are recognized in the European Community.
- Page 98 Index V.35 ... 1-16, A-3 – A-4, B-3 V.36 ... B-3 accessories ... 1-4 WAN ... A-3 – A-7 address tables ... 4-6 X.21 ... 1-16, A-3, A-6, B-3 AEP: AppleTalk Echo Protocol ... 2-18, 4-13 certification altitude specifications ... B-2 See data communications specifications AppleTalk Phase 2 routing service Circuit Statistics screen ...
- Page 99 ... 2 DECnet ... v HP cables ... A-3 DECnet Router Statistics screen ... 2-14 HP Stack Manager ... 1-3 – 1-5, 1-7, DEFAULT_CONFIG ... 2-4 1-18 – 1-19, 1-22 – 1-23 diagnostic tests ... 4-9 – 4-14 Distributed Management RS-232 port ...
- Page 100 See also password manuals ... 1-4 ICMP: Internet Control Message Protocol MIB ... 2-9, 4-11 ... 4-12 monitor, self-test ... 4-7 installation summary ... 1-2 – 1-4 interface See also cable NCL ... 2-3 – 2-4, 2-8, 2-16 RS-232/V.24/V.28 ... v Atping command ...
- Page 101 Rgetdn command in NCL ... 2-17 Rgetir command in NCL ... 2-16 operating code ... 4-2 Rgetis command in NCL ... 2-16 Rgetr command in NCL ... 2-16 Rgetxr command in NCL ... 2-16 password ... 2-9, 3-6 Router Fault LED ... 3-2 – 3-3 clear ...
- Page 102 self-test of ... 1-21, 3-3 SNMP Mgt Fault LED ... 3-2 spanning tree ... 2-6, 2-11, 3-10 specifications ... B-1 – B-4 standards See specifications static routes ... 2-6 station address ... 4-11 statistics ... 2-9, 2-14 – 2-15, 4-11 synchronous port See WAN port Telnet ...
- Page 103 cable ... B-3 interface ... 1-16 port ... 4-10, A-3 – A-8, B-3 test cable ... A-3 WAN Net Fail LED ... 1-22, 3-2 – 3-3 WAN Rx LED ... 3-2 – 3-3, 3-10 WAN Tx LED ... 3-2 – 3-3, 3-10 warranty ...
- Page 104 ©Copyright 1994 Hewlett-Packard Company Printed U.S.A. 12/94 Manual Part Number 5963-2632 *5963-2632*...