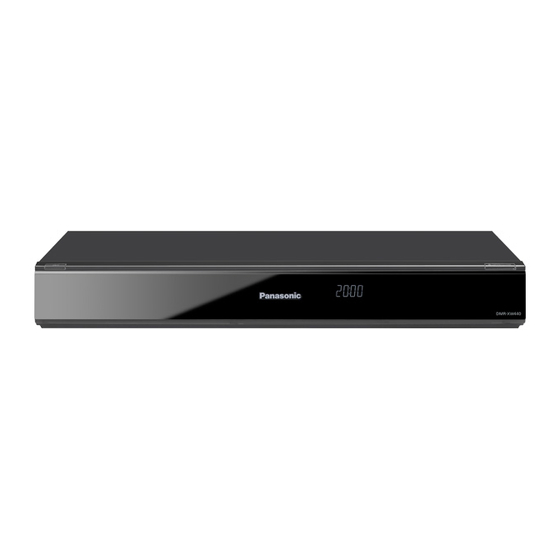
Panasonic DMR-XW440 Operating Instructions Manual
Hide thumbs
Also See for DMR-XW440:
- Operating instructions manual (104 pages) ,
- Operating instructions manual (20 pages)
Table of Contents
Advertisement
Quick Links
Thank you for purchasing this product.
Please read these instructions carefully before using this product, and save this manual for future use.
• This DVD Recorder is for viewing and recording free to view channels only. It does not receive
pay TV or encrypted channels.
Software (Firmware) Update
GZ
Broadcast services continue to add new features. As they evolve, firmware
updates may be required to support the latest features. Panasonic strives to
continually update firmware as new technology is released. It's very important
you install the latest updates to maintain proper operation of your unit.
For details, refer to "Software (Firmware) Update" (
http://panasonic.jp/support/global/cs/ (This site is in English only.)
Operating Instructions
DVD Recorder
DMR-XW440
Model No.
81) or
SQT0135
Advertisement
Table of Contents

Related Manuals for Panasonic DMR-XW440


Summary of Contents for Panasonic DMR-XW440
-
Page 1: Operating Instructions
Software (Firmware) Update Broadcast services continue to add new features. As they evolve, firmware updates may be required to support the latest features. Panasonic strives to continually update firmware as new technology is released. It’s very important you install the latest updates to maintain proper operation of your unit. -
Page 2: Safety Precautions
Safety precautions WARNING CAUTION Unit Unit • To reduce the risk of fire, electric shock or • This unit utilizes a laser. Use of controls or product damage, adjustments or performance of procedures other than those specified herein may result in - Do not expose this unit to rain, moisture, dripping or splashing. -
Page 3: Supplied Accessories
- Do not recharge alkaline or manganese Indemnity concerning recorded content batteries. Panasonic does not accept any responsibility for - Do not use batteries if the covering has been damages directly or indirectly due to any type of peeled off. -
Page 4: Table Of Contents
Table of contents Safety precautions ..... .2 Editing video Supplied accessories ....3 Deleting/Editing recorded titles . -
Page 5: Getting Started
Convenient functions About descriptions in these operating instructions VIERA Link functions....67 • Pages to be referred to are indicated as “ Playback menu . -
Page 6: Hdd And Media Information
Getting started HDD and media information Getting started For more details, refer also to the specifications. ( Recordable/playable contents (–: Impossible) Media type Standard symbol Recordable contents Playable contents • Video • AVCHD/AVCHD 3D Built-in hard disk drive • JPEG [HDD] (HDD) §1... - Page 7 It cannot be recorded directly. (Only compatible with copying from the built-in HDD) §2 Recorded with AVCHD format compatible devices (Panasonic video camera, etc.). It may not be §3 able to play back, add, or edit depending on the device.
-
Page 8: Recording Mode
Getting started HDD and media information About extension of files MP4: “.MP4” “.mp4” “.MOV” “.mov” MPEG2: “.MPG” “.mpg” “.MPEG” “.mpeg” “.M2TS” “.m2ts” “.MTS” “.mts” “.TS” “.ts” Xvid: “.AVI” “.avi” Subtitle text files: “.SRT” “.srt” “.SUB” “.sub” “.TXT” “.txt” MKV: “.MKV” “.mkv”... -
Page 9: Notes
Getting started • Disc recorded on another device Notes • It may be necessary to finalize the disc, create Top Menu or close the session on the Notes for an External HDD (USB HDD) equipment used for recording to play on this You can use an external HDD in the following two unit. - Page 10 Getting started HDD and media information Notes for the SD cards Media handling • Compatible SD card • Do not touch the recorded surface of the discs or the terminal surface of the SD cards. - SD Memory Card (from 8 MB to 2 GB, FAT12 and FAT16 DO NOT formats) - SDHC Memory Card...
-
Page 11: Unit Care
Getting started Unit care HDD/USB HDD handling care When moving the unit Before moving the unit, ensure the disc tray is • The HDD is a high precision device empty. The HDD is a high precision recording instrument and is easily susceptible to damage. 1 Switch the unit to standby mode. -
Page 12: Control Reference Guide
Getting started Control reference guide Instructions for operations are generally described using the remote control. Remote control 9 Show DIRECT NAVIGATOR, Top Menu ( : Show OPTION menu ( 38, 52, 57) ; Colour buttons (Use in accordance with ... - Page 13 Getting started Display Main unit Pull to flip down the 6 Recording indicator front panel. • The indicator will light up while recording. • The indicator will blink while recording is 1 Standby/on switch (Í/I) paused and before recording starts.
-
Page 14: Connection
About HDMI cable Use the High Speed HDMI cables. Non-HDMI-compliant cables cannot be utilized. It is recommended that you use Panasonic’s HDMI cable. When outputting 1080p signal, please use HDMI Cables 5.0 meters or less. • Keep the RF coaxial cables as far away as possible from other cables. -
Page 15: Amplifier/Receiver Connections
Getting started When the unit is not to be used for a long Amplifier/receiver connections time To save power, unplug it from the household HDMI terminal mains socket. This unit consumes a small amount of power, even when the unit is in 3D programmes can be played back when standby mode. - Page 16 Getting started Connection ∫ Amplifier/receiver not compatible with 3D DIGITAL AUDIO OUT terminal 3D programmes can be played back when Amplifier/receiver OPTICAL IN this unit is connected to a 3D compatible • This connection only supports up to 5.1ch. Optical digital audio cable Amplifier/receiver HDMI IN (ARC compatible)
-
Page 17: Network Connection
Getting started Network connection When this unit is connected to the network, you can enjoy network functions (DLNA function, Network Service, Remote Recording, etc.). For details about connection method, refer to the instructions supplied with the connected equipment. After you make the LAN cable connection, the network setting is needed. -
Page 18: Settings
While pressing [TV Í], enter the code with the number buttons. TV operation buttons Manufacturer and Code No. DRIVE INPUT SELECT right) PAGE Brand Code Brand Code Panasonic 01/02/03/04 NOBLEX AIWA NOKIA 25/26/27/60/61 AKAI 27/30 INTERNET NORDMENDE BEKO 05/71/72/73/74 RADIO/ OLEVIA BENQ... -
Page 19: Easy Setting
Getting started Easy Setting • If tuning is cancelled partway through, it may not be possible to receive the channels. Restart setup again. Turn on the TV, then select the appropriate AV input to suit the connections to this unit. Easy Network Setting Press [Í] on the remote control or [Í/I] on Follow the on-screen instructions and make... -
Page 20: Function Menu Screen
Getting started FUNCTION MENU screen You can easily access the desired functions, such FUNCTION MENU list as playback, timer recording, the unit’s settings • Media etc. via the FUNCTION MENU. - Disc Press [FUNCTION MENU]. - SD Card - USB device FUNCTION MENU Media TV Guide... -
Page 21: Watching Broadcasts
Watching broadcasts Watching broadcasts Watching broadcasts Using Channel List Instructions for operations are generally described using the remote control. ( You can select from the list of channel names. Press [OK]. Press [INPUT SELECT] and select “TV”, then press [OK]. All Digital Channels Press [CH W X] to select the channel. -
Page 22: Using Tv Guide System
Watching broadcasts Watching broadcasts Using TV Guide system Listings screen The TV Guide system enables you to select e.g., programme easily, view programme information, Fri 27 Mar etc. It provides the future broadcasts over the 21:45 NEWS next eight days (depending on the broadcasters). -
Page 23: Using Channel Information
Watching broadcasts Using channel information Operations while watching broadcast While watching a programme To show subtitle Press [STATUS When “ ” appears in channel information left) 71:20 DR Press [STTL • Press again to hide subtitle. 10:30 9:00 - 11:00 All Digital Channels Switching audio Set timer... -
Page 24: Rewind Live Tv/Pause Live Tv
Watching broadcasts Watching broadcasts REWIND LIVE TV/PAUSE LIVE TV 8:50:55 01.01.2013 This unit temporarily saves a live TV programme Play 8:50.50 you are watching with this unit’s tuner on HDD. REWIND LIVE TV 1 The time that you can rewind the live You can rewind live TV programme to the point programme. -
Page 25: Recording
Recording Recording TV programmes Recording To set the recording time 1 Select “Recording Time” or “Continuous recording” in step 4 ( left). • This operation will only record to built-in HDD. Recording Time: • This unit can record two programmes being You can set the length of recording time from broadcasted at the same time. -
Page 26: Operation During Recording
Recording Recording TV programmes Operation during Recording To pause recording After displaying the recording programme, press To check the recording programme [PAUSE ;]. • Press again to restart recording. Press [STATUS (A title is not split into separate titles.) e.g., While recording two programmes simultaneously •... -
Page 27: Timer Recording
Recording Timer recording If “Overlapped Timer Recording” screen appears Overlapped Timer Recording • This operation will only record to built-in HDD. Timer programme overlaps with others. • This unit can record two programmes being Some part or all of programmes may not be recorded completely. broadcasted at the same time. -
Page 28: Manually Programming Timer Recording
Recording Timer recording To confirm and edit the timer programme Various functions with TV Guide Refer to “To confirm and edit a timer programme”. This unit has several functions that enable timer recordings to be controlled by the signal sent from Operation during Recording the broadcaster. -
Page 29: Timer Recording From Channel Information
This unit PC, Smartphone, etc. - formatting - finalising/creating Top Menu For details, please check the following website. http://panasonic.jp/support/global/cs/ (This site is in English only.) Preparation • Network connection ( 17, 19) • Remote Recording Function Settings ( • This unit will always be connected to the Internet when this function is activated. -
Page 30: To Confirm And Edit A Timer Programme
Recording Timer recording To confirm and edit a timer Screen icons programme Red: Timer recording standby is activated. Press [PROG/CHECK]. Grey: Timer recording standby is deactivated. e.g., Currently recording programme Timer Recording 30:30 DR TUE 01.01.2013 08:05 Space Channel Name Schedule Mode A part or all of the programme will not be... -
Page 31: Playing Back Video
Playing back video Playing titles on the HDD Playing back video DIRECT NAVIGATOR (VIDEO) § screen “For recorded titles ( 9)” only § Screen icons Press [FUNCTION MENU]. Currently recording programme Select “Video” in “Contents on HDD”, Protected title then press [OK]. Title was not recorded due to e.g., recording protection... - Page 32 Playing back video Playing titles on the HDD Selected titles are bundled to form a group. Select “Create”, then press [OK]. Titles will be categorised automatically. Release Grouping: You can quickly find the recorded titles by All the titles in the group are released. selecting the tab.
-
Page 33: Playing Titles On The Media
Playing back video Playing titles on the media Menu screen § Selecting screen for each operation is displayed when the media is inserted, and you can access “For data files ( 9)” only § the operation screen easily. e.g., [USB] Insert the media. -
Page 34: Playback From Chapter View
Playing back video Playing titles on the media DIRECT NAVIGATOR screen Video Menu ( AVCHD ) screen e.g., [SD] e.g., Video Menu All Titles DIRECT NAVIGATOR DVD-RAM Time Remaining 10:30 (HG) Video Menu (AVCHD) SD Card Channel Date Title Name 29.10 Date Time... -
Page 35: Operation During Play
Playing back video Operation during play Quick View Press and hold [PLAY/a1.3 1]. • Press again to return to normal speed. • Xvid, MKV, MP4 and MPEG2: Quick View is not effective. • Quick View is not effective when playing back the DVD-RW •... - Page 36 Playing back video Operation during play Skipping the specified time To delete the Chapter Mark 1 Press [TIME SLIP]. [HDD] [USB_HDD] (For recorded titles, 9) [RAM] 1 While paused 2 Select the time with [3, 4]. Press [SKIP :] or [SKIP 9] and skip to •...
-
Page 37: 3D Video Playback
Playing back video 3D Picture Mode 3D video playback - Normal: Preparation Normal 3D effects. Connect 3D compatible TV to this unit. ( - Soft: • Perform the necessary preparations for the TV. Soft 3D effects. • This function cannot be enabled when “Signal Play back following the instructions displayed Format”... -
Page 38: Editing Video
Editing video Deleting/Editing recorded titles Editing video Once deleted, divided or partially deleted, Available disc space after deleting recorded content cannot be restored to its original state. Make certain before proceeding. • [HDD] [USB_HDD] [RAM] The space deleted becomes available for §... - Page 39 Editing video Deleting Dividing title 1 Select “Delete Title”, then press [OK]. [HDD] [USB_HDD] [RAM] 1 Select “Divide Title” in “Edit”, then press [OK]. 2 Select “Delete”, then press [OK]. 2 Press [OK] at the point to divide the title. Entering title name •...
- Page 40 Editing video Deleting/Editing recorded titles 3 Select the item, then press [OK]. File Conversion Convert & Delete: [HDD] [USB_HDD] The original title will be deleted to save HDD File Conversion is a function to convert the capacity after conversion. recording mode of the title in DR mode and Convert Only: AVCHD contents.
- Page 41 Editing video Editing chapters To cancel a “Now” conversion Press and hold [RETURN ] for more than [HDD] [USB_HDD] [RAM] 3 seconds. 1 Select “Chapter View”, then press [OK]. 2 Perform the editing operations. To confirm whether the conversion is completed Edit Chapter Mark: Press [DIRECT NAVIGATOR].
-
Page 42: Copying Video
Copying video Copying titles Copying video §1, 2, 3 Set other settings, then press [OK]. e.g., Automatic Standby after Copy “For recorded titles ( 9)” only §1 The title in the source media will be deleted. §2 Standby status can be changed if required Please press OK to start copying. - Page 43 Copying video To change the selection Setting the copying options 1 Select “No”, then press [OK] in step 7 ( 42). 1 Select the item in step 8 ( 42). 2 Press [2, 1] to change the settings. e.g., [HDD] > [RAM] The order of copying •...
-
Page 44: Copying From Media Other Than Hdd With Direct Navigator
Copying video Copying titles Copying from media other than HDD Copying titles with copying list with DIRECT NAVIGATOR ,. [USB_HDD] [HDD] §1, 2, 3 [RAM] [+RW] > [HDD] [RAM] [DVD-R] [DVD-RW] [+R] > [HDD] Insert a disc. [+RW] The menu screen appears. ( >... - Page 45 Copying video Register titles for copy. Make other settings. 1 Select “Create List”, then press 1 Select “Other Settings”, then press [1] (right). [1] (right). 2 Select “New item”, then press [OK]. e.g., 3 Select the title, then press the yellow Copy button.
- Page 46 Copying video Copying titles Editing the copying list Screen icons 1 Select the title after step 4-4 ( 45). Titles that cannot be copied in high speed mode Copy Cancel All Destination Capacity: 21000 MB ( 66% ) Size: 14000 MB Titles that cannot be copied Copy Direction Size...
-
Page 47: Notes For Copying
Copying video Notes for copying Notes for normal speed copy • [DVD-R] [DVD-RW] [+R] [+RW] You cannot copy to Notes for high speed copy the disc in the following cases. High Speed Copying is the process of copying a - When there is not enough free space on the title to disc in high speed while maintaining the HDD. -
Page 48: Copying A Finalised Disc
Copying video Copying titles Copying a finalised disc Select “Start Copying”, then press [OK]. [DVD-V] > [HDD] Select “Yes”, then press [OK]. While playing a disc, the content being played is • When the Top Menu is displayed: copied to the HDD according to the set time. Select the title you want to start copying, then press [OK]. -
Page 49: Copying Title Playing
- 1080/50p or 1080/60p Refer to “Notes for copying”. ( - Without the AVCHD information (video recorded with certain non-Panasonic equipment, etc.) • 3D video may not be copied correctly. • [RAM] [DVD-R] [DVD-RW] [+R] [+RW] When copying the titles in DR, HG, HX, HE, HL or HM modes, copy will be performed at normal speed in FR mode. -
Page 50: Photo And Music
Photo and Music Playing photos Photo and Music To exit the Calendar screen §1 §2 Press [PAUSE ;]. • When there are many files and/or folders, some files may not be displayed or not be playable. ( “For data files ( 9)”... -
Page 51: Photo Play Option
Photo and Music Photo play option Slideshow settings While displaying a photo: On the Photo Menu screen: Press [OPTION]. Press the green button. Select the item, then press [OK]. Slideshow Aspect Start Slideshow You can switch the screen mode. ( Interval Normal Transition Effect... -
Page 52: Editing Photos
Photo and Music Editing photos § Select the item, then press [OK]. Enter Folder Name [RAM] only Refer to “Entering text”. ( § On the Photo Menu screen: Combine Folders [HDD] e.g., [HDD] Select “Yes”, then press [OK]. Photo Menu 03.01.2012 Delete Folder 29.10.2012... -
Page 53: Copying Photos
Photo and Music Copying photos §1 §2 Copying automatically [USB_HDD] [RAM] [DVD-R] > [HDD] [CD] [SD] [USB] Newly added photos will automatically be copied “For data files ( 9)” only (JPEG, MPO) §1 to the HDD. [RAM] [DVD-R] only §2 Insert the media. -
Page 54: Playing Music
Photo and Music Playing music Copying music (MP3) to HDD §1 §2 [USB_HDD] [DVD-R] [CD] [USB] > [HDD] “For data files ( 9)” only (MP3) After performing steps 1–2 ( left) §1 [DVD-R] only §2 Press the blue button. Select “Copy”, then press [OK]. Music CD: Insert the disc. -
Page 55: Playing Music Recorded On Hdd
Photo and Music Playing music recorded on HDD Playlists [HDD] 1 Select the playlist, then press [OK]. Press [FUNCTION MENU]. 2 Select the track, then press [OK]. Select “Music” in “Contents on HDD”, then Frequently Played press [OK]. Tracks most often played recently (up to Music Menu Total Tracks 53 30 tracks). -
Page 56: Operations During Music Play
Photo and Music Playing music Operations during music play Displaying photos (Screen Saver) Photos can be displayed during music playback. [HDD] [USB_HDD] [DVD-R] [CD] [USB] While playing the music Stop Press the red button. Press [STOP ∫]. • To select the photos to display The original photo stored in the HDD by default Pause or a folder registered with “Photos for Music”... -
Page 57: Editing Music/Playlist
Photo and Music Editing music/playlist Delete All Tracks 1 If the confirmation screen appears: Select “Yes”, then press [OK]. On the Music Menu screen: 2 Select “Delete”, then press [OK]. Press [OPTION]. e.g., Delete Album Music Menu Total Tracks 53 Select “Delete”, then press [OK]. -
Page 58: Network
For details regarding the connection and and the operating instructions for each item of operation of equipment connected via a network, equipment. refer to their respective operating instructions. http://panasonic.jp/support/global/cs/ DLNA function compatible software should be § (This site is in English only.) installed. -
Page 59: Using This Unit As Client
• You may not be able to use the Control Panel even if you You can share videos, photos and music stored in use the Panasonic DLNA compatible equipment. the DLNA Certified media server (such as a PC • Depending on the contents and the connected equipment, with Windows 7 installed etc.). - Page 60 H.264 .mp4 MPEG2 MPEG2 .mpg Dolby Digital ® Linear PCM .mpeg Xvid H.264 .avi Dolby Digital ® H.264 AAC-LC .mkv Dolby Digital ® Vorbis FLAC Only when the server is another Panasonic §1 Blu-ray Disc Recorder, etc. SQT0135...
-
Page 61: Using This Unit As Media Renderer
Network Using this unit as Media Renderer • Depending on the contents and the connected equipment, playback may not be possible. This unit will work as Media Renderer, which • Items displayed in grey on the display cannot be played allows you to play back the contents on DLNA back by this unit. -
Page 62: Enjoying Network Service
Therefore, Panasonic will make no warranty for the content or the continuity of the services. • All features of websites or content of the service may not be available. -
Page 63: With Other Equipment
With Other Equipment Recording from external equipment With Other Equipment To stop recording Press [STOP ∫]. Recording mode: XP, SP, LP, EP Manually programming timer recording from Preparation external equipment Connect the Set Top Box or video equipment Refer to “Manually programming timer recording” 28). -
Page 64: Copying The Hd Video (Avchd)
DVD-R in High Definition”. ( • The original file must be in the AVCHD standard. • If you connect a Panasonic product with a USB connection cable, setup screen may be displayed on the connected equipment. For details, refer to the instructions for the connected equipment. -
Page 65: Registering The External Hdd (Usb Hdd)
• For details about connection method, refer to For the latest information on recommended the instructions supplied with the USB HDD. USB HDDs, please check the following website. http://panasonic.jp/support/global/cs/ Disconnecting the USB HDD Please use the following procedure to disconnect. • Certain non-recommended USB HDDs cannot Disconnecting without following this procedure be used with this unit. -
Page 66: Registering The Usb Hdd
With Other Equipment Registering the external HDD (USB HDD) Registering the USB HDD To cancel all USB HDD registrations Refer to “Cancellation of all USB HDD • If the registering screen appears when Registrations”. ( connecting the USB HDD, go to step 4. Press [SETUP]. -
Page 67: Convenient Functions
• This unit supports “HDAVI Control 5” function. When you set the TV to standby mode, this unit is “HDAVI Control 5” is the standard for Panasonic’s HDAVI also automatically set to standby mode. Control compatible equipment. This standard is compatible with Panasonic’s conventional HDAVI equipment. -
Page 68: Playback Menu
Convenient functions Playback menu A variety of operations and settings such as Basic Operation changing the subtitles and audio languages can Soundtrack § be performed during playback of video or music. Show or change the soundtrack. Also, picture and sound quality can be set to your Audio Selection/AD personal taste. - Page 69 Convenient functions Sound Settings Picture Settings Sound Effects Picture Type • This function is effective when “Digital Audio Select the picture quality mode. Output” is set to “PCM”. ( Sharpness Adjustment Re-master 1/Re-master 2 Adjusts the sharpness of images. The greater Sound becomes more natural by adding the value is, the sharper images will be.
-
Page 70: Basic Settings
Convenient functions Basic Settings You can change the unit’s settings of Digital TV Menu list Tuning, Sound, Display, Connection, Network etc. The locations of the setting items are as follows. in the menu. For details on each setting item, please refer to Common procedures the following pages. - Page 71 Convenient functions Picture Network Still Mode ( Easy Network Setting ( NTSC Video Output ( Network Settings ( IP Address / DNS Settings ( Sound Proxy Server Settings ( Dynamic Range Compression ( Network Service Settings ( Downmix ( Lock ( Bilingual Audio Selection ( Automatic Volume Control ( Digital Audio Output (...
-
Page 72: Digital Tv Tuning
Convenient functions Basic Settings Digital TV Tuning Channel List You can edit the channel list. Favourites Edit • To hide unwanted channels You can create four favourites of channels for 1 Select the channel. making viewing and recording easier. 2 Press [OK]. The check mark is removed. -
Page 73: Hdd / Disc / Usb Hdd
Convenient functions HDD / Disc / USB HDD Child Lock ( Parental Rating ) You can restrict the viewing of channels Settings for Playback unsuitable to children. Set a ratings level to limit broadcast viewing and Soundtrack playback. Select the audio language. •... -
Page 74: Picture
Convenient functions Basic Settings Aspect for Recording USB HDD Disconnection Sets the aspect ratio when recording or This function puts the USB HDD in a state in copying except in DR mode. which it can be safely disconnected. ( • “HG”, “HX”, “HE”, “HL” or “HM” mode: USB HDD Management If “Automatic”... -
Page 75: Sound
Convenient functions Sound Dolby Digital / Dolby Digital Plus Dynamic Range Compression MPEG To lower the dynamic range for playback (e.g., at Select the audio signal to output. night). • Select “PCM” when the connected • This does not work depending on broadcasts equipment cannot decode the respective and recorded titles. -
Page 76: Display
Convenient functions Basic Settings Aspect for 4:3 Video Display To play a 4:3 title, set how to show pictures on a On-Screen Information 16:9 TV. Select the time until the channel information TV System screen ( 23) disappears automatically. Set in accordance with the TV System for the connected TV. -
Page 77: Network
Press [OK] to start Easy Network Setting. ( For details please check the following website. Network Settings http://panasonic.jp/support/global/cs/ (This site is in English only.) IP Address / DNS Settings Check the connection of the network or set Remote Recording function the IP address and DNS. - Page 78 Convenient functions Basic Settings Home Network Settings Conversion Setting for DLNA You can set the DLNA (Server) function. • On: When playing back on DLNA (Client) compatible equipment, this setting Home Network function reduces the chance of break-ups and You can switch between enable/disable of freezing of an image by lowering the the DLNA (Server) and DMR (Media image quality.
-
Page 79: Others
Remote Control Change the remote control code on the main unit and the remote control if you place other Panasonic products close together. • Use “DVD 1”, the factory set code, under normal circumstances. 1 Select the code, then press [OK]. - Page 80 Convenient functions Basic Settings Clock System Update If the time is not set correctly, use the settings Software Update in Standby listed in the method below. When you set this unit to standby mode, • Automatic software (firmware) updates ( 81) are This unit usually obtains time and date downloaded automatically at the time you...
-
Page 81: Software (Firmware) Update
• The timer recording always takes preference over the software (Firmware) download; if the timer recording is scheduled to start, the downloading will be performed at the next opportunity. • You can also download the latest software (firmware) from the following website. http://panasonic.jp/support/global/cs/ SQT0135... -
Page 82: Other Operations
Convenient functions Other operations Media management Disc Protection [RAM] [RAM] [DVD-R] [DVD-RW] [+R] [+RW] [SD] Select “Yes”, then press [OK]. Press [FUNCTION MENU]. e.g., Select “Media”, then press [OK]. Disc Name Disc Protection Select the media, then press [OK]. Delete all titles •... - Page 83 • You cannot finalise discs recorded on other manufacturer’s equipment. • [DVD-R] [DVD-RW] [+R] If you finalise discs recorded on Panasonic equipment other than this unit, the background selected as “Top Menu” may not be displayed. • Discs finalised on this unit may not be playable on other players due to the condition of the recording.
-
Page 84: Entering Text
Convenient functions Other operations Create Top Menu Entering text [+RW] Preparation You can create Top Menu for displaying on other • Show the “Enter Title Name” screen, etc. equipment. Select a character, then press [OK]. Make selections from “Top Menu” and “Auto-Play Repeat this step to enter other characters. -
Page 85: Switching The Aspect Ratio Of The Screen
Convenient functions Switching the aspect ratio of the HOLD function screen The HOLD function deactivates all buttons on the unit and remote control. When the image does not match the screen size of the TV, you can enlarge the image to fill the Press and hold [OK] and [RETURN screen. -
Page 86: Troubleshooting
Troubleshooting Troubleshooting guide Troubleshooting Before requesting service, make the following General operation checks. If the problem still persists, consult your dealer for instructions. The unit does not work. Updating to the latest software (firmware) may • Check the connections. ( solve the problem. -
Page 87: Displays
Troubleshooting The remote control does not work. TV screen and video • The remote control and main unit are using Screen size is wrong. different codes. Change the code on the remote control. • Check the “TV Aspect” or “Aspect for 4:3 Video”. Press and hold [OK] and •... - Page 88 Troubleshooting Troubleshooting guide The images do not appear on the TV. 3D video is not output correctly. The picture is distorted during play, or video • 3D video may be output correctly by changing will not play correctly. the following settings: •...
-
Page 89: Sound
Troubleshooting Timer recording does not work properly. Sound • Failed timer recordings are displayed in grey No sound. with on the Timer Recording screen. ( Distorted sound. When you programme a timer recording, check • Check the connections. ( the screen icons. If “!” is displayed, this timer •... -
Page 90: Play
Troubleshooting Troubleshooting guide The time recorded on the disc and the Image for the Quick View is not smooth. available time shown do not add up. • Image may not be played back smoothly in case • [DVD-R] [+R] If you record or edit many times, the of high definition titles. -
Page 91: Photo
Troubleshooting TV Guide Photo The TV Guide system does not receive any The contents of the SD card cannot be read. data. (e.g., The TV Guide screen is not • Remove the card from the slot and then insert displayed.) again. -
Page 92: Viera Link
- While executing functions using a network, • This unit does not support “ONE TOUCH PLAY” such as Network Service function of the Panasonic AV Control Receiver. • You cannot play back simultaneously from two or more items of DLNA compatible equipment. -
Page 93: Messages On The Unit's Display
Troubleshooting UNSUPPORT Messages on the unit’s display The media is not supported. The following messages or service numbers appear on the unit’s display when something unusual is detected. UPD / (“∑” stands for a number.) The software (firmware) is being updated. You cannot (“∑”... -
Page 94: Reference
Reference Specifications Reference Specifications are subject to change without ∫ Video/Audio terminals notice. Analog video input (pin jack): 1 pc. Input level: 1 Vp-p (75 ≠) ∫ General Analog video output (pin jack): 1 pc. Dimensions: 430 mm (W) Output level: 1 Vp-p (75 ≠) 59 mm (H) Analog audio L/R input (pin jack):... - Page 95 Reference ∫ Recordable discs ∫ Playable discs DVD-RAM: 2X SPEED (Ver. 2.0), DVD-Video: DVD-Video format 2-3X SPEED (Ver. 2.1), CD-DA (Audio CD) 2-5X SPEED (Ver. 2.2) DVD-RAM: DVD Video Recording format, DVD-R (SL): 1X SPEED (Ver. 2.0), AVCHD format, JPEG , MPO §1 §1...
- Page 96 Reference Specifications ∫ SD Card Maximum numbers of titles that can be Compatible media: SD Memory Card § recorded Format: SD Card: only FAT12, FAT16 999 titles SDHC Card: only FAT32 SDXC Card: only exFAT (When continuously recording for Data that can be played: JPEG, MPO, long durations, titles are AVCHD format, MPEG2, MP4...
- Page 97 Reference ∫ MP3 ∫ MP4 Playable media: HDD, DVD-R, DVD-R DL, Playable media: SD Card, USB device CD-R, CD-RW, USB device MPEG-4 AVC/H.264: Up to High Profile, Level 4.2 Compression rate: 32 kbps to 320 kbps Video resolution: Up to 1920k1080 Sampling rate: 16 kHz, 22.05 kHz, 24 kHz, MPEG-4 AAC-LC...
- Page 98 Reference Specifications ∫ XP, SP, LP, EP modes Recording modes and approximate recording times Recording Mode Depending on the content being recorded, the (500 GB) recording time may become shorter than 107 hours indicated. 215 hours ∫ DR mode 430 hours Recording 860 hours Mode...
-
Page 99: Language Code List
Reference Language code list Lingala: 7678 Abkhazian: 6566 Afar: 6565 Lithuanian: 7684 Afrikaans: 6570 Macedonian: 7775 Albanian: 8381 Malagasy: 7771 Malay: 7783 Amharic: 6577 Arabic: 6582 Malayalam: 7776 Armenian: 7289 Maltese: 7784 Assamese: 6583 Maori: 7773 Marathi: 7782 Aymara: 6589 Azerbaijani: 6590 Moldavian:... -
Page 100: Licenses
Reference Licenses “AVCHD”, “AVCHD 3D”, “AVCHD Progressive” and “AVCHD 3D/Progressive” are trademarks of Panasonic Corporation and Sony Corporation. DLNA, the DLNA Logo and DLNA CERTIFIED are trademarks, service marks, or certification marks of the Digital Living Network Alliance. DVB and the DVB logos are trademarks of the DVB Project. - Page 101 Basic Settings menu. At least three (3) years from delivery of this product, Panasonic will give to any third party who contacts us at the contact information provided below, for a charge no more than our cost of physically performing source code distribution, a complete machine-readable copy of the corresponding source code covered under GPL V2.0, LGPL V2.1 or the other licenses with the...
-
Page 102: Index
Reference Index Aspect ......76, 85 HDAVI Control ..... 67, 76 Audio . - Page 103 Reference SD Card Video Format ......83 AVCHD ......31, 33 Media information .
- Page 104 The recording and playback of content on this or any other device may require permission from the owner of the copyright or other such rights in that content. Panasonic has no authority to and does not grant you that permission and explicitly disclaims any right, ability or intention to obtain such permission on your behalf.