
Related Manuals for Dell M109S


Summary of Contents for Dell M109S
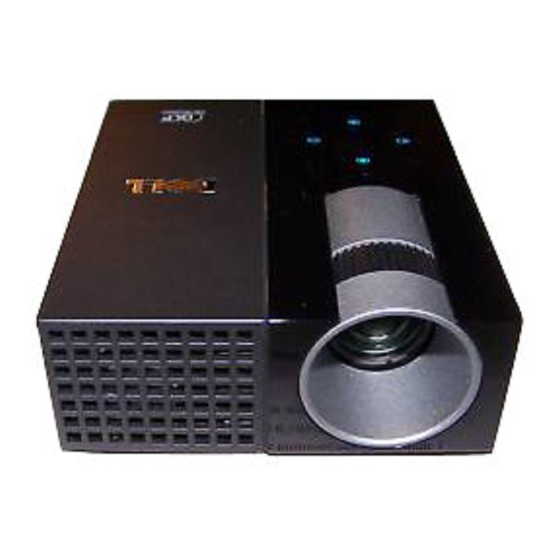
- Page 1 Dell M109S Projector User’s Guide Model: M109S Downloaded from ProjectorsManual.com Manuals w w w . d e l l . c o m | s u p p o r t . d e l l . c o m...
- Page 2 Inc. is strictly forbidden. ® Trademarks used in this text: Dell and the DELL logo are trademarks of Dell Inc.; DLP and DLP logo are trademarks of TEXAS INSTRUMENTS INCORPORATED; Microsoft, and Windows are either trademarks or registered trademarks of Microsoft Corporation in the United States and/or other countries.
-
Page 3: Table Of Contents
Contents Your Dell™ Projector ........About Your Projector Connecting Your Projector . - Page 4 ..... Contacting Dell™ ....
-
Page 5: Your Dell™ Projector
Your Dell™ Projector Your projector comes with all the items shown below. Ensure that you have all the items, contact Dell if anything is missing. Package Contents Multi-input cable AC adapter User’s guide media & Documentation Power cable Pouch Your Dell™ Projector... -
Page 6: About Your Projector
Do not block the ventilation slots and openings on the projector. Ensure the projector operates between ambient temperatures (5 C to 35 NOTE: For more information, see the Product Information Guide that ships with your projector. Your Dell™ Projector Downloaded from ProjectorsManual.com Manuals... -
Page 7: Connecting Your Projector
Connecting Your Projector Multi-input connector CAUTION: Before you begin any of the procedures in this section, follow the Safety Instructions as described on page 6. Connecting Your Projector Downloaded from ProjectorsManual.com Manuals... -
Page 8: Connecting A Computer
Connecting a Computer Connecting a Computer using a VGA Cable Multi-input cable AC adapter Power cord Connecting Your Projector Downloaded from ProjectorsManual.com Manuals... -
Page 9: Connecting A Dvd Player
Connecting a DVD Player Connecting a DVD Player using a Composite Cable AC adapter Power cord Multi-input cable Composite video cable NOTE: The composite video cable is not provided by Dell. Connecting Your Projector Downloaded from ProjectorsManual.com Manuals... - Page 10 Connecting Your Projector Downloaded from ProjectorsManual.com Manuals...
-
Page 11: Using Your Projector
Turn on your source (computer, DVD player, etc.). The projector automatically detects your source. The Dell Logo will continue for 10 seconds while power on. If the "Searching for signal..." message appears on the screen, ensure that the appropriate cables are securely connected. -
Page 12: Adjusting The Projector Focus
Adjusting the Projector Focus Rotate the focus ring until the image is clear. The projector focuses at distances ranging between 23.6" to 94.5" (60 cm to 240 cm). Move the projector forward or backward to zoom in and out. Focus ring Using Your Projector Downloaded from ProjectorsManual.com Manuals... -
Page 13: Adjusting Projection Image Size
Adjusting Projection Image Size 60"(152.4cm) 40"(101.6cm) 25"(63.5cm) 15 "(38.1cm) 23.6"(60cm) Screen Typical 15" (38.1cm) 25" (63.5cm) 40" (101.6cm) 60" (152.4cm) (Diagonal) Typical 12.3" X 8.6" 20.5" X 14.3" 32.8" X 22.9" 49.2" X 34.4" Screen (WxH) size 31.2cm X 21.8cm 52.0cm X 36.4cm 83.3cm X 58.2cm 124.9cm X 87.3cm... -
Page 14: Using The Control Panel
Using the Control Panel Error LED If the error LED is blinking amber, one of the fans has failed. The projector will automatically shut down. If the problem persists, contact Dell™. / Keystone Press to select the On Screen Display (OSD) items. adjustment Press to adjust image distortion caused by tilting the projector. - Page 15 Right / Auto Adjust Press to adjust the OSD setting. Press to synchronize the projector to the input source. Auto Adjust does not operate if the onscreen display (OSD) is displayed. Menu Press to activate the OSD. Use the directional keys and the Menu button to navigate through the OSD.
-
Page 16: Using The On-Screen Display
Using the On-Screen Display The projector has a multi-language On-Screen Display (OSD) that can be displayed with or without an input source present. To navigate through the tabs in the Main Menu, press the button on the control panel. To select a submenu, press the Enter button on the control panel. -
Page 17: Picture (In Pc Mode)
PICTURE (in PC Mode) Using the Picture menu, you can adjust the display settings of your projectors. The Picture menu provides the following options: IDEO —Allows you to optimize the projector’s display mode: PC, Bright, sRGB (provides more accurate color representation), Movie, and Custom (set your preferred settings). -
Page 18: Picture (In Video Mode)
Picture menu provides the following options: IDEO —Allows you to optimize the projector’s display mode: PC, Bright, sRGB (provides more accurate color representation), Movie, and Custom (set your preferred settings). If you adjust the settings for White Intensity or Degamma, the projector automatically switches to Custom. -
Page 19: Display (In Pc Mode)
DISPLAY (in PC Mode) Using the Display menu, you can adjust the display settings of your projectors. The Display menu provides the following options: SPECT ATIO —Allows you to set the aspect ratio. • 4:3 - The input source scales to fit the screen. •... -
Page 20: Set Up
Display menu provides the following options: SPECT ATIO —Alows you to set the aspect ratio. • 4:3 - The input source scales to fit the screen. • Original - The input source scales to fit the screen while keeping the aspect ratio of the input source. - Page 21 EYSTONE —Adjusts the image distortion caused by tilting the projector. OSITION —Allows you to select the position of the OSD menu on the screen. RANSPARENCY —Select to change the transparency level of the OSD background. IMEOUT —Allows you to adjust the time for an OSD Timeout. By default, the OSD disappears after 30 seconds of non-activity.
-
Page 22: Others
If you have entered incorrect password, you will be given another 2 chances. After the three invalid attempts, the projector will automatically turn off. NOTE: If you forget your password, contact DELL™ or qualified service personnel. To cancel the password function, select Off and enter the password to disable the function. HANGE ASSWORD . -
Page 23: Troubleshooting Your Projector
Troubleshooting Your Projector If you experience problems with your projector, see the following troubleshooting tips. If the problem persists, contact Dell™. See on page 27. Problem Possible Solution No image appears on the • Ensure that the external graphics port is enabled. If screen you are using a Dell™... - Page 24 The projector has overheated. The display amber automatically shuts down. Turn the display on again after the projector cools down. If the problem persists, contact Dell™. Error LED is blinking A projector fan has failed and the projector will amber automatically shut down.
-
Page 25: Specifications
Specifications Light Valve 0.45" SVGA DMD Type Y Brightness 50 ANSI Lumens (Max) Contrast Ratio 800:1 Typical (Full On/Full Off) Uniformity 80% Typical (Japan Standard - JBMA) Light Source R/G/B LED module Number of Pixels 858 x 600 Displayable Color 16.7M colors Projection Lens F/2.0, f=17.67mm fixed lens... - Page 26 Compatibility Modes (Analog) V. Frequency (Hz) H. Frequency (KHz) Resolution 640X350 70.1 31.5 720X400 70.1 31.5 640X480 59.9 31.5 640X480 37.5 640X480 800X600 60.3 37.9 800X600 46.9 800X600 85.1 53.7 1024X768 48.4 1024X768 1024X768 68.7 1152X864 67.5 1280X1024 1280X1024 1280X1024 91.1 1440X900 55.5...
-
Page 27: Contacting Dell
Dell provides several online and telephone-based support and service options. Availability varies by country and product, and some services may not be available in your area. To contact Dell for sales, technical support, or customer service issues: Visit support.dell.com. Verify your country or region in the Choose A Country/Region dropdown menu at the bottom of the page. - Page 28 Contacting Dell™ Downloaded from ProjectorsManual.com Manuals...
-
Page 29: Appendix: Glossary
Appendix: Glossary ANSI Lumens—A standard for measuring the brightness. It is calculated by dividing a square meter image into nine equal rectangles, measuring the lux (or brightness) reading at the center of each rectangle, and averaging these nine points. Aspect Ratio—The most popular aspect ratio is 4:3 (4 by 3). Early television and computer video formats are in a 4:3 aspect ratio, which means that the width of the image is 4/3 times the height. - Page 30 dB—decibel—A unit used to express relative difference in power or intensity, usually between two acoustic or electric signals, equal to ten times the common logarithm of the ratio of the two levels. Diagonal Screen—A method of measuring the size of a screen or a projected image. It measures from one corner to the opposite corner.
- Page 31 UXGA—Ultra Extended Graphics Array — 1600 x 1200 pixels count. VGA—Video Graphics Array — 640 x 480 pixels count. XGA—Extra Video Graphics Array — 1024 x 768 pixels count. Glossary Downloaded from ProjectorsManual.com Manuals...
- Page 32 Glossary Downloaded from ProjectorsManual.com Manuals...
- Page 33 On-Screen Display, 16 V. Frequency, 25 AUTO-ADJUST, 16 Video Compatibility, 25 DISPLAY (in PC Mode), 19 Weight, 25 DISPLAY (in Video Mode), 19 INPUT SOURCE, 16 support Main Menu, 16 contacting Dell, 27 OTHERS, 22 Index Downloaded from ProjectorsManual.com Manuals...
- Page 34 Troubleshooting, 23 contact Dell, 24 Index Downloaded from ProjectorsManual.com Manuals...