Yamaha 15F Owner's Manual
Hide thumbs
Also See for 15F:
- Owner's manual (54 pages) ,
- Owner's manual (62 pages) ,
- Owner's manual (190 pages)

Related Manuals for Yamaha 15F


Summary of Contents for Yamaha 15F
- Page 1 9.9F OWNER’S MANUAL Read this manual carefully before operating this outboard motor. 63V-28199-7E-E0...
- Page 2 Read this manual carefully before operating this outboard motor. Keep this manual onboard in a waterproof bag when boating. This manual should stay with the outboard motor if it is sold.
-
Page 3: Important Manual Information
If EMU25108 To the owner there is any question concerning this manual, Thank you for selecting a Yamaha outboard please consult your Yamaha dealer. motor. This Owner’s Manual contains infor- To ensure long product life, Yamaha recom-... -
Page 4: Table Of Contents
Table of contents Anti-fouling paint ......10 Safety information......1 Outboard motor disposal Outboard motor safety....1 requirements......11 Propeller ..........1 Emergency equipment....11 Rotating parts........1 Hot parts ..........1 Electric shock........1 Components ........12 Engine shut-off cord (lanyard) .... 1 Components diagram .... - Page 5 Table of contents Engine shut-off cord (lanyard) ..22 Checking painted surface of Oil ............. 23 outboard motor ......38 Engine ..........23 Periodic maintenance ....38 Install top cowling ......23 Replacement parts ......39 Filling fuel and engine oil....23 Severe operating conditions ....
-
Page 6: Safety Information
Safety information EMU33623 EMU33672 Outboard motor safety Engine shut-off cord (lanyard) Attach the engine shut-off cord so that the Observe these precautions at all times. engine stops if the operator falls overboard or EMU36502 Propeller leaves the helm. This prevents the boat from People can be injured or killed if they come in running away under power and leaving peo- contact with the propeller. -
Page 7: Carbon Monoxide
Overloading incorrect weight Have an approved PFD on board for every distribution can compromise the boats han- occupant. Yamaha recommends that you dling and lead to an accident, capsizing or must wear a PFD whenever boating. At a mi- swamping. -
Page 8: Weather
Safety information EMU33891 Boating safety publications Be informed about boating safety. Additional publications and information can be obtained from many boating organizations. EMU33601 Laws and regulations Know the marine laws and regulations where you will be boating- and obey them. Several sets of rules prevail according to geographic ZMU06025 location, but all are basically the same as the... -
Page 9: General Information
Record your outboard motor serial number in Code of conformed directives the spaces provided to assist you in ordering EMU25207 spare parts from your Yamaha dealer or for CE Marking reference in case your outboard motor is sto- Outboard motors affixed with this “CE”mark- len. -
Page 10: Read Manuals And Labels
Read any manuals supplied with the boat. Read all labels on the outboard motor and the boat. If you need any additional information, contact your Yamaha dealer. EMU33833 Warning labels If these labels are damaged or missing, contact your Yamaha dealer for replacements. ZMU06038... - Page 11 General information ZMU05740 EMU33913 Contents of labels EWM01672 The above warning labels mean as follows. WARNING Read Owner’s Manuals and labels. EWM01692 Wear an approved personal flotation de- WARNING vice (PFD). Emergency starting does not have start- Attach engine shut-off cord (lanyard) to in-gear protection.
- Page 12 General information Electrical hazard EMU35133 Symbols The following symbols mean as follows. Notice/Warning ZMU05666 ZMU05696 Read Owner’s Manual ZMU05664 Hazard caused by continuous rotation ZMU05665...
-
Page 13: Specifications And Requirements
Specifications and requirements Bore × stroke: EMU34522 Specifications 56.0 × 50.0 mm (2.20 × 1.97 in) TIP: Ignition system: “(AL)” stated in the specification data below represents the numerical value for the alumi- Spark plug (NGK): num propeller installed. BR7HS-10 Likewise, “(SUS)”... -
Page 14: Installation Requirements
EMU33565 Boat horsepower rating appropriate. EWM01561 Your Yamaha dealer can help you select the WARNING right propeller for your boating needs. Select Overpowering a boat can cause severe in- a propeller that will allow the engine to reach stability. -
Page 15: Start-In-Gear Protection
Ethanol can be used if the ethanol EMU39192 Start-in-gear protection content does not exceed 10% and the fuel Yamaha outboard motors are equipped with meets the minimum octane ratings. E85 is a start-in-gear protection device. This feature fuel containing 85% ethanol and must not be permits the engine to be started only when it used in your outboard motor. -
Page 16: Outboard Motor Disposal Requirements
A tool kit with assorted screwdrivers, pliers, wrenches (including metric sizes), and electrical tape. Waterproof flashlight with extra batteries. An extra engine shut-off cord (lanyard) with clip. Spare parts, such as an extra set of spark plugs. Consult your Yamaha dealer for details. -
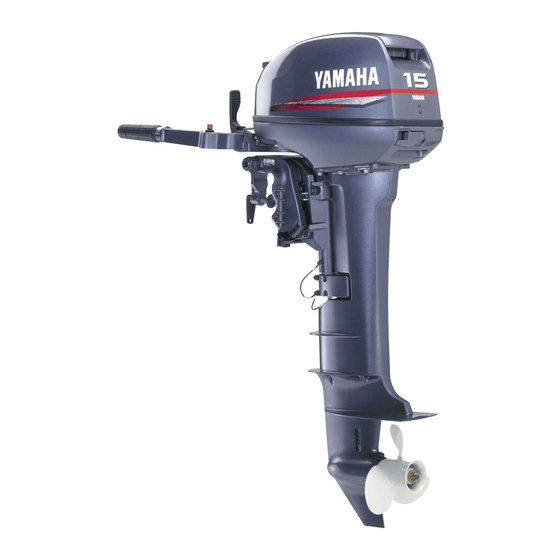
Page 17: Components
Components EMU2579Z Components diagram TIP: * May not be exactly as shown; also may not be included as standard equipment on all models (order from dealer). 1. Top cowling 16.Anti-cavitation plate 2. Cowling lock lever 17.Cooling water inlet 3. Cooling water pilot hole 18.Propeller 4. -
Page 18: Fuel Joint
Components mercial users should conform to relevant licensing or approval authority regula- tions. EMU25925 Gear shift lever Move the gear shift lever forward to engage the forward gear or rearward to engage the 1. Fuel joint reverse gear. 2. Fuel gauge 3. -
Page 19: Throttle Indicator
Components When constant speed is desired, tighten the EMU25963 adjuster to maintain the desired throttle set- Throttle indicator ting. The fuel consumption curve on the throttle in- EMU25996 dicator shows the relative amount of fuel con- Engine shut-off cord (lanyard) and clip sumed for each throttle position. -
Page 20: Engine Stop Button
Components 1. Engine shut-off cord (lanyard) 1. Use to start a hot engine 2. Clip 2. Use to warm up a cold engine or restart a warm engine 3. Engine shut-off switch 3. Use to warm up a cold engine or restart a EMU26004 warm engine Engine stop button... -
Page 21: Trim Rod (Tilt Pin)
Components 1. Tilt lock lever To increase resistance, turn the adjuster To lock it, set the tilt lock lever in the lock po- clockwise. sition. To release, push the tilt lock lever in the To decrease resistance, turn the adjuster release position. -
Page 22: 2-Pin Connector
When using it, keep tery, not to the 2-pin connector. in mind the following points: Use a genuine Yamaha connector. Use lighting equipment only. Connect lighting equipment directly to the 2-pin connector. -
Page 23: Installation
Installation EMU26903 Installation The information presented in this section is intended as reference only. It is not possible to provide complete instructions for every possible boat and motor combination. Proper mounting depends in part on experience and the specific boat and motor combination. EWM01591 WARNING ZMU01760... -
Page 24: Clamping The Outboard Motor
Test runs at different heights can help de- the transom. termine the optimum mounting height. Consult your Yamaha dealer or boat man- ufacturer for further information on deter- mining the proper mounting height. For instructions on setting the trim angle of the outboard motor, see page 31. - Page 25 Installation packaging. If used, they must be of at least the same quality of material and strength and must be tightened se- curely. After tightening, test run the engine and check their tightness. [EWM00652]...
-
Page 26: Operation
Operation Next two hours: EMU36382 First-time operation Accelerate at full throttle onto plane, then EMU30175 reduce engine speed to three-quarter Breaking in engine throttle (approximately 4000 r/min). Vary Your new engine requires a period of break- engine speed occasionally. Run at full in to allow mating surfaces of moving parts to throttle for one minute, then allow about wear in evenly. -
Page 27: Remove The Top Cowling
To remove tank should be checked and cleaned by a the top cowling, release the cowling lock le- Yamaha dealer. ver and lift off the top cowling. ZMU06092 EMU36892... -
Page 28: Oil
2. Engine shut-off cord (lanyard) cowling by pushing it with both hands. If the EMU27121 top cowling is loose, have it repaired by your Yamaha dealer. Check to be sure you have plenty of oil for your trip. EMU27142 Engine ... -
Page 29: Gasoline And Oil Mixing (100:1)
Operation wash with soap and water. If gasoline Fill the fuel tank, but do not overfill. spills on your clothing, change your WARNING! Do not overfill. Otherwise clothes. fuel can expand and overflow if the temperature increases. [EWM02611] Be sure the engine is stopped. Disconnect the fuel line from the fuel tank Fuel tank capacity: 25 L (6.61 US gal, 5.50 Imp.gal) -
Page 30: Operating Engine
Operation Replace the fuel tank cap and close Gasoline to engine oil tightly. ratio Shake the fuel tank to mix the fuel thor- Break-in period See page 21 oughly. After break-in 100:1 Make sure that the oil and gasoline are mixed. -
Page 31: Sending Fuel (Portable Tank)
Operation toms include nausea, dizziness, and drowsiness. Keep cockpit and cabin ar- eas well ventilated. Avoid blocking ex- haust outlets. EMU27469 Sending fuel (portable tank) If there is an air vent screw on the fuel tank cap, loosen it 2 or 3 turns. ZMU02024 TIP: Wipe up any spilled gasoline immediately... - Page 32 Operation EMU27533 Manual start models EWM01841 WARNING Failure to attached engine shut-off cord could result in a runaway boat if opera- tor is ejected. Attach the engine shut-off cord to a secure place on your clothing, or your arm or leg while operating. Do not attach the cord to clothing that could tear loose.
-
Page 33: Checks After Starting Engine
Stop the engine and check whether the cooling water inlet on the lower case or the cooling water pilot hole is blocked. Consult your Yamaha dealer if the prob- lem cannot be located and corrected. After the engine starts, slowly return the manual starter handle to its original posi- tion before releasing it. -
Page 34: Stop Switches
Operation EMU36972 Stop switches Perform the following procedure to check that the engine stop switch and engine shut- off switch operate properly. Start the engine, and then check that the engine stops when the engine stop button is pushed. ... -
Page 35: Stopping Boat
Operation After stopping the engine, tighten the air EMU31743 Stopping boat vent screw on the fuel tank cap and set EWM01511 the fuel cock lever or knob to the closed WARNING position, if equipped. Do not use the reverse function to slow down or stop the boat as it could cause you to lose control, be ejected, or im- pact the steering wheel or other parts of... -
Page 36: Trimming Outboard Motor
Operation EMU27863 EMU27873 Trimming outboard motor Adjusting trim angle for manual tilt models EWM00741 WARNING There are 4 or 5 holes provided in the clamp bracket to adjust the outboard motor trim an- Excessive trim for the operating condi- gle. tions (either trim up or trim down) can cau- Stop the engine. -
Page 37: Adjusting Boat Trim
Operation TIP: The outboard motor trim angle can be changed approximately 4 degrees by shifting the trim rod one hole. EMU27913 Adjusting boat trim When the boat is on plane, a bow-up attitude results in less drag, greater stability and effi- ciency. -
Page 38: Procedure For Tilting Up (Manual Tilt Models)
Operation EWM00223 WARNING Make sure that no one is near the out- board motor when tilting the outboard motor up or down. Otherwise, body parts could be crushed between the outboard motor and the clamp bracket. EWM00251 WARNING Leaking fuel is a fire hazard. If there is a Place the tilt lock lever (if equipped) in the fuel joint on the outboard motor, discon- release/up position. -
Page 39: Procedure For Tilting Down (Manual Tilt Models)
Operation ting an underwater obstacle could cau- se the outboard motor to lift out of the water, resulting in loss of control. Use extra care when operating in re- verse. Too much reverse thrust can cau- se the outboard motor to lift out of the water, increasing the chance of acci- dent and personal injury. -
Page 40: Cruising In Other Conditions
Operation ZMU08033 Slightly tilt the outboard motor up. The tilt Slowly lower the outboard motor to the support bar will lock automatically, sup- normal position. porting the outboard motor in a partially EMU35392 Cruising in other conditions raised position. This outboard motor has Cruising in salt water 2 positions for shallow water cruising. -
Page 41: Maintenance
Consult your motor, disconnect the fuel line from the Yamaha dealer for further details. outboard motor to prevent fuel from EMU28237 Clamp screw mounting models leaking. -
Page 42: Storing Outboard Motor
[ECM00292] be performed to prevent excessive damage. It is advisable to have your outboard motor serviced by an authorized Yamaha dealer pri- or to storage. However, you, the owner, with a minimum of tools, can perform the follow- ing procedures. -
Page 43: Lubrication
Seal EWM01982 replacement should be performed by an WARNING authorized Yamaha dealer prior to use. These procedures require mechanical Grease all grease fittings. For further de- skills, tools, and supplies. If you do not tails, see page 42. -
Page 44: Replacement Parts
EMU28512 Replacement parts If replacement parts are necessary, use only genuine Yamaha parts or parts of equivalent design and quality. Any part of inferior quality may malfunction, and the resulting loss of control could endanger the operator and pas- sengers. -
Page 45: Maintenance Chart 1
When operating in salt water, muddy, other turbid (cloudy), acidic water, the engine should be flushed with clean water after each use. The “ ” symbol indicates the check-ups which you may carry out yourself. The “ ” symbol indicates work to be carried out by your Yamaha dealer. Initial Every... -
Page 46: Maintenance Chart 2
Inspection or replace- switch/choke switch ment as necessary Wire harness connec- Inspection or replace- tions/wire coupler con- ment as necessary nections Fuel tank (Yamaha por- Inspection and clean- table tank) ing as necessary EMU34452 Maintenance chart 2 Every Item Actions... -
Page 47: Greasing
Maintenance EMU28944 Greasing Yamaha grease A (water resistant grease) Yamaha grease D (corrosion resistant grease; for propeller shaft) -
Page 48: Cleaning And Adjusting Spark Plug
Instead, take the outboard motor to a 1. Spark plug gap Yamaha dealer. You should periodically re- 2. Spark plug part number move and inspect the spark plug because 3. Spark plug I.D. mark (NGK) -
Page 49: Inspecting Wiring And Connectors
For idle speed specifications, see page 8. If you have difficulty verifying the idle speed, or the idle speed requires ad- justment, consult a Yamaha dealer or other qualified mechanic. EMU29115 Inspecting wiring and connectors ... -
Page 50: Removing Propeller
Otherwise, the propeller could come off during oper- ation and be lost. Apply Yamaha marine grease or a corro- Check the propeller shaft oil seal for dam- sion resistant grease to the propeller age. -
Page 51: Changing Gear Oil
[ECM00714] knob is locked. Severe injury could oc- TIP: cur if the outboard motor accidentally For disposal of used oil, consult your Yamaha falls. dealer. Tilt the outboard motor so that the gear Put the outboard motor in a vertical posi- oil drain screw is at the lowest point pos- tion. -
Page 52: Cleaning Fuel Tank
If you have any question about properly Remove the screws holding the fuel joint doing this procedure, consult your assembly. Pull the assembly out of the Yamaha dealer. tank. Keep away from sparks, cigarettes, flames, or other sources of ignition when cleaning the fuel tank. -
Page 53: Inspecting And Replacing Anode(S)
Maintenance EMU29317 Inspecting and replacing anode(s) Yamaha outboard motors are protected from corrosion by sacrificial anodes. Inspect the external anodes periodically. Remove scales from the surfaces of the anodes. Consult a Yamaha dealer for replacement of external anodes. ECM00721 NOTICE Do not paint anodes, as this would render them ineffective. -
Page 54: Trouble Recovery
Q. Has fuel pump malfunctioned? If your outboard motor requires repair, bring A. Have serviced by a Yamaha dealer. it to your Yamaha dealer. If the engine trouble-alert indicator is flashing, Q. Are spark plug(s) fouled or of incorrect ty- consult your Yamaha dealer. - Page 55 Q. Is fuel contaminated or stale? A. Fill tank with clean, fresh fuel. Q. Is carburetor clogged? A. Have serviced by a Yamaha dealer. Q. Is fuel filter clogged? A. Clean or replace filter. Q. Is fuel joint connection incorrect? A.
- Page 56 Trouble Recovery A. Have serviced by a Yamaha dealer. Q. Are weeds or other foreign matter tangled on gear housing? Q. Is load on boat improperly distributed? A. Remove foreign matter and clean lower A. Distribute load to place boat on an even unit.
-
Page 57: Temporary Action In Emergency
A. Tighten bolt. Have a Yamaha dealer check the out- board motor before operating it again. Q. Is steering pivot loose or damaged? A. Tighten or have serviced by a Yamaha EMU39792 Starter will not operate dealer. If the starter mechanism does not operate... -
Page 58: Emergency Starting Engine
Trouble Recovery Do not touch the ignition coil, spark plug EWM02362 WARNING wire, spark plug cap, or other electrical Use this procedure only for emergency components when starting or operating engine starting to return to the nearest the outboard motor. You could get an port for repairs. -
Page 59: Treatment Of Submerged Motor
EMU33502 Treatment of submerged motor If the outboard motor is submerged, immedi- ately take it to a Yamaha dealer. Otherwise some corrosion may begin almost immedi- ately. NOTICE: Do not attempt to run the outboard motor until it has been com- pletely inspected. -
Page 60: Index
INDEX 2-pin connector ........17 Filling fuel for portable tank ....23 First-time operation ......21 Flushing in a test tank......37 Alcohol and drugs........2 Fuel and engine oil, filling ..... 23 Anode(s), inspecting and replacing ..48 Fuel filter, checking......22, 43 Anti-fouling paint ........ - Page 61 INDEX Submerged outboard motor ....54 Operating engine ........25 Outboard motor disposal requirements ........11 Throttle friction adjuster......14 Outboard motor (painted surface), Throttle grip .......... 13 checking ..........38 Throttle indicator........14 Outboard motor safety ......1 Tiller handle .......... 13 Outboard motor serial number ....
- Page 62 Printed in Japan December 2013–0.2 × 1 CR Printed on recycled paper...