Table of Contents
Advertisement
Quick Links
Advertisement
Table of Contents

Related Manuals for Zanussi ZCG562


Summary of Contents for Zanussi ZCG562
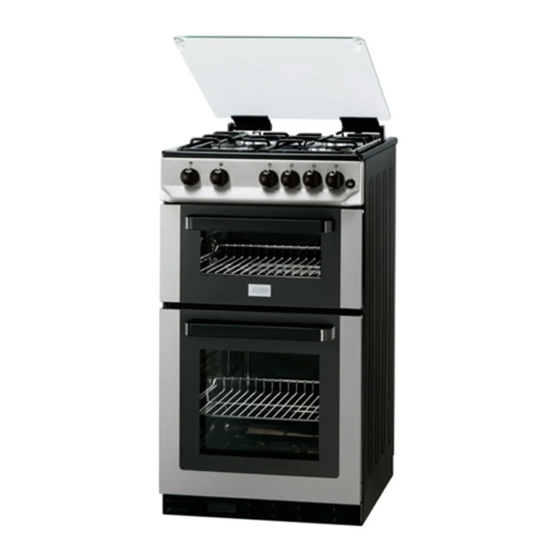
- Page 1 Cooker ZCG562 ZCG561...
-
Page 2: Table Of Contents
Contents Safety instructions _ _ _ _ _ _ _ _ _ _ _ _ _ _ _ _ _ 2 Cooking tables _ _ _ _ _ _ _ _ _ _ _ _ _ _ _ _ _ _ _ _ 10 Description of the appliance _ _ _ _ _ _ _ _ _ _ _ _ _ _ _ 4 Care and cleaning _ _ _ _ _ _ _ _ _ _ _ _ _ _ _ _ _ _ 12 Before first use _ _ _ _ _ _ _ _ _ _ _ _ _ _ _ _ _ _ _ _ _ 5... -
Page 3: Cleaning And Maintenance
children should be kept away. • Do not place sealed cans or aerosols inside the oven. They may explode if they are heated. During use • Ensure that all control knobs are in the off position • This appliance is not intended to be operated by when not in use. -
Page 4: Description Of The Appliance
Description of the appliance Product description Pan Supports Control Panel Grill Door Main Oven Door Grill Pan Grid Grill Pan Shelf Levelling Feet Controls and their functions Top Oven/Grill Knob Small Burner Knob Main Oven Knob Right Medium Burner Knob Left Medium Burner Knob Ignition Button Large Burner Knob... -
Page 5: Before First Use
Before first use Rating plate may become hotter than in normal use. Children should be kept away. During this period an odour • This is usually situated on the front frame of the may be emitted, it is therefore advisable to open a appliance and can be seen upon opening the door. -
Page 6: The Hob
The hob The gas hob has different burner sizes to suit WARNING! different types of cooking. Ensure the pan supports are correctly fitted before To ensure maximum burner efficiency only use pots using the hob. and pans with flat bases appropriate to the burner size used. -
Page 7: The Grill
Hints and tips WARNING! This function is used to adjust finish time of the Take care to avoid burns and scalds when reaching cooking period. across the hotplate. • Do not overfill pans or they will boil over. WARNING! • Do not use pans with very heavy handles, which Take extra care when deep fat frying, do not cover cause the pan to tip. -
Page 8: Hints And Tips
WARNING! using the grill as all the metal parts can become very hot! The grill door must be left open when grilling. To turn off the grill Hints and tips • Most foods should be placed on the grid in the grill pan to allow maximum circulation of air to lift the food out of the fats and juices •... -
Page 9: The Main Oven
IMPORTANT! The times quoted above are given as a guide and should be adjusted to suit personal taste. The main oven Heat zones Press the ignition button immediately. Keep the There are zones of heat within the oven. The control knob depressed for up to 5 seconds, but no temperature in the middle is the gas mark you have longer than 10 seconds. -
Page 10: Cooking Tables
reflect the heat away and give less base browning. • When cooking more than one dish in the oven, place dishes centrally on different shelves rather than cluster several dishes on one shelf, this will allow the heat to circulate freely for the best cooking results. -
Page 11: Roasting Chart
Gas Mark Pos. Food Approximate cook time(h) Fruit Pies, Crumbles 0:45 - 1:00 Milk Puddings 1:30 - 2:15 3 + 5 0:08 - 0:18 Scones Choux Pastry 0:35 - 0:45 Éclairs / Profiteroles 0:25 - 0:35 Flaky Pastry 0:25 - 0:45 3 + 5 0:15 - 0:30 Mince Pies... -
Page 12: Care And Cleaning
Meat Gas mark Cooking time Turkey/Goose 0:20 - 0:25 minutes per ½kg (1lb) up to 3½kg (7lb) then 0:10 minutes per ½kg (1lb) over 3½kg (7lb). 0:25 - 0:35 minutes per ½kg (1lb) Duck and 0:25 - 0:30 minutes over. Pheasant 0:35 - 0:40 minutes per ½kg (1lb) and 0:35 - 0:40 minutes over. - Page 13 Cleaning inside the grill and oven 2. Cap to crown. Place cap centrally on the top of compartments crown (enamel side up). Move sideways and front to back to check the cap is properly fitted. • The vitreous enamel main oven and grill 3.
- Page 14 Removal of inner Glasses (if applicable ) After Cleaning: • Push the glass towards under the location bracket “A”. • Place the glass under location bracket “B”. Before cleaning the oven door glasses, you must pull out the inner glass as shown: To clean the glass door panels •...
-
Page 15: What To Do If
What to do if... Maintenance must only be carried out by a solve yourself without the expense of a service call. In-guarantee customers should make sure that competent/qualified person. Do not try to alter/ modify the checks have been made as the engineer will the appliance yourself, as this could be dangerous. -
Page 16: Technical Data
Technical Data Dimensions Height: 900mm (nominal) Width: 500mm (nominal) Depth: 600mm (nominal) Weight: 47.3Kg Space for fixing at hob level 20mm minimum clearance Space for fixing above hob level See important note location of appliance Minimum space above hob level 787mm (If a cooker hood is fitted refer to the cookerhood installation instructions) Connections... -
Page 17: Installation
This appliance complies with: European Council Gas Directive 90/396/EEC EMC Directive Directives Low voltage Directive 73/23/EEC, 89/336/EEC, CE Marking Directive 93/68/EEC. Installation MODEL RECOGNITION TABLE MODEL NAME COLOR GAS TYPE ZCG561FW WHITE ZCG562FW WHITE ZCG562FM BROWN 1) For more information, refer to Technical Data. Safety requirements air supply in accordance with BS. -
Page 18: For Your Safety
For your safety ground level i.e. in a basement or aboard any boat, yacht or other vessel. • Do not try to disconnect the appliance from the gas supply if the supply pipe does not have a bayonet Levelling the appliance connection, as described in the installation •... -
Page 19: Checking The Grill
– For LP. Gas. The pressure must be set to 29 mbar for use on butane or 37 mbar for use on propane. 4. Turn off the taps, disconnect the pressure gauge. 5. Check operation of each hob burner. Checking the grill •... -
Page 20: Environmental Information
and check that after about 10 minutes the flame The flame should remain alight. If after 10 size has reduced. seconds the burner has not lit, stop operating the 4. Turn off the control and check that the oven appliance and wait at least 1 minute before flames go out. - Page 21 Tel: Electrolux 08445 613 613 (*) AEG-Electrolux 08445 611 611 (*) Zanussi-Electrolux 08445 612 612 (*) (*) Calls may be recorded for training purposes Electrolux Group (Irl) Ltd Long Mile Road, For Customer Service in The Republic of Ireland Dublin 12, Republic of Ireland Tel: +353 (0)1 please contact us at the address below: 4090751 Email: service.eid@electrolux.ie...
- Page 24 To buy accessories, consumables and spare parts at our online shop please visit: www.zanussi.co.uk www.zanussi.com...