Table of Contents
Advertisement
1-800-4-D
INSTRUCTION MANUAL
GUIDE D'UTILISATION
MANUAL DE INSTRUCCIONES
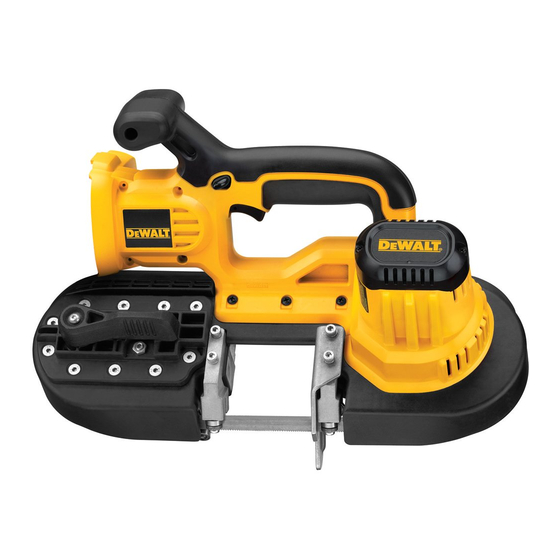
DCS370
Heavy-Duty 18 Volt Cordless Band Saw
Scie à ruban industrielle sans fil de 18 volts
Sierra de banda para trabajo pesado, inalámbrica, de 18 voltios
If you have questions or comments, contact us.
Pour toute question ou tout commentaire, nous contacter.
Si tiene dudas o comentarios, contáctenos.
WALT • www.dewalt.com
E
INSTRUCTIVO DE OPERACIÓN, CENTROS DE SERVICIO Y PÓLIZA DE
GARANTÍA. ADVERTENCIA: LÉASE ESTE INSTRUCTIVO ANTES DE
USAR EL PRODUCTO.
Advertisement
Table of Contents

Related Manuals for DeWalt DCS370


Summary of Contents for DeWalt DCS370
- Page 1 If you have questions or comments, contact us. Pour toute question ou tout commentaire, nous contacter. Si tiene dudas o comentarios, contáctenos. 1-800-4-D WALT • www.dewalt.com INSTRUCTION MANUAL INSTRUCTIVO DE OPERACIÓN, CENTROS DE SERVICIO Y PÓLIZA DE GUIDE D’UTILISATION GARANTÍA. ADVERTENCIA: LÉASE ESTE INSTRUCTIVO ANTES DE USAR EL PRODUCTO.
-
Page 3: Save All Warnings And Instructions For Future Reference
1) WORK AREA SAFETY Defi nitions: Safety Guidelines a) Keep work area clean and well lit. Cluttered or dark areas The definitions below describe the level of severity for each invite accidents. signal word. Please read the manual and pay attention to b) Do not operate power tools in explosive atmospheres, these symbols. -
Page 4: Personal Safety
3) PERSONAL SAFETY 4) POWER TOOL USE AND CARE a) Stay alert, watch what you are doing and use common a) Do not force the power tool. Use the correct power tool sense when operating a power tool. Do not use a power for your application. - Page 5 battery pack may create a risk of fire when used with another • Always cease operation at once if you notice any abnormality battery pack. whatsoever. b) Use power tools only with specifically designated battery • Always be sure all components are mounted properly and securely packs.
-
Page 6: Important Safety Instructions For All Battery Packs
• crystalline silica from bricks and cement and other masonry ..direct current ..alternating or direct products, and ...Class I Construction current • arsenic and chromium from chemically-treated lumber. n o ..no-load speed ....(grounded) Your risk from these exposures varies, depending on how often you ...Class II Construction ..earthing terminal do this type of work. -
Page 7: Specific Safety Instructions For Lithium Ion (Li-Ion)
• DO NOT splash or immerse in water or other liquids. SPECIFIC SAFETY INSTRUCTIONS FOR NICKEL CADMIUM (NiCd) OR NICKEL METAL HYDRIDE (NiMH) • Do not store or use the tool and battery pack in locations where the temperature may reach or exceed 105°F (40°C) •... -
Page 8: Important Safety Instructions For All Battery Chargers
The RBRC Seal CAUTION: Burn hazard. To reduce the risk of injury, charge only WALT rechargeable batteries. Other types of batteries may burst The RBRC™ (Rechargeable Battery Recycling causing personal injury and damage. Corp oration) Seal on the nickel cadmium, nickel metal hydride or lithium ion batteries (or battery packs) NOTICE: Under certain conditions, with the charger plugged in to indicate that the costs to recycle these batteries (or... - Page 9 • Disconnect the charger from the outlet before attempting 16 gauge has more capacity than 18 gauge. An undersized cord any cleaning. This will reduce the risk of electric shock. will cause a drop in line voltage resulting in loss of power and overheating.
- Page 10 Charge Indicators FIG. 1 Some chargers are designed to detect certain problems that can arise with battery packs. Problems are indicated by the red light flashing at a fast rate. If this occurs, re-insert battery pack into the charger. If the problem persists, try a different battery pack to determine if the charger is OK.
-
Page 11: Important Charging Notes
charge, it may need to be recharged before use. A battery pack may 4. The battery pack should be recharged when it fails to produce also slowly lose its charge if left in a charger that is not plugged into sufficient power on jobs which were easily done previously. -
Page 12: Intended Use
COMPONENTS (Fig. 2, 3) FIG. 2 WARNING: Never modify the power tool or any part of it. Damage or personal injury could result. A. Auxiliary handle B. Lock-off button C. Trigger switch D. Main handle E. Work stop F. Guide rollers G. -
Page 13: Blade Selection
Trigger Switch (Fig. 2) FIG. 3 Release switch lock-off button (B) by pressing button. Pull the trigger switch (C) to turn the motor ON. Releasing the trigger switch turns the motor OFF. Releasing the trigger switch also automatically actuates lock- off button. -
Page 14: Blade Description
generated during cutting may cause the band saw blade to become 4. Tighten both the adjusting locking nuts and close the quick release bound to the material, possibly resulting in overload and burn-out of lever. (It will be necessary to run the saw to observe the tracking.) the motor. -
Page 15: Removing And Installing Blades
To remove the battery pack from the tool, press the battery FIG. 5 BLADE DIRECTION release buttons (P) and firmly pull the battery pack out of the tool handle. Insert it into the charger as described in the charger manual. Removing and Installing Blades WARNING: To reduce the risk of serious personal injury, turn POSITION OF TEETH ON LEFT SIDE OF MACHINE... -
Page 16: Operation
4. Make sure that the blade is fully inserted into the guide rollers and 2. Bring the work stop (E) into contact with the workpiece. Turn the positioned squarely against the rubber tires. saw on. 5. Rotate the blade tension lever (H) counterclockwise until it stops FIG. -
Page 17: Maintenance
NOTICE: During cutting, if the band saw becomes locked or jammed 5. The tool’s own weight provides the most efficient downward in the workpiece material, release the switch immediately to avoid cutting pressure. Added operator pressure slows the blade and damage to the band saw blade and motor. - Page 18 Industrial Tool Co., 701 East Joppa Road, Baltimore, MD 21286, call within 90 days from the date of purchase with a receipt for a full refund 1-800-4-D WALT (1-800-433-9258) or visit our website: www.dewalt. – no questions asked. com. LATIN AMERICA: This warranty does not apply to products sold in Repairs Latin America.
- Page 19 FREE WARNING LABEL REPLACEMENT: If your warning labels become illegible or are missing, call 1-800-4-D WALT (1-800-433- 9258) for a free replacement.