Table of Contents
Advertisement
Quick Links
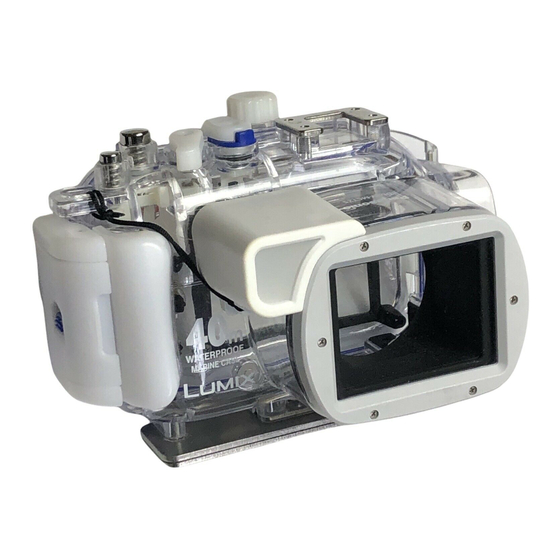
Operating Instructions
Marine Case
DMW-MCTZ3
Model No.
Before connecting, operating or
adjusting this product, please read
the instructions completely.
For USA assistance, please call: 1-800-272-7033 or send e-mail to : digitalstillcam@us.panasonic.com
For Canadian assistance, please call: 1-800-99-LUMIX (1-800-995-8649) or
send e-mail to: lumixconcierge@ca.panasonic.com
VQT1F25
PP
Advertisement
Table of Contents

Related Manuals for Panasonic DMW-MCTZ3


Summary of Contents for Panasonic DMW-MCTZ3
-
Page 1: Operating Instructions
DMW-MCTZ3 Model No. Before connecting, operating or adjusting this product, please read the instructions completely. For USA assistance, please call: 1-800-272-7033 or send e-mail to : digitalstillcam@us.panasonic.com For Canadian assistance, please call: 1-800-99-LUMIX (1-800-995-8649) or send e-mail to: lumixconcierge@ca.panasonic.com VQT1F25... -
Page 2: Table Of Contents
Contents Before Use ........3 Accessories........5 Handling and Care . -
Page 3: Before Use
Before Use ≥ This Marine Case is designed for Panasonic Digital Camera. You can enjoy taking pictures underwater at depths up to 40 m/130 feet. ≥ In the case of water leakage due to insufficient care, Matsushita is in no way liable for damage to any products (digital camera, batteries, card etc.) - Page 4 Before Use (continued) ∫ Using the Case in high or low temperatures ≥ If you open or close the Case where it is humid or hot and then move to a place that is cold or dive underwater, condensation may appear inside the Case, the glass surface may become cloudy and the digital camera may be damaged.
-
Page 5: Accessories
Accessories When you first open the package, check that the Case and all the accessories are included and that there has been no damage to the Case or any of the accessories during distribution or transportation. If you find something unusual, consult your dealer before using the Case. -
Page 6: Handling And Care
Handling and Care ≥ Do not place the Case where it may fall. • If the Case falls on your head or foot, it will injure you and cause the Case to malfunction. ≥ Never alter the Case. • If water leaks into the digital camera because the Case was altered, the digital camera may be damaged beyond repair. - Page 7 ≥ Do not leave the Case where the temperature is high. • The temperature inside the Case becomes very high particularly when it is exposed to direct sunlight on a beach, a ship etc. or when it is left in an airtight car in the summer.
-
Page 8: Components
Components 1 2 3 VQT1F25 Zoom Lever Strap Eyelet (for attaching the supplied hand strap and diffuser) Shutter Button Mode Dial Front Case Diffuser (supplied) Front Glass Camera ON/OFF Switch 3/Exposure Compensation/ Auto Bracket/White Balance Fine Adjustment/Backlight Compensation In Simple Mode Button 1/Flash Setting Button [MENU/SET] Button... -
Page 9: What Is The O-Ring
What is the O-ring? ≥ The O-ring is a waterproofing packing used for underwater cameras, watches and diving equipment. ≥ The O-ring keeps the Case waterproof by sealing the gap between the rear case and the front case. ∫ How the O-ring keeps the Case waterproof Rear Case The gum comes into contact with the sides of the Case making the Case waterproof and stopping water from entering from the gap. -
Page 10: Preparation -Setting The O-Ring
Preparation -Setting the O-ring- Be sure to set the O-ring before attaching a digital camera. Thoroughly wash and dry your hands before handling the O-ring. Place the O-ring where there is no sand or dust. Loosen the O-ring with your fingers to remove it. ≥... - Page 11 Check the O-ring. ≥ Check that there is no dirt, sand, hair, dust, salt crystals, lint or grease on the O-ring. If you find any of these, remove them with a soft, dry cloth. Dirt Salt crystals ≥ There may be dirt on the O-ring that you cannot see. Check if there is any dirt by rubbing your finger over the O-ring.
- Page 12 Preparation -Setting the O-ring- (continued) Inspect the opposite side of the O-ring in the same way. Apply the grease (supplied). ≥ Apply a rice-grain size of grease (supplied) evenly to the O-ring with the tip of your finger. ≥ Dirt or dust will stick to the O-ring if you apply too much grease. ≥...
- Page 13 Inspect the O-ring one last time. Check the following one more time: ≥ There is no dirt sticking to the O-ring. ≥ The O-ring has not come out. ≥ The O-ring is not twisted. ≥ There are no scratches or squashed parts on the O-ring. Thoroughly wipe any grease off your hands with a dry cloth and then wash your hands with water.
-
Page 14: Preparation -Checking The Case Is Waterproof
Preparation -Checking the Case is Waterproof- After setting the O-ring, check that no water leaks into the Case by submerging it in a water tank, bath tub etc. for more than about 3 minutes before attaching a digital camera. ≥ Do not use the Case in water over 40 °C/104 °F. -
Page 15: Preparation -Attaching The Digital Camera
Preparation -Attaching the Digital Camera- Check that the ON/OFF Switch on the camera and the case is set to [OFF]. ≥ Remove the strap from the digital camera. Push 2 up with your finger while sliding 1 to open the buckle. Attach the digital camera to the Case. - Page 16 Preparation -Attaching the Digital Camera- (continued) ≥ When inserting the silica gel, bend it as shown in the illustration below and then insert it as far as possible. If you close the Case with the silica gel not fully inserted, the silica gel will get caught in the O-ring causing water leakage.
- Page 17 ∫ Notes ≥ Check one more time that the O-ring is fitted evenly into the O-ring groove. ≥ Avoid opening or closing the Case where there is a lot of sand or dust and in humid or wet places. ≥ If there is a sudden change in temperature, condensation may appear inside the Case.
-
Page 18: Taking Pictures
Taking Pictures ∫ Before taking pictures underwater Check the following before diving. ≥ Is there sufficient remaining battery power? ≥ Is there sufficient memory in the card? ≥ Is the O-ring fitted evenly into the O-ring groove? ≥ Have you checked that no water leaks into the Case? ≥... -
Page 19: Tips For Taking Pictures In The Water
Tips for Taking Pictures in the Water When the image is too bluish in the water ) several times until [ Press Press ( ) to adjust the white balance. Press [MENU/SET] to finish. ≥ You can also press the shutter button halfway to finish. Select the best picture Set the flash to [ Using the auto bracket function (For models with an auto bracket function) -
Page 20: After Use
After Use After finishing taking pictures, follow the steps below. Submerge the Case in fresh water for about 30 minutes or more without removing the digital camera to remove any salt crystals etc. ≥ Press all the operation buttons etc. on the Case to wash away any seawater. -
Page 21: Cleaning And Storing
Remove the O-ring from the Case and check that there is no debris, etc. in the O-ring groove. Check that there are no scratches etc. on the O-ring while you are applying the grease. ∫ Notes Be careful when removing the digital camera from the Case so that it does not get wet. - Page 22 Caution for Use ≥ Use only the specified grease. If you use other types of grease, the surface of the O-ring may be damaged causing water leakage. ≥ The O-ring comes into contact with the sides of the Case making the Case waterproof.
-
Page 23: Specifications
∫ About storage and inspection after use ≥ Always take the digital camera out of the Case. ≥ Make sure that no dirt or dust is stuck to the O-ring. ≥ Thoroughly dry the Case at room temperature and then store it in a cool, dark place. ≥... -
Page 24: Limited Warranty
If repair is needed during the warranty period the purchaser will be required to furnish a sales receipt/proof of purchase indicating date of purchase. Also, purchaser will be responsible for shipping the unit to the above address. For assistance in Puerto Rico call Panasonic Puerto Rico, Inc. (787)-750-4300 or fax (787)-768-2910. VQT1F25 FOR U.S.A. - Page 25 Limited Warranty Limits And Exclusions This warranty ONLY COVERS failures due to defects in materials or workmanship, and DOES NOT COVER normal wear and tear or cosmetic damage. The warranty ALSO DOES NOT COVER damages which occurred in shipment, or failures which are caused by products not supplied by the warrantor, or failures which result from accidents, misuse, abuse, neglect, mishandling, misapplication, alteration, faulty installation, set-up adjustments, misadjustment of consumer controls, improper...
- Page 26 5770 Ambler Drive, Mississauga, Ontario L4W 2T3 PANASONIC PRODUCT – LIMITED WARRANTY Panasonic Canada Inc. warrants this product to be free from defects in material and workmanship and agrees to remedy any such defect for a period as stated below from the date of original purchase.
- Page 27 WARRANTY SERVICE/PRODUCT REPAIRS For product operation repairs and information assistance, please contact: Our Customer Care Centre: 1-800 #: 1-800-99-LUMIX (1-800-995-8649) Fax #: (905) 238-2360 Lumix Email link: lumixconcierge@ca.panasonic.com Email link: “Customer support” on www.panasonic.ca VQT1F25...
-
Page 28: Spanish Quick Use Guide/Guía Rápida En Español
Antes del uso (P3) ≥ Este estuche marino ha sido diseñado para las cámaras digitales de Panasonic. Puede gozar de la toma de imágenes submarinas a una profundidad hasta 40 m/130 pies. ≥ En el caso de infiltración debida a escaso cuidado, Matsushita no se responsabiliza por los daños... - Page 29 ≥ Si de repente desplaza el estuche de un lugar, o agua, frío a uno caliente, podría empañarse la superficie del cristal. Espere hasta que el estuche se acerque a la temperatura del aire antes de tomar las imágenes. ∫ Acerca de la preparación ≥...
- Page 30 Guía rápida en español ≥ No cuelgue la correa alrededor de su cuello cuando está sumergido en el agua. • Ésta podría envolverse alrededor de su cuello causándole sofocación u otra seria herida. ≥ Limpie toda grasa de sus manos. •...
- Page 31 ≥ Cuando toma imágenes con el flash, el rango disponible de éste último es menos debajo de la superficie del agua que estando en tierra. ¿Qué es el anillo tórico? ≥ El anillo tórico es una junta hermética utilizada para cámaras, reloj submarinos y otros dispositivos de buceo.
- Page 32 Guía rápida en español Controle la ranura del anillo tórico. • Granos de arena o cristales de sal endurecidos pueden entrar en la ranura del anillo tórico. Sáquelos con un chorro de aire o un estropajo de algodón. Si usa un estropajo de algodón, tenga cuidado de no dejar ninguna de sus fibras en la ranura de dicho anillo.
- Page 33 ≥ Tenga cuidado de llevar consigo un anillo tórico de repuesto en el caso de que se dañase o arañase el que está usando. Preparación -Control de lo impermeable del estuche- ≥ Después de colocar el anillo tórico, compruebe que no haya infiltración de agua dentro del estuche sumergiendo éste último en un tanque de agua, una bañera etc.
- Page 34 Guía rápida en español Preparación -Unión de la cámara digital- (P15) ≥ Compruebe que el interruptor ON/ OFF de la cámara y el estuche marino esté en [OFF]. ≥ Quite la correa de la cámara digital. Empuje hacia arriba 2 con su dedo, mientras hace deslizar 1 para abrir la hebilla.
- Page 35 ∫ Notas ≥ Compruebe una o más veces que el anillo tórico esté aplicado de manera uniforme dentro de su ranura. ≥ Evite abrir o cerrar el estuche donde haya mucha arena o polvo o en lugares húmedos o mojados. ≥...
- Page 36 Panasonic Consumer Electronics Company, Division of Panasonic Corporation of North America One Panasonic Way, Secaucus, NJ 07094 Panasonic Puerto Rico, Inc. Ave. 65 de Infantería, Km. 9.5, San Gabriel Industrial Park, Carolina, Puerto Rico 00985 Panasonic Canada Inc. 5770 Ambler Drive, Mississauga, Ontario, L4W 2T3...
- Page 37 Japon Imprimé Ltd. Co., Industrial Electric Matsushita 2007 www.panasonic.ca 624-5010 (905) Ontario Mississauga, Drive, Ambler 5770 Inc. Canada Panasonic...
- Page 38 VQT1F25 www.panasonic.ca à » clientèle à Support lumixconcierge@ca.panasonic.com 238-2360 (1-800-995-8649) 1-800-99-LUMIX l’appareil, fonctionnement PRODUITS GARANTIE/RÉPARATION « courriel Lien Lumix courriel Lien (905) télécopieur N° frais sans Ligne l’aide obtenir clientèle à service notre contacter veuillez pour réparation Pour SOUS RÉPARATION...
- Page 39 été lequel pour l’usage plus, manipulation. impropre abusif usage couvre Canada main-d’oeuvre pièces main-d’oeuvre main-d’oeuvre indiquée période accepte, fabrication Panasonic Ontario être peuvent garanties exclusions exclusions reconnaissent CONSÉCUTIF. AUCUNE D’OBLIGATION POUR INCLUANT IMPLICITE, REMPLACE EXPRESSE réparation toute pour exigée seulement.
- Page 40 VQT1F25 récentes plus informations etc., Internet, site catalogue, comprises) (P)] (H)k3 (H)k93 (L)k94 2007 mars compter revendeur. boîtier boîtier. serait accessoire l’achat. avant effectué celui vérification l’inspection boîtier, Cette l’achat. après à frais endroit dans ranger torique. joint boîtier. après vérification utilisés.
- Page 41 afin l’utilisation après doux. chiffon linge avec essuyez-la votre consultez réparé, réparation. pour indiqué silice utiliser dans disponibles antibuée douce. inoxydable acier parties anticorrosifs tiède. courante l’eau chimiques. détergents benzine l’alcool, solvants moyen garde à peut, boîtier etc.) usage Leur réparation.
- Page 42 VQT1F25 éraflure. aucune conseillons vous nous rangement, à fréquence entretenus, durée Bien environ pendant etc. d’eau infiltration toute l’absence n’est torique joint photo, l’appareil période pour boîtier neuf. torique joint Ceci etc. saleté, taché sont avant couvercle également Essuyez toutes retirez-en boîtier, pointu...
- Page 43 rangez. vous lorsque boîtier l’eau. avec boîtier laver provoquer peut cela doux chiffon avec boîtier l’eau. avec uniquement (P20) propre. ventilé. bien frais, endroit dans numérique photo avant photo l’appareil pression sous l’eau l’intérieur à saleté l’extérieur lavez boîtier soit qu’il jusqu’à...
- Page 44 VQT1F25 toiture. sous l’intérieur où endroit choisissez mauvais, combinaison votre dans cheveux. corps l’eau avec mains celui-ci boîtier pendant torique joint aucune n’y qu’il numérique. photo l’appareil à exemple mouillé, particulièrement pénétrée l’eau à attentif votre d’humidité trace toute soin.) (Lavez propres.
- Page 45 détérioration accélérer Ceci soleil. rayons cristaux imprégné pression, sous débit inutilisables. deviendront retirés sont afin boîtier etc. fonctionnement, cristaux tous d’enlever minutes environ pendant suivantes. étapes bien boîtier endommager directement l’exposant boîtier. complètement n’est chiffon d’eau. infiltrations grand trop à l’eau avec touches...
- Page 46 VQT1F25 numérique. photo l’appareil parmi préférée photo votre orange, clown rapide photo choisir pouvez Vous expositions avec photos automatique réglage finir. pour déclencheur blancs. apparaisse. l’eau dans d’utilisation manuel lire prises. sélectionner pouvez vous rafale, mouvement à sujet prises. été enregistrées.
- Page 47 avant avant, verre être pouvez vous avant, mises être peuvent elles numérique.) photo l’appareil conseillons vous nous boîtier, photo. prendre point. désirez vous sujet numérique. photo l’appareil [SOUS-MARIN] sélectionnez verrouiller. pour Appuyez boîtier? rainure? dans Essuyez point. mise verre saleté photo, l’appareil devant...
- Page 48 VQT1F25 puis tout essuyez utilisation, trépied. fixation fixez- puis superposés soient poids premier creux partie deuxième saillie partie deux utilisez vous fixer. utilisez puis marin boîtier fixation prise avec partie alignez poids, d’un négative) (flottabilité mer. deux marin boîtier mer.(flottabilité l’eau poids: d’un...
- Page 49 l’absence plus fois silice placez s’embue, l’objectif avec contact assurez- cela, éviter Pour basse, l’eau température d’eau. infiltration sera celui-ci place, boîtier fermez vous l’illustration montré (suite) numérique photo (P14) boîtier. vérifiez photo, l’appareil loquet. dans etc. fermé. correctement boîtier. d’utiliser boîtier éviter...
- Page 50 VQT1F25 silice boîtier. ouvrir pour glisser faisant photo l’appareil numérique photo neuf. silice (fournie). silice protection l’anneau heurter dans numérique photo tout doigt votre numérique. photo l’appareil [OFF]. marche/arrêt l’interrupteur l’appareil place ≥ toujours Utilisez Insérez ≥ à Attention l’appareil Installez loquet.
- Page 51 causer peut sable entre trouve étranger boîtier partie pieds, pieds. m/130 jusqu’à allant toujours Plongez boîtier. pression raison d’un boîtier lancez vous proximité. L’hydrogène batterie. immédiatement photo l’appareil l’utilisez qu’il signifie cela l’eau, qu’il l’eau dans immergé numérique photo l’appareil peut chaleur °F.
- Page 52 VQT1F25 vous celui où infiltration causer graisse, trop appliquez vous puis rainure, dans n’y qu’il vérifiez torique saleté, endommagé joint surface n’éraflez boîtier. fermez extérieure surface chiffon avec torique. éraflé. dans rechange torique joint torique joint coller peuvent (fournie). graisse couche étrangers matériaux...
- Page 53 fibres chiffon. d’un d’eau. infiltrations causer graisse, type autre utilisez torique. joint collera poussière (fournie) graisse quantité manière. même (suite) torique- Incorrect Correct étiré. trop tordu. logement. sorte torique. joint collée rainure. dans torique. joint papier d’un l’aide à s’endommager peut vous indiquée.
- Page 54 VQT1F25 fibres laisser tampon d’air rainure dans entrer peuvent Écaillements joint remplacez cas, éraflé effiloché écrasé, celui-ci laisser torique. joint doigt voir. pouvez vous Poussière avec retirez-la choses, fibre sel, cristaux poussière, torique. à veillez coton, tampon avec précaution avec Retirez-les durcis cristaux...
- Page 55 l’érafler. pourrait Ceci torique Joint avec torique joint soulevez doigts deux l’enlever. pour poussière. torique. joint manipuler d’installer avant torique- torique. joint retirer pour érafler attention bout torique joint doigts avec torique sable sans endroit avant soin avec place torique joint joint place...
- Page 56 VQT1F25 peut entretien entretien uniformisant hermétiquement. surface l’eau, pression l’eau Pression l’ouverture. rendant boîtier avant Couvercle torique Joint numérique photo étanche boîtier avant partie entre l’espace montres photo, appareils d’eau. infiltrations mauvais important. Donc, boîtier. côtés d’eau infiltrations plus scellé écrasé...
- Page 57 déverrouillage Levier verrouillage Loquet arrière Couvercle automatique point mise Verrouillage automatique/ point 2/Touche verrouillage MODE] [DISPLAY/LCD l’affichage/mode Touche (prévisualisation) 4/[REV] Touche d’effacement Touche [FUNC]/ fonction Touche menu) (affichage/réglage [MENU/SET] Touche 1/du flash mode Touche simple mode contre-jour blancs/Compensation l’équilibre Réglage l’exposition/ automatique réglage...
- Page 58 VQT1F25 faible plus celui-ci disponible l’image coupés être peuvent fonctionnement. mauvais avec batterie fonctionnement. mauvais courts-circuits infiltrations, l’intérieur à température peut celui-ci boîtier, peut chaleur été. etc. voyage, plage, lorsqu’il surtout élevée très élevée. température renverser. peut boîtier d’eau. infiltration portée flash, avec...
- Page 59 batteries retirez incendie. immédiatement. anormal bruit caissons. maladie consignes nécessaires l’eau, sous boîtier utilisant incendie. immédiatement arrêtez bouche. votre mains. blessures d’autres suffocation êtes vous lorsque avalé enfant votre pensez joint silice graisse, provoquer peut cela boîtier, joint silice sport. avez vous sous-marine...
- Page 60 VQT1F25 I’illustration. selon pas. l’utiliser vous lorsque VHD1930 poids fixation VFC4190 Courroie VZG0371 pièces) (dessiccatif) silice indiqués ceux avant revendeur constatez vous ceux-ci accessoires vérifiez fois, première Fixez-le Fixez diffuseur retirer pouvez torique) (pour graisse torique accessoires autres votre consultez d’anormal, transport.
- Page 61 lorsque attention Faites boîtier lourd objet sable d’eau gouttes dans l’avance à mettez-la d’eau mouillées sont mains combinaison votre dans cheveux. corps votre gouttes complètement boîtier arrière avant côté où l’eau éclaboussé suivantes. remplacer pour plongée l’intérieur à numérique photo l’intérieur.
- Page 62 étanchéité. l’eau dans boîtier immergez numérique. provoquant accidents dépenses. l’intérieur à présents etc.) subis dommages précautions, manque jusqu’à allant profondeur Panasonic. numérique élevée. laissez correctement. l’appareil élevée très hermétique appareil exposés bateau, voiture, dans numérique photo avant torique joint l’intérieur à...
- Page 63 l’appareil l’eau photo l’appareil boîtier- torique- l’utilisation rangement dans prise place l’étanchéité -Vérification joint place torique? entretien. matières VQT1F25 Garantie Spécifications Remarques Nettoyage utilisation. Après pour Conseils vues Prise numérique -Mise Préparatifs Préparatifs -Mise Préparatifs joint qu’un Qu’est-ce Composants Manipulation Accessoires.
- Page 64 S0207Kd0 VQT1F25 d’utilisation. manuel lire recommandé utiliser régler DMW-MCTZ3 marin Boîtier d’utilisation lumixconcierge@ca.panasonic.com 1-800-995-8649 attentivement l’appareil, raccorder, Avant modèle Manuel à courriel envoyez 1-800-99-LUMIX composez I’aide, N° Pour...