Table of Contents
Advertisement
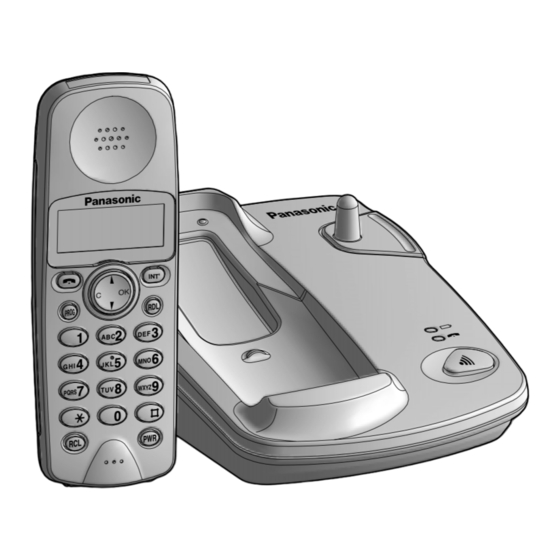
Operating Instructions
PLEASE READ BEFORE USE AND SAVE.
Charge the batteries for about 4 hours before initial use.
This equipment is not designed for making emergency
telephony calls when the power fails. Alternative arrangements
should be made for access to emergency services.
PR O G
3
2
D E F
1
A B C
6
5
M N O
4
J K L
G H I
9
8
W XY Z
7
T U V
PQ RS
0
P W R
R C L
Digital Cordless Phone
KX-TCD951EB
Model No.
Advertisement
Table of Contents

Related Manuals for Panasonic KX-TCD951EB


Summary of Contents for Panasonic KX-TCD951EB
- Page 1 This equipment is not designed for making emergency telephony calls when the power fails. Alternative arrangements should be made for access to emergency services. Model No. D E F M N O W XY Z P W R Digital Cordless Phone KX-TCD951EB...
-
Page 2: Important Information
Important Information APPROVED for connection to telecommunication systems spec- ified in the instructions for use subject to the conditions set out in them. 610110 Do not connect the AC adaptor to any AC outlet other than the standard AC 230–240 V, 50 Hz. •... - Page 3 This apparatus is not suitable as an extension to a payphone or for use on a party line with shared service. This cordless telephone has been designed to operate on radio frequencies which have been assigned to the exclusive use of cordless telephones.
-
Page 4: Before Initial Use
Before Initial Use Thank you for purchasing your new Panasonic digital cordless telephone. For your future reference Serial No. (found on the bottom of the unit) Name and address of dealer Included with this unit AC Adaptor (p. 10) Part No. KX-TCA9E or KX-TCA11E Handset Cover (p. -
Page 5: For Best Performance
For Best Performance Battery Charge Rechargeable Ni-Cd batteries power the handset. Install the batteries (p. 9) and charge them for about 4 hours before initial use (p. 11). Base Unit Location Calls are transmitted between the base unit and the handset using wireless radio waves. For maximum distance and noise-free operation, the recommended base unit location is: Away from electrical appliances such as a TV, radio, personal computer or another telephone. -
Page 6: Table Of Contents
Contents Chapter 1 Preparation Location of Controls ...8 Display ...9 Settings ...9 Installing the Batteries in the Handset ...9 Connections ...10 Battery Charge...11 Turning the Power ON...12 Selecting the Dialling Mode...13 Selecting the Handset Ringer Volume/Pattern ...14 Selecting the Base Unit Ringer Volume ...15 Chapter 2 Basic Operations... - Page 7 Chapter 4 Multi-Unit User Operations For Optional Multi-Unit Users...30 Operating More than One Handset ...30 Operating More than One Base Unit ...30 Registration ...31 Registering a Handset in the Base Unit ...31 Selecting the Base Unit Access ...32 Cancelling a Handset ...33 Selecting the Stand-by Mode Display ...34 Bell Selection ...34...
-
Page 8: Location Of Controls
Location of Controls Base unit Charge Contacts (p. 11) Page Button Handset Display (p. 9) Talk Button (p. 16, 17) Cancel Button (p. 16, 17, 18, 22, 23) Program Button PROG (p. 13, 18, 20, 22) Tone Button (p. 20) Recall Button (p. -
Page 9: Display
Display Icons The in range icon indicates that the handset is in range of the base unit. It flashes when the handset is out of range. The page/intercom icon is displayed when paging or using the intercom. It flashes when another unit pages the handset. -
Page 10: Connections
* The abbreviation TNV means “Telephone Network Voltage”. USE ONLY WITH Panasonic AC ADAPTOR KX-TCA9E OR KX-TCA11E. Be careful not to confuse the telephone line jack with the AC adaptor jack on the base unit. If connected improperly, the base unit will not work and damage may occur. -
Page 11: Battery Charge
Recharge When “ ” flashes or the unit beeps every 15 seconds, recharge the batteries. Battery information After your Panasonic batteries are fully charged: Operation Approx. Ni-Cd battery life (Included) While in use (Talk) While not in use (Stand-By) Battery life may vary depending on usage conditions and ambient temperature. -
Page 12: Turning The Power On
Settings Turning the Power ON Display Press After all possible configurations briefly appear, the display will change to the following. Then the handset is in the stand-by mode. The current connected base unit number is displayed. - i - You can choose whether to display the base unit number, handset number or no display in the stand-by mode by programming (p. -
Page 13: Selecting The Dialling Mode
Selecting the Dialling Mode You can program the dialling mode to tone or pulse. If you have touch tone service, set to tone. If rotary or pulse service is used, set to pulse. The factory preset is tone. Make sure that the power is ON and the unit is in the stand-by mode. Press then I NT... -
Page 14: Selecting The Handset Ringer Volume/Pattern
Settings Selecting the Handset Ringer Volume/Pattern You can program the desired handset ringer volume and pattern. Make sure that the power is ON (p. 12) and the unit is in the stand-by mode. Ringer volume 7 levels are available. The lowest level is 1. The highest level is 6. -
Page 15: Selecting The Base Unit Ringer Volume
Selecting the Base Unit Ringer Volume 4 levels (HIGH, MEDIUM, LOW, OFF) are available. The factory preset is MEDIUM. When set to OFF, the base unit will not ring. Make sure that the power is ON (p. 12) and the unit is in the stand-by mode. I NT Press PROG... -
Page 16: Making Calls
Making Calls Make sure that the power is ON (p. 12). Press Dial a phone number. The dialled number is displayed. i2345678 After a few seconds, the display will start showing the length of the call. 888800 - 00 - 00 To hang up, press handset on the base unit. -
Page 17: Answering Calls
To redial the last number dialled Press The last number dialled is automatically redialled. To redial after confirming the numbers in redial memory The unit automatically stores the last 10 numbers dialled into redial memory. Press The last number dialled is displayed. Select the desired number by pressing You can also search from the most recent to oldest number by pressing G. -
Page 18: Speed Dialling
Speed Dialling Storing Phone Numbers in Memory You can store up to 20 telephone numbers in the handset. Make sure that the power is ON (p. 12) and the unit is in the stand-by mode. Press G or F until a desired memory station number ( 00 to i9 ) is displayed. -
Page 19: Special Features
Special Features How to Use the Pause Feature (For Analog PBX Line/Long Distance Service Users) We recommend you press distance service. Ex: Line access number (PBX) Phone number Pressing once creates a pause. This prevents misdialling when you redial or dial a stored number. Pressing more than once increases the length of the pause between numbers. -
Page 20: Handset Locator
Special Features Handset Locator From the base unit, you can locate the handset or page a person at the handset with ring tones. Press The in use indicator ( The handset rings for 1 minute and “ The base unit is displayed as “ [0] ”. To stop paging, press Temporary Tone Dialling (For Rotary or Pulse Service Users) -
Page 21: Using The Recall Feature
The earth relay can be installed as an option depending on your PBX requirements. Please consult your nearest Panasonic Service Centre for installation. Then you can select the time break recall or earth mode. The factory preset is time break recall. -
Page 22: Summary Of Programmable Functions
Summary of Programmable Functions You can program the following function items using the handset near the base unit. See the corresponding pages for function details. Make sure that the power is ON (p. 12) and the unit is in the stand-by mode. <Stand-by mode>... -
Page 23: Setting The Password
Once you have programmed the password, you cannot confirm it. We recommend you write down the password. If you forget it, please consult your nearest Panasonic Service Centre. On the handset You need to enter the password when using the functions, such as “Setting the call prohibition”... -
Page 24: Direct Call
Direct Call You can store a number in the direct call memory. This feature allows you to make a call easily by pressing . Incoming calls are accepted. Setting the Direct Call Mode After storing the direct call number, the unit will automatically switch to the direct call mode. Press PROG Press G or F until “... -
Page 25: Call Prohibition
To turn OFF the call prohibition mode Press G or F to select OFF in step 5. You can press to select OFF. “ ” will go out. If you forget your handset password, please consult your nearest Panasonic Service Centre. -
Page 26: Call Restriction
Call Restriction You can restrict desired handset(s) from dialling selected phone numbers. Phone numbers beginning with the restricted digits cannot be dialled out. For example, if “00” is assigned as the call restriction number, international calls cannot be made. For selected handset(s), you can assign up to 6 call restriction numbers (up to 8 digits). Set the call restricted handset(s) and the restriction number(s) by programming. -
Page 27: Other Programmable Settings
Other Programmable Settings Setting the Key Tones You can choose whether or not the handset keys will sound tones (key tone, confirmation tone, error tone). The factory preset is ON. Press PROG Press G or F until “ F2 i ” is displayed, then press The current setting is displayed. -
Page 28: Selecting The Talk Mode Display
Other Programmable Settings Selecting the Talk Mode Display You can choose whether to display the length of the call or the dialled telephone number while in the talk mode. The factory preset is the length of the call. Press PROG Press G or F until “... -
Page 29: Clearing The Settings In Memory
Clearing the Settings in Memory This function enables the handset or base unit to clear the following settings at one time. They will return to their initial settings. On the handset Function Initial setting Base unit access Automatic base unit access Key tones Handset ringer volume 3 (MEDIUM) -
Page 30: For Optional Multi-Unit Users
The optional handset model number is KX-TCA101EB. The functions of the optional handset are the same as those of the KX-TCD951EB handset. An optional charger, KX-TCA110EB, is available from your Panasonic dealer. Operating More than One Base Unit You can register and operate your handset at up to 4 base units. -
Page 31: Registration
Registration Registering a Handset in the Base Unit You must register the handset in the base unit before use. Charge the optional handset batteries for about 4 hours before initial use. Make sure that the power is ON (p. 12) and the unit is in the stand-by mode. Register the handset number within 1 minute. -
Page 32: Selecting The Base Unit Access
Registration Selecting the Base Unit Access Automatic base unit access The handset automatically selects a registered base unit. When the handset moves to another base unit radio area, it loses contact with the previous base unit and automatically accesses the new base unit. If the handset is in the overlap area between several base unit radio areas, the handset will access a base unit in the order of the base unit numbers. -
Page 33: Cancelling A Handset
Cancelling a Handset Each handset can cancel itself or another handset. I NT Press PROG then Press Enter the base unit password (p. 23). The current registered handset number(s) is/are displayed. Ex. Handset 1, 2, 3, 4, 5 and 6 are registered. i23456 Enter the handset number(s) you want to cancel. -
Page 34: Selecting The Stand-By Mode Display
Selecting the Stand-by Mode Display You can choose whether to display the currently connected base unit number, handset number or no display while in the stand-by mode. The factory preset is the base unit number. Press PROG Press G or F until “ F3 i ” is displayed, then press The current setting is displayed. -
Page 35: Selecting All Handsets
Selecting first handset One handset will ring first, then all other handsets will ring if the first handset is not answered. You can choose which handset will ring first and the ring count (1 to 6) until all handsets ring. The factory preset is 3 rings. I NT Press then... -
Page 36: Paging/Intercom
Paging/Intercom Paging All Handsets from the Base Unit The base unit user can page all handsets. Press All handsets will ring for 1 minute. To stop paging, press Intercom between Handsets A 2-way intercom is available between handsets. Ex. Handset 1 is paging Handset 2. Handset 1: Press I N T... -
Page 37: Transferring A Call From One Handset To Another
Transferring a Call from One Handset to Another The intercom can be used during a call, enablings you to transfer a call between handsets registered to the same base unit. Transferring a call using the intercom Ex. Handset 1 is transferring a call to Handset 2. -
Page 38: Conference
Paging/Intercom Conference During a call using the handset, you can make an intercom call to another handset and then combine the calls together to establish a conference call between handsets registered to the same base unit. Handset 1: During a call, press the desired handset number. -
Page 39: Replacing The Batteries
Ni-MH battery: For about 8 hours Discard defective batteries as soon as possible. Defective batteries may leak into the unit. Please use only Panasonic P-03H or P-P03S batteries. If the rechargeable batteries are not inserted correctly, the handset will not work. -
Page 40: Using The Belt Clip
Replacing the Batteries Caution: To reduce the risk of fire or injury to persons, read and follow these instructions. 1. Use only the batteries specified. 2. Do not use non-rechargeable batteries. 3. Do not mix old and new batteries. 4. Do not dispose of the batteries in a fire. They may explode. Check with local waste management codes for special disposal instructions. -
Page 41: Before Requesting Help
Before Requesting Help Problem The unit does not work. “ ” flashes and an alarm tone sounds when you press A busy tone sounds when you press You cannot dial. “ ” flashes during a conversation and the call is disconnected. Static, sound cuts in/out, fades. - Page 42 Before Requesting Help Problem You cannot program function items such as the dialling mode. You cannot store a phone number in memory. While programming function items or storing numbers, the unit starts to ring. does not function. You cannot redial. The paged handset does not answer.
- Page 43 Problem You cannot register the handset in the base unit. “ ” flashes or the unit beeps every 15 seconds. You charged the batteries fully, but “ ” flashes. The charge indicator ( ) light never goes out while charging. The base unit has registered a maximum of 6 handsets or the handset has registered a maximum of 4 base units.
-
Page 44: Safety Instructions
Safety Instructions Take special care to follow the safety suggestions listed below. Safety 1) The unit should be connected to a power supply only of the type described in the operating instructions or as marked on the unit. 2) When the unit is not used, turn the power off. When left unused for a long period of time, the base unit should be unplugged from the household AC outlet. -
Page 45: Adding Another Phone
Adding Another Phone This unit will not function during a power failure. To connect a standard telephone on the same line, use a T-adaptor. To B.T. Socket T-Adaptor Telephone Line Cord Standard Telephone Important Notice Concerning the Correct Use and Charging of Ni-Cd (Ni-MH) Batteries Batteries, due to their construction, undergo some wear and tear. -
Page 46: Term Definitions
Dear purchaser, You have acquired a KX-TCD951EB, which is a product made in regard with the European Standards for Cordless Telephones (DECT). DECT technology is characterised by high-security protection against interceptions as well as high-quality digital transmission. This telephone was designed for a wide range of applications. - Page 47 8. The guarantee period applicable to this product shall be 12 months. Please keep these Operating Instructions with your receipt. Panasonic Business Systems U.K. Receipt No. Model No. KX-TCD951EB GUARANTEE Date of Purchase Serial No.
- Page 48 73/23/EEC 89/336/EEC 92/31/EEC 93/68/EEC Sales Department: Panasonic Business Systems U.K. Panasonic House, Willoughby Road, Bracknell, Berkshire, RG12 8FP Manufacturer: Kyushu Matsushita Electric (U.K.) Ltd. Pencarn Way, Duffryn, Newport, South Wales, NP10 8YE, United Kingdom Printed in the United Kingdom PQQX12191ZB-UK...