Table of Contents
Advertisement
Quick Links
TM-19L2D
TM-17L2D
LCD DISPLAY MONITOR
LCD-DISPLAYMONITOR
MONITEUR LCD
SCHERMO A CRISTALLI LIQUIDI
MONITOR PANTALLA LCD
МОНИТОР С ЖК-ДИСПЛЕЕМ
LCD 显示器
LCT2402-002A-H
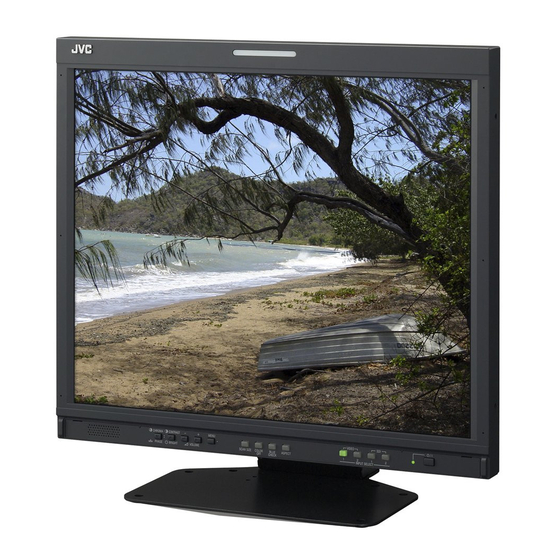
The illustration of the monitor is of TM-19L2D.
INSTRUCTIONS
BEDIENUNGSANLEITUNG
MANUEL D'INSTRUCTIONS
MANUAL DE INSTRUCCIONES
ИHCТРУKЦИЯ ПО ЭКСПЛУАТАЦИИ
ITALIANO
FRANÇAIS
DEUTSCH
ENGLISH
ISTRUZIONI
使用说明书
ESPAÑOL
РУССКИЙ
中 文
Advertisement
Table of Contents

Related Manuals for JVC TM-17L2D


Summary of Contents for JVC TM-17L2D
- Page 1 INSTRUCTIONS BEDIENUNGSANLEITUNG MANUEL D’INSTRUCTIONS ISTRUZIONI TM-19L2D MANUAL DE INSTRUCCIONES ИHCТРУKЦИЯ ПО ЭКСПЛУАТАЦИИ TM-17L2D 使用说明书 LCD DISPLAY MONITOR LCD-DISPLAYMONITOR MONITEUR LCD SCHERMO A CRISTALLI LIQUIDI MONITOR PANTALLA LCD МОНИТОР С ЖК-ДИСПЛЕЕМ LCD 显示器 The illustration of the monitor is of TM-19L2D.
-
Page 2: Table Of Contents
TM-19L2D TM-17L2D INSTRUCTIONS LCD DISPLAY MONITOR Table of Contents Safety Precautions ..........2 IMPORTANT SAFEGUARDS ......2 Maintenance ............. 3 Installation ............4 Daily Operations / Connections ......6 Front panel ............6 Rear panel ............7 Available signals ..........7 Menu Configuration—MAIN MENU .... -
Page 3: Safety Precautions
Safety Precautions WARNING: TO REDUCE RISK OF FIRE OR ELECTRIC SHOCK, DO NOT EXPOSE THIS APPARATUS TO Warning: • Make enough room for inserting or removing the RAIN OR MOISTURE. NO OBJECTS FILLED WITH LIQUIDS, SUCH AS VASES, SHALL BE power plug. -
Page 4: Maintenance
• Do not wipe the cabinet using solvent such as To avoid irreparable change in appearance of the If you wish to dispose of this product, please visit our web page www.jvc-europe.com to alcohol, thinner, or benzine. screen such as uneven color, discoloration, scratches, obtain information about the take-back of the product. -
Page 5: Installation
Installation CAUTION To detach the stand • Do not rest your arm on the monitor or lean against the monitor. CAUTION • Do not touch the LCD panel when installing the monitor. Lay the monitor on a cloth with the LCD panel facing down to prevent the LCD panel from being damaged. •... - Page 6 To adjust the stand height To prevent an accidental fall To change the stand height, change the position of the stand plate as illustrated below after Fix the monitor to a wall by using strings. detaching the stand from the monitor. •...
-
Page 7: Daily Operations / Connections
Daily Operations / Connections 7 Front panel • “NO EFFECT” is displayed when you press a button which is not available for the current input or signal format (the lamp lights even when the function does not actually work). • The items controlled by the MAKE system cannot be controlled by the buttons on the front panel (“REMOTE ON” is displayed and the lamps do not light). -
Page 8: Rear Panel
7 Rear panel 1 AC IN terminal 5 VIDEO 2 IN/OUT terminals AC power input connector. Input (IN) and output (OUT) terminals for the • Connect the provided AC power cord to an composite signals. AC outlet. • Use the AUDIO INPUT VIDEO 2 terminal (7) for audio connection. -
Page 9: Menu Configuration-Main Menu
Menu Configuration—MAIN MENU BACK LIGHT Setting value: 00 – 25 Main Menu Operations Adjusts the brightness of the display. Press MENU button. Press MENU button to finish the menu operation. APERTURE Setting value: 00 – 10 Press buttons to select an item, Adjusts the sharpness of the picture. -
Page 10: Menu Configuration-Set Up Menu
Menu Configuration—SET UP MENU PICTURE SUB ADJ. Setup Menu Operations Adjusts the standard level for the picture adjustment. Press button while pressing MENU Press buttons to select an item, Item To do Setting value button. then press buttons to make CONTRAST* Adjust the standard level for the contrast adjusted with CONTRAST button on the front panel. - Page 11 Menu Configuration—SET UP MENU (cont.) For the operation procedure, see page 9. SYNC FUNCTION Setting for the synchronization with signals Selected item Item To do Setting value NO SYNC ACTION Select the screen status when no signal is OFF, POWER SAVE (Power Save mode), coming in.
-
Page 12: External Control
External Control 7 About the external control To assign the functions to the pin terminals For the operation procedure, see page 9. This monitor has the MAKE/TRIGGER terminal, which allows you to control the monitor by the make Select “REMOTE SETTING” on the SET UP MENU. contact or the trigger system. -
Page 13: Troubleshooting
Troubleshooting Solutions to common problems related to the monitor are described here. If none of the solutions The following are not malfunctions. presented here solves the problem, unplug the monitor and consult an authorized dealer or service • When a still image is displayed for a long time, it may remain indistinctly on the screen after the picture has center. -
Page 14: Specifications
5.8 kg (without the stand) Accessories AC power cord x 2 Notice on transportation This monitor is precision equipment and needs dedicated packing material for transportation. Never use any packing material supplied from sources other than JVC or JVC-authorized dealers. ENGLISH... -
Page 15: Dimensions
7 Dimensions (Unit: mm) TM-19L2D <Front view> <Side view> <Rear view (without the stand)> VESA mounting holes (4-M4, depth: 10 mm) TM-17L2D <Front view> <Side view> <Rear view (without the stand)> 30.2 VESA mounting holes (4-M4, depth: 10 mm) Stand bottom... - Page 16 TM-19L2D/TM-17L2D LCD DISPLAY MONITOR © 2008 Victor Company of Japan, Limited 0708STH-MW-MT...