Table of Contents
Advertisement
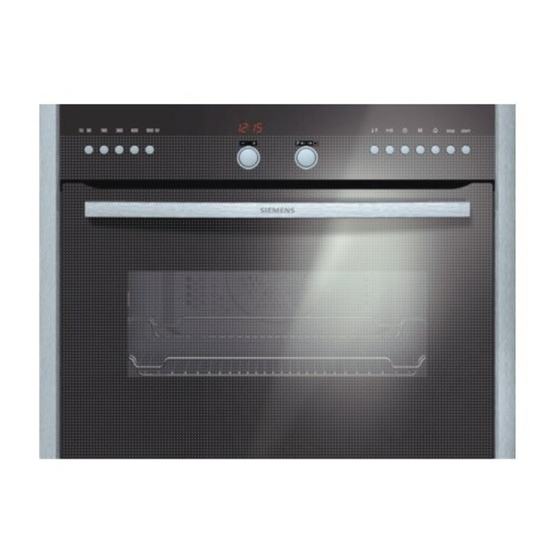
Making cooking as much fun as eating
Please read this instruction manual. This will ensure that you
make full use of all the technical benefits the compact
microwave oven has to offer.
It will provide you with important safety information. You will
be familiarised with the individual components of your new
microwave. And we will show you how to make settings step
by step. It is quite simple.
The tables list the adjustment values and shelf levels for
numerous well known dishes. All these dishes are tested in
our cooking studio.
In the unlikely event of a malfunction, look here for
information on how to rectify minor faults yourself.
A detailed table of contents will help you to find your way
around quickly.
Enjoy your meal.
Instruction manual
HB86K581
en
9000 129 560
S041085
Advertisement
Table of Contents

Related Manuals for Siemens HB86K581


Summary of Contents for Siemens HB86K581
- Page 1 In the unlikely event of a malfunction, look here for information on how to rectify minor faults yourself. A detailed table of contents will help you to find your way around quickly. Enjoy your meal. Instruction manual HB86K581 9000 129 560 S041085...
-
Page 2: Table Of Contents
Table of contents Important information ..... . . Before installation ......Safety information . - Page 3 Table of contents The microwave ......Ovenware ........Setting procedure .
- Page 4 Table of contents Auto start ........Basic settings .
- Page 5 Table of contents Tables and tips ......Defrosting, heating up and cooking with the microwave .
-
Page 6: Important Information
Important information Read this instruction manual carefully. Only then will you be able to operate your appliance safely and correctly. Please keep the instruction and installation manual in a safe place. Please pass on these instruction manuals to the new owner if you sell the appliance. Before installation Disposing in an Unpack the appliance and dispose of the packaging... -
Page 7: Safety Information
Safety information This appliance is intended for domestic use only. Only use the microwave oven for preparing foodstuffs. Children and the Children are only permitted to use the solo microwave microwave function if they have been instructed how to do so. They must be able to operate the microwave oven correctly. -
Page 8: Safety Information For Microwave Operation
Inadequate cleaning Clean the appliance on a regular basis. The surface of the appliance could be destroyed and the appliance could corrode over time if it is not cleaned with sufficient care. Microwave energy could escape. Repairs Incorrect repairs are dangerous. There is a risk of electrocution! Repairs may only be carried out by after sales service technicians who have been fully trained by us. - Page 9 Packaging Never heat meals in heat retaining packages. Risk of fire. Do not leave food heating unattended in containers made of plastic, paper or other combustible materials. Airtight packaging may burst when food is heated. There is a risk of burning. Follow the information provided on the packaging.
-
Page 10: Causes Of Damage
Foods with shells or Never cook eggs in their shells. Never reheat skin hard boiled eggs as they may crack or explode. The same applies to shellfish and crustaceans. There is a risk of burning. Always prick the yoke when frying or poaching eggs. Always prick the skin of foodstuffs with peels or skins such as apples, tomatoes, potatoes and sausages before cooking to prevent the peel or skin from... - Page 11 Cooling with the Only leave the microwave oven to cool with the door microwave oven door open closed. Do not allow anything to become trapped in the microwave oven door. The fronts of adjacent units may be damaged over time even if you only leave the microwave oven door open slightly.
-
Page 12: Your New Microwave Oven
Your new microwave oven Here you will learn more about your new microwave oven. The control panel and its switches and indicators are explained here. The types of heating available and the accessories included with your oven will be explained here. The control panel Rotary knob Function selector... -
Page 13: Function Selector
Function selector You use the function selector to set the operating mode, temperature, and individual adjustments for automatic programs. Turning the function selector clockwise shows the types of heating and anticlockwise the programs. In the display you will see the type of heating you have selected and in the second line a temperature or level as a default value. -
Page 14: Control Buttons And Display Panel
Control buttons and display panel BA button Use to change line in the text display Rapid heating button Z Use to heat the oven quickly Clock button j Use to select the time or the end time ! M button Use to select a memory mode Timer button a Use to select the kitchen timer... -
Page 15: Types Of Heating
Types of heating Different types of heating are available with the oven. You can therefore select the best method for cooking any dish. Microwaves Microwaves are converted into heat in foodstuffs. Microwaves are suitable for rapid defrosting, warming, melting, and cooking. Top/bottom heating This ensures the even distribution of heat onto the cake or roast from the top and bottom of the oven. - Page 16 Hot air A fan on the back wall distributes the heat from the top and bottom elements equally throughout the oven. You can use hot air to bake sponge cakes in tins. 3D hot air A ventilator on the back wall distributes heat from the upper and lower elements and the ring element evenly in the oven.
- Page 17 Grill, small area Only the middle section of the grill heating element is switched on. This type of heating is ideal for cooking small quantities and saves energy. Place the items to be grilled in the centre of the wire rack. Grill, large area The entire area under the grill heating element becomes hot.
-
Page 18: Oven And Accessories
Keep warm You can use temperatures from 60ºC to 100 ºC to keep food warm. Remember that warm food spoils more easily, so you should therefore not keep dishes warm for longer than two hours. Oven and Accessories The accessories can be inserted into the oven at 3 different levels. -
Page 19: Cooling Fan
Glass pan HZ86G000 For large roasts, moist cakes, bakes, and gratins. It can also act as a splashguard if you are grilling meat directly on the wire rack. To do this, insert the glass pan at level 1. Special accessory Enamel baking tray HZ86B000 For cakes and cookies. -
Page 20: Before Using For The First Time
Before using for the first time This section tells you everything you need to do before using the cooker for the first time. Heat the oven and clean the accessories. Read the safety instructions in the Important information" section. Firstly, check to see if the j clock symbol and three zeros are flashing in the display. -
Page 21: Heating Up The Oven
Heating up the oven Heat the empty oven with the door closed to remove the new oven smell. Method Select hot air using the function selector. Press the BA button to change to the second line. Set 250 ºC using the function selector. Press the j clock button. -
Page 22: The Microwave
The microwave The microwave can be used solo, i.e. on its own, or in combination with a different type of heating. Here you will find information about ovenware and how to set the microwave. Tables and tips The Tables and tips section contains a number of examples of how to defrost, heat and cook using the microwave. -
Page 23: Setting Procedure
between 30 and 60 seconds. Check the temperature of the ovenware during this period. The ovenware should still be cold or warm to the touch. The ovenware is unsuitable if it becomes hot or sparks are generated. Setting procedure Microwave power can be set to 900 watts for a maximum of 30 minutes. -
Page 24: Selecting Several Follow On Power Settings
The cooking time has A signal sounds. The oven switches off. The display elapsed shows End time" or Oven cooling". The clock reappears in the display if you press the Stop button or open the oven door. Changing the cooking time You may change the cooking time at any time. -
Page 25: Setting The Oven
Setting the oven There are various ways in which you can set your oven. The oven switches off automatically when the meal is Switching off the oven manually ready. The oven switches off You can leave the kitchen for a long time. automatically You can set the oven so that you place the meal in the The oven switches on and... - Page 26 Use the function selector to set the required Top/bottom heating temperature or setting. Press the Start button. Top/bottom heat. Switching off When the dish is ready, press the Stop button twice or open the oven door and press the Stop button once. The display goes out.
-
Page 27: If The Oven Is To Switch Off Automatically
Heating indicator The heating indicator provides a visual display of increasing oven temperature. The heating indicator does not appear if you are grilling. Fließtext normal Fließtext normal Fließtext normal Titel:3 Fließtext normal Fließtext normal Fließtext normal Zur Erfüllung der einschlägigen Sicherheitsvorschriften muß... -
Page 28: If The Oven Is To Switch On And Off Automatically
The cooking time has A signal sounds. The oven switches off. The display elapsed shows End time" or Oven cooling". The clock reappears in the display if you press the Stop button or open the oven door. Changing the setting You may change the cooking time and temperature at any time. - Page 29 Use the rotary knob to set a later end time. Press the Start button. The setting is adopted. The display will show the end time until the oven switches on. The end time symbol ! lights up. The oven switches on at the appropriate time.
-
Page 30: Rapid Heating
Rapid heating This allows you to heat up the oven particularly quickly. The rapid heating function is not suitable for all types of heating. Top/bottom heating Suitable types of heating Intensive heat Hot air 3D hot air The rapid heating function is also suitable for the types of heating combined with microwave operation. -
Page 31: Setting The Oven And Microwave In Combination
Setting the oven and microwave in combination On this setting, a type of heating is in operation at the same time as the microwave. You cannot combine the 900 W microwave setting with a type of heating. If you try to do this, Not possible"... - Page 32 Set the required cooking time using the rotary knob. Turn the function selector clockwise until the Hot air grilling required type of heating appears. Use the BA button to move to the second line. Hot air grilling Use the function selector to set the required Hot air grilling temperature or setting.
- Page 33 Press the Start button. The cooking time counts down in the display. A signal sounds. The oven switches off. The display The cooking time has elapsed shows End time" or Oven cooling". Open the oven door or press the Stop button. You may change the temperature, grill setting or Changing the setting cooking time at any time.
-
Page 34: Automatic Programs
Automatic programs Setting procedure You can use the automatic programs to defrost foodstuffs easily and to prepare many dishes quickly and simply. For automatic programs, there are 11 program groups with total of 51 programs. Example: Minced meat, deep frozen, 1000 g Turn the function selector anticlockwise and Defrosting choose a program group. - Page 35 Use the rotary knob to set the required weight. Press the Start button. The cooking time is visible in the display. The cooking time has A signal sounds. The oven switches off. End time" elapsed. appears in the display. If the oven is still hot, the display reads Oven cooling".
-
Page 36: Notes On Automatic Programs
Pausing Open the oven door. The cooling fan may run on. Close the door and press the Start button again. The oven continues operating as before. If you forget to press the Start button, you will hear a signal after three seconds. Press Start button" appears in the display. - Page 37 Defrosting If possible, freeze and store food flat and in portions at -18 ºC. Put the frozen food on a flat dish, e.g. a glass or porcelain plate. Cover thin pieces and protruding pieces with small pieces of aluminium foil. This prevents these parts from overcooking.
- Page 38 Potatoes Boiled potatoes: Cut into pieces of a uniform size. Add 2 tablespoons of water per 100 g potatoes, and add salt to taste. Potatoes boiled in their skins: Use potatoes of equal size. Wash the potatoes and prick them all over. Place the wet potatoes in a dish.
-
Page 39: Standing Time
Meat Cook sirloin fatty side down first. Beef joint, roast veal, leg of lamb and roast pork: The roast should cover two thirds of the dish base. Add 50 ml liquid to the roast. Add another 50 100 ml liquid after turning if necessary. -
Page 40: Program Table
Program table Program group Suitable foodstuffs Weight range Ovenware/accessories, Program in kg shelf height Defrosting Bread, deep frozen*** Wheat bread, mixed bread, wholemeal bread 0.20 1.50 Flat dish without lid, Wire rack, level 1 Cakes, dry, deep frozen* Sponge cake without icing, yeast cake 0.20 1.50 Flat dish without lid, Wire rack, level 1... - Page 41 Program group Suitable foodstuffs Weight range Ovenware/accessories, Program in kg shelf height Vegetables, deep frozen* Cauliflower, broccoli, carrots, cabbage 0.15 1.00 Flat dish with lid, turnip, red cabbage, spinach Wire rack, level 1 Signal to stir ½ of the time has passed Potatoes Boiled potatoes* Firm potatoes, quite firm potatoes, floury...
- Page 42 Program group Suitable foodstuffs Weight range Ovenware/accessories, Program in kg shelf height Turkey breast, fresh** Skinless turkey breast 0.80 2.00 Flat dish with lid, Wire rack, level 1 Signal to turn after C of the time has passed if whole chicken Signal to turn after ½...
-
Page 43: Memory
Program group Suitable foodstuffs Weight range Ovenware/accessories, Program in kg shelf height Fried potatoes, deep frozen* 0.20 0.80 Universal pan, level 2 Signal to turn after C of the time has passed. Snacks,deep frozen Spring rolls, deep frozen* 0.10 1.00 Universal pan, level 2 Mini spring rolls, deep frozen*... -
Page 44: Storing Memory Settings
You can also save a meal from the automatic program function. Storing memory settings Select one of the six memory locations and set it. Example: Memory location 1, 360 W, 7 minutes, hot air, 220 ºC Press the M" memory button. Set memory Set memory"... - Page 45 Use the function selector to set the type of heating. Hot air Use the BA button to move to the second line. Hot air Use the function selector to set the required Hot air temperature or grill setting. Press the M" memory button. Stored" is shown Stored in the display.
-
Page 46: Starting The Memory Function
Starting the Memory function The stored settings for your dishes can easily be called up. Place the dish in the oven. Example: Memory location 1, 360 W, 7 minutes, hot air, 220 ºC Press the M" memory button. 1 appears for memory location 1. -
Page 47: Clock
Switching the oven on and Select the memory location using the M" memory off automatically button. Press the j hour button and extend the end time. Note Once the oven has been started, you can no longer change the memory location. The temperature, grill setting and cooking time can only be changed once the oven has been started. -
Page 48: Auto Start
Changing the time e.g. Press the j clock button. Make settings as described from summer to winter in points 1 and 2. time Hiding the clock The oven is set so that the clock is permanently displayed. This basic setting can be changed to Clock only when in use"... -
Page 49: Basic Settings
Basic settings Your oven has several basic settings. Before using the appliance for the first time, ensure that the display is in the correct language. The basic setting is German. You can change all the basic settings individually at any time. Basic setting Function Change to... -
Page 50: Setting Procedure
Setting procedure Example: You may select different languages. Changing the language to English Press and hold the M" memory button for a few seconds. The basic setting "Sprache auswählen" appears in the first line of the display and "Deutsch" in the second line. -
Page 51: Childproof Lock
Childproof lock The oven has a childproof lock to prevent children switching it on accidentally. Hold down the Stop button for a few seconds. Locking the oven Childproof lock active" is displayed in the display. All functions are blocked. Hold down the Stop button for a few seconds again. Unlocking The lock is released. - Page 52 Set the alarm time using the rotary knob. Press the a timer button. The time counts down in the display. The time has elapsed A signal sounds. Press the a timer button. The clock reappears in the display. Changing the timer period Press the a timer button.
-
Page 53: Safety Switch Off
Safety switch off If you forget to switch off the oven, the safety switch off function will be activated. Oven operation will be interrupted. The temperature or grill setting determines when this will happen. If the oven is no longer heating up, 5 appears in the display. -
Page 54: Oven
Appliances with aluminium Use a mild window cleaning detergent. Using a soft fronts window cloth or a non fluffing microfibre cloth, wipe lightly in a horizontal direction. Harsh cleaning products, scratchy sponges and rough cleaning cloths are not suitable. Oven Never use coarse scouring pads or cleaning sponges. - Page 55 Removal Put a tea towel in the oven. Pull the clips on the oven ceiling forward. Push the front glass cover down with the thumbs of your other hand. Release the clips. Slide the cover forward using both hands and place it on the grill heating element.
- Page 56 If the oven is only lightly soiled: Rinse the glass cover with hot water. In the event of heavy soiling: Clean the glass cover and the enamelled surfaces of the oven. Installation Slide the cover in with the smooth side facing down, and place it on the grill heating element.
-
Page 57: Cleaning The Glass Panels
Cleaning the glass panels The glass panels on the oven door can be removed to assist cleaning. Important the oven must be cold. There is a risk of burns. Removal Open the oven door. Loosen the two screws an the door using a slotted crewdriver (blade width 8 11 mm). -
Page 58: Seal
Raise the panel slightly and attach it at the top. Open the door fully, while holding the panels with one hand. Screw in the screws using a slotted crewdriver (blade width 8 11 mm). Close the door. The oven must not be used again until the panels have been correctly fitted. -
Page 59: Troubleshooting
Troubleshooting Should a malfunction occur, it is often only due to a minor fault. Please read the following instructions before calling the after sales service: Malfunction Possible cause Notes/remedial action The oven does not work. The plug is not plugged in to Plug it in. - Page 60 Malfunction Possible cause Notes/remedial action The food was colder than Stir or turn the food during usual. cooking. A 5" is shown in the clock The safety switch off was Press the Stop button. display. activated. The oven was operated for a long period without the setting being changed.
-
Page 61: Replacing The Oven Lightbulb
Replacing the oven lightbulb The oven lightbulb can be replaced. Heat resistant 12 V 20 W halogen bulbs are available from the after sales service or in specialized stores. When removing a new halogen bulb from the packaging, always use a dry cloth. This will increase the life of the bulb. -
Page 62: Changing The Door Seal
Changing the door seal If the door seal is defective, it must be changed. Replacement seals for you appliance are available from our after sales service. Please specify the E number and FD number of your appliance. Open the oven door. Pull off the old door seal. -
Page 63: After Sales Service
After Sales Service If your appliance needs repairing, you can contact our after sales service. You will find the address and telephone number of your nearest after sales service centre in the phone book. The after sales service centres listed will also be happy to advise you of a service point in your local area. -
Page 64: Tables And Tips
Tables and tips This table contains a selection of dishes and the optimum settings at which to cook them. You can use the table to look up which microwave setting, type of heating, and temperature are most suitable for your dish, which accessories to use, and at what height to set the wire rack. - Page 65 Defrosting Place the frozen food in an open container on the wire rack. Delicate parts such as the legs and wings of chicken or fatty outer layers of roasts can be covered with small pieces of aluminium foil. The foil must not touch the oven walls.
- Page 66 Amount Microwavesetting (watts), Notes Cooking time in minssutes Vegetables, e.g. peas 300 g 180 W, 8 13 mins. Stir carefully half way through. 600 g 180 W, 10 mins. + 90 W, 8 13 mins. Fruit 300 g 180 W, 7 10 mins. Stir carefully during defrosting e.g.
- Page 67 Amount Microwavesetting (watts), Notes Cooking time in minutes Menu, one course meal, ready made 300 400 g 600 watts, 11 15 mins. covered meal in two to three parts Soups 400 500 g 600 watts, 8 13 mins. covered Stews 500 g 600 watts, 10 15 mins.
-
Page 68: Cooking Food
Amount Microwavepower setting, Notes cooking time in minutes Full meal, one course meal, 350 500 g 600 watts, 4 8 mins Covered ready to eat meal (2 3 components) Drinks 150 ml 900 watts, 1 3 mins Place a spoon in the container. 300 ml 900 watts, 3 4 mins Do not overheat alcoholic drinks. -
Page 69: Tips For Microwave Operation
Amount Microwavepower setting, Notes cooking time in minutes Fresh whole chicken, 1500 g 600 watts, 25 30 mins Turn half way through the cooking time. without giblets Fish fillet, fresh 400 g 600 watts, 8 13 mins Vegetables, fresh 250 g 600 watts, 6 10 mins Cut vegetables into pieces of equal 500 g... -
Page 70: Meat, Poultry, Fish
Meat, poultry, fish About the tables The temperature and roasting time depend on the type and amount of food being cooked. This is why temperature ranges are given in the tables. Begin with the lower temperature and, if necessary, use a higher setting the next time. - Page 71 Microwave setting in Level Type of Tempera Notes watts, cooking time heating ture in in minutes ºC, grill setting Pot roasted beef -, 120 mins 150 170 Dish with lid on wire rack. approx. 1,000 g Turn twice. Sirloin, medium rare 180 W, 30 40 mins 240 260 Uncovered dish.
- Page 72 Notes on grilling Always grill with the oven door closed and do not preheat. If possible, grill pieces of meat which are of the same thickness. Steaks should be at least 2 to 3 cm thick. Such pieces will be browned evenly and stay juicy and soft in the middle.
-
Page 73: Advice On Roasting And Grilling
Amount Weight Level Type of Grill Cookingtime in minutes heating Toast 12 slices high 1st side: approx. 4 6 mins. high 2nd side: approx. 2 3 mins. Toast 4 slices*** high 1st side: approx. 5 6 mins. high 2nd side: approx. 3 4 mins. Grease the wire rack with oil before grilling. -
Page 74: Cakes And Pastries
Cakes and pastries About the tables The times given apply to dishes placed in a cold oven. The temperature and baking time depend on the consistency and amount of the mixture. This is why temperature ranges are given in the tables. Begin with the lower temperature and, if necessary, use a higher setting the next time, since a lower temperature allows more even browning. - Page 75 Top/bottom heating Intensive heat Hot air 3D hot air Cake Ovenware Level Type of Temperature Cookingtime heating in C in minutes Sponge cake, delicate Ring shaped/ 150 170 60 80 (e.g. pound cake)* Vienna ring cake tin Cake base made from shortcrust Springform cake tin 170 190 30 40...
-
Page 76: Baking Tips
Cake Ovenware Level Type of Temperature Cookingtime heating in C in minutes Allow cakes to cool for approximately 20 minutes in the oven. ** Never pour water directly into the hot oven. *** Enamel baking trays are available as optional accessories in specialist shops. **** Preheat using rapid heating. - Page 77 How to check that a sponge cake Approximately 10 minutes before the end of the baking time is cooked properly. specified in the cooking instructions, pierce the deepest part of the cake using a cocktail stick. The cake is done if the cocktail stick comes out clean.
-
Page 78: Energy Saving Tips
Energy saving tips Only preheat the oven if it specifies in the recipe or in the table in the instruction manual that you should do Use non stick, black painted or enamelled tins. They absorb the heat especially well. If you have several cakes to bake it is best to bake them one after the other. - Page 79 Dish Amount Ovenware Level Microwave Cooking Type of Temp. wattage time in heating in ºC minutes Setting Savoury bakes made Approx. Shallow 600 W 20 25 180 200 from raw ingredients* 1100 g casserole dish (e.g. potato gratin) Toast with topping* 2 4 slices Universal pan Depending...
-
Page 80: Deep Frozen Ready Meals
Deep Frozen Ready Meals Please observe the instructions on the packaging. The values in the table apply to dishes placed in a cold oven. Top/bottom heating t Hot air 3D hot air Dish Level Type of heating Temperature in Cooking time in ºC minutes Fruit strudel... - Page 81 Tips for braising meat Only use fresh, clean meat. Sear the meat at a very hot temperature and for a sufficiently long time. Do not cover the meat when braising in the oven. Even larger pieces of meat do not need to be turned. Meat can be carved immediately following braising.
-
Page 82: Acrylamide In Food
Acrylamide in food Experts are currently discussing how dangerous acrylamide in food can be. We have compiled this information sheet for you on the basis of current research. Where does acrylamide Acrylamide in food does not come from external come from? contamination. -
Page 83: Test Dishes
Baking Set the temperature to a maximum of 200 ºC when using the top/bottom heating setting, and to a maximum of 180 ºC for the 3D hot air setting. Cookies: Set the temperature to a maximum of 190 ºC when using the top/bottom heating setting, and to a maximum of 170 ºC for the 3D hot air setting. -
Page 84: Microwave Cooking
Microwave cooking Dish Microwave setting (watts), Notes Cooking time in minutes Custard 360 W, 20 Place the Pyrex dish on the wire rack, + 180 W, 20 25 level 1. Sponge 600 W, 8 10 Place the 22 cm diameter Pyrex dish on the wire rack, level 1. - Page 85 Ovenware and notes Level Type of Tempera Baking time heating ture in ºC in minutes Viennese whirls Universal pan 160 180 20 30 Universal pan 150 170 20 30 Enamel baking tray* + 140 160 40 50 universal pan** Small Cakes Universal pan 160 180 25 35...