Table of Contents
Advertisement
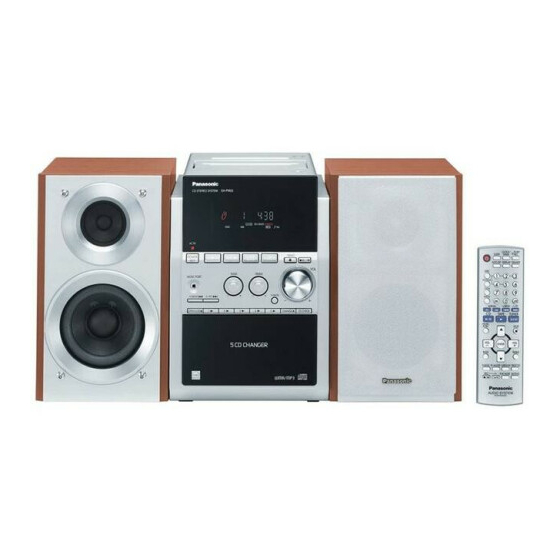
The illustrations show SC-PM53.
SC-PM533 is available in the U.S.A. only.
Table of contents
INSTRUCTIONS .................................. 3
Disc information ..................................... 3
Getting started ........................................ 4
Placement of speakers ........................... 5
Overview of controls .............................. 6
Discs ........................................................ 7
Cassette tape .......................................... 9
Radio ........................................................ 10
Timer ........................................................ 11
Sound adjustment .................................. 12
External unit ............................................ 13
Troubleshooting guide ........................... 14
Specifi cations ......................................... 15
Maintenance ............................................ 15
When moving the unit ............................ 15
(ONLY FOR U.S.A.) ............................. 16
(ONLY FOR CANADA) ........................ 17
Product Service ...................................... 17
Español
Español
Preparativos iniciales ............................ 18
Colocación de los altavoces ................ 18
Controles ................................................ 19
Discos ..................................................... 20
Cintas de casete .................................... 21
Radio ....................................................... 22
Temporizador ......................................... 23
P PC
Operating Instructions
CD Stereo System
Model No.
SUPPLIED ACCESSORIES
SUPPLIED ACCESSORIES
Please check and identify the supplied accessories.
Use numbers indicated in parentheses when asking for
replacement parts. (As of December 2005)
In the U.S.A. to order accessories, refer to "Accessory
Purchases" on page 16.
1 x Remote control
(N2QAYB000008)
1 x AC power supply cord
(K2CB2CB00018)
2 x Remote control batteries
Before connecting, operating or adjusting this product, please
read the instructions completely.
Please keep this manual for future reference.
Operations in these instructions are described using remote
control, but you can do the operations with the main unit if the
controls are the same.
Unless otherwise indicated, illustrations in these operating
instructions are of SC-PM53 for the U.S.A. and Canada.
Your unit may not look exactly as illustrated.
La guía rápida en español se encuentra en la página 18 - 23.
SC-PM53
SC-PM533
1 x AM loop antenna
(N1DAAAA00001)
1 x FM indoor antenna
(RSA0007-L)
RQTV0097-2P
Advertisement
Table of Contents

Related Manuals for Panasonic RQTV0097-2P


Summary of Contents for Panasonic RQTV0097-2P
-
Page 1: Table Of Contents
Unless otherwise indicated, illustrations in these operating instructions are of SC-PM53 for the U.S.A. and Canada. Your unit may not look exactly as illustrated. La guía rápida en español se encuentra en la página 18 - 23. (RSA0007-L) RQTV0097-2P... -
Page 2: Instructions
Dear customer Thank you for purchasing this product. For optimum performance and safety, please read these instructions carefully. These operating instructions are applicable to the following system. System SC-PM53 Main unit SA-PM53 Speakers SB-PM53 The model number and serial number of this product can be found on either the back or the bottom of the unit. -
Page 3: Important Safety Instructions
Disc information • This unit can play MP3 or WMA fi les and CD-DA format audio CD-R/RWs that have been fi nalized. • It may not be able to play some CD-R/RWs depending on the condition of the recording. • Do not use irregularly shaped discs. •... -
Page 4: Getting Started
Getting started Step Step 1 1 - Making the connections - Making the connections Connect the AC power supply cord only after all other connections have been made. Connect the AM loop antenna. AM loop antenna Stand the antenna up on its base. Keep the loose antenna cord away from other wires and cords. -
Page 5: Placement Of Speakers
Step 2 - Inserting batteries into the remote control - Inserting batteries into the remote control AA/R6/LR6 S S tep 3 3 - DEMO function - DEMO function Placement of speakers Speakers are designed identically so that no left or right channel orientation is necessary. Use only the supplied speakers. -
Page 6: Overview Of Controls
Overview of controls Main unit Main unit Refer to numbers in parentheses for page reference. Cassette lid (9) AC supply indicator (AC IN) This indicator lights when the unit is connected to the AC power supply. 1 Standby/on switch (POWER y/l) (15) Press to switch the unit from on to standby mode or vice versa. -
Page 7: Discs
Discs Basic play Basic play Press [y] to turn the unit on. Press [1 3~ 5 3] to select your desired tray. Press [OPEN/CLOSE 0] to open the disc tray and then load the disc. Press [OPEN/CLOSE 0] again to close the tray. - Page 8 Discs (continued) Checking which discs are in the trays (CD CHECK) Checking which discs are in the trays (CD CHECK) Press [CD CHECK]. CD CHECK Press the button again to close the trays. Note • The tray with a disc being played will not open. •...
-
Page 9: Cassette Tape
Cassette tape Top of unit Cassette lid The buttons described for “Cassette tape” are mainly for the main unit unless indicated otherwise. Basic play Basic play Press [0] and insert the cassette. Forward side Close the lid by hand. Press [TAPE 3] to start play. To play the other side of the cassette, turn the cassette over. -
Page 10: Radio
Radio Manual tuning Manual tuning Press [TUNER/BAND] to select “FM” or “AM”. Press [PLAY MODE] to select “MANUAL”. Press [4/REW/4] or [3/FF/¢] to select the frequency of the required station. “ ST ” is displayed when a stereo FM broadcast is being received. -
Page 11: Timer
Timer Setting the clock Setting the clock This is a 12-hour clock. Press [CLOCK/TIMER] to select “CLOCK”. Each time you press the button: CLOCK ˚ PLAY Original display Within 5 seconds, press [4/REW/4] or [3/FF/¢] to set the time. Press [CLOCK/TIMER] again to confi rm. Displaying the clock Press [CLOCK/TIMER] to display the clock for a few seconds. -
Page 12: Sound Adjustment
Timer (Continued) Other basic operations Other basic operations Action change the settings Repeat steps 1 to 4 and 6 on page 11. change the source ˚ 1) Press [ or volume indicator from the display. 2) Make changes to the source or volume. 3) Perform steps 5 and 6 on page 11. -
Page 13: External Unit
Enjoying surround sound Enjoying surround sound Enable you to add natural width and depth to the stereo sound. To activate Press [SURROUND] to display “ To cancel Press [SURROUND] again to clear “ Note • Surround sound is less discernible when listening through headphones. -
Page 14: Troubleshooting Guide
Troubleshooting guide Before requesting service, make the following checks. If you are in doubt about some of the check points, or if the remedies indicated in the chart do not solve the problem, refer to the “Customer Services Directory” on page 16 if you reside in the U.S.A., or refer to the “Product information”... -
Page 15: Specifi Cations
2-Channel 20 Hz to 20 kHz (+1dB, -2 dB) Below measurable limit 8 fs MASH (1 bit DAC) 2 way, 2 speaker system 10cm (4˝) cone type (6 Ω) 6 cm (2 ˝) cone type (6 Ω) 6 Ω 90 W (Max) 90 W (Max) 80 dB/W (1.0 m) -
Page 16: Limited Warranty (Only For U.s.a.)
Monday-Friday 9 am-9 pm; Saturday-Sunday 10 am-7 pm, EST. For hearing or speech impaired TTY users, TTY: 1-877-833-8855 Accessory Purchases Accessory Purchases Purchase Parts, Accessories and Instruction Books online for all Panasonic Products by visiting our Web Site at: http://www.pasc.panasonic.com or, send your request by E-mail to: npcparts@us.panasonic.com You may also contact us directly at: 1-800-332-5368 (Phone) 1-800-237-9080 (Fax Only) (Monday-Friday 9 am to 8 pm, EST.) -
Page 17: Limited Warranty (Only For Canada)
Technics Audio Product Panasonic Audio & DVD Product Accessories including rechargeable batteries In-home Service will be carried out only to locations accessible by roads and within 50 km of an authorized Panasonic service facility. LIMITATIONS AND EXCLUSIONS This warranty does not apply to products purchased outside Canada or to any product which has been improperly installed,... -
Page 18: Preparativos Iniciales
Preparativos iniciales Paso 1 1 Paso - Conexiones - Conexiones Conecte el cable de alimentación de CA sólo después de haber hecho todas las demás conexiones. Conecte la antena de cuadro de AM. Ponga la antena en posición vertical sobre su base. Conecte los cables de los altavoces. -
Page 19: Controles
Controles Aparato principal Aparato principal Los números entre paréntesis indican la página de referencia. Soporte de casete (21) Indicador de alimentación de CA (AC IN) Este indicador se encenderá cuando el aparato esté conectado a la red de CA. 1 Interruptor de alimentación en espera/ conectada (POWER y/l) (15) Pulse este interruptor para cambiar del modo de alimentación conectada al modo de alimentación... -
Page 20: Discos
Discos Reproducción básica Reproducción básica Pulse [y] para encender el aparato. Pulse [1 3~ 5 3] para seleccionar la bandeja deseada. Pulse [OPEN/CLOSE 0] para abrir la bandeja del disco y cargar un CD. Vuelva a pulsar [OPEN/CLOSE 0] para cerrar la bandeja. La etiqueta tiene que estar hacia arriba... -
Page 21: Cintas De Casete
Cintas de casete Parte superior del aparato Soporte de casete Los botones descritos para “Cintas de casete” son principalmente para la unidad a no ser que se indique lo contrario. Reproducción básica Reproducción básica Pulse [0] e insertar la cinta. Lado de avance Cierre la tapa con la mano. -
Page 22: Radio
Radio Sintonización manual Sintonización manual Pulse [TUNER/BAND] para seleccionar “FM” o “AM”. Pulse [PLAY MODE] para seleccionar “MANUAL”. Pulse [4/REW/4] o [3/FF/¢] para seleccionar la frecuencia de la emisora requerida. Se visualizará “ ST ” cuando esté siendo recibida una emisora estéreo por FM. -
Page 23: Temporizador
Temporizador Puesta en hora Puesta en hora Éste es un reloj de sistema de 12 horas. Pulse [CLOCK/TIMER] para seleccionar “CLOCK”. Cada vez que pulse el botón: CLOCK ˚ PLAY Visulización original Entre 5 segundos, Pulse [4/REW/4] o [3/FF/¢] para ajustar la hora. Pulse [CLOCK/TIMER] para terminar de poner la hora. - Page 24 Panasonic Consumer Electronics Company, Division of Panasonic Corporation of North America One Panasonic Way Secaucus, New Jersey 07094 http://www.panasonic.com © 2005 Matsushita Electric Industrial Co., Ltd. Printed in Malaysia Panasonic Puerto Rico, Inc. Ave. 65 de Infantería, Km. 9.5 San Gabriel Industrial Park, Carolina, Puerto Rico 00985 Panasonic Canada Inc.