AEG L 98699 FL User Manual
Hide thumbs
Also See for L 98699 FL:
- User manual (44 pages) ,
- User manual (40 pages) ,
- User manual (40 pages)
Table of Contents
Advertisement
Quick Links
Advertisement
Table of Contents

Related Manuals for AEG L 98699 FL


Summary of Contents for AEG L 98699 FL
- Page 1 User Manual L 98699 FL Washing Machine...
-
Page 2: Table Of Contents
15. TECHNICAL DATA..................... 30 FOR PERFECT RESULTS Thank you for choosing this AEG product. We have created it to give you impeccable performance for many years, with innovative technologies that help make life simpler features you might not find on ordinary appliances. Please spend a few minutes reading to get the very best from it. -
Page 3: Safety Information
ENGLISH SAFETY INFORMATION Before the installation and use of the appliance, carefully read the supplied instructions. The manufacturer is not responsible if an incorrect installation and use causes injuries and damages. Always keep the instructions with the appliance for future reference. -
Page 4: Safety Instructions
The appliance is to be connected to the water mains • using the new supplied hose-sets. Old hose sets must not be reused. If the supply cord is damaged, it must be replaced by • the manufacturer, its Authorised Service Centre or similarly qualified persons in order to avoid a hazard. - Page 5 ENGLISH 2.3 Water connection 2.5 Internal light • Make sure not to cause damage to WARNING! the water hoses. Risk of injury. • Before you connect the appliance to new pipes or pipes not used for a • Visible LED radiation, do not look long time, let the water flow until it is directly into the beam.
-
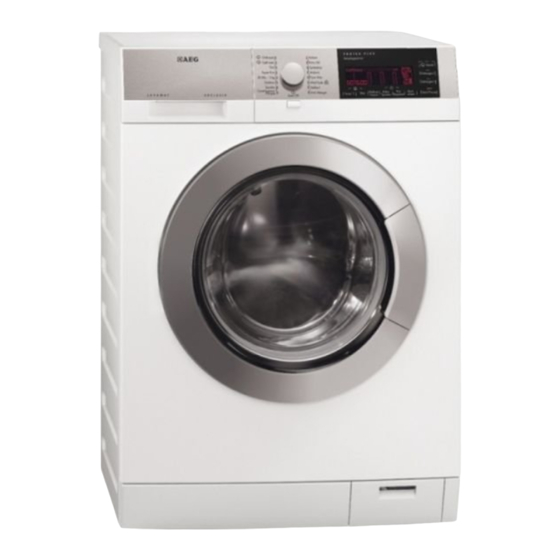
Page 6: Product Description
3. PRODUCT DESCRIPTION 3.1 Appliance overview Worktop Detergent dispenser Control panel Door handle Internal light Rating plate Drain pump filter Feet for the appliance level 3.2 How to activate the child 3.3 Installation on suspended safety device flooring This device prevents children or pets to Suspended wooden floors are be closed in the drum. -
Page 7: Control Panel
ENGLISH 3.5 Accessories Read carefully the instructions supplied with the accessory. • Spanner: to remove the transit bolts. • Plastic caps: to close the holes on the rear side of the cabinet after the removal of the transit bolts. • Sound barriers: to decrease the noise while the appliance operates. - Page 8 4.2 Display The display shows: The text bar: • Guides you in the use of the appliance. • Shows the programme status and phase. • Shows alarm messages. Refer to 'Troubleshooting' . The symbols appear on the display when the related phase or function is set.
- Page 9 ENGLISH Digit area Time of the day When you activate the appliance the display shows the time of the day for some seconds. To adjust the clock, refer to "Clock setting". Programme duration When you touch the related button, the programme cycle duration is displayed for few seconds then, the time of the programme end appears again.
-
Page 10: Programmes
Time save The indicator comes on when you set one of the programme dura- tion. Shortened time Extra Quick Extra rinsing The value shows the total number of the rinses. The indicator bar fills accordingly the numbers of rinses. - Page 11 ENGLISH Programme Maximum Programme description Temperature range load (Type of load and soil level) Maximum spin speed White cotton and coloured cotton. Normal soil 9 kg 1600 rpm and light soil. Cottons 95°C - Cold White and coloured cotton. Normal soil and 9 kg light soil.
- Page 12 Programme Maximum Programme description Temperature range load (Type of load and soil level) Maximum spin speed Cottons and synthetics items with light soil 3 kg 1200 rpm level or worn only once. 20 Min. - 3 Kg 40°C - 30°C 3 kg Mixed fabric (cotton and synthetic items).
- Page 13 ENGLISH Programme Maximum Programme description Temperature range load (Type of load and soil level) Maximum spin speed Steam programme for synthetic items. This cy- 1.5 kg cle helps to dewrinkle the laundry. Anticrease 40° C 1) To reduce the creases of the laundry, this cycle regulates the water temperature and performs a soft wash and spin phase.
-
Page 14: Consumption Values
Programme Stains/ Extra Time Delay Pre- Spin Soak Start Rinse Save wash Rinse ■ ■ ■ ■ Outdoor ■ ■ ■ ■ 20 Min. - 3 Kg ■ ■ Super Eco ■ ■ ■ ■ Cottons Eco ■ ■... -
Page 15: Options
ENGLISH At programme start the display shows the duration programme for the maximum load capacity. During the washing phase the programme duration is automatically cal- culated and can be greatly reduced if the laundry load is lower than the maximum load capacity (e.g. Cotton 60°C, maximum load capacity 9 kg, the programme duration exceeds 2 hours;... -
Page 16: Delay Start
7.3 Memory Use this function for persons allergic to detergents and in areas where the water Touch one of the buttons Memory to is soft. memorise a programme or to set a memorised programme. 7.8 Stains/Prewash Memorise a programme: Touch this button to set one of the 1. -
Page 17: Settings
ENGLISH 8. SETTINGS 8.1 Acoustic signals You can activate this function: • After you touch Start/Pause : all the You can hear the acoustic signals when: buttons and the programme knob are • You activate the appliance. deactivated. • You deactivate the appliance. •... -
Page 18: Daily Use
The minute digits flash. The hour digits flash. 3. Turn the programme knob to change 2. Turn the programme knob to change the minutes. the hour. 4. Touch Start/Pause button to confirm 3. Touch Start/Pause button to confirm the selection. - Page 19 ENGLISH 10.6 Check the position of the This data is indicative and refers to the detergent quantity for a maximum load flap that the manufacturer recommends. 4. Make sure that no laundry stays 1. Pull out the detergent dispenser until between the seal and the door.
- Page 20 3. Touch button Start/Pause. The With the flap in the programme starts. position DOWN: • Do not use 10.10 Behaviour of the gelatinous or thick appliance liquid detergents. • Do not put more After approximately 15 liquid detergent than...
-
Page 21: Hints And Tips
ENGLISH 10.13 Opening the door 4. Keep the door and air filter ajar, to prevent mildew and odours. WARNING! 10.15 Draining water out after If the temperature and level of the water in the drum are end of cycle too high and the drum still The washing programme is completed, rotates you cannot open the but there is water in the drum:... - Page 22 • Obey the washing instructions that – liquid detergents, preferably for are on the laundry care labels. low temperature wash • Do not wash together white and programmes (60 °C max) for all coloured items. types of fabric, or special for •...
-
Page 23: Care And Cleaning
ENGLISH 12. CARE AND CLEANING • Remove the laundry from the drum. WARNING! • Set the cotton programme with the Refer to Safety chapters. highest temperature with a small quantity of detergent. 12.1 External cleaning 12.4 Door seal Clean the appliance only with soap and warm water. - Page 24 12.7 Cleaning the drain filter WARNING! Do not clean the drain filter if the water in the appliance is hot.
- Page 25 ENGLISH...
-
Page 26: Emergency Drain
12.8 Cleaning the inlet hose and the valve filter 45° 20° 12.9 Emergency drain 0° C, remove the remaining water from the inlet hose and the drain pump. Because of a malfunction, the appliance 1. Disconnect the mains plug from the cannot drain the water. -
Page 27: Troubleshooting
ENGLISH 13. TROUBLESHOOTING WARNING! Refer to Safety chapters. 13.1 Introduction The start of the appliance does not occur or it stops during operation. First try to find a solution to the problem (refer to the table). If not, contact the Authorised Service Centre. - Page 28 Message Possible solution The display tells there is a The anti-flood device is activated: water alert. • Disconnect the appliance. • Close the water tap. • Contact the service centre. The display tells that the Wait until the mains supply is stable. The appliance auto- main supply is unstable.
- Page 29 ENGLISH Problem Possible solution You cannot open the appli- Make sure that the washing programme is finished. ance door. Set the drain or the spin programme if there is water in the drum. Make sure that the appliance receives electrical power. This problem may be caused by a failure of the appli- ance.
-
Page 30: Emergency Door Opening
After the check, activate the appliance. The programme continues from the point of interruption. If the problem occurs again, contact the Authorised Service Centre. If the display shows other alarm codes. Deactivate and activate the appliance. If the problem continues, contact the Authorised Service Centre. -
Page 31: Environment Concerns
ENGLISH Level of protection against ingress of solid particles IPX4 and moisture ensured by the protective cover, ex- cept where the low voltage equipment has no pro- tection against moisture Water supply pressure Minimum 0,5 bar (0,05 MPa) Maximum 8 bar (0,8 MPa) Cold water Water supply Maximum Load... - Page 32 www.aeg.com/shop...