Table of Contents
Advertisement
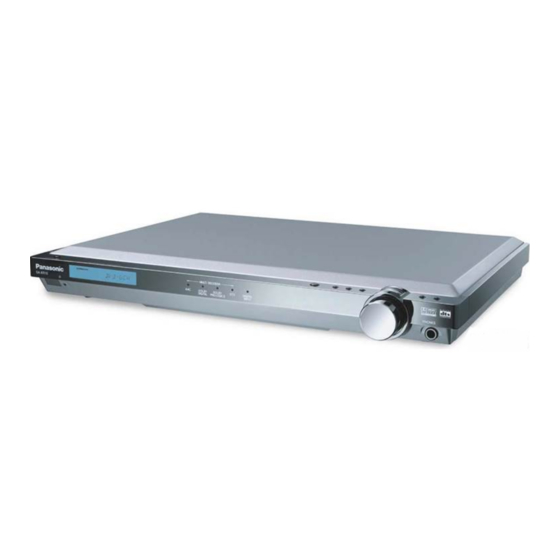
RECEIVER
DVD
TV
VCR
TUNER/
INPUT
BAND
DIGITAL
SELECTOR
RECEIVER
TOP MENU
MENU
ENTER
DISPLAY
RETURN
SLOW
/SEARCH
SKIP
STOP
PAUSE
PLAY
SOUND MODE CHANNEL VOLUME
MUTING
SUBWOOFER
SFC
Dear customer
Thank you for purchasing this product.
Before connecting, operating or adjusting this product, please read
these instructions completely.
Please keep this manual for future reference.
As an
Panasonic has determined that this
product meets the
guidelines for energy efficiency.
PP
En
Cf
E
S
NERGY
TAR
®
Partner,
E
S
NERGY
TAR
AV Control Receiver
Table of contents
Before use
IMPORTANT SAFETY INSTRUCTIONS ......................2
Listening caution..........................................................3
Supplied accessories ..................................................4
The remote control ......................................................4
Step 1
Step 2
Step 3
Step 4
Operations
Control guide ..............................................................12
The radio ....................................................................18
Others
Making a recording ....................................................20
Timer function ............................................................20
Other settings ............................................................21
®
Reference
Troubleshooting guide ..............................................22
The RESET function ..................................................22
Maintenance ................................................................22
Specifications..............................................................23
Product Service ..........................................................23
Warranty (U.S.A.) ........................................................24
Customer Services Directory (U.S.A.) ......................24
Operating Instructions
SA-XR10
Model No.
5
6
8
10
RQT6501-Y
H0602RF0
Advertisement
Table of Contents

Related Manuals for Panasonic SA-XR10


Summary of Contents for Panasonic SA-XR10
-
Page 1: Table Of Contents
Before connecting, operating or adjusting this product, please read these instructions completely. Please keep this manual for future reference. As an NERGY Panasonic has determined that this product meets the guidelines for energy efficiency. Before use IMPORTANT SAFETY INSTRUCTIONS ...2 Listening caution...3... -
Page 2: Important Safety Instructions
IMPORTANT SAFETY INSTRUCTIONS Read these operating instructions carefully before using the unit. Follow the safety instructions on the unit and the applicable safety instructions listed below. Keep these operating instructions handy for future reference. Read these instructions. Keep these instructions. Heed all warnings. -
Page 3: Listening Caution
Listening caution EST. 1924 Selecting fine audio equipment such as the unit you’ve just purchased is only the start of your musical enjoyment. Now it’s time to consider how you can maximize the fun and excitement your equipment offers. This manufacturer and the Electronic Industries Association’s Consumer Electronics Group want you to get the most out of your equipment by playing it at a safe level. -
Page 4: Supplied Accessories
Use the numbers indicated in parentheses when asking for replacement parts. Only for U.S.A.) To order accessories contact 1-800-332-5368 or web site (http://www.panasonic.com). The remote control Batteries – ¡ Insert so the poles (+ and –) match those in the remote control. -
Page 5: Step
Step 2 3 4 Placement of speakers Connecting speakers Other connections are possible depending on your speaker system. See your speaker system’s operating instructions for details. Turn off the receiver before connecting the speakers. Speaker Impedance: 6–8 Front speaker Front speaker (right) (left) LOOP... -
Page 6: Equipment Connections
Step Stereo connection cable White (L) Optical fiber cable To connect equipment, refer to the appropriate operating instructions. Note ¡Do not bend the optical fiber cable. ¡Turn off all components before making any connections. ¡Use digital connection to enjoy Dolby Digital or DTS ( \ page 11). ¡Use analog connection to enjoy sources that cannot be decoded on this unit and to record a source ( \ pages 11 and 20). - Page 7 Peripheral equipment and cables sold separately unless otherwise indicated. Antennas FM indoor antenna (included) Fix the other end of the antenna where reception is best. Adhesive tape White LOOP LOOP Keep the antenna cord away from DVD players and other cords. LOOP MONITOR OUT LOOP...
-
Page 8: Settings
Step hange the settings to suit your speakers and units to the environment in which you are using them. Before making any changes, read the descriptions of the settings, note the factory settings and ranges, and refer to the equipment’s instructions. POWER 8 MEMORY TUNE MODE Display... -
Page 9: Adjusting Speaker Output Level
DISTANCE Enter the distance of the front, center and surround speakers from the seating position Change the distance so that the sound from all the speakers (except for the subwoofer) reaches you at the same time. You can select distances between 3 and 30 feet at one-foot intervals. -
Page 10: Basic Operations
Step 1 2 3 RECEIVER TUNER/ BAND DIGITAL RECEIVER TOP MENU ENTER DISPLAY SKIP STOP PAUSE SOUND MODE CHANNEL VOLUME DIRECT TUNING/ 10/ENTER DISC L BALANCE R TV VOL TV/VIDEO SETUP SUB TITLE AUDIO MARKER REPEAT REPEAT GROUP PAGE DIGITAL INPUT POWER 8 INPUT SELECTOR VOLUME... - Page 11 STEREO mode Use this mode to play digital or analog stereo sources or to play surround sources through two speakers. When surround sources are played in this mode, the sounds intended for the other speaker channels are played through the front speakers. SURROUND mode Select this mode when you are playing a digital surround source (Dolby Digital or DTS).
-
Page 12: Remote Control
Control guide Operating the receiver Reference pages are shown as black circled numbers RECEIVER TUNER/ BAND RECEIVER TOP MENU ENTER DISPLAY SKIP STOP PAUSE SOUND MODE CHANNEL VOLUME DIRECT TUNING/ 10/ENTER DISC L BALANCE R TV VOL SETUP SUB TITLE REPEAT REPEAT PAGE... -
Page 13: Main Unit
25 26 Main unit @ @ 0 0 Standby/on button [POWER 8] Press to switch the unit from on to standby mode or vice versa. In standby mode, the unit is still consuming a small amount of power. @ @ 1 1 [INPUT SELECTOR]: To select the input source @ @ 2 2 [FM MODE]: Press to switch to monaural mode if FM reception is poor... - Page 14 Control guide This remote control is the key to your home theater experience. Actual operations depend on your equipment and software. Be sure to read the instructions for your other components. You may need to enter a code to operate some equipment (a page 17). RECEIVER TUNER/ BAND...
- Page 15 o o [SUB TITLE]: To change subtitles ! ! 0 0 [SETUP]: To show set up menus ! ! 1 1 [REPEAT]: To select a repeat play mode ! ! 2 2 [A-B REPEAT]: To specify start and finish points for A-B repeat ! ! 3 3 [GROUP]: (DVD Audio only) To select a group ! ! 4 4 [PAGE]: (DVD Audio only)
- Page 16 Control guide RECEIVER TUNER/ BAND RECEIVER TOP MENU ENTER DISPLAY SKIP STOP PAUSE SOUND MODE CHANNEL VOLUME DIRECT TUNING/ DISC L BALANCE R TV VOL SETUP SUB TITLE REPEAT REPEAT GROUP PAGE INPUT DIGITAL SELECTOR MENU q q [PAUSE h]: To pause play w w [STOP g]: To stop play...
- Page 17 This remote control can operate Panasonic and Technics audiovisual equipment that have remote control sensors. You may need to change the remote control code. It can also operate some other brands of televisions, video cassette players, and DVD players. Check the table for the brand and enter the code as follows.
-
Page 18: The Radio
The radio RECEIVER TUNER/ BAND TUNER/ INPUT BAND DIGITAL SELECTOR RECEIVER RECEIVER TOP MENU MENU ENTER DISPLAY SLOW /SEARCH SKIP STOP PAUSE PLAY SOUND MODE CHANNEL VOLUME MUTING SUBWOOFER TEST TONE DELAY DIRECT TUNING/ DISC DIRECT TUNING/ 10/ENTER LEVEL DISC L BALANCE R TV VOL TV/VIDEO... - Page 19 RECEIVER TUNER/ INPUT BAND DIGITAL SELECTOR RECEIVER TOP MENU MENU ENTER DISPLAY RETURN SLOW /SEARCH SKIP STOP PAUSE PLAY CHANNEL SOUND MODE CHANNEL VOLUME MUTING SUBWOOFER TEST TONE DELAY DIRECT TUNING/ 10/ENTER LEVEL DISC L BALANCE R TV VOL Selecting channels On the remote control Press [CHANNEL 1 or 2 ].
-
Page 20: Making A Recording
Making a recording Recording on a VCR You can record to a VCR connected to VCR OUT. See the recording unit’s operating instructions for details on how to prepare it for recording. When recording with a VCR, you can record any source except VCR. 1. -
Page 21: Other Settings
Other settings Setting descriptions A DR COMP Dynamic range compression Change this setting to listen to software recorded with Dolby Digital at low volume (such as late at night) and maintain audio clarity. It reduces the peak level in loud scenes without affecting the sound field. -
Page 22: Troubleshooting Guide
Before requesting service, make the below checks. If you are in doubt about some of the check points, or if the remedies indicated in the chart do not solve the problem: In the U.S.A., contact the Panasonic Customer Call Center at 1-800-211-7262, or e-mail consumerproducts@panasonic.com, or web site (http://www.panasonic.com). -
Page 23: Specifications
Product information For product information or assistance with product operation: In the U.S.A., contact the Panasonic Customer Call Center at 1-800-211- 7262, or e-mail consumerproducts@panasonic.com, or web site (http://www.panasonic.com). In Canada, contact Panasonic Canada Inc. Customer Care Centre at 905-624-5505, web site (www.panasonic.ca), or an authorized... -
Page 24: Warranty (U.s.a.)
Carry-In or Mail-In Service For Carry-In or Mail-In Service in the United States call 1-800-211-PANA (1-800-211- 7262) or visit Panasonic web site: http://www.panasonic.com For assistance in Puerto Rico call Panasonic Sales Company (787)-750-4300 or fax (787)-768-2910. Limited Warranty Limits And Exclusions This warranty ONLY COVERS failures due to defects in materials or workmanship, and DOES NOT COVER normal wear and tear or cosmetic damage.