Panasonic SC-DK20 Operating Instructions Manual
Dvd stereo system
Hide thumbs
Also See for SC-DK20:
- Operating instructions manual (64 pages) ,
- Operating instructions manual (64 pages)
Table of Contents
Advertisement
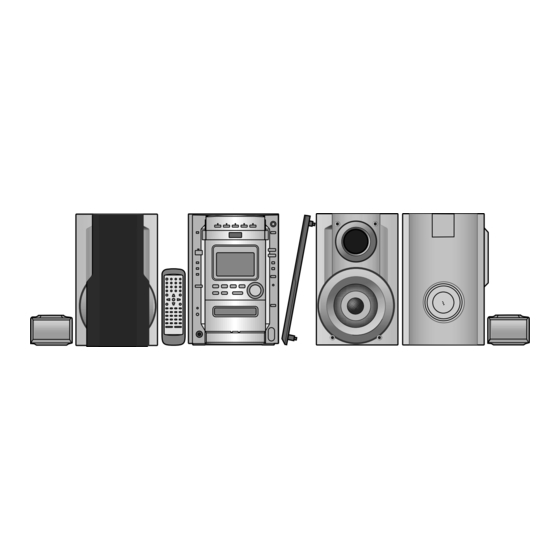
The above illustration of the unit is an example and shows the model for the U.S.A.
Before connecting, operating or adjusting this product, please read these instructions
completely.
Please keep this manual for future reference.
P
PC GCP
GN GC
GCS
DVD Stereo System
Operating Instructions
SC-DK20
Model No.
Region number supported by
this unit
Region numbers are allocated to DVD unit and
software according to where they are sold.
For U.S.A. and Canada
•
The region number of this unit is "1".
•
The unit will play DVDs marked with labels
containing "1" or "ALL".
Example:
For the Middle East and South Africa
•
The region number of this unit is "2".
•
The unit will play DVDs marked with labels
containing "2" or "ALL".
Example:
For Asia
•
The region number of this unit is "3".
•
The unit will play DVDs marked with labels
containing "3" or "ALL".
Example:
For Australia, N.Z. and Latin America
•
The region number of this unit is "4".
•
The unit will play DVDs marked with labels
containing "4" or "ALL".
Example:
For U.S.A. only
The servicenter list and warranty can be found
on pages 59 and 60.
RQT6345-3P
Advertisement
Table of Contents

Related Manuals for Panasonic SC-DK20


Summary of Contents for Panasonic SC-DK20
-
Page 1: Operating Instructions
The above illustration of the unit is an example and shows the model for the U.S.A. Before connecting, operating or adjusting this product, please read these instructions completely. Please keep this manual for future reference. PC GCP GN GC DVD Stereo System Operating Instructions SC-DK20 Model No. -
Page 2: Table Of Contents
Video cable ... 1 pc. (RJL1P016B15A) Please check and identify the supplied accessories. Use numbers indicated in parentheses when asking for replacement parts. (Only for U.S.A.) To order accessories contact 1-800-332-5368 or web site (http://www.panasonic.com). For Australia and N.Z. (RJA0035-X) - Page 3 Radio operations The radio: manual tuning ... 28 The radio: preset tuning ... 29 Tape operations Cassette tapes ... 30 Sound quality/sound field operations Adjusting the bass ... 31 Changing sound field and quality ... 31 Enjoying surround sound ... 33 Recording operations Before recording ...
-
Page 4: Important Safety Instructions
IMPORTANT SAFETY INSTRUCTIONS Read these operating instructions carefully before using the unit. Follow the safety instructions on the unit and the applicable safety instructions listed below. Keep these operating instructions handy for future reference. Read these instructions. Keep these instructions. Heed all warnings. -
Page 5: The Remote Control
L DVD-R discs Panasonic DVD-R recorded and finalized on a Panasonic DVD video recorder are played as DVD-Video on this unit. It may not be possible to play these discs in all cases due to the type of disc or condition of the recording. - Page 6 Disc information Disc symbols used in these operating instruc- tions The functions you can use depend on the type of disc you play. These marks are used to indicate which type of disc is available for use. : Feature can be used with DVD-Video : Feature can be used with Video CD : Feature can be used with Audio CD Playing DVDs and Video CDs...
-
Page 7: Simple Set-Up
The small speakers with the long cords are surround speakers. Place on either side of listening position, or slightly to the rear, about 1 meter higher than ear level with the Panasonic logo fac- ing towards the listening position. The effect varies with the type of music and music source. -
Page 8: Step2 Speakers And Tv
Simple set-up STEP Speakers and TV The illustrations show the model for U.S.A., Canada, Australia, and N.Z. Connect the cords to the terminals of same color. • Never short-circuit positive (+) and negative (–) speaker wires. • Be sure to connect only positive (red or gray) wires to positive (+) terminals and negative (black, blue or gray with blue line) wires to negative (–) terminals. -
Page 9: Step3 Antennas And Ac Power Supply Cord
STEP Antennas and AC power supply cord FM indoor antenna Twist the vinyl tip and pull off. Fix the other end of the antenna where reception is best. Adhesive tape AM loop antenna Twist the vinyl tip and pull off. Stand the antenna up on its base. -
Page 10: Front Panel Controls
The illustration is the model for the Middle East, South Africa and Asia. DISC 1 DISC 2 DISC 3 MANAGER AC IN DISPLAY DEMO CLOCK TIMER PLAY TUNE MODE TUNER TAPE SELECTOR BAND MEMORY REV MODE FM MODE BP REC STOP PHONES TUNE MODE TUNER... - Page 11 TV V POWER ER AUTO O OF MIX 2CH ACTIO CTION SLEEP DIMMER DIMMER UTING DISC DISC TV V VIDEO IDEO TOP MENU OP MENU TV CH UP V CH UP MENU MENU CH SE CH SELECT ENT NTER TEST TV CH V CH DOWN GUI DISP...
-
Page 12: Turning Demo Off
• DISPLAY DEMO (For U.S.A. and Canada) (For others) POWER CLOCK TIMER CLOCK TIMER TV V POWER ER AUTO O OF SLEEP AUTO OFF TV V VIDEO IDEO TOP MENU OP MENU TV CH UP V CH UP CH SELECT CH SE ENT NTER TEST... -
Page 13: Quick Setup
TV V POWER ER AUTO O OF MIX 2CH ACTIO CTION • SLEEP DIMMER DIMMER UTING DISC DISC TV V VIDEO IDEO TOP MENU OP MENU TV CH UP V CH UP MENU MENU CH SELECT CH SE ENT NTER TEST TV CH V CH DOWN... -
Page 14: Discs
DISC 1–DISC 5 , TUNE MODE OPEN CLOSE TV V POWER ER AUTO O OF MIX 2CH ACTIO CTION SLEEP DIMMER DIMMER UTING DISC DISC TV V VIDEO IDEO DISC, 1–5 Numbered buttons TOP MENU OP MENU TV CH UP V CH UP MENU MENU... -
Page 15: Using Menus To Play Mp3 Discs
TV V POWER ER AUTO O OF MIX 2CH ACTIO CTION SLEEP DIMMER DIMMER UTING DISC DISC TV V VIDEO IDEO TOP MENU OP MENU TV CH UP V CH UP MENU MENU CH SE CH SELECT ENT NTER TEST TV CH V CH DOWN GUI DISP... -
Page 16: Resume Function
TV V POWER ER TV V VIDEO IDEO TOP MENU OP MENU CH SELECT CH SE TEST GUI DISP GUI DISP MARKER S.S .SRND 3D AI 3D AI SOUND EQ SOUND EQ POSITION MEMORY L SUBWOOFER SUBW SHIFT SHIFT TUNE MODE RESUME POSITION POSITION... -
Page 17: Skip
TV V POWER ER AUTO O OF MIX 2CH ACTIO CTION SLEEP DIMMER DIMMER UTING DISC DISC TV V VIDEO IDEO TOP MENU OP MENU TV CH UP V CH UP MENU MENU CH SELECT CH SE ENT NTER TEST TV CH V CH DOWN GUI DISP... -
Page 18: Changing The Picture Quality For Movie Viewing
CINEMA TV V POWER ER AUTO O OF MIX 2CH SLEEP DIMMER DIMMER TV V VIDEO IDEO TOP MENU OP MENU TV CH UP V CH UP CH SELECT CH SE ENT NTER TEST TV CH V CH DOWN GUI DISP GUI DISP MARKER SUB TITLE... -
Page 19: Changing Soundtrack And Subtitle Languages
TV V POWER ER AUTO O OF MIX 2CH ACTIO CTION SLEEP DIMMER DIMMER UTING DISC DISC TV V VIDEO IDEO TOP MENU OP MENU TV CH UP V CH UP MENU MENU CH SELECT CH SE ENT NTER TEST TV CH V CH DOWN GUI DISP... -
Page 20: Marking A Position
TV V POWER ER AUTO O OF MIX 2CH SLEEP DIMMER DIMMER TV V VIDEO IDEO TOP MENU OP MENU TV CH UP V CH UP CH SE CH SELECT ENT NTER TEST TV CH V CH DOWN GUI DISP GUI DISP MARKER SUB TITLE... -
Page 21: Other Methods Of Disc Play
TV V POWER ER AUTO O OF MIX 2CH ACTIO CTION SLEEP DIMMER DIMMER UTING DISC DISC TV V VIDEO IDEO TOP MENU OP MENU TV CH UP V CH UP MENU MENU CH SE CH SELECT ENT NTER TEST TV CH V CH DOWN GUI DISP... -
Page 22: Program Play
TV V POWER ER AUTO O OF MIX 2CH SLEEP DIMMER DIMMER TV V VIDEO IDEO TOP MENU OP MENU TV CH UP V CH UP CH SE CH SELECT ENT NTER TEST TV CH V CH DOWN GUI DISP GUI DISP SELECTOR MARKER... -
Page 23: Random Play
TV V POWER ER AUTO O OF MIX 2CH ACTIO CTION SLEEP DIMMER DIMMER UTING DISC DISC TV V VIDEO IDEO TOP MENU OP MENU TV CH UP V CH UP MENU MENU CH SE CH SELECT ENT NTER TEST TV CH V CH DOWN GUI DISP... -
Page 24: Using The Cd Manager
SELECTOR MANAGER CD MANAGER Disc number DISC CD MANAGER DVD/CD TV V POWER ER SLEEP TV V VIDEO IDEO TOP MENU OP MENU TV CH UP V CH UP CH SE CH SELECT ENT NTER TEST TV CH V CH DOWN GUI DISP GUI DISP MARKER... -
Page 25: Using On-Screen Menu Icons
TV V POWER ER AUTO O OF MIX 2CH ACTIO CTION SLEEP DIMMER DIMMER UTING DISC DISC TV V VIDEO IDEO TOP MENU OP MENU TV CH UP V CH UP MENU MENU CH SE CH SELECT ENT NTER TEST TV CH V CH DOWN GUI DISP... -
Page 26: Disc Information
Using On-Screen Menu Icons Disc information Digital 1 ENG 3/2.1 ch 1 : 46 : 50 Icon Title number Chapter number Time • Press [8], [9] to show the elapsed 1 : 46 : 50 play time or remaining time for the title. -
Page 27: Unit Information
Unit information Play menu Icon Content A-B repeat ( page 21) [ENTER] (start point) [ENTER] (finish point) To cancel [ENTER] Repeat play ( page 21) C (Chapter) T (Title) OFF Marker ( page 20) You can mark up to 5 positions to play 1 2 3 ¤... -
Page 28: The Radio: Manual Tuning
REV MODE/ FM MODE/BP TUNER BAND TUNE MODE TUNED STEREO DOWN -- dB REV MODE/ FM MODE BP MONO RQT6345 The radio: manual tuning Radio stations can be tuned manually by selecting the station’s frequency or they can be preset into channels to make it easy to tune page 29). -
Page 29: The Radio: Preset Tuning
TV V POWER ER AUTO O OF MIX 2CH ACTIO CTION SLEEP DIMMER DIMMER UTING DISC DISC TV V VIDEO IDEO TOP MENU OP MENU TV CH UP V CH UP MENU MENU CH SELECT CH SE ENT NTER TEST TV CH V CH DOWN GUI DISP... -
Page 30: Cassette Tapes
L, TUNE MODE REV MODE/ FM MODE/BP g/(, 3 )/f, 4 TV V POWER ER AUTO O OF SLEEP TV V VIDEO IDEO TOP MENU OP MENU TV CH UP V CH UP CH SE CH SELECT ENT NTER TEST TV CH V CH DOWN GUI DISP... -
Page 31: Adjusting The Bass
TV V POWER ER AUTO O OF MIX 2CH ACTIO CTION SLEEP DIMMER DIMMER UTING DISC DISC TV V VIDEO IDEO TOP MENU OP MENU TV CH UP V CH UP MENU MENU CH SE CH SELECT ENT NTER TEST TV CH V CH DOWN GUI DISP... - Page 32 3D AI 3D AI SHIFT SOUND EQ SOUND EQ SOFT SUPER SOUND EQ RQT6345 Using the acoustic image equalizer (AI EQ) SUPER 3D AI Achieve subtle sound quality settings with the soft, sharp, heavy, SOUND EQ and light coordinates, and add surround effects with the three- dimensional settings.
-
Page 33: Enjoying Surround Sound
Enjoying surround sound The following chart gives a summary of this unit’s surround features. Note • All the features are only effective if speakers are used. No discernible effect will be heard through headphones. • None of the features are effective when radio is selected as the source. •... - Page 34 TV V POWER ER AUTO O OF SLEEP MIX 2CH TV V VIDEO IDEO TOP MENU OP MENU TV CH UP V CH UP CH SE CH SELECT ENT NTER TEST TV CH V CH DOWN GUI DISP GUI DISP MARKER SUB TITLE TITLE...
- Page 35 TV V POWER ER AUTO O OF MIX 2CH ACTIO CTION SLEEP DIMMER DIMMER UTING DISC DISC TV V VIDEO IDEO TOP MENU OP MENU TV CH UP V CH UP MENU MENU CH SELECT CH SE CH SELECT ENT NTER TEST TV CH V CH DOWN...
- Page 36 TV V POWER ER AUTO O OF SLEEP TV V VIDEO IDEO TOP MENU OP MENU TV CH UP V CH UP CH SELECT CH SE CH SELECT ENT NTER TEST TV CH V CH DOWN GUI DISP GUI DISP 8, 9 MARKER SUB TITLE...
-
Page 37: Before Recording
Side A Tab for side B Tab for side A To re-record Normal tape High position tape Discrimination hole TUNE MODE OPEN TAPE TAPE Selected direction TUNE MODE REV MODE/ FM MODE BP Before recording Selection of tapes for recording The unit automatically identifies the type of tape. -
Page 38: Recording Discs
SELECTOR L, TUNE MODE REC STOP DVD/CD REC STOP CD MANAGER RQT6345 Recording discs DISC 1– DISC 5 Preparation: • Do the preparatory steps ( • Press [SELECTOR] to select “DVD/CD”. Normal recording Insert the disc you want to record. If play starts, press [L, TUNE MODE] twice to stop the disc. -
Page 39: Recording The Radio
REV MODE/ FM MODE/BP aREC/STOP REC STOP TUNED STEREO REV MODE FM MODE BP TV V POWER ER AUTO O OF MIX 2CH SET UP SET UP SLEEP DIMMER DIMMER UTING DISC DISC TV V VIDEO IDEO ECHO ECHO TOP MENU OP MENU TV CH UP V CH UP... - Page 40 TV V POWER ER AUTO O OF MIX 2CH SLEEP DIMMER DIMMER TV V VIDEO IDEO ECHO ECHO TOP MENU OP MENU TV CH UP V CH UP CH SELECT CH SE ENT NTER TEST TV CH V CH DOWN GUI DISP GUI DISP MARKER...
- Page 41 TV V POWER ER AUTO O OF MIX 2CH SET UP SET UP SLEEP DIMMER DIMMER UTING DISC DISC TV V VIDEO IDEO ECHO ECHO TOP MENU OP MENU TV CH UP V CH UP MENU MENU CH SE CH SELECT ENT NTER TEST TV CH...
- Page 42 TV V POWER ER AUTO O OF MIX 2CH SLEEP DIMMER DIMMER TV V VIDEO IDEO ECHO ECHO ECHO TOP MENU OP MENU TV CH UP V CH UP CH SE CH SELECT ENT NTER TEST TV CH V CH DOWN GUI DISP GUI DISP MARKER...
-
Page 43: Using The Timers
• CLOCK TIMER CLOCK TIMER CLOCK TIMER PLAY (For U.S.A. and Canada) (For others) POWER Using the timers The play timer This timer starts play of the selected source at the selected time. For U.S.A. and Canada: 12-hour clock For others: 24-hour clock The example shows settings on the 12-hour clock for play between 6:30 a.m. - Page 44 • CLOCK TIMER CLOCK TIMER CLOCK TIMER PLAY (For U.S.A. and Canada) POWER RQT6345 The record timer This timer records the radio at the set time. For U.S.A. and Canada: 12-hour clock For others: 24-hour clock The example shows settings on the 12-hour clock for recording from 6:30 p.m.
- Page 45 CLOCK/ TIMER rPLAY/ rREC TV V POWER ER AUTO O OF MIX 2CH ACTIO CTION SLEEP DIMMER DIMMER UTING SLEEP DISC DISC TV V VIDEO IDEO TOP MENU OP MENU TV CH UP V CH UP MENU MENU CH SE CH SELECT ENT NTER TEST...
-
Page 46: Convenient Functions
-DISPLAY/ –DEMO DISPLAY DEMO TV V POWER ER AUTO O OF SLEEP DIMMER TV V VIDEO IDEO TOP MENU OP MENU TV CH UP V CH UP CH SELECT CH SE ENT NTER TEST TV CH V CH DOWN GUI DISP GUI DISP MARKER SUB TITLE... -
Page 47: External Unit Connections
Laser disc player/ Rear panel Video cassette recorder/ Record player AUDIO Rear panel S-VIDEO S-VIDEO IN S-VIDEO cable FM outdoor antenna (not included) 75 coaxial cable (not included) 15 mm AM outdoor antenna (not included) 5-12m External unit connections • Turn the unit off before making connections. -
Page 48: Using Other Equipment
Press [POWER f/I] ([f/I]) to turn the unit on. • Do the preparatory steps ( To stop recording Press [[REC/STOP]. You can use the remote control to operate a Panasonic television. Turning the television on/off Press [SHIFT] + [TV POWER]. MIX 2CH ACTIO... -
Page 49: Changing Settings
TV V POWER ER AUTO O OF MIX 2CH ACTIO CTION SLEEP DIMMER DIMMER UTING DISC DISC TV V VIDEO IDEO TOP MENU OP MENU TV CH UP V CH UP MENU MENU CH SE CH SELECT ENT NTER TEST TV CH V CH DOWN GUI DISP... -
Page 50: Summary Of Settings
Changing settings Summary of settings This chart shows the settings for this unit. See page 49 for details on operation. Shaded items are the factory settings. Main menu Disc Audio Choose the preferred audio language. Subtitle Choose the preferred subtitle language. Menus Choose the preferred language for disc menus. - Page 51 Changes to the settings remain intact after the unit is turned off. Do the setting procedures again to restore to the original settings. “Other ¤¤¤¤” : Input a code number with the numbered buttons ( page 54). “Original” : The original language of each disc will be selected.
- Page 52 Changing settings Summary of settings Main menu Audio Speaker Setting Set the delay time for your center and surround speakers page 55). D. Range Compression Change the dynamic range. Dynamic range is the difference between the loudest sound and the softest sound. Audio during Search Choose whether to have sound during search.
- Page 53 When the center/surround speakers cannot be located in the ideal position. Remarks Turn dynamic range compression on in the following cases. • For clear dialogue when listening at low volume. • When sound is distorted while playing multi-channel DVD audio through two channels.
-
Page 54: Entering A Password
Changing settings Entering a password When setting ratings (When the level is 8) The password screen is shown when you select levels 0 to 7. 1. Input a 4-digit password with the numbered buttons and press [ENTER]. SETUP Ratings Enter a 4-digit password, then press ENTER. -
Page 55: Delay Time
Delay time (Dolby Digital, center and surround speakers only) The sound from speakers can reach the listening position at different times depending on placement. You can allow for this difference by changing the delay time of the center and surround speakers. Calculating delay time Ideal position of the center speaker... -
Page 56: Troubleshooting Guide
In the U.S.A., contact the Panasonic Customer Call Center at 1-800-211-7262, or e-mail consumerproducts@panasonic.com, or web site (http://www.panasonic.com). In Canada, contact Panasonic Canada Inc. Customer Care Centre at 1-800-561-5505, web site (www.panasonic.ca), or an authorized Servicentre closest to you. Reference pages are shown as black circled numbers 8. -
Page 57: Maintenance/Product Service
Product information For product information or assistance with product operation: In the U.S.A., contact the Panasonic Customer Call Center at 1-800-211-7262, or e-mail consumerproducts@panasonic.com, or web site (http://www.panasonic.com). In Canada, contact Panasonic Canada Inc. Customer Care Centre at 1-800-561-5505, web site (www.panasonic.ca), or an... -
Page 58: Glossary
Glossary Chapter This is the smallest division on DVD and is roughly equivalent to a track. Title This is the largest division on DVD. Track This is the smallest division on Video CD and Audio CD, and usually equates to a single song. PBC (Playback control) This method of controlling disc play is included on version 2.0 Video CDs. -
Page 59: Servicenter List (Only For U.s.a.)
Servicenter List (ONLY FOR U.S.A.) RQT6345... -
Page 60: Warranty (Only For U.s.a.)
Servicenter Directory. Or call toll free, 1-800-211-7262 to locate a PASC authorized Servicenter. Carry-in or mail-in service in Puerto Rico can be obtained during the war- ranty period by calling the Panasonic Sales Company telephone number listed in the Servicenter Directory. -
Page 61: Specifications
Specifications For U.S.A., Canada and Latin America AMPLIFIER SECTION For U.S.A. and Canada Power output 10 % THD, both channels driven 75 Hz SUBWOOFER 150 W (4 ) 1 kHz FRONT 35 W per ch (6 CENTER 60 W (8 ) SURROUND 30 W per ch (8 Total power in stereo mode... - Page 62 Memo For the Middle East, South Africa and Asia Specifications AMPLIFIER SECTION RMS power output 10 % THD, both channels driven 75 Hz SUBWOOFER 150 W (4 ) 1 kHz FRONT 40 W per ch (6 ) CENTER 80 W (8 ) SURROUND 40 W per ch (8 ) Total power in stereo mode...
- Page 63 For Australia and N.Z. Specifications AMPLIFIER SECTION RMS power output 10 % THD, both channels driven 75 Hz SUBWOOFER 150 W (4 ) 1 kHz FRONT 45 W per ch (6 CENTER 70 W (8 ) SURROUND 40 W per ch (8 Total power in stereo mode (FRONT and SUBWOOFER) 240 W Total power in Home Theater mode...
- Page 64 For U.S.A. Panasonic Consumer Electronics Company, Division of Matsushita Electric Corporation of America One Panasonic Way Secaucus, New Jersey 07094 http://www.panasonic.com © 2002 Matsushita Electric Industrial Co., Ltd. Printed in Singapore ®...