Table of Contents
Advertisement
Quick Links
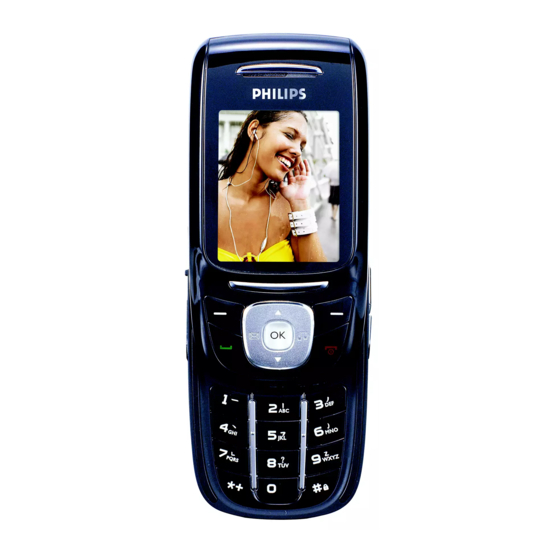
Discover Your Phone
Back of the phone:
camera lens
Side of the phone:
Side key
Earplug jack
Camera key
Navigation keys
Left softkey
Dial key
Charger jack /
Data transfer connector
Philips continuously strives to improve its products.
Therefore, Philips reserves the rights to revise this user
guide or withdraw it at any time without prior notice.
Philips provides this user guide "as is" and does not
accept, except as required by applicable law, liability for
any error, omission or discrepancy between this user
guide and the product described. The device is meant to
be connected to GSM/GPRS networks.
How to...
Switch the phone On/Off
Enter the main menu
65,000 colour
main screen
Enter the
menu
OK key
Enter the
Right soft key
menu
Enter the
Hang up key
Enter the main menu
Number keys
Enter the
menu
Enter the
Microphone
menu
Display the call history
Enter the camera
preview mode
Enter the Video Player
menu
Adjust the volume
Hold down
Press
Quick Search
Press the
Audio Player
Press
Shortcuts
menu
Press
Press
Write Message
Press
Alert Type
Press
Press
Press
Hold down
Press the right side key.
)
.
L
.
R
.
+
.
-
.
,
.
<
.
>
.
(
.
C
.
C
.
Advertisement
Table of Contents

Related Manuals for Philips S890


Summary of Contents for Philips S890
-
Page 1: Discover Your Phone
Therefore, Philips reserves the rights to revise this user guide or withdraw it at any time without prior notice. Philips provides this user guide “as is” and does not accept, except as required by applicable law, liability for any error, omission or discrepancy between this user guide and the product described. - Page 2 Take photos Press the right side keys, Enter the phone number Press the number keys. End a call Press Keypad introductions < > Move the cursor when editing text. In standby mode, press Message menu, press menu. In the camera preview mode, <...
- Page 3 </>/+/- keys are referred to as navigation keys. In this user guide, the phrase "press the key" refers to pressing and thereafter releasing a key; "Hold down a key" refers to pressing a key and keeping it depressed for 2 seconds or longer.
-
Page 4: Table Of Contents
1. Getting Started ...5 Removal and Insertion of the SIM Card ...5 Removal and Insertion of the Memory Card ...5 Removal and Installation of the Battery ...6 Battery charging ...7 Turning the Phone On and Off ...8 Unlocking the Phone Lock ...8 Unlocking the SIM card ...8 Connecting to the Network ...9 2. - Page 5 ... 61 General outline ... 61 Keyboard values ... 61 Icons & symbols ... 62 Precautions ... 63 Troubleshooting ... 67 Philips Authentic Accessories Specific Absorption Rate Information ... 70 Limited warranty ... 71 Declaration of conformity ... 69 ... 74...
-
Page 6: Getting Started
1. Getting Started Before using your mobile phone, you must insert a valid SIM (Subscriber Identity Module) card into the phone. The SIM card is supplied by your network provider. The information recorded on the chip of the SIM card include data required in order to establish a connection with the network, the names and numbers in your phonebook, your messages, etc. -
Page 7: Removal And Installation Of The Battery
• Push up the lid on the memory card trough, place the memory card into the memory card trough. • Push down the lid, and glide it to secure the memory card in the memory card trough. • When you need to remove the memory card, please first turn off the phone, remove the battery, then remove the memory card. -
Page 8: Battery Charging
Battery charging The new battery is partially charged (about 50%) and may be used directly out of the box. During the first three charge cycles, you must ensure that the battery is fully discharged before re-charging. This will enable optimum performance of the battery. •... -
Page 9: Turning The Phone On And Off
Turning the Phone On and Off To turn the phone on or off, hold down If you turn on the phone without inserting the SIM Insert card, the phone will display the SIM card, the phone will automatically check if the SIM card is useable. -
Page 10: Connecting To The Network
Your SIM card comes with a standard 4-8 digit PIN number supplied by your network provider. You should change this to your own number as soon as possible. Connecting to the Network When the SIM card is successfully opened, your mobile phone will start to search for an available network (Searching... -
Page 11: Main Functions
2. Main Functions Characteristic Function This mobile phone has the following characteristic functions: Phone Book Offers quick search function. The phone can hold a maximum of 300 phonebook records and each phonebook record can hold a maximum of 4 phone numbers. The number of phonebook records that the SIM card can hold is dependent on your SIM card... - Page 12 Sound Allows you to record sound in both Recorder calling and non-calling modes. When the phone is in calling mode, you can press dialogue, or press select the sound recorder. Recorded sound is saved in *.amr or *.wav formats and stored in the Recorder folder of the (D:\ or E:\);...
-
Page 13: Dialing
Display Allows you to configure how menus are displayed onscreen. Side Key Supports side key function. You can set different functions according to your needs. Dialing You may make and receive calls on your phone when the symbol of your network provider appears on the screen. -
Page 14: Emergency Calls
Dialing Calls from the Call Log Your mobile phone can also store records of the most recently missed, received and dialed calls, as well as the call time of the last call and the accumulated time of calls received and dialed. When the call log is full, the old numbers will be erased automatically. -
Page 15: Call Option
Call Option Option During a call, press to enter the call option H-Free menu; press to activate and increase H-Held volume, press again to deactivate and decrease volume. The call option menu can only be seen while a call is being made. -
Page 16: Function Menu
3. Function Menu How to Use the Function Menu Scroll to select a function Menu • In standby mode, press menu. During a call, press call option menu, then use desired item on the call menu, and press select the function. •... -
Page 17: Call History
Call History Missed Calls Dialed Calls Received Calls Delete Call Log Call Time Last Call Time/Total Sent/Total Received/Reset All Time Call Cost Last Call Cost /Total Cost/Reset Cost/Max Cost/ Price Per Unit SMS Counter Sent/Received GPRS Counter Last Sent/Last Received/All Sent/All Received/Reset Counter Camera Camera... - Page 18 General Activate/Customize Meeting Activate/Customize Outdoor Activate/Customize Indoor Activate/Customize Headset Customize Services STK* Data Account Extra Calendar To Do List Alarm Calculator Units Converter Currency Converter Shortcuts The items that appear under the STK menu may be different according to the network operator. Function Menu...
-
Page 19: Phone Book
4. Phone Book To Phone You can use option in the phonebook menu to save name card information such as Name, Number, Home Number, Company Name, Email Address, Office Number, Fax Number, Associate Picture, Associate Sound, and Caller Group. To display a list of telephone numbers, all you need to Name do is to press in standby mode to enter the... - Page 20 Copy All From SIM select telephone entries on your SIM card onto your mobile phone, or select From Phone to copy all the telephone entries on your mobile phone onto your SIM card. When you copy telephone number entries from your mobile phone onto your SIM card, only the names and telephone numbers will be copied.
- Page 21 Preferred Storage: set a default • setting for the storage of telephone numbers: to Phone. You can also choose the preferred storage when adding a new phone entry. • Fields: show or hide Home Number, Company Name, Email Address, Office Number, Fax Number, Associate Associate Sound, Caller Group...
- Page 22 Copy copy the current phonebook entry to another phone or SIM card. If the phonebook entry is on the phone, this action makes a copy on the SIM card. If the phonebook entry is on the SIM card, this action makes a copy on the phone.
-
Page 23: Messages
5. Messages In the main menu, scroll to select Messages, and then to enter. The available options include: SMS, press MMS, Voice Mail Server Broadcast If your network supports SMS (Short Message Service) and you have applied for this service from your network provider, you can send English and Chinese short messages through the short message service centre. - Page 24 Edit edit the current message. Delete delete the current message. Delete Same delete all messages of which the Number number is the same as the selected number in the Inbox. Delete All delete all messages in the Inbox. Use Number extract the telephone number of the sender in the current message that contains the numbers (3-40 bit).
-
Page 25: Write Message
Write Message Before writing a short message, please confirm that you have set the short message service centre number. You can edit your short message via Option Press to enter the menu: Done After finishing your message you can select this option and use Send Only, select... -
Page 26: Common Setting
Template This menu allows you to predefine up to ten messages that you use most frequently. Select a message and press to access the next optons. Edit To write a new message or edit the selected predefined message. Erase To delete the selected predefined message. -
Page 27: Mms
Pref. Bearer This option allows you to set the preferred transmission mode. For further detail, please contact with network provider. MMS refers to Multimedia Message Service. It supports multimedia functions and can send text, images, sound and many multimedia file formats. The MMS function is operator dependent. - Page 28 Remove delete the current attachment. Attachment Insert New Slide insert a new slide after the current page. Delete Slide delete the current page. Previous Slide return to the previous page. Next Slide enter the next page. Preview preview the current MMS. Slide Timing set the display time of the current page, different pages can have...
- Page 29 When you are in your home network, and the Retrieval mode is set as Immediate, an icon will be displayed on the standby screen to indicate that you have received a new MMS. At this time, the MMS will be temporarily saved in the cache. If a new MMS is received when you are not in standby mode, continuously press standby mode;...
- Page 30 Forward edit the MMS and forward it, at the same time, the subject is changed to "Fw: ...". Delete delete the current MMS. Delete All delete all the MMS in the inbox. Use Number extract the number of the sender, Dial Save To Phone Outbox...
-
Page 31: Message Settings
Delete delete the current MMS. Delete All delete all the MMS in the drafts folder. Use Number extract the number of the sender Dial and recipient, Book. Message Settings The user must make the necessary settings in order to use the MMS feature. MMS Settings Enter and carry out the following... - Page 32 • Roaming: set the degree of emergency in the downloading of MMS when you are roaming. You can select or Restricted. Read Report: set whether or not • read report should be sent. You can select Send, request. Delivery Report: •...
-
Page 33: Voice Mail Server
Voice Mail Server This will automatically direct incoming calls to the voice mail centre when you cannot answer the call. The caller can leave a message on the voice mail system of the service network. If the caller leave a message, you can access the message by calling the voice mail system. -
Page 34: Call History
6. Call History In the main menu, press the navigation keys to scroll Call History, then press and select can look up information on the call records. Missed Calls Missed Calls, the screen displays the name of the Enter caller (if the name is already stored in the phonebook) and telephone number of the missed call. -
Page 35: Call Time
Call Time Call Time. You can check Press to enter information regarding the call duration. Last Call Time view the duration of the last call. Total Sent view the total duration of outgoing calls made. Total Received view the total duration of incoming calls received. -
Page 36: Camera
7. Camera This mobile phone is equipped with a high resolution camera (30 thousand picture element), which you can use to take pictures, and then save them in your mobile phone, use them as your mobile phone wallpaper (main screen size) or send them to your friends and colleagues via MMS. - Page 37 Image Size set the size at which the picture will be saved. There are three sizes: 640x480 320x240 Main LCD Size When size of the image is set as 640x480, zoom is not supported; when size of the image is set as 320x240, Zoom 1x and Zoom 2x are supported.
-
Page 38: Imageviewer
• After taking the picture, press (default File Path is Phone), then return to view finder mode. Or press to return to view finder mode without saving the picture. Cont Shot is set to On, saving and taking of a •... -
Page 39: Audio Player
8. Audio Player In the main menu, press the navigation keys to scroll Audio Player, then press and select In the Audio Player menu, press music, such as pause or resume; press music in the playlist one after another; press adjust the volume. -
Page 40: Video Player
9. Video Player In the main menu, press the navigation keys to scroll Video Player, then press and select Video Recorder Video Recorder, the video recorder displays the Enter view finder interface. Press begin recording, then press save, or press to exit and save. -
Page 41: Fun & Games
10. Fun & Games In the main menu, press the navigation keys to scroll and Fun & Games, then press select comprises the following: Games, Repeater and Karaoke. Games Select a game, press . For details about each game, you can refer to the direction on the screen. Game Setting Game Audio Game Vibration On... -
Page 42: Ab Repeater
Settings change File Pref.Storage. To select the file format, press Phone Card as the preferred storage, < > press Forward forward current file to MMS. AB Repeater Enter the menu and select the repeat file, then press Option to carry out the following operations: Select enter the AB Repeater operation interface, press the right side key to... -
Page 43: File Manager
11. File Manager In the main menu, press the navigation keys to scroll File Manager, and then press and select The menu displays "D:\" and "E:\"(if a Memory card has been inserted into the mobile phone). Open allows you to open the folder. Create Folder create a new folder and edit the folder name. - Page 44 Copy copy the current file to another destination. Press operation, and display all files under the same root list. If you wish to copy the file in the same root list, press to select the destination, then carry out you wish to copy the file from a different root list, press to select D:\ or E:\, then press Option...
-
Page 45: Settings
12. Settings In the main menu, press the navigation keys to scroll and select Settings. Press menu. In this menu, you can configure your usage preferences of the mobile phone. These include Setup, Call Setup, Number, Network Restore Factory Settings. Phone Setup Phone Setup Enter the... -
Page 46: Display Characteristics
encoding. If certain characters cannot be displayed, please switch the encoding in order to view them. Display Characteristics Themes select menu colour: Blue, Orange, then activate the current theme, and change the menu colour. Wallpaper set the background image of main screen displayed in idle mode: System Choose... -
Page 47: Call Setup
Dedicated key You can edit the shortcut function of the navigation < > keys in standby mode. Shortcuts You can edit the shortcut menu, it can be found in Extra > shortcuts. Call Setup You can carry out the following settings: Caller ID This function provides the user with the ability to send or hide his/her phone number from the other... -
Page 48: Call Barring
Divert If Busy divert all incoming calls when there is at least one call in progress. Divert All Data divert all data calls. Calls Cancel All deactivate all call diverts. Divert When you have selected one of the above modes, you may carry out the following operations: Activate activate this function. -
Page 49: Ip Number
Cancel All cancel all barrings. You need to enter the barring password. Change Barring enter the old password, and set the new password. Call Time Reminder This option enables you to remind yourself about the duration of a call. When this option is enabled, there will be a short beep when the duration of a call exceeds the reminder timer. -
Page 50: Security Setup
Manual manually select and connect to a network from a list of available networks. Preferred Networks Preferred Networks is a list of networks already configured and set by you. The preferred networks will be stored in the SIM card. Press to show a list of preferred networks. -
Page 51: Fixed Dial
If you enter an incorrect PIN number three times in succession, your SIM card will be locked. At this time, you need the PUK number to unlock the SIM card. The PIN number and PUK number may have been provided to you together with the SIM card. If you do not have them, please contact your network provider. -
Page 52: Restore Factory Settings
in the fixed dialing number list are displayed in the phone book. Barred Dial If your SIM card supports it, certain numbers can be barred. When this function is activated, you may only dial the numbers that is in the barred dialing list. Mode enter PIN 2 code and turn barred dialing function... -
Page 53: User Profiles
13. User Profiles Your mobile phone provides a number of user profiles for you to set your mobile phone's ring tone, according to condition and environment. From the main menu, press the navigation keys to scroll User Profiles. Press and select Profiles menu, where you will be able to access the following: General, Meeting, Outdoor,... - Page 54 Alert Type: This option allows • you to set the type of alert you wish to receive when there is an incoming call. You can select only one option from Ring, Vibration Only, Vibra Then Ring. Ring Type: This option allows •...
-
Page 55: Services
14. Services In the main menu, press the navigation keys to scroll and select Services. There are three submenus: STK, Data Account. to scroll and select STK. Press Press menu. In this menu, you can use the value- added services provided by your network operator. Your mobile phone supports STK functions. -
Page 56: Recent Pages
Delete delete the selected bookmark. Add Bookmark edit the title and address of the new bookmark. Recent Pages You can visit the web sites you visited recently. Enter Address Use this menu to manually enter the URL address of a website and access it. You can also access a website Bookmarks Recent Pages using... - Page 57 Show Images select images. Service select to receive or not to receive Message WAP service messages. Settings Clear Cache Data or services that you have visited will be saved in the cache memory of your mobile phone. Please promptly clear these temporary files that record your online data.
-
Page 58: Data Account
Exit exit the WAP browser window and disconnect. Save Image save a picture. This option will only appear when there is a picture in the current page. When browsing a WAP page, you can press time to exit the WAP browser window, disconnect and return to standby mode. - Page 59 GPRS In this menu, the mobile phone will display a list of GPRS Data account. You can select and edit the GPRS data: Account Name specify a name for the account. edit APN. User Name set the user identification for login to APN.
-
Page 60: Extra
15. Extra In the main menu interface, press the navigation keys to Extra scroll to and press to enter the You can make use of some practical applications, such as: Calendar, To Do List, Alarm, Calculator, Currency Converter and Shortcuts. Calendar When you enter the Calendar, the screen will display the current month. -
Page 61: Calculator
Calculator The calculator supports 4 basic arithmetic functions to facilitate simple calculations. Calculator Enter the to display the operation interface of the calculator: • Use the number keys from numbers, and use to enter decimal point. < > • Press to enter the symbols for the four mathematical operators +, -, or /. -
Page 62: Input Methods
16. Input Methods General outline This mobile phone supports English input and the following input methods: Multitap ABC, Multitap abc, Numeric, Smart ABC, and Smart abc. Text entry functions permitted on this mobile phone are: • Inputting and editing of short messages •... -
Page 63: Icons & Symbols
Icons & symbols In standby mode, several symbols can be displayed simultaneously on the main screen. If the network symbol isn’t displayed, the network is currently not available. You may be in a bad reception area, moving to a different location may help. GSM Network - Your phone is connected to a GSM network. -
Page 64: Precautions
Precautions Radio Waves Your cellular mobile phone is a low power radio transmitter and receiver. When it is operating, it sends and receives radio waves. The radio waves carry your voice or data signal to a base station that is connected to the telephone network. -
Page 65: Always Switch Off Your Phone
Always switch off your phone... Inadequately protected or sensitive electronic equipment may be affected by radio energy. This interference can lead to accidents. Before boarding an aircraft and/or when packing the phone in your luggage: the use of mobile phones in an aircraft may be dangerous for the operation of the aircraft, disrupt the mobile phones network and may be illegal. -
Page 66: Improved Performance
Philips phone null and void. The use of an incorrect type of battery may also cause an explosion. -
Page 67: Your Mobile Phone And Your Car
Philips has marked the battery and packaging with standard symbols designed to promote the recycling and appropriate disposal of your eventual waste. The battery should not be disposed of with general household waste. -
Page 68: Troubleshooting
Your battery seems to over heat You might be using a charger that was not intended for your phone. Make sure you always use the Philips authentic accessory shipped with your phone. Your phone doesn’t display the phone numbers of incoming calls This feature is network and subscription dependent. - Page 69 You have the feeling that you miss some calls Check your call divert options. The display shows SIM failure Check that the SIM card has been inserted in the right position. If the problem remains, your SIM card may be damaged. Contact your operator. When attempting to use a feature in the menu, the mobile displays NOT ALLOWED...
-
Page 70: Philips Authentic Accessories
Additional accessories may also be provided or sold separately. Package contents may therefore vary. To maximise the performance of your Philips mobile phone and not to void the warranty, always purchase Philips Authentic Accessories that are specially designed for use with your phone. Philips Consumer Electronics cannot be held liable for any damages due to use with non-authorised accessories. -
Page 71: Specific Absorption Rate Information
While there may be differences between the SAR levels of various phones and at various positions, they all meet the international protection standards for exposure to radio waves. The highest SAR value for this Philips S890 model phone when tested for compliance against the standard was 0.21W/kg for ICNIRP recommendation and 0.302 W/kg for IEEE Standard. -
Page 72: Limited Warranty
The limited warranty for original Philips rechargeable battery extends for six (6) months from the date of purchase. 3. What Will Philips Do if The Product is Not Free From Material Defects in Materials and Workmanship During The Limited Warranty... - Page 73 Normal wear and tear or Force Majeure. 5. How Do You Get Warranty Service? a) Return the Product to an authorized service center of Philips. You may contact the local Philips office for the location of the nearest authorized service center.
- Page 74 OF ANY LIMITED REMEDY. This limited warranty represents the complete and exclusive agreement between the Consumer and Philips with respect to this cellular Product and it supercedes all prior agreements between the parties, oral or written, and all other communications between the parties relating to the subject matter of this limited warranty.
-
Page 75: Declaration Of Conformity
Declaration of conformity Philips (China) Investment Co., Ltd. BU Wireless China 21F, Tower 1 Kerry Everbright City 218 Tian Mu Xi Road Shanghai, P.R.C200010 declare under our sole responsibility that the product Philips S890 GSM/GPRS Dualband Digital Mobile Phone TAC: 351727 01...