Table of Contents
Advertisement
Quick Links
Advertisement
Chapters
Table of Contents

Related Manuals for Philips Xenium 929


Summary of Contents for Philips Xenium 929
-
Page 2: Call Option
Pilot Key, confirm by pressing it) until you reach the function you desire. To return to the previous menu: Pilot Key. You can also return to the previous display by pressing key. To return to the idle screen: PHILIPS Hotkeys Voice keys Accessories M enu type Network... -
Page 3: Overview Of Menus
Overview of menus Names Messages Send SMS Read SMS SMS settings SMS centre Signature Validity period Reply path Delivery report Auto save SMS Broadcast SMS Mailbox No Call list Organiser Events Day view Week view Month view Extras Call counters Last call information Info at call end Accumulated call timers... -
Page 4: Table Of Contents
Table of contents Before first use Your very first call Using the carousel Example To adjust the contrast Activate/deactivate Using the Names and other lists Glossary Your phone Description of the phone Screen Initial start up procedure The micro-SIM card Inserting your subscriber card (micro SIM card) Your PIN code and PUK code... - Page 5 Your phone and its environment Efficient use of your phone Battery safety Safety and security Responsibility Respect of local laws and regulations 51 Use while driving Maintenance Looking after your phone Efficient use of your phone Troubleshooting Philips Authentic Accessories Index Table of contents...
-
Page 6: Before First Use
Your very first call Turn the phone face down 1 Insert the micro-SIM card. Remove the micro-SIM card from the Sim card. Push the metal retaining clip to the right and lift the cardholder. Slide in the SIM card between the retaining clip and the plastic tongue with the cut corner of the card as shown on the drawing. - Page 7 Turn the phone face up 3 To switch on the phone. Open the flip. Press and hold the 5 Wait for the 2 beeps. The connection is established. The green LED flashes and the screen looks like this: To set the time and date, see page 39. 7 Press Once connected, your phone emits two beeps.
-
Page 8: Using The Carousel
Using the carousel The carousel is a circular loop of icons displayed on the screen. These icons provide access to the different menus and sub menus used to operate your phone. PHILIPS Hotkeys Voice keys Accessories Operator Services* M enu type... -
Page 9: Activate/Deactivate
Move the Pilot Key Then confirm by pressing the Pilot Key This gives you access to the Move the Pilot Key ( by pressing the Pilot Key Display You enter the Move the Pilot Key ( by pressing the Pilot Key Contrast You enter the The active parameter appears underlined on the screen. -
Page 10: Glossary
Glossary DTMF Dual Tone Multi Frequency. The tones are transmitted by the phone to the network. They are used to interrogate answering machines, transmit codes, ... Enhanced Full Rate. Standard for high quality sound GSM900. Your phone will switch EFR on automatically if it is supported by the GSM network you currently use. Fixed Dialling Numbers. -
Page 11: Your Phone
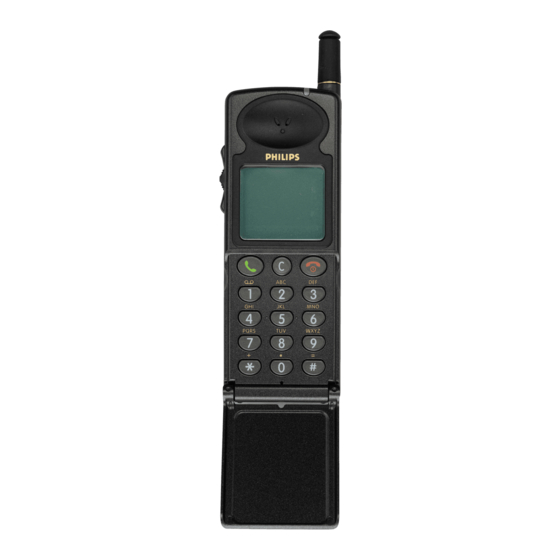
Description of the phone 1 Antenna Pull out completely when making a call. 2 LED - Green flashing slowly - means the phone is registered with a network. - Green flashing quickly - means a call has been received but not yet answered. - Red flashing - means the battery is low. - Page 12 The flip: The flip protects the keypad of your phone. It can be used with all the accessories (Traveler’s Charger, Hands Free Kits, etc.). To detach easily, push the flip downwards. To reinstall the flip, first fit one side in the hinge on the phone, then the other. CORRECT INCORRECT Your phone...
-
Page 13: Screen
Screen Carousel: A loop of icons on your display which provides access to the menu of your choice. Date and time Displayed in idle screen. To set the date and time, see page 34. Indicators Alarm clock Indicates that the alarm is activated. Silent Indicates that the ringer is turned off. -
Page 14: Initial Start Up Procedure
Initial start up procedure The micro-SIM card To use your phone, you must insert a valid SIM card that is supplied by your GSM service provider. Your phone requires a micro-SIM card. The SIM card contains your subscription number and your GSM phone number. It also contains a memory in which you can store phone numbers and messages. -
Page 15: The Battery
The battery Your phone is powered by a rechargeable battery. A new battery is not fully charged. Charge it by following the procedure on page 13. A battery is only fully charged after having been charged and then totally discharged two or three times. -
Page 16: Charging The Battery
- the flashing of the battery fixed icon - a continuous alert beep Acessory not compatible. Please unplug - a message screen. This measure is designed to protect your phone. For best results, always use a Philips Authentic Accessory. Initial start up procedure displayed on the... -
Page 17: Making An Emergency Call
Making an emergency call 112: European emergency call Key in the emergency number for your present location (e.g. 112 or other official emergency number). Emergency numbers vary depending on the location. • Switch on the phone. The display shows the welcome screen. Even if you are asked for your PIN code, your phone will function without it. -
Page 18: Using Your Phone
Switching on • Press the key. • Enter your PIN code if asked and press NOTE: The PIN code requirement is a security feature that you can switch on and off using the “PIN protection*” menu (see page 38). Idle screen After switching on (and entering the PIN code), your phone displays the idle screen which means that the phone is ready to use. -
Page 19: Events In Idle Screen
For example, to enter “Love”, you have to press thrice and press twice. The word “Love” will appear on the screen. NOTES: A number can contain a maximum of 40 digits, depending on your SIM card. It is a good idea to enter all numbers, even local ones, with their international prefix, country code and area code. -
Page 20: Redial And Reply
• To answer a call you can either: • press • press the Pilot Key • Silent ringer The ringer volume of this incoming call is set to silent and the phone goes back to the incoming call screen. • Accept call Accept call •... -
Page 21: Voice Dial
Voice dial You can automatically dial a number by saying your correspondent’s name. In idle screen: • To program a voice tag : Names In the menu, select the Name you want to add a Voice dial to. Press the Pilot Key twice then select Follow the instructions displayed on the screen which invite you to say, then to repeat the voice tag. -
Page 22: Adjusting The Earpiece Volume
• Consult your Organiser (see page 29) • Consult your Call list (see page 29) • Transmit DTMF tones to answering machines and other devices(see page 46). Adjusting the earpiece volume During a call: • Move the Pilot Key up Mute the microphone You can mute the microphone so that your correspondent cannot hear you. -
Page 23: Consulting The Names List
Consulting the Names list During a call: • Press • Move the Pilot Key to select Pilot Key. NAMES • In the menu, scroll through the entries by moving the Pilot Key. • Press to return to the In-call screen. Locking the keypad You can lock the keypad to protect the keys from being pressed accidentally (for example, when the phone is in your pocket). -
Page 24: Activate/Deactivate The Silent Mode
Activate/deactivate the silent mode If you do not want your phone to ring when you receive a call, activate the silent ringer. If you receive a call while the silent mode is activated, the LED flashes quickly, and the display shows In idle screen: •... -
Page 25: Using The Menus
Easy to find and simple to use in either Advanced menu or Simple menu mode via the Pilot Key, the menus contain all your GSM phone functions. All the menus have icons with scrollable lists and are used in the same way. The messages displayed on the screen explain what you have to do. - Page 26 Display Zoom on/off Backlight Animation* Contrast Security Keypad lock Public names* Call barring* Change codes PIN protection Time and date Clock display Set date Set time Language Menu type Simple menu Advanced menu Accessories** Car melodies Speakers Car kit command Auto switch off Auto answer Voice keys*...
-
Page 27: Names
Names menu allows you to consult the list of your correspondents, add new names, write Names and send messages. The names are listed in alphabetical order. You can scroll through the list using the Pilot Key or by entering the first letter of the name. In the list you can choose from the following: NOTE: In idle mode, you can directly access the names list by moving the Pilot Key downwards... -
Page 28: Emergency
Delete menu allows you to delete the number and selected name. Delete Change menu allows you to modify the selected name, number and determine whether Change it is a fax, phone or data transmission number. Emergency The selection displays the emergency call number. Press Own number Selecting Own No. - Page 29 To see Add icon the image, the receiver needs a GSM mobile phone which supports emotion icons (Philips Savvy for example). Otherwise the equivalent code will be displayed at the end of the receiver’s message.
-
Page 30: Read Sms
Read SMS menu allows you to consult the list of SMS you have saved, and received. Read SMS Using different carousels, you can also delete, reply, re-send or forward these messages.” Saved Messages The messages you sent are labelled with or with in auto save SMS mode (see page 28). -
Page 31: Broadcast Sms
Validity period option allows you to select the length of time your message is to be stored in Validity period your SMS centre. This is useful when your correspondent is not connected to the network. Reply path You can activate or deactivate the option transmits your SMS message centre number with the message. -
Page 32: Call List
Call list menu provides you with the list of calls you have received and given, as well as Call list attempts at auto redial and details of voice messages. The calls are displayed in chronological order with the most recent first. When the Call List is empty the screen displays empty . -
Page 33: Day View, Week View And Month View
To Do menu allows you to enter a date, a time, general details, and an alert. The event To do may be repeated (in Advanced mode only). Quick Settings menu allows you to program the activation of a specific Quick Setting. Select a Quick Settings date and time, and the Quick Setting to be activated (see page 45). -
Page 34: Extras
Extras menu enables you to manage the Call counters, Extras Euro converter, Voice memo, Alarm clock, Calculator and game. Call counters menu allows you to handle the cost and Call counters duration of your calls. Last call information menu allows you to display the duration and/or Last call info cost (depending on your subscription) of your last calls. -
Page 35: Euros
Reset menu allows you to reset the current accumulated cost to 0; requires your PIN2 Reset code Euros menu enables you to convert a sum into Euros. -> Euros Euros menu enables you to convert a sum from Euros. <- Euros NOTE: The currency used for the conversion is determined by the country where you have subscribed. -
Page 36: Brick Game
Brick Game consists in breaking a complete set of bricks with a ball and a racket. When Brick Game you have broken all of them, you play with a new set of bricks (new level). Game principle : • the ball is moving through the screen, rebounding on different elements. When it hits a brick, the brick disappears and your performance increases. -
Page 37: Settings
Settings menu allows you to customise your phone. Settings To select the different ringer melodies and alert Sounds beeps. To set the display parameters: contrast, animation, Display backlighting and zoom To manage security: PIN codes, keypad lock, Security restrictions, etc. To set the time and date, change the clock display mode. -
Page 38: Key Tones
Creating a 20 melody: This option allows you to compose a melody with up to 66 notes. You select the required notes on the keys from you can change the notes up or down in semitones. You can change notes to flats by the key or to sharps by the you will hear the note and the corresponding effect. -
Page 39: Display
Organiser alerts menu allows you to activate or deactivate an alert when an event is due. Organiser alert Battery low alert menu allows you to activate or deactivate an alert which informs you that the Battery low alert battery is low and requires recharging. New SMS tone menu allows you to activate or deactivate an alert tone each time you receive New SMS tone... -
Page 40: Security
Contrast menu allows you to choose among 5 levels of Contrast contrast. Security menu ensures the security of your phone by Security locking the keypad, limiting calls to public numbers, prohibiting specific incoming and outgoing calls, activating security via PIN codes and changing those PIN codes. Keypad lock menu allows you to activate or deactivate the keypad lock. -
Page 41: Call Barring
Delete menu allows you to delete the number and selected name. Delete Call barring menu allows you to limit the use of your phone to specific calls. This function Call barring is network dependent and requires a call barring password supplied by your service provider. This carousel allows you to bar Outgoing menu... -
Page 42: Time And Date
Time and date menu allows you to set the time and date and Time and date choose the clock display format. Clock display option allows you to select analogue or Clock display digital time formats. Analogue option allows you to display the time on the Analogue idle screen using a clock face. -
Page 43: Accessories
Advanced menu mode provides you with access to all the features of your phone. Advanced menu Accessories menu becomes available the first time an Accessories accessory is plugged in (car kit). It allows you to set the parameters linked to the accessories. Car melodies option allows you to select the incoming call Car melodies... -
Page 44: Hotkeys
Hotkeys menu allows to set a direct access to several Hotkeys functions through a simple long key press (in Advanced mode only). To program a Hotkey, select a key in the list (from carousel displayed on the screen. The menu and the key to call your voice mailbox. -
Page 45: Network
Creates an event in the organiser menu. Add organiser event Displays the event list in the menu. Show events Records a voice memo. Record voice memo Plays the voice back. Play voice memo Forwards all calls to the voice mailbox. Fwd to voice mail Direct access to Brick game Brick Game... -
Page 46: Call Forward
Call forward menu allows you to divert incoming voice, fax or data calls either to a number Call forward in your Names list or to your mailbox. CALL TYPE Voice calls Fax calls Data calls FORWARD OPTION Unconditional Conditional no reply or not reachable or busy No reply No reachable... -
Page 47: Any Key Answer
The phone shall emit one beep at the beginning of each attempt and one special beep if the connection is successful. Any key answer menu allows you to accept a call by pressing any key, except the Any key answer key is used to reject a call (in Advanced mode only). -
Page 48: Quick Settings
Quick settings menu allows you to access a group of Quick settings predefined settings. You can use these quick settings to adapt your phone to your environment. You can also associate a quick setting with a Hotkey (see Hotkeys, page 41). Any change of parameter you may have made in a given quick setting are lost when you select an other quick settings except for the normal setting. -
Page 49: Use Of Network Services
Use of network services Additional GSM network services (GSM strings) The phone supports standard GSM strings. These can be sent from the keypad to the network. They are used to activate all supplementary services provided by the network (see your service provider). -
Page 50: Making A Second Call
Interrogating your answering machine (example): To hear all messages (code 3, say) on your answering machine (password 8421) at phone number 12345678, you could call: The phone dials 12345678 and waits for the call to connect. When connected, the phone transmits 8421 (the password), pauses 2.5 seconds, and then sends the last digit. -
Page 51: Answering A Second Call
Answering a second call You are able to receive another call when already in communication (if this feature is available on your network). When you receive a second call the phone emits an alert beep and the screen displays Call waiting •... -
Page 52: Conference Call
Conference Call The user can activate the conference call by making consecutive outgoing calls, or create it from a multiparty call context. The user may have up to five members at the same time. He can endd the conference with When making consecutive outgoing calls, first initiate a normal call with the first number of the conference. -
Page 53: Precautions
Radio wave safety Your cellular phone is a radio transmitter/receiver. When it is switched on, it transmits and receives radio waves in the frequency ranges of 880MHz to 960MHz. The GSM network controls the power at which the phone transmits. This varies between 0.02 watt and 2 watts. Public concern has been focused for some time on the possible health hazards for users of cellular phones. -
Page 54: Battery Safety
accessories makes all guarantees null and void. Your phone manufacturer will not be held liable for any damage resulting from the use of accessories, other than your phone manufacturer’s accessories. • Do not use battery chargers other than those specified in the manufacturer’s catalogue. The use of another charger may be dangerous and will invalidate any type approval given to the phone. -
Page 55: Use While Driving
Please remember to observe the local regulations regarding the disposal of your packaging materials, exhausted batteries and old phone and where possible promote their recycling. Philips has marked the battery and packaging with standard symbols designed to promote the recycling and appropriate disposal of your eventual waste. Battery: •... -
Page 56: Maintenance
Your phone will give you years of trouble-free service if you give it a little care and attention. Look after it carefully, keep it clean and dry, and regularly discharge and charge the batteries. Looking after your phone Your phone is a highly sophisticated electronic device. Treat it with care. •... -
Page 57: Troubleshooting
Move your phone to a place where the temperature is in the range and wait a few minutes before re-charging. Unplug the charger and use a Philips Authentic Accessory. Your phone is configured to work only with your service provider’s SIM card. Please contact your service provider to get further informations. - Page 58 Problem Difference between a long press and a short press on numeric keypad. The time and the date are reset. Your phone does not display the phone number of incoming calls. When attempting to use a feature in the menu, the mobile displays allowed When trying to send a...
-
Page 59: Philips Authentic Accessories
Philips Authentic Accessories "When Performance Counts ... Philips Authentic Accessories are Designed to Maximize the Performance of Your Philips Phone." BATTERIES Slim Battery: • A Lightweight power pack-easy to insert and • Powerful Lithium Ion battery delivers at least 155 mins of talk time or 9 days of standby time*. -
Page 60: Desktop Charger
• Full duplex hands-free car kit designed and engineered for convenient and safe hands- free use. • Features: Philips Authentic Cradle with built in Fax/Data Port, Voice recognition, Auto Volume Control, Auto Answer, Radio Mute, Additional Ringer Melodies and Privacy Mode (with optional handset). - Page 61 • Easy to install - simply plug into the vehicle power outlet. • Features : Philips Authentic Phone Cradle, Volume and Privacy mode and Battery Charger. Hands-Free Headset • Use your phone under almost any condition with this hands-free very mobile solution.
- Page 62 To maximize the performance of your phone and not void the warranty, always purchase Philips Authentic Accessories that are specially designed for use with your phone. Philips Consumer Communications cannot be held liable for any damage due to use with non authorised accessories.
-
Page 63: Index
accessories accumulated call timers accumulated cost activating car kit command activating network services advanced menu alarm clock alarm system animation answering a call answering a second call answering a third call antenna any key answer auto answer auto answer option auto redial option auto save option auto save SMS... - Page 64 earpiece earpiece volume easy hands-free car kit emergency call emotion icons entering characters entering phone numbers events extra options menu extras fast travel charger fax number tag flash dialling forwarding calls full duplex hands-free car kit game GSM strings hands-free car kit headset headset quick setting holding a call...
- Page 65 names Names list add a flash dial add a voice tag adding an entry call list calling from consulting copying from the call list deleting an entry finding an entry modifying an entry sending a SMS from network network menu network registration new SMS tone normal...
- Page 66 slim battery SMS centre SMS settings SOS call sounds spare batteries speakers storing a message storing a name storing a number storing a number from the Call list switching on/off symbols table of characters table of emotion icons data number fax number voice number text entry...