D-Link DSL-200 Quick Installation Manual
Usb
Hide thumbs
Also See for DSL-200:
- User manual (50 pages) ,
- Manual (8 pages) ,
- Quick installation manual (3 pages)
Advertisement
Quick Links
Download this manual
See also:
User Manual
This product can be set up
using any current web
browser, i.e., Internet Explorer
6 or Netscape Navigator 6.2.3.
Before Your Begin
This Quick Installation Guide gives step-by-step instructions for setting up the D-Link
DSL-200 ADSL Modem. The model you have purchased may appear slightly
different from those shown in the illustrations. For more detailed information about
the ADSL Modem, its components, making network connections and technical
specifications, please refer to the User's Manual included with your ADSL Modem.
Check Your Package Contents
These are the items included with your DSL-200 purchase:
©2006 D-Link Systems, Inc. All rights reserved. Trademarks or registered trademarks are the property of
their respective holders. Software and specifications are subject to change without notice.
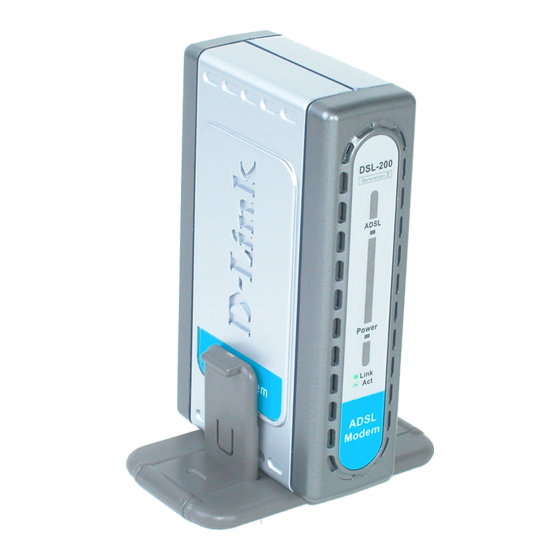
•DSL-200 ADSL Modem (USB interface)
•CD ROM include Driver and User's Guide
Quick Installation Guide
•
•USB Cable
•Phone Cable
USB ADSL Modem
If any of the above items are missing,
please contact your reseller.
D-Link DSL-200
Advertisement

Related Manuals for D-Link DSL-200


Summary of Contents for D-Link DSL-200
-
Page 1: Quick Installation Guide
•Phone Cable If any of the above items are missing, please contact your reseller. ©2006 D-Link Systems, Inc. All rights reserved. Trademarks or registered trademarks are the property of their respective holders. Software and specifications are subject to change without notice. - Page 2 1.1 Windows 98SE/ME 1) Insert the DSL-200 Installation CD into the CD-ROM drive. The system should detect the installation program and run the program automatically. If installation does not begin automatically after a few seconds, find the autorun.exe icon located on the CD and double-click it.
- Page 3 2) Choose the appropriate driver from the driver list and click it. A notification message will appear indicating that the setup process has begun. Choose this driver and click it 3) The Welcome window will appear. Make sure you have quit all other programs and click Next.
- Page 4 4) In the Select Service Provider window, select Other Service Provider and click Next. Click Next. 5) In the Select Driver Type window, choose the driver that best suits your ADSL connection, and then click Next. Select WAN Driver Driver. Click Next.
- Page 5 6) In the Communication Settings window you must provide the PVC settings, Encapsulation method and Modulation method for configuring the Modem. Type in the VPI and VCI values in their respective fields. 7) In the same window, select the appropriate Encapsulation method from the drop-down menu.
- Page 6 9) The Ready to Install window appears. Click Next to copy the needed driver files. Click Next. 10) After clicking Next, the Installing screen below will appear notifying you that your computer is downloading files and preparing for installation. Wait for installation.
- Page 7 11) After the files are downloaded, another Installing screen will prompt you to plug your modem into your computer. Plug the rectangular end of the USB cable into the USB port of your PC, and then plug the square end of the USB cable into the USB port of the ADSL Modem.
- Page 8 Please insert Win 98 CD-ROM now. 13) The Found New Hardware screen will appear notifying you that your computer has detected the modem and is currently installing it. 14) At the end of this process, the Reboot screen will appear prompting you to restart your computer.
- Page 9 Upon restarting your computer, a new icon (two arrows) will appear in the System Tray. If you are using PPP (WAN driver only) the D-Link Dial-up PPP Connection icon will appear on your desktop after restarting.
- Page 10 1.2 Windows 2000/XP 1) Insert the DSL-200 Installation CD into the CD-ROM drive. The system should detect the installation program and run the program automatically. If installation does not begin automatically after a few seconds, find the autorun.exe icon located on the CD and double-click it. To view the contents of the CD, open My Computer from the desktop, and right-click on your CD-ROM.
- Page 11 3) The Welcome window will appear. Make sure you have quit all other programs and click Next. Click Next. 4) In the Select Service Provider window, select Other Service Provider and click Next. Click Next.
- Page 12 5) In the Select Driver Type window, choose the driver that best suits your ADSL connection, and then click Next. Select WAN Driver Driver. Click Next. In the Communication Settings window you must provide the PVC settings, Encapsulation method and Modulation method for configuring the Modem. Type in the VPI and VCI values in their respective fields.
- Page 13 Enter your and VCI. Select your Encapsulation. Select your Modulation. Click Next 9) The Ready To Install window appears. Click Next to copy the needed driver files. Click Next.
- Page 14 After clicking Next, the Installing screen below will appear notifying you that your computer is downloading files and preparing for installation. Wait for installation. After the files are downloaded, another Installing screen will prompt you to plug your modem into your computer. Plug the rectangular end of the USB cable into the USB port of your PC, and then plug the square end of the USB cable into the USB port of the ADSL Modem.
- Page 15 After finishing the installation procedure, a new icon (two arrows) will appear in the System Tray. If you are using PPP (WAN driver only) the D-Link Dial-up PPP Connection icon will appear on your desktop after installing.
-
Page 16: Windows Xp 64Bit
1.3 Windows XP 64bit 1) Insert the DSL-200 Installation CD into the CD-ROM drive. The system should detect the installation program and run the program automatically. If installation does not begin automatically after a few seconds, find the autorun.exe icon located on the CD and double-click it. - Page 17 3) The Welcome window will appear. Make sure you have quit all other programs and click Next. Click Next. 4) In the Select Service Provider window, select Other Service Provider and click Next. Click Next.
- Page 18 5) In the Select Driver Type window, choose the driver that best suits your ADSL connection, and then click Next. Select ATM, WAN, Driver. Click Next. 6) In the Communication Settings window you must provide the PVC settings, Encapsulation method and Modulation method for configuring the Modem. Type in the VPI and VCI values in their respective fields.
- Page 19 Enter your and VCI. Select your Encapsulation. Select your Modulation. Click Next 9) The Ready To Install window appears. Click Next to copy the needed driver files Click Next...
- Page 20 10) After clicking Next, the Installing screen below will appear notifying you that your computer is downloading files and preparing for installation. Wait for installation. 11) After the files are downloaded, another Installing screen will prompt you to plug your modem into your computer. Plug the rectangular end of the USB cable into the USB port of your PC, and then plug the square end of the USB cable into the USB port of the ADSL Modem.
- Page 21 After finishing the installation procedure, a new icon (two arrows) will appear in the System Tray. If you are using PPP (WAN driver only) the D-Link Dial-up PPP Connection icon will appear on your desktop after installing.
-
Page 22: Making A Connection
Making a Connection Fixed IP Your need to specify the fixed IP address and other required settings in this window to perform your connection. Enter your IP address, Subnet mask and Default gateway. Enter your Preferred and/or Alternate DNS server. Click OK. - Page 23 Dynamic IP Double click the icon named Connect D-Link Dial-Up PPP Connection on desktop. Enter user name and password provided by the service provider to perform the connection. Enter your User name and Password. Click Dial.
-
Page 24: Verify The Adsl Connection
Verify the ADSL Connection Before you continue to the final step, make sure that the ADSL connection has been established. This can be done easily using the Modem’s ADSL connection monitoring feature described below. Desktop Monitoring A new icon will appear in the System Tray of your desktop. These colored arrows will help you monitor the status of your ADSL connection. - Page 25 MEMO...
-
Page 26: Technical Support
Technical Support You can find software updates and user documentation on the D-Link website. Tech Support for customers within Australia: D-Link Technical Support over the Telephone: 1300-766-868 Monday to Friday 8:00am to 8:00pm EST Saturday 9:00am to 1:00pm EST D-Link Technical Support over the Internet: http://www.dlink.com.au... - Page 27 You can find software updates and user documentation on the D-Link website. Tech Support for customers within South Eastern Asia and Korea: D-Link South Eastern Asia and Korea Technical Support over the Telephone: +65-6895-5355 Monday to Friday 9:00am to 12:30pm, 2:00pm-6:00pm...
- Page 28 Technical Support You can find software updates and user documentation on the D-Link website. Tech Support for customers within India D-Link Technical Support over the Telephone: +91-22-26526741 +91-22-26526696 –ext 161 to 167 Monday to Friday 9:30AM to 7:00PM D-Link Technical Support over the Internet: http://ww.dlink.co.in...
- Page 29 Technical Support You can find software updates and user documentation on the D-Link website. D-Link provides free technical support for customers for the duration of the warranty period on this product. Customers can contact D-Link technical support through our web site or by phone.
- Page 30 Technical Support You can find software updates and user documentation on the D-Link website. Tech Support for customers within the U.A.E & North Africa: D-Link Technical Support over the Telephone: (971) 4-391-6480 (U.A.E) Sunday to Wednesday 9:00am to 6:00pm GMT+4 Thursday 9:00am to 1:00pm GMT+4 D-Link Middle East &...
- Page 31 You can find software updates and user documentation on the D-Link website. Tech Support for customers within South Africa and Sub Sahara Region: D-Link South Africa and Sub Sahara Technical Support over the Telephone: +27-12-665-2165 08600 DLINK ( For South Africa only )
- Page 32 Technical Support You can find updates and user documentation on the D-Link website Tech Support for Latin America customers: D-Link Technical Support over the followings Telephones: Argentina: 0800-666 1442 Monday to Friday 09:00am to 22:00pm Chile: 800-214 422 Monday to Friday 08:00am to 21:00pm...