
Related Manuals for Philips DVR2104


Summary of Contents for Philips DVR2104
-
Page 1: Digital Video Recorder
DVR2104 Network Hardware Compression MPEG4 Stand Alone Digital Video Recorder User Guide PDF 文件使用 "pdfFactory Pro" 试用版本创建 www.fineprint.cn... -
Page 2: Safety Precautions
SAFETY PRECAUTIONS Power l This video recorder is used on 110V-240V AC and connected to the ground. Confirm the voltage before using. l No using the machine for a long time, cut off the machine power supplies, and pulls out the plug from the AC outlet. Caution l There are two modes of video output: one is BNC, and the other is VGA. - Page 3 The correct order is as follow: clear assistant disc→clear master disc→out setting →save→turn off→restart→ other setting. Advice Record the television program or program of VCD/ DVDs, please remember absolutely not to infringe on the right of work power and others of the third parties. PDF 文件使用...
- Page 4 The characteristic and the function of this video recorder Characteristic: Use PHILIPS (PNX1500 CMOS DSP chip), offer more high compression and definition. The PSOS that separate from PC completely is used. Start quickly, auto protects and auto resume. The operation is in brief; use convenience, and the operation are similar with VCR.
- Page 5 Overwrite Auto alert setting for surplus content. Record before alert function, store in EMS memory Dormancy function is set to reduce the quantity of heat and prolong the use. Search Search on time/date/list/exact. Search on 1 HD singly, also display the list corresponding. Normal/alert record search.
- Page 6 Front panel control IR remote control. Network control Back up Through network Through USB2.0 Upgrade Through USB……… Through network PDF 文件使用 "pdfFactory Pro" 试用版本创建 www.fineprint.cn...
-
Page 7: Table Of Contents
TABLE OF CONTENTS FEATURE AND FUNCTION. ……………………………………..……… …. 1 simple system operation 1.RECORD OPERATION 1-1.MANUAL……………………… ………………………………………… …3 1-2.ALERT... 3 1-3.MOTION DETECT ... 3 1-4.SCHEDULING... 3 1-5.COMBINATION RECORD ... 4 User guide 1.switch on... 5 2.shut down ... 5 3.Normal record... 5 4.Warning system... - Page 8 3. general setting... 13 4. record setting... 14 5.alert setting ... 16 6. schedule setting ... 18 7. record searching... 19 8. record copy... 20 9.Motion detect ... 21 10. system management ... 22 11. privilege (Option) setting ... 24 12.
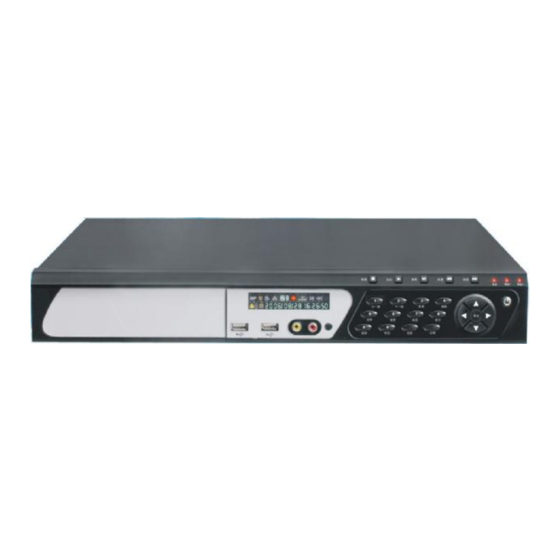
- Page 9 front of the panel map ○ 1 Alert LED ○ 2 Timming LED ○ 3 Date ○ 4 Time ○ 5 P .T. Z ○ 6 Alert ○ 7 HDD PDF 文件使用 "pdfFactory Pro" 试用版本创建 System connection Remote Video Out ○...
- Page 10 Back panel and connection terminal ① ③ ② Audio input 1,2,3,4 ① Audio output 1,2 ② Video input 1,2,3,4 ③ Video output 1,2 ④ VGA interface ⑤ Net connect RJ45 ⑥ RS232 interface ⑦ Alert input/output signal and RS-485 signal terminal. the order from left ⑧...
-
Page 11: Record Operation
1. Record operation Record operation can be divided into Manual, Auto, Alert, Motion and the combination operation of above. Manual “ record setting”, Press button “quantity” . “=” press the mark of record appear on the VFD and monitor. manual belong to the normal record. “=”... -
Page 12: 1-5.Combination Record
the left of the VFD display area and Press" scheduling “and input manager's password to cancel the scheduling of record. Combination record The combination record can be use according to need. Such as the scheduling detects record, it needs to combine the scheduling record setting and detect record setting. -
Page 13: User Guide 1.Switch On
Do not shut off the power supply when the system is under recording backup; otherwise the finished records will be lose. Pull out the power cable from the AC outlet if the DVR will not be used for a long time. Normal recording Connect all power supplies of related equipments before recording,make... -
Page 14: Warning System
The manual and schedule recordings are normal ones. The alert recording is decided by DVR, the manual recording is casual, and the auto recording is scheduled. -
Page 15: Motion Detect
When “pre-alert recording” is no set to be “0”, press “alert” and the system will be in alert. When there is alert, the system will record the pre-alert condition. When pre-alert recording” is set to be “0”, the system won’t be in alert, and the system won’t record the pre-alert condition. -
Page 16: Schedule Record
Pre-set “schedule recording parameter setting”, and press “schedule” on the front panel to start schedule. The signal“¹” will show. It is an auto way for recording, and it cannot be used with manual recording at the same time. When you press “schedule”, any other button won’t be effective except “guard”, “vision”, “play”... -
Page 17: Searching Play
Continually press 8 or7, and the system will have 6 levels of forwarding and 5 levels of reviewing to shift the speed. Searching play Video recorder can perform searching play when it is playing. There are two kinds of searching play: searching depends on time or on the paragraph. The former is through window setting and pressing keys on the front panel performs the later. -
Page 18: Password
decides what settings and operations the operator can do. The manager’s and operator’s password can be set and modified in “authority”, after inputting the old password. The new password should be input for twice. The system will only accept the new password when they are the same. You can choose any eight numbers from 0 to 9 as the password, and input them through the number keys in the front panel. -
Page 19: The Choice And Format Of Disc
two HDDs (the capacity of HDD can be different.) When installing the second HDD, please set it “slave” as the instruction of the manufacture. Otherwise, the system won’t work. The second HDD can work as an “assistant disc” to store information and operate. -
Page 20: Record Searching
Record searching Press “searching”, and the list will appear. Searching in the paragraph: move “ é ” or “ ê ” to choose certain recording in the listed files, press “searching” again, the “searching in the paragraph” dialogue box will appear, input the beginning time and press “searching”, the system will begin to search in the paragraph Repeatedly watching function: move “é... -
Page 21: System Setting
Before using video recording, set the system according to own needs, otherwise the video recorder will perform following the settings in the factory. (For further information, please read “system management”) Enter menu In the live monitor, press “option” in the front panel. If the system has password, “Please Input password”... -
Page 22: Record Setting
General setting is mainly about time, date and network IP settings. Time and date setting: set the recording time. Press the number keys and input the year, month, date, hour, minute, and second to check the time. After that, press ”setting” and the time setting gets into effect at once. - Page 23 Recording setting is used to set the baud rate, frame rate and working mode of HDD when using manual recording. Choose picture: choose from ”all”, “picture 1”, “picture 2”,“picture 3”and “picture 4” to set the picture. Setting effect: when the user has chosen either one from the four pictures without pressing the “setting effect”, the system will play the four pictures instead of one.
-
Page 24: Alert Setting
The disk is full. If recording needed, choose one of the following steps: Press“clear”to stop the buzzer ringing and exit Status 5. Alert setting Move the cursor to “alert setting”, and press è to enter the following window: Alert setting is used to set the alert mechanism and the working parameter of the alert. - Page 25 period of time. Alert upload: the system will automatically stop uploading when it reaches the set time. Auto-inspect the sentries time: after setting it, the video recording will output an alert in the set time. It has to be cleared by hand. It is used to check whether the guard is on duty and whether the video recording is working well.
-
Page 26: Schedule Setting
6. Schedule setting Press ”option”, choose ”schedule setting” from the system setting menu, press è and enter the following window: Circle: (eight options) workday, weekday, Monday, Tuesday, Wednesday, Thursday, Friday, and Saturday. Workday, weekday, Monday and Tuesday can be set between Monday to Sunday; Wednesday, Thursday, Friday, and Saturday set as the date (month/date). -
Page 27: Record Searching
7. Record searching Press “option”, choose “recording searching” in the system menu press è to enter the following window: Recording searching is used to search the recording information. The user can choose the following options to search the information. Input the time: input the beginning and end time of the recording. Input the card NO.: input the bank card NO. -
Page 28: Record Copy
The video recording provides several kinds of information backup. The user can set the backup time, mode, category, facility and other parameters. Backup facility: USB, IDE, Network can be used as backup facilities. Backup mode: it is used to deal with the backup facility with the information on it. -
Page 29: Motion Detect
9.Detect Press “detect”, menu press è to enter the following window: Choose picture: picture 1, picture 2, picture 3, and picture 4. The picture can be set independently. Setting effect: when the user has chosen either one from the four pictures without pressing the “setting effect”, the system will play the four pictures instead of one. -
Page 30: System Management
independently. When setting, the picture and its number appear on the screen. User can also press “next picture” to choose the picture that needs setting. 13. Attention: The alert of information lost and screen cover will only be rang in the alert state. 10.system management Press “Manage”, choose “system management”... - Page 31 5. Default: also called pre-setting, it is the standard setting when the video recording is examined and left the factory, and it is used as the foundation of changing other settings. User can set it according to his own need. When the setting is in chaos or not up to the expectancy, press “get back the default”...
-
Page 32: Privilege (Option) Setting
8. Get back the information: if user inadvertently formats HDD and loses the information, he can get the information back. 9. Attention: be careful in this function. The company will not be responsible to the information lost or destroyed because of wrong operation. 11.Authority Press “option”, choose “authority”... -
Page 33: Supplement Setting
default, the operator only gets the right of “recording searching”. Attention: be careful to authorize in order to keep the video recording work well. 12.Notes: Press “option”, choose “assistant setting” in the system menu press è to enter the following window HDD:HDD information. -
Page 34: Display Of Running State
Display of running state Besides displays on the front panel, this machine can also show the date, time and the running state on the monitor screen. Display of running state There are some signals on the screen, as below: alram quality Date&time state... -
Page 35: Vision Of Hdd Running
DISPLAY OF HDD USAGE when the basic function of running and time has shown on screen,press “display”will appear a color signal to show the usage of HDD. Alert record used 13.62 The color means the percent of the usage HDD; you should see according to the direction which arrow direct. -
Page 36: Standard And Para
Item Compression standard Video signal Video input Video output Audio input Audio output Alarm input Alarm output Alarm mode Network mode Backup mode Resolution Hard disk Code function Power source Power Environment temperature weight Exterior size Notice: will not notice when there are any change. PDF 文件使用... -
Page 37: External Dimension
Model. PDF 文件使用 "pdfFactory Pro" 试用版本创建 Exterior 435mm External dimension (L)x(W)x(H) mm 435x360x63 Package contents Description POWER CORE ADAPTOR USER GUIDE (CD) www.fineprint.cn size Weight (kg) Quantity...