Table of Contents
Advertisement
Advertisement
Table of Contents

Related Manuals for Asus CM-32


Summary of Contents for Asus CM-32
-
Page 1: User Guide
User Guide CM-32 Wireless-AC2600 DOCSIS 3.0 Cable Modem Router... - Page 2 Product warranty or service will not be extended if: (1) the product is repaired, modified or altered, unless such repair, modification of alteration is authorized in writing by ASUS; or (2) the serial number of the product is defaced or missing.
-
Page 3: Table Of Contents
Table of contents Getting to know your cable modem router Package contents .................6 Your cable modem router ............6 Positioning your router ..............9 Product label ................10 Hardware Setup ................. 10 1.5.1 Setup Requirements ............10 1.5.2 Setting up your cable modem router ......11 Connecting to the Internet Activate your Internet service .......... - Page 4 Table of contents Configuring the Advanced Settings Wireless ..................44 4.1.1 General ..................44 4.1.2 WPS ....................47 4.1.3 Wireless MAC Filter ...............49 4.1.4 RADIUS Setting ..............50 4.1.5 Professional ................51 LAN ....................53 4.2.1 LAN IP ..................53 4.2.2 DHCP Server ................54 4.2.3 Route ..................55 WAN ....................
- Page 5 Setting up your printer server ..........78 Download Master ..............83 5.4.1 Configuring Bit Torrent download settings ....84 5.4.2 NZB settings ................85 Troubleshooting Basic Troubleshooting ............. 86 Frequently Asked Questions (FAQs) ........89 Appendices Notices .......................98 ASUS Contact information ..............110 Networks USA Hotline Information ..........110...
-
Page 6: Getting To Know Your Cable Modem Router
Support CD ( Manual & Device Discovery utility NOTES: • If any of the items is damaged or missing, contact ASUS for technical inquiries and support, Refer to the ASUS Support Hotline list at the back of this user manual. • Keep the original packaging material in case you would need future warranty services such as repair or replacement. 1.2 Your cable modem router USB 3.0... - Page 7 Downlink LED Off: No power. Flashing: Scanning for downstream cable signal. White: Locked on DOCSIS 3.0 downstream signal. Blue: Locked on DOCSIS 2.0 downstream signal. Uplink LED Off: No power or not locked on downstream. Flashing: Ranging White: Ranging complete DOCSIS 3.0 bonded upstream. Blue: Ranging complete DOCSIS 2.0 bonded upstream.
-
Page 8: Specifications
WAN (Internet) port Connect a network cable into this port to establish WAN connection. Coaxial port Connect a coaxial cable into this port to establish DOCSIS connection. Power (DC-IN) port Insert the bundled AC adapter into this port and connect your router to a power source. -
Page 9: Positioning Your Router
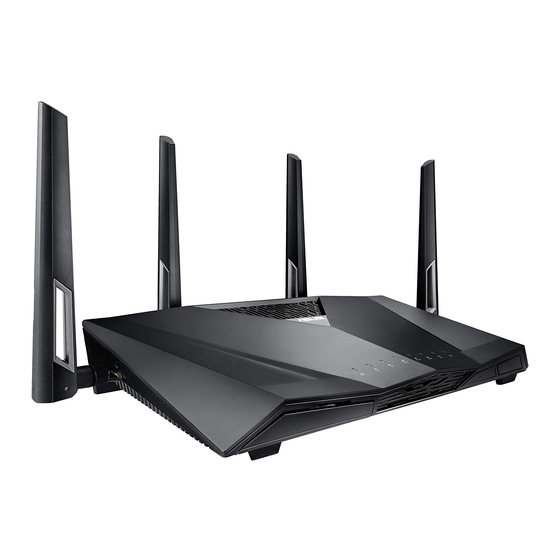
1.3 Positioning your router For the best wireless signal transmission between the cable modem router and the network devices connected to it, ensure that you: • Place the cable modem router in a centralized area for a maximum wireless coverage for the network devices. • Keep the device away from metal obstructions and away from direct sunlight. • To prevent signal interference or loss, keep the device away from 802.11g or 20MHz only Wi-Fi devices, 2.4GHz computer peripherals, Bluetooth devices, cordless phones, transformers, heavy-duty motors, fluorescent lights, microwave ovens, refrigerators, and other industrial equipment. • Always update to the latest firmware. Visit the ASUS website at http://www.asus.com to get the latest firmware updates. • To ensure the best wireless signal, orient the four detachable antennas as shown in the drawing below. -
Page 10: Product Label
Google Chrome NOTES: • If your computer does not have built-in wireless capabilities, you may install an IEEE 802.11a/b/g/n/ac WLAN adapter to your computer to connect to the network. • CM-32 is certified by Comcast, Charter, Time Warner, and Cox cable services. • Some IEEE 802.11n devices that you want to connect to your network may or may not support 5GHz band. Refer to the device's manual for specifications. • The Ethernet RJ-45 cables that will be used to connect the network devices should not exceed 100 meters. -
Page 11: Setting Up Your Cable Modem Router
1.5.2 Setting up your cable modem router You can connect your CM-32 as a cable modem router or use it as a standalone Wi-Fi router. IMPORTANT! Use a wired connection when setting up your cable modem router to avoid possible setup problems. - Page 12 6. Click Skip Setup Wizard to go to the Network Map (if you have set up before, ignore this step). 7. Go to Advanced Settings > WAN > Dual WAN, select "Ethernet" as primary WAN and click Apply. 8. You can now use CM-32 as a standalone wireless router.
-
Page 13: Connecting To The Internet
I f your CM-32 is visible to your ISP but there is still no Internet connection, reboot your CM-32 and check the online status again. If your CM-32 is still not visible to your ISP or your ISP can not provide technical support, do the following: 1) G o to router.asus.com or http://192.168.1.1. -
Page 14: Specify The Starting Frequency
2. Launch your web browser and go to http:// router.asus.com or http://192.168.1.1. 3. Enter default login name "admin" and password "admin" when prompted. 4. On the welcome page, click Go to proceed. 5. Set up a new login name and password for your CM-32, then click Next. - Page 15 5. Select Static IP, click Next. 6. Enter the IP address and DNS information provided by your ISP, click Next. NOTE: CM-32 supports Automatic IP (DHCP) and Static IP Internet type only.
- Page 16 7. Confirm the wireless network name (SSID) and security key for your 2.4GHz and 5 GHz wireless connection. You can keep the default wireless settings or assign new ones. Click Apply when done.
-
Page 17: Connecting To Your Wireless Network
2. Connect to your CM-32’s SSID and when prompted, enter the password. 3. If you have changed the CM-32’s SSID and password during the basic network setup process, enter the information you... - Page 18 1. Ensure that the 2.4 GHz and 5 GHz LEDs light up. 2. Launch your web browser and go to http:// router.asus.com or http://192.168.1.1. 3. Enter default login name "admin" and password "admin" or your personal login name and password if you have set.
-
Page 19: Configuring The General Settings
Configuring the General settings 3.1 Using the Network Map Network Map allows you to configure your network’s security settings, manage your network clients, and monitor your USB device. -
Page 20: Setting Up The Wireless Security Settings
3.1.1 Changing the wireless security settings CM-32 comes with a set of unique default wireless security settings. You can change the settings if you like to. To change the wireless security settings: 1. From the navigation panel, go to General > Network Map. - Page 21 3. On the Wireless name (SSID) field, key in a unique name for your wireless network. 4. From the Authentication Method dropdown list, select the authentication method for your wireless network. If you select WPA-Personal or WPA-2 Personal as the authentication method, key in the WPA-PSK key or security passkey. IMPORTANT! The IEEE 802.11n/ac standard prohibits using High Throughput with WEP or WPA-TKIP as the unicast cipher. If you use these encryption methods, your data rate will drop to IEEE 802.11g 54Mbps connection.
-
Page 22: Managing Your Network Clients
3.1.2 Managing your network clients To manage your network clients: 1. From the navigation panel, go to General > Network Map tab. 2. On the Network Map screen, select the Clients icon to display your network client’s information. 3. To block a client’s access to your network, select the client and click the open lock icon. -
Page 23: Monitoring Your Usb Device
3.1.3 Monitoring your USB device The ASUS cable modem router provides two USB ports for connecting USB devices or USB printer to allow you to share files and printer with clients in your network. NOTES: • To use this feature, you need to plug a USB storage device, such as a USB hard disk or USB flash drive, to the USB2.0 ports on the front and rear panel of your cable modem router. - Page 24 IMPORTANT! You first need to create a share account and its permission /access rights to allow other network clients to access the USB device via an FTP site/third-party FTP client utility, Servers Center, Samba, or AiCloud. For more details, refer to the section 3.5 Using the USB Application and 3.6 Using AiCloud in this user manual.
- Page 25 Safely removing the USB disk IMPORTANT: Incorrect removal of the USB disk may cause data corruption. To safely remove the USB disk: 1. From the navigation panel, go to General > Network Map. 2. In the upper right corner, click >...
-
Page 26: Creating A Guest Network
The Guest Network provides temporary visitors with Internet connectivity via access to separate SSIDs or networks without providing access to your private network. NOTE: CM-32 supports up to six SSIDs (three 2.4GHz and three 5GHz SSIDs). To create a guest network: 1. - Page 27 4. To change a guest’s settings, click the guest settings you want to modify. Click Remove to delete the guest’s settings. 5. Assign a wireless name for your temporary network on the Network Name (SSID) field. 6. Select an Authentication Method. 7.
-
Page 28: Using The Traffic Manager
3.3 Using the Traffic Manager 3.3.1 Managing QoS (Quality of Service) and bandwidth Quality of Service (QoS) allows you to set the bandwidth priority and manage network traffic. To set up QoS: 1. From the navigation panel, go to General > Traffic Manager > QoS tab. - Page 29 NOTES: • Traditional QoS and Bandwidth limiter do not work simultaneously. • To fill in the source IP or MAC, you can: Enter a specific IP address, such as "192.168.122.1". Enter IP addresses within one subnet or within the same IP pool, such as “192.168.123.*”, or “192.168.*.*”...
-
Page 30: Monitoring Traffic
3.3.2 Monitoring Traffic The traffic monitor function allows you to access the bandwidth usage and speed of your Internet, wired, and wireless networks. It allows you to monitor network traffic even on a daily basis. NOTE: Packets from the Internet are evenly transmitted to the wired and wireless devices. -
Page 31: Setting Up Parental Control
3.4 Setting up Parental Control Parental Control allows you to control the Internet access time. Users can set the time limit for a client’s network usage. To use the parental control function: 1. From the navigation panel, go to General > Parental control. 2. -
Page 32: Using The Usb Application
USB hard disk or USB flash drive, in the USB 2.0 ports on the front and rear panel of your cable modem router. Ensure that the USB storage device is formatted and partitioned properly. Refer to the ASUS website at http://event. asus.com/2009/networks/disksupport/ for the file system support table. - Page 33 3. Select the access rights that you want to assign to the clients accessing your shared data. 4. Create your domain name via the ASUS DDNS services, read the Terms of Service and then select I will use the service and accept the Terms of service and key in your domain name.
-
Page 34: Using Servers Center
Server to install to your USB disk. NOTE: Before using the DLNA Media Server function, connect your device to the CM-32’s network. Then, go to General > USB application > Servers Center > Media Servers tab to configure. Refer to the following for... - Page 35 • Enable DLNA Media Server: Select ON/OFF to enable/ disable the DLNA Media Server. • Enable iTunes Server: Select ON/OFF to enable/disable the iTunes Server. • Media server directory: Select your media server directory and click Apply to share files from the USB disk to media devices in the network.
- Page 36 2. Follow the steps below to add, delete, or modify an account. To create a new account: a) Click to add new account. b) In the Account and Password fields, key in the name and password of your network client. Retype the password to confirm.
- Page 37 3. From the list of folders, select the type of access permission that you want to assign for specific folders: • R/W: Select this option to assign read/write access. • R: Select this option to assign read-only access. • No: Select this option if you do not want to share a specific file folder.
- Page 38 To use FTP Share service: Ensure that you have set up your FTP server through NOTES: AiDisk. For more details, refer to the section 3.5.1 Using AiDisk. 1. From the navigation panel, click General > USB application > Servers Center > FTP Share tab. 2.
-
Page 39: Using Aicloud
To use AiCloud: 1. From Google Play Store or Apple Store, download and install the ASUS AiCloud app to your smart device. 2. Connect your smart device to your network. Follow the instructions to complete the AiCloud setup process. - Page 40 1. Insert a USB storage device into the wireless router. 2. Turn on Cloud Disk. 3. Go to https://router.asus.com and enter the router login account and password. For better user experience, we recommend that you use Google Chrome or Firefox.
- Page 41 4. You can now start accessing Cloud Disk files on devices connected to the network. NOTE: When accessing the devices that are connected to the network, you need to enter the device’s user name and password manually, which will not be saved by AiCloud for security reason.
-
Page 42: Smart Access
3.6.2 Smart Access The Smart Access function allows you to easily access your home network via your router’s domain name. NOTES: • You can create a domain name for your router with ASUS DDNS. For more details, refer to section 4.3.6 DDNS. • By default, AiCloud provides a secure HTTPS connection. Key in https:// [yourASUSDDNSname].asuscomm.com for a very secure Cloud Disk and Smart Access usage. - Page 43 1. Launch AiCloud, click Smart Sync > Go. 2. Select ON to enable Smart Sync. 3. Click Add new account. 4. Enter your ASUS WebStorage account password and select the directory that you want to sync with WebStorage. 5. Click Apply.
-
Page 44: Configuring The Advanced Settings
Configuring the Advanced Settings 4.1 Wireless 4.1.1 General The General tab allows you to configure the basic wireless settings. To configure the basic wireless settings: 1. From the navigation panel, go to Advanced Settings > Wireless > General tab. 2. Select 2.4GHz or 5GHz as the frequency band for your wireless network. - Page 45 4. In the Hide SSID field, select Yes to prevent wireless devices from detecting your SSID. When this function is enabled, you would need to enter the SSID manually on the wireless device to access the wireless network. 5. Select any of these wireless mode options to determine the types of wireless devices that can connect to your wireless router: •...
- Page 46 • WPA/WPA2 Personal/WPA Auto-Personal: This option provides strong security. You can use either WPA (with TKIP) or WPA2 (with AES). If you select this option, you must use TKIP + AES encryption and enter the WPA passphrase (network key). • WPA/WPA2 Enterprise/WPA Auto-Enterprise: This option provides very strong security.
-
Page 47: Wps
4.1.2 WPS WPS (Wi-Fi Protected Setup) is a wireless security standard that allows you to easily connect devices to a wireless network. You can configure the WPS function via the PIN code or WPS button. NOTE: Ensure that the devices support WPS. To enable WPS on your wireless network: 1. - Page 48 Note: WPS supports authentication using Open System, WPA-Personal, and WPA2-Personal. WPS does not support a wireless network that uses a Shared Key, WPA-Enterprise, WPA2-Enterprise, and RADIUS encryption method. 3. In the WPS Method field, select Push Button or Client PIN code.
-
Page 49: Wireless Mac Filter
4.1.3 Wireless MAC Filter Wireless MAC filter provides control over packets transmitted to a specified MAC (Media Access Control) address on your wireless network. To set up the Wireless MAC filter: 1. From the navigation panel, go to Advanced Settings > Wireless >... -
Page 50: Radius Setting
4.1.4 RADIUS Setting RADIUS (Remote Authentication Dial In User Service) Setting provides an extra layer of security when you choose WPA- Enterprise, WPA2-Enterprise, or Radius with 802.1x as your Authentication Mode. To set up wireless RADIUS settings: 1. Ensure that the wireless router’s authentication mode is set to WPA-Enterprise, WPA2-Enterprise, or Radius with 802.1x. -
Page 51: Professional
4.1.5 Professional The Professional screen provides advanced configuration options. NOTE: We recommend that you use the default values on this page. In the Professional Settings screen, you can configure the following: • Frequency: Select the frequency band that the professional settings will be applied to. - Page 52 • Date to Enable Radio (weekend): You can specify which days of the weekend wireless networking is enabled. • Time of Day to Enable Radio: You can specify a time range when wireless networking is enabled during the weekend. • Set AP isolated: The Set AP isolated item prevents wireless devices on your network from communicating with each other.
-
Page 53: Lan
• Wireless multicast forwarding: Select Enable to allow the wireless router to forward multicast traffic to other wireless devices that support multicast. Select Disable to prevent the router from forwarding multicast transmissions. • Enable WMM APSD: Enable WMM APSD (Wi-Fi Multimedia Automatic Power Save Delivery) to improve power management between wireless devices. -
Page 54: Dhcp Server
To modify the LAN IP settings: 1. From the navigation panel, go to Advanced Settings > LAN > LAN IP tab. 2. Modify the IP address and Subnet Mask. 3. When done, click Apply. 4.2.2 DHCP Server Your wireless router uses DHCP to assign IP addresses automatically on your network. -
Page 55: Route
4.2.3 Route If your network makes use of more than one router, you can configure a routing table to share the same Internet service. NOTE: We recommend that you do not change the default route settings unless you have advanced knowledge of routing tables. To configure the LAN Routing table: 1. - Page 56 3. In the Domain Name text box, enter a domain name for the wireless router. 4. In the IP Pool Starting Address field, key in the starting IP address. 5. In the IP Pool Ending Address field, key in the ending IP address.
-
Page 57: Wan
4.3 WAN 4.3.1 Internet Connection The Internet Connection screen allows you to configure the settings of various WAN connection types. To configure the WAN connection settings: 1. From the navigation panel, go to Advanced Settings > WAN > Internet Connection tab. 2. - Page 58 Contact your ISP and update the MAC address associated with your ISP service. o Clone or change the MAC address of the ASUS wireless router to match the MAC address of the previous networking device recognized by the ISP.
-
Page 59: Dual Wan
2. Configure Primary WAN, Secondary WAN, check Failback if you need. 3. If necessary, you can enable Ping Time Watch Dog to monitor the connection between the CM-32 and the remote host. Click Apply to save. • Interval: the time interval between two ping packets. -
Page 60: Port Trigger
4.3.3 Port Trigger Port range triggering opens a predetermined incoming port for a limited period of time whenever a client on the local area network makes an outgoing connection to a specified port. Port triggering is used in the following scenarios: •... - Page 61 • Trigger Port: Specify a trigger port to open the incoming port. • Protocol: Select the protocol, TCP, or UDP. • Incoming Port: Specify an incoming port to receive inbound data from the Internet. • Protocol: Select the protocol, TCP, or UDP. NOTES: •...
-
Page 62: Virtual Server/Port Forwarding
Forwarding on your router allows PCs outside the network to access specific services provided by a PC in your network. NOTE: When port forwarding is enabled, the ASUS router blocks unsolicited inbound traffic from the Internet and only allows replies from outbound requests from the LAN. - Page 63 2. Configure the following settings below. When done, click Apply. • Enable Port Forwarding: Choose Yes to enable Port Forwarding. • Famous Server List: Determine which type of service you want to access. • Famous Game List: This item lists ports required for popular online games to work correctly.
- Page 64 • You will need a client outside your LAN but has Internet access (referred to as “Internet client”). This client should not be connected to the ASUS router. • On the Internet client, use the router’s WAN IP to access the server.
-
Page 65: Dmz
4.3.5 DMZ Virtual DMZ exposes one client to the Internet, allowing this client to receive all inbound packets directed to your Local Area Network. Inbound traffic from the Internet is usually discarded and routed to a specific client only if port forwarding or a port trigger has been configured on the network. -
Page 66: Ddns
DNS name rather than WAN IP address. • Server and Host Name: Choose ASUS DDNS or other DDNS. If you want to use ASUS DDNS, fill in the Host Name in the format of xxx.asuscomm.com (xxx is your host name). -
Page 67: Nat Passthrough
• Enable wildcard: Enable wildcard if your DDNS service requires one. NOTES: DDNS service will not work under these conditions: • When the wireless router is using a private WAN IP address (192.168.x.x, 10.x.x.x, or 172.16.x.x), as indicated by a yellow text. • The router may be on a network that uses multiple NAT tables. 4.3.7 NAT Passthrough NAT Passthrough allows a Virtual Private Network (VPN) connection to pass through the router to the network clients. -
Page 68: Ipv6
4.4 IPv6 This wireless router supports IPv6 addressing, a system that supports more IP addresses. This standard is not yet widely available. Contact your ISP if your Internet service supports IPv6. To set up IPv6: 1. From the navigation panel, go to Advanced Settings > IPv6. 2. -
Page 69: Vpn Server
4.5 VPN Server VPN (Virtual Private Network) provides a secure communication to a remote computer or remote network using a public network such as the Internet. NOTE: Before setting up a VPN connection, you would need the IP address or domain name of the VPN server you are trying to access. -
Page 70: Firewall
4.6 Firewall The wireless router can serve as a hardware firewall for your network. NOTE: The Firewall feature is enabled by default. 4.6.1 General To set up basic Firewall settings: 1. From the navigation panel, go to Advanced Settings > Firewall >... -
Page 71: Keyword Filter
To set up a URL filter: 1. From the navigation panel, go to Advanced Settings > Firewall > URL Filter tab. 2. On the Enable URL Filter field, select Enabled. 3. Enter a URL and click the button. 4. Click Apply. 4.6.3 Keyword filter Keyword filter blocks access to webpages containing specified keywords. -
Page 72: Network Services Filter
3. Enter a word or phrase and click the Add button. 4. Click Apply. NOTES: • The Keyword Filter is based on a DNS query. If a network client has already accessed a website such as http://www.abcxxx.com, then the website will not be blocked (a DNS cache in the system stores previously visited websites). -
Page 73: Ipv6 Firewall
Destination IP, Port Range, and Protocol. Click the button. 6. Click Apply. 4.6.5 IPv6 Firewall By default, your ASUS wireless router blocks all unsolicited incoming traffic. The IPv6 Firewall function allows incoming traffic coming from specified services to go through your network. -
Page 74: Administration
4.7 Administration 4.7.1 System The System page allows you to configure your wireless router settings. To set up the System settings: 1. From the navigation panel, go to Advanced Settings > Administration > System tab. 2. You can configure the following settings: •... -
Page 75: Restore/Save/Upload Setting
4.7.2 Restore/Save/Upload Setting To restore/save/upload cable modem router settings: 1. From the navigation panel, go to Advanced Settings > Administration > Restore/Save/Upload Setting tab. 2. Select the tasks that you want to do: • To restore to the default factory settings, click Restore, and click OK in the confirmation message. •... -
Page 76: System Log
4.8 System Log System Log contains your recorded network activities. NOTE: System log resets when the router is rebooted or powered off. To view your system log: 1. From the navigation panel, go to Advanced Settings > System Log. 2. You can view your network activities in any of these tabs: •... -
Page 77: Utilities
If Autorun is disabled, run setup.exe from the root directory of the support CD. • The utilities are not supported on MAC OS. 5.1 Device Discovery Device Discovery is an ASUS WLAN utility that detects an ASUS router device, and allows you to configure the wireless networking settings. To launch the Device Discovery utility: •... -
Page 78: Setting Up Your Printer Server
5.2 Setting up your printer server You can share your printer with computers running on Windows® and MAC operating system using LPR/LPD (Line Printer Remote/ Line Printer Daemon). To share your LPR printer: 1. From the Windows® desktop, click Start > Devices and Printers >... - Page 79 3. Select Create a new port then set Type of Port to Standard TCP/IP Port. Click New Port. 4. In the Hostname or IP address field, key in the IP address of the wireless router then click Next.
- Page 80 5. Select Custom then click Settings. 6. Set Protocol to LPR. In the Queue Name field, key in LPRServer then click OK to continue.
- Page 81 7. Click Next to finish setting up the standard TCP/IP port. 8. Install the printer driver from the vendor-model list. If your printer is not in the list, click Have Disk to manually install the printer drivers from a CD-ROM or file.
- Page 82 9. Click Next to accept the default name for the printer. 10. Click Finish to complete the installation.
-
Page 83: Download Master
5.3 Download Master Download Master is a utility that helps you download files even while your laptops or other devices are switched off. NOTE: You need a USB device connected to the wireless router to use Download Master. To use Download Master: 1. -
Page 84: Configuring Bit Torrent Download Settings
5. Use the navigation panel to configure the advanced settings. 5.3.1 Configuring Bit Torrent download settings To configure BitTorrent download settings: 1. From Download Master’s navigation panel, click Bit Torrent to launch the Bit Torrent Setting page. 2. Select a specific port for your download task. 3. -
Page 85: Nzb Settings
5.3.2 NZB settings You can set up a USENET server to download NZB files. After entering USENET settings, Apply. -
Page 86: Troubleshooting
1. Check if the power cord is properly plugged to the modem router and wall outlet. 2. Check if you are using the ASUS power adapter supplied for this product. 3. If the error persists, it could indicate a hardware problem. - Page 87 SSID (wireless network name), encryption mehtod, and password are correct. Check if your network settings are correct. • Each client on the network should have a valid IP address. ASUS recommends that you use the router’s DHCP server to assign IP addresses to computers on your network.
- Page 88 • Some cable modem service providers require you to use the MAC address of the computer initially registered on the account. You can view the MAC address in the web GUI, Network Map > Clients page, and hover the mouse pointer over your device in Client Status.
-
Page 89: Frequently Asked Questions (Faqs)
6.2 Frequently Asked Questions (FAQs) I cannot access the router GUI using a web browser • If your computer is wired, check the Ethernet cable connection and LED status as described in the previous section. • Ensure that you are using the correct login information. The default factory login name and password is “admin/admin”. Ensure that the Caps Lock key is disabled when you enter the login information. - Page 90 The client cannot establish a wireless connection with the router. NOTE: If you are having issues connecting to 5GHz network, make sure that your wireless device supports 5GHz or features dual band capabilities. • Out of Range: • Move the router closer to the wireless client. • T ry to adjust antennas of the router to the best direction as described in section 1.4 Positioning your router.
- Page 91 • SSID has been hidden. If your device can find SSIDs from other routers but cannot find your router’s SSID, go to Advanced Settings > Wireless > General, select No on Hide SSID, and select Auto on Control Channel. • If you are using a wireless LAN adapter, check if the wireless channel in use conforms to the channels available in your country/area.
- Page 92 Internet is not accessible. • The device has been blocked via the Parental Control function. Go to General > Parental Control and see if the device is in the list. If the device is listed under Client Name, remove the device using the Delete button or adjust the Time Management Settings.
- Page 93 Login name: admin Password: admin Enable DHCP: Yes (if WAN cable is plugged in) IP address: 192.168.1.1 Domain Name: http://router.asus.com Subnet Mask: 255.255.255.0 DNS Server 1: 192.168.1.1 DNS Server 2: (Blank) SSID (2.4GHz): Please see the product label on SSID (5GHz):...
- Page 94 Cannot access Web GUI Before configuring your wireless router, do the steps described in this section for your host computer and network clients. Disable the proxy server, if enabled. Windows ® 1. Click Start > Internet Explorer to launch the browser. 2.
- Page 95 MAC OS 1. From your Safari browser, click Safari > Preferences > Advanced > Change Settings... 2. From the Network screen, deselect FTP Proxy and Web Proxy (HTTP). 3. Cllick Apply Now when done. NOTE: Refer to your browser's help feature for details on disabling the proxy server.
- Page 96 3. To obtain the IPv4 IP settings automatically, tick Obtain an IP address automatically. To obtain the IPv6 IP settings automatically, tick Obtain an IPv6 address automatically. 4. Click OK when done. MAC OS 1. Click the Apple icon located on the top left of your screen.
- Page 97 Disable the dial-up connection, if enabled. Windows ® 1. Click Start > Internet Explorer to launch the browser. 2. Click Tools > Internet options > Connections tab. 3. Tick Never dial a connection. 4. Click OK when done. NOTE: Refer to your browser's help feature for details on disabling the dial-up connection.
-
Page 98: Appendices
We believe in providing solutions for you to be able to responsibly recycle our products, batteries, other components, as well as the packaging materials. Please go to http://csr.asus. com/english/Takeback.htm for the detailed recycling information in different regions. - Page 99 communications. However, there is no guarantee that interference will not occur in a particular installation. If this equipment does cause harmful interference to radio or television reception, which can be determined by turning the equipment o and on, the user is encouraged to try to correct the interference by one or more of the following measures: •...
- Page 100 Note to System Installer For this apparatus, the cable shield/screen shall be grounded as close as practical to the point of entry of the cable into the building. For products sold in the US and Canada, this reminder is provided to call the system installer's attention to Article 800-93 and Article 800-100 of the NEC (or Canadian Electrical Code Part 1), which provides guidelines for proper grounding of the cable shield.
-
Page 101: Licensing Information
GNU General Public License Licensing information This product includes copyrighted third-party software licensed under the terms of the GNU General Public License. Please see The GNU General Public License for the exact terms and conditions of this license. All future firmware updates will also be accompanied with their respective source code. - Page 102 Software Foundation’s software and to any other program whose authors commit to using it. (Some other Free Software Foundation software is covered by the GNU Library General Public License instead.) You can apply it to your programs, too. When we speak of free software, we are referring to freedom, not price.
- Page 103 Finally, any free program is threatened constantly by software patents. We wish to avoid the danger that redistributors of a free program will individually obtain patent licenses, in effect making the program proprietary. To prevent this, we have made it clear that any patent must be licensed for everyone’s free use or not licensed at all.
- Page 104 You may charge a fee for the physical act of transferring a copy, and you may at your option offer warranty protection in exchange for a fee. 2. You may modify your copy or copies of the Program or any portion of it, thus forming a work based on the Program, and copy and distribute such modifications or work under the terms of Section 1 above, provided that you also meet all of...
- Page 105 whose permissions for other licensees extend to the entire whole, and thus to each and every part regardless of who wrote it. Thus, it is not the intent of this section to claim rights or contest your rights to work written entirely by you; rather, the intent is to exercise the right to control the distribution of derivative or collective works based on the Program.
- Page 106 The source code for a work means the preferred form of the work for making modifications to it. For an executable work, complete source code means all the source code for all modules it contains, plus any associated interface definition files, plus the scripts used to control compilation and installation of the executable.
- Page 107 6. Each time you redistribute the Program (or any work based on the Program), the recipient automatically receives a license from the original licensor to copy, distribute or modify the Program subject to these terms and conditions. You may not impose any further restrictions on the recipients’...
- Page 108 This section is intended to make thoroughly clear what is believed to be a consequence of the rest of this License. 8. If the distribution and/or use of the Program is restricted in certain countries either by patents or by copyrighted interfaces, the original copyright holder who places the Program under this License may add an explicit geographical distribution limitation excluding those countries, so that...
- Page 109 NO WARRANTY 11 BECAUSE THE PROGRAM IS LICENSED FREE OF CHARGE, THERE IS NO WARRANTY FOR THE PROGRAM, TO THE EXTENT PERMITTED BY APPLICABLE LAW. EXCEPT WHEN OTHERWISE STATED IN WRITING THE COPYRIGHT HOLDERS AND/OR OTHER PARTIES PROVIDE THE PROGRAM “AS IS” WITHOUT WARRANTY OF ANY KIND, EITHER EXPRESSED OR IMPLIED, INCLUDING, BUT NOT LIMITED TO, THE IMPLIED WARRANTIES OF MERCHANTABILITY AND FITNESS FOR A PARTICULAR...
-
Page 110: Asus Contact Information
Networks USA Hotline Information Hotline Number 1-812-282-2787 Service Hours 8:30-12:00 EST Mon-Fri 9:00-18:00 EST Sat-Sun NOTE: For more information, visit the ASUS support site at: http://support.asus.com ASUSTeK Computer Inc. Manufacturer: Tel: +886-2-2894-3447 Address: 4F, No. 150, LI-TE RD., PEITOU,...