Table of Contents
Advertisement
Quick Links
Download this manual
See also:
Instruction Manual
SERVICE MANUAL
POWER/STANDBY
SPECIFICATIONS AND PARTS ARE SUBJECT TO CHANGE FOR IMPROVEMENT
February
2001
DVD PLAYER
Digital Media Products Division, Tokai
TK
No.9101E
DV-P315U
DV-P313U
CONTENTS
2. Reference Information
4. Operating Instructions
6. Circuit Descriptions
7. Troubleshooting
updated 11/19/02
Advertisement
Chapters
Table of Contents

Related Manuals for Hitachi DV-P315U


Summary of Contents for Hitachi DV-P315U
-
Page 1: Table Of Contents
No.9101E DV-P315U DV-P313U SERVICE MANUAL POWER/STANDBY CONTENTS 1. Precautions 2. Reference Information 3. Product Specification 4. Operating Instructions 5. Disassembly and Reassembly 6. Circuit Descriptions 7. Troubleshooting 8. Exploded Views 9. Replacement Parts List updated 11/19/02 10. Block Diagram 11. PCB Diagrams 12. -
Page 2: Precautions
Precautions 1. Precautions 1-1 Safety Precautions 1) Before returning an instrument to the customer, always make a safety check of the entire Any measurements not within the limits specified instrument, including, but not limited to, the herein indicate a potential shock hazard that must be eliminated before returning the instrument to following items: the customer. - Page 3 Precautions 2) Read and comply with all caution and safety re- 5) Components, parts, and/or wiring that appear to lated notes non or inside the cabinet, or on the have overheated or that are otherwise damaged chassis. should be replaced with components, parts and/ or wiring that meet original specifications.
-
Page 4: Servicing Precautions
Precautions 1-2 Servicing Precautions (4) An insulation tube or tape is sometimes used and CAUTION : Before servicing Instruments covered some components are raised above the printed by this service manual and its supplements, read and wiring board for safety. The internal wiring is follow the Safety Precautions section of this manual. -
Page 5: Esd Precautions
Precautions 1-3 ESD Precautions Electrostatically Sensitive Devices (ESD) (7) Immediately before removing the protective ma- terials from the leads of a replacement ESD device, touch the protective material to the chassis Some semiconductor (solid state) devices can be or circuit assembly into which the device will be damaged easily by static electricity. - Page 6 Precautions 1-4 Handling the optical pick-up The laser diode in the optical pick up may suffer WRIST-STRAP electrostatic breakdown because of potential static FOR GROUNDING electricity from clothing and your body. The following method is recommended. THE UNIT (1) Place a conductive sheet on the work bench (The black sheet used for wrapping repair parts.) CONDUCTIVE SHEET (2) Place the set on the conductive sheet so that the...
- Page 7 Precautions 1-5 Pick-up disassembly and reassemblyº 1-5-1 Disassembly 1-5-2 Assembly 1) Remove the power code. 1) Replace the Pick-up. 2) Disassemble the Deck-Assy. 2) Remove the soldering 2 points on Pick-up. 3) Solder land 2 points short on Pick-up. (See Fig. 1- 3) Reassemble the Deck-Assy.
-
Page 8: Product Specification
3. Product Specifications Power Requirements AC 120V, 60Hz Power Consumption Weight 2.7kg GENERAL Dimensions W 430mm X D 240mm X H 79mm Operating Temperature Range +5°C ~ +35°C Operating Humidity Range 10% to 75% Reading Speed : 3.49 m/s (Digital Versatile Disc) Approx. - Page 9 Product Specification MEMO...
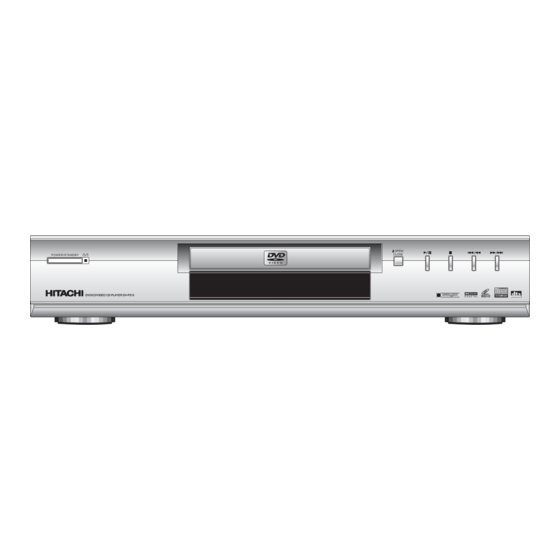
- Page 10 escription-Front Panel ront Panel Display POWER/STANDBY Front Panel Controls Front Panel Display POWER/STANDBY You can now select different viewing points of the scene recorded by different When the unit is first plugged in, the indicator lights. When POWER/STANDBY cameras (Multi Angle). pressed, the lamp goes out and the player is turned on.
- Page 11 Remote Control – DV-P315U - DVD Function Buttons DVD POWER Button • Turns the player on and off. A-B REPEAT Button • Marks a segment to repeat between A and B. REPEAT Button • Allows you to repeat play a title, chapter, track, or disc.
- Page 12 our of the Remote Control — DV-P313U — DVD Function Buttons DVD POWER Button • Turns the player on and off. NUMBER Buttons REPEAT Button • Allows you to repeat play a title, chapter, track, or disc. A-B REPEAT Button •...
- Page 13 escription-Rear Panel DIGITAL AUDIO OUT MIXED AUDIO OUT VIDEO OUT S-VIDEO OUT COMPONENT VIDEO OUT S-VIDEO OPTICAL COAXIAL VIDEO OUT SELECT Y,Pb,Pr Rear Panel DIGITAL AUDIO OUT JACK S-VIDEO OUT JACK Use either an optical or coaxial digital Use the S-V ideo cable to connect this cable to connect to a compatible jack to the S-V ideo jack on your Dolby Digital receiver .
-
Page 14: Disassembly And Reassembly
5. Disassembly and Reassembly 5-1 Cabinet and PCB Note : Reassembly in reverse order. 5-1-1 Top Cabinet Removal 1) Remove 3 Screws Œ on the back Top Cabinet. 2) Lift up the Top Cabinet in direction of arrow. Œ 3 SCREWS Fig. - Page 15 Disassembly and Reaasembly 5-1-2 Door-Tray Removal 1) Supply power and open Tray Œ . 2) Disassemble the Door-Tray ´ in direction of arrow "A". 3) Close Tray Œ and power off. Note : If Tray Œ doesn't open, insert a Screw driver ¨ into the Emergency hole ˇ (as shown in detailed drawing) and then push it in the direction of arrow "B".
- Page 16 Disassembly and Reaasembly 5-1-3 Ass'y Front-Cabinet Removal 1) Remove Ass'y Front-Cabinet Œ. Œ ASS'Y FRONT-PANEL Fig. 5-3 Ass'y Front-Cabinet Removal...
- Page 17 Disassembly and Reaasembly 5-1-4 Ass'y Deck Removal 1) Disconnect Flat-Cable,Connect-Wire from DCN1, DCN2 on Main PCB. 2) Remove 3 Screws Πfrom the Ass'y Deck and lift it up. Π3 SCREWS DECK-ASS'Y FLAT-CABLE CONNECT-WIRE MAIN PCB DCN1 DCN2 Fig. 5-4 Ass'y Deck Removal...
- Page 18 Disassembly and Reaasembly 5-1-5 Main PCB, Jack PCB Removal 1) Remove 2 Screws Œ and lift up the Jack PCB ´. 2) Remove 3 Screws ˇ and lift up the Main PCB ¨. Œ 2 SCREWS ´ JACK PCB ˇ 3 SCREWS ¨...
-
Page 19: Pcb Location
Disassembly and Reaasembly 5-2 PCB Location Fig. 5-6 PCB Location... - Page 20 Disassembly and Reaasembly 5-3 Connector Diagram DECK-ASS'Y DECK PCB Œ ˇ JACK PCB Ø ” ˆ ∏ ˝ ´ MAIN PCB ¨ ’ CONNECTOR NO. DIRECTION CONNECTOR NO. Œ ´ FLAT-CABLE DECK PCB MAIN PCB DCN1 ˇ ¨ CONNECT-WIRE (HCN1) HOUSING PCB MAIN PCB DCN2...
- Page 21 Disassembly and Reaasembly 5-4 Deck 5-4-1 Tray Disc Removal 1) Insert a Screw Driver Œ into Emergency Hole ´ and push the Slider Housing ˇ in the direction arrow "A". 2) When the Tray Disc ¨ comes out a little, pull it in the direction arrow "B" by hand. 3) Pull the Tray Disc ¨...
- Page 22 Disassembly and Reaasembly 5-4-2 Ass'y P/U Deck Removal 1) Disconnect DCN2 Œ, DCN3 ´. 2) Lift down the Assy P/U Deck ˇ while simultaneously pushing 2 Hooks ¨, ˆ in the direction of arrow "A", "B". ¨ HOOK "A" ˆ HOOK "B"...
- Page 23 Disassembly and Reaasembly 5-4-3 Housing Ass'y Removal 1) Remove Belt Œ. 2) Push the Hook ´ in the direction arrow "A" and lift up Pulley Gear ˇ. 3) Push the Slider Housing ˆ in the direction arrow "B" and lift up the Gear Tray ¨. 4) Lift up the Slider Housing ˆ.
- Page 24 Disassembly and Reaasembly 5-4-4 Sub Chassis Removal 1) Remove the Soldering of Motor Feed (+, - wire) Œ. 2) Remove the 4 Screws ´. 3) Lift up the Ass'y Brkt Deck ˇ. ´ 4 SCREWS ˇ ASSY-BRAK DECK Œ SOLDERING OF MOTOR FEED (+, - WIRE) Fig.
- Page 25 Disassembly and Reaasembly 5-4-5 Ass'y Brkt Deck Removal 1) Remove Washer Œ. 2) Remove Gear Feed B ´ , Gear Feed A ˇ. 3) Remove 2 Screws ¨. 4) Remove Shaft Pick-Up ˆ and Pick-Up Assy Ø. 5) Remove 1 Screw ∏. 6) Remove 2 Screws ”.
- Page 26 No Disc recognition No focus incoming LD is outputted FE in SIC1-25 from object lens at Check RIC1 and A, B, C, D input. is within specified range? play key input? No focus incoming and no disc occurs. SIC3-26, 27 output Check SIC3.
- Page 27 No pick-up home positing NO LD CD ON RIC1-21 is 5V? Check MIC1 SLD, SIC1-34 Check MIC1 output is normal? Divide RQ1 emitter terminal voltage and 5V real voltage LED+, SLED- difference into 10ohm. Check SIC3 SIC3-32, 33 output are normal? Current exceeds 0.1A? Open check in related circuit.
- Page 28 No Search Operation FINE SEEK Check FINE SEEK MIRR MIRR, SIC1-157 RFAGCO, RIC1-72 Check RIC1 Peripheral curcuit. signal (RIC1-46) is missing? output is normal? output level is normal? Check pick-up. TZCO signal Check SIC1 Peripheral curcuit. Check RIC1 peripheral circuit. (SIC1-24) is occurs? Track incomming is Time out due to many jump counts.
- Page 29 Abnormal rotation of No Tray open/close disc motor Input of RF signal RIC1-71 output MIC1-6, 8 is is normal? (SIC1-15) is normal? Open ; "L", "L" ? Micom (MIC1) error. Close ; "H", "H"? Check RIC1 peripheral circuit and A, B, C, D. RIC1-70 output SPD output is normal? are normal?
- Page 30 CD/VCD/DVD L/R output error Digital output error (Mixed Audio output) Normal DATA 0 is Output in ZIC1-127 is normal? Check ZIC1-121 output. Check ZIC1 peripheral circuit. input in AIC1-3? Check ZIC1-125 Analog output of Output in (CD/VCD ; 16.9344MHz, Check AIC3. AIC1-9, 10, 11, 12 is AIC3-6, 8, 10 is DVD ;...
- Page 31 No Power (120 Voltage) No Power (Free Voltage) (Standby LED OFF) (Standby LED OFF) PFD01 error? Replace fuse. PFD01 error? Replace fuse. PDS01 voltage PDS01 voltage Check PRF10. Check PDS01 ~ 04. is missing? is missing? Collector of PICF1 Drain (pin 1) Check 2d voltage.
- Page 32 CVBS output error S-Video output error Pin of VDD_2.5 & Check the connection between VDD-3.3 in Zic1 has pin 1 in PCNS1 and pin 3 in ZIC5. VSW1 video select normal level? Move the select switch to up position. switch is up position? 27MHz clock Check the connection between input is normal at...
- Page 33 Y/Pr/Pb output error VSW1 video select Move the select switch to down position. switch is down position? VR121 of VSW1 Check the soldering of VSW1. is low state? Check the connection between Pin 38 in FIC1 is high state? pin 38 in FIC1 and VR121.
- Page 34 8. Exploded View Page 8-1 Cabinet Assembly - - - - - - - - - - - - - - - - - - - - - - - - - - - - - - - - 8-2 Deck Assembly - - - - - - - - - - - - - - - - - - - - - - - - - - - - - - - - - -...
-
Page 35: Exploded Views
Exploded Views 8-1 Cabinet Assembly... -
Page 36: Deck Assembly
Exploded Views 8-2 Deck Assembly H106 H220 H207 H200 H210... - Page 37 Exploded Views MEMO...
-
Page 38: Replacement Parts List
ACCESSORIES FIC4 TC11791 MODULE,REMOCON MIC1 TC11361 IC 95C265 Remote, DV-RM300, [DV-P313U] TS15543 REMOTE HAND SET [P315U] MIC2 TC11294 EPROM [P315U] Remote, DV-RM310, [DV-P315U] TS16331 REMOTE HAND SET [P313U] MIC2 TC11295 EPROM [P313U] TE13361 CABLE,AV MIC3 TC11671 IC 24257 MIC4 TC11681... - Page 39 Electrical Parts List SYMBOL SYMBOL P-NO DESCRIPTION P-NO DESCRIPTION TE13891 CRYSTAL 27HMZ TE13871 CRYSTAL 20HMZ PTD1 TA14191 TRANSFORMER AVJ1 TE13931 JACK AVJ2 TE13941 JACK AVJ4 TE14191 JACK AVJ5 TE13961 CONNECTOR TE14011 CONNECTOR CN1A TE14001 CONNECTOR TE13381 CONNECTOR(35P) DCN1A TE14001 CONNECTOR TE13901 RESONATOR 5MHZ HSW1...
-
Page 40: Block Diagram
10. Block Diagram DECK ASS'Y (DP-7) MIC4 2K EEPROM Remote Control FLT Display FIC1 MIC1 MIC2 8M EPROM (TMP91C219F) (uPD780232) Main Controller Front Controller MIC3 1M SDRAM Spindle/Sied/Tray Motor Pick-up & I/V Amp ZIC2 SDRAM Optical ZIC1 (ZiVA-4.1) IEC958/1937 Coaxial RIC1 A/V Decoder (KS1462) - Page 41 Block Diagram MEMO 10-2...
-
Page 42: Pcb Diagrams
11. PCB Diagrams 11-1 Main - - - - - - - - - - - - - - - - - - - - - - - - - - - - - - - - - - - - - - - - 11-2 11-2 Jack - - - - - - - - - - - - - - - - - - - - - - - - - - - - - - - - - - - - - - - - 11-3... - Page 43 PCB Diagrams 11-1 Main 11-2...
- Page 44 PCB Diagrams 11-2 Jack 11-3...
- Page 45 PCB Diagrams 11-3 Deck 11-4 Housing 11-4...
-
Page 46: Wiring Diagram
12. Wiring Diagram 12-1... - Page 47 Wiring Diagram MEMO 12-2...
-
Page 48: Schematic Diagrams
13. Schematic Diagrams Block Identification of PCB 13-1 Power - - - - - - - - - - - - - - - - - - - - - - - - - - - - - - - - - - - - - - 13-2 13-2 AV-Decoder/Main-Micom/Key - - - - - - - - - - - - - - - - - - - - - - 13-3... -
Page 49: Power
Schematic Diagrams 13-1 Power 13-2... -
Page 50: Av-Decoder/Main-Micom/Key
Schematic Diagrams 13-2 AV-Decoder/Main-Micom/Key 13-3... -
Page 51: Servo
Schematic Diagrams 13-3 Servo 13-4... -
Page 52: Video
Schematic Diagrams 13-4 Video (OPTION) 13-5... -
Page 53: Audio
Schematic Diagrams 13-5 Audio (OPTION) (OPTION) 13-6... -
Page 54: Front-Micom/Vfd Display
Schematic Diagrams 13-6 Front-Micom/VFD Display (OPTION) (OPTION) 13-7... -
Page 55: Deck
Schematic Diagrams 13-7 Deck 13-8... - Page 56 DV-P315U No.9101E Digital Media Products Division, Tokai DV-P313U Copylight © Hitachi, Ltd. 2001. All rights reserved. Printed in Japan (II)