Philips PET749 User Manual
Philips portable dvd player user manual
Hide thumbs
Also See for PET749:
- Quick start manual (2 pages) ,
- Specifications (3 pages) ,
- Quick start manual (2 pages)
Table of Contents
Advertisement
Advertisement
Table of Contents

Related Manuals for Philips PET749


Summary of Contents for Philips PET749
- Page 1 Philips Consumer Lifestyle A division of Philips Electronics North America Corporation P.O. Box 10313 Stamford, CT 06904 Phone: 1-888-PHILIPS (744-5477) Meet Philips at the Internet http://www.philips.com/welcome © 2010 Koninklijke Philips Electronics N.V. All rights reserved. PET749_37_UM_V2.0...
- Page 2 Register your product and get support at www.philips.com/welcome EN User manual ES Manual del usuario FR Mode d’emploi PET749...
-
Page 3: Table Of Contents
Contents Important Important safety instructions Notice Your portable DVD player Introduction What’s in the box Overview of the main unit Overview of the remote control Get started Charge the battery Install remote control battery Connect additional equipment Play Turn on... - Page 4 Register online at www.philips.com/welcome today to get the very most from your purchase. Registering your model with PHILIPS makes you eligible for all of the valuable benefits listed below,so don't miss out. Register online at www.philips.com/welcome to ensure: *Product Safety Notification By registering your product, you'll receive notification - directly...
- Page 5 Philips is not liable for any damage to or loss of any programs, data, or other information stored on any media contained within the product, or any non-Philips product or part not covered by this warranty.
-
Page 6: Important
1 Important Important safety instructions Important Safety Instructions a Read these instructions. b Keep these instructions. c Heed all warnings. d Follow all instructions. e Do not use this apparatus near water. f Clean only with dry cloth. g Do not block any ventilation openings. Install in accordance with the manufacturer’s instructions. - Page 7 l Use only with the cart, stand, tripod, bracket, or table specified by the manufacturer or sold with the apparatus. When a cart is used, use caution when moving the cart/apparatus combination to avoid injury from tip-over. m Unplug this apparatus during lightning storms or when unused for long periods of time.
-
Page 8: Hearing Safety
Warning • Never remove the casing of this apparatus. • Never lubricate any part of this apparatus. • Never place this apparatus on other electrical equipment. • Keep this apparatus away from direct sunlight, naked flames or heat. • Never look into the laser beam inside this apparatus. •... -
Page 9: Notice
Notice Any changes or modifications made to this device that are not expressly approved by Philips Consumer Lifestyle may void the user’s authority to operate the equipment. Notice for the USA This equipment has been tested and found to comply with the limits for a Class B digital device, pursuant to part 15 of the FCC Rules. -
Page 10: Disposal Of Your Old Product And Batteries
Please inform yourself about the local rules on separate collection of batteries. The correct disposal of batteries helps prevent potentially negative consequences on the environment and human health. Please visit www.recycle.philips.com for additional information on a recycling center in your area. Caution •... - Page 11 Recording and playback of material might require consent. See Copyright Act 1956 and The Performer’s Protection Acts 1958 to 1972. This apparatus includes this label:...
-
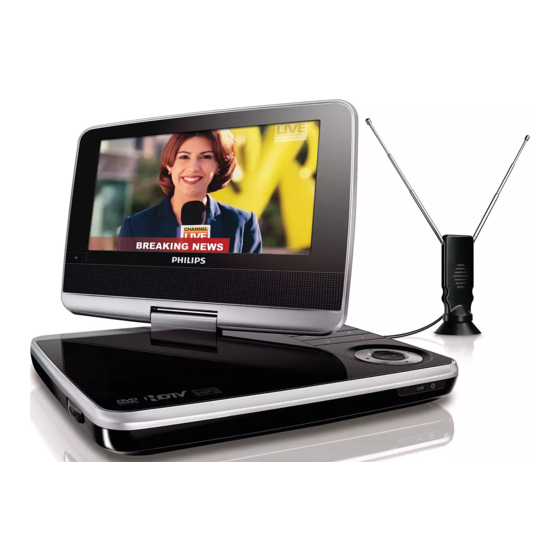
Page 12: Your Portable Dvd Player
2 Your portable DVD player Congratulations on your purchase, and welcome to Philips! To fully benefit from the support that Philips offers, register your product at www.philips. com/welcome. Introduction Your portable DVD player plays digital video discs that conform to the universal DVD Video standard. -
Page 13: Overview Of The Main Unit
Overview of the main unit a Display panel • Stops disc play. c TV OPTIONS • Accesses TV options relating to the current activity or selection. d ANTENNA • Antenna jack. e AV OUT • Audio/video output jack. • Headphone jack. VOLUME •... -
Page 14: Disc Menu
h OFF - POWER - ON (CHR) • Turns on/off DVD player. i CHR • Charging indicator. (CH+), (CH-), , • Navigates menus. (CH+), (CH-) • Switches to the next or previous channel. • Searches backward/forward at different speeds. • Confirms an entry or selection. -
Page 15: Overview Of The Remote Control
Overview of the remote control a DVD/DTV • Switches between DVD and DTV. • Adjusts screen aspect ratio. c INFO • For TV, displays program information (if available). • For DVD, displays playback information. - Page 16 d MUTE • Mutes or restores volume. e DISC MENU • For DVD, accesses or exits disc menu. • For VCD, turns on or off PBC (Playback Control) mode. • For VCD version 2.0 or SVCD with PBC turned on, returns to the menu.
- Page 17 • Stops disc play. • Skips to the previous or next title, chapter, or track. • Starts, pauses or resumes disc play. t DISPLAY • Adjusts the display value of the system. u OK • Confirms an entry or selection. •...
-
Page 18: Get Started
• Always follow the instructions in this chapter in sequence. If you contact Philips, you will be asked for the model and serial number of your player. The model number and serial number are on the bottom of your player. Write the numbers here: Model No. -
Page 19: Install Remote Control Battery
» The charge indicator turns on. It takes less than 6 hours to fully charge the battery. » When the battery is fully charged, the charge indicator turns off. Install remote control battery Caution • Risk of explosion! Keep batteries away from heat, sunshine or fire. Never discard batteries in fire. -
Page 20: Connect Additional Equipment
Connect additional equipment Connect a TV Caution • Turn off your player before connecting to any additional equipment. You can connect the player to a TV to enjoy DVD. • Match the color of the AV cables (the AV cable connected to the TV is not supplied) with the jacks: the yellow cable is for the yellow video jack, the red/white cable is for the red/white audio jacks. - Page 21 • Fully extend the antenna for better reception. • The antenna with the magnetic base can be attached to any ferrous surface for your convenience. not supplied...
-
Page 22: Play
4 Play Turn on Slide the OFF - POWER - ON (CHR) switch to the ON position. Select OSD language You can choose a different language for the on-screen display text. Press SETUP. » The setup menu appears. Video Password Français Español Select [-- General Setup Page --] >... -
Page 23: Play Options
Play options Select audio language For DVDs that contain two or more audio languages. • During play, press AUDIO repeatedly until the language is selected. Select subtitle language For DVDs that contain two or more subtitle languages. • During play, press SUBTITLE repeatedly until the language is selected. -
Page 24: Adjust Display
[-- General Setup Page --] [OSD Lang] [Screen Saver] [Resume] [Angle Mark] [--Video Setup Page--] [TV Type] [--Password Setup Page--] [Password] [--Preference Setup Page--] [Audio] [Subtitle] [Disc Menu] [Parental] [Default] Press to go back to previous menu level. Press SETUP to exit. Adjust display Press DISPLAYon the remote control. -
Page 25: Watch Tv
Before you start, ensure that you have connected the antenna to the player. • Make sure you are in an area with sufficient signal coverage. You can check the signal coverage with the TV broadcast authority of your country or visit www.philips.com/ support. First time installation When the unit is turned on, press DVD/DTV to switch to DTV mode. - Page 26 Select the time zone, DST and timer format, then press [Go to next step :] and press OK to confirm. First Time Installation Please connect the product to air antenna Air/Cable Cable Go to next step : Browse Select Select the antenna type as [Air], then press step :] and press OK to confirm.
-
Page 27: Switch Channels
If you connect the portable TV to a cable TV socket, select [Yes], and then press OK. » Auto channel search (Cable) starts and will take a few minutes. » When auto channel search is complete, the total number of TV and radio channels found is displayed. -
Page 28: Play Options
Select a channel, and then press name. Edit channels Press SETUP. » The setup menu is displayed. Select [Channel management] > [Channel edit], and press OK. Select a channel. • To delete the channel, press the red button. • To set the channel your favorite one, press the green button. •... - Page 29 [General] [Menu language] [Closed Caption] [Factory reset] [Time] [Time zone] [DST] [Time format] [Channel installation] [Air/Cable] [Auto scan] [Manual scan] [Channel management] [Channel name] [Channel edit] Press to go back to previous menu level. Press SETUP to exit. View closed captions (subtitles) The caption service displays transmitted CC- and T- text.
- Page 30 Note • This television provides a display of television closed captioning that conforms with the EIA-608 standard and in accordance with Sections 15.119 of the FCC rules. • The captions do not always use correct spelling and grammar. • Not all TV programs and product commercials include closed caption information. Refer to your area TV program listings for the TV channels and times of closed caption shows.
- Page 31 Note • Not all caption services are used by a TV channel during the transmission of a closed caption program. Press SETUP to exit. Summary of caption services Service Description CC-1 and T-1 are the primary caption and text services. The captioning or text is displayed in the same language as the program’s dialogue (up to 4 lines of script on the TV screen, where it...
- Page 32 [Advanced [Off] selection] [Service1] to [Service6] Press SETUP to exit. Select how digital captions are displayed You can choose the size, font, color, background and other characteristics of the caption text. Press SETUP and select [General] > [Closed Caption] > [Option] > [Mode], then press OK to confirm.
- Page 33 Difficulties viewing closed captions on DTV programming If you have difficulties viewing closed captions on DTV programming, including HDTV, received from your subscription television provider, you should: • consult any consumer information and manuals/guides on closed captions for DTV programming provided by your subscription television provider;...
-
Page 34: Product Information
6 Product information Note • Product information is subject to change without prior notice. Dimensions Weight Power supply Power consumption Operating temperature range Laser wavelength TV system Video output Output format (DVD) Output level Load impedance Audio line out Audio out (analog audio) Load impedance Audio distortion + noise Frequency response... -
Page 35: Troubleshooting
To keep the warranty valid, never try to repair the system yourself. If you encounter problems when using the player, check the following points before requesting service. If the problem remains unsolved, register your player and get support at www.philips.com/welcome. No power •... - Page 36 Cannot play disc • Ensure the disc label is upwards. • Clean the disc. With a clean, soft, lint-free cloth, wipe the disc outwards from the center. • Check if the disc is defective by trying another disc. No response to operating commands •...