Philips GOGEAR SA6145 User Manual
Digital audio video player
Hide thumbs
Also See for GOGEAR SA6145:
- Quick start manual (14 pages) ,
- User manual (64 pages) ,
- Specifications (2 pages)
Table of Contents
Advertisement
Advertisement
Table of Contents

Related Manuals for Philips GOGEAR SA6145


Summary of Contents for Philips GOGEAR SA6145
- Page 1 Digital audio video player SA6125 SA6145 SA6185...
-
Page 2: Need Help
Need help? Please visit www.philips.com/welcome where you can access to a full set of supporting materials such as user manual, flash tutorial, the latest software upgrades and answers to frequently asked questions. -
Page 3: Table Of Contents
Contents Important safety information Your new player What’s in the box Register your product Getting started Overview of controls and connections Main menu Install Connect and charge 3.4.1 Use the supplied USB cable 3.4.2 Battery level indication Transfer music and pictures Transfer videos Enjoy 3.7.1... - Page 4 4.5.1 4.5.2 4.5.3 4.5.4 4.5.5 4.5.6 5.1.1 5.1.2 5.1.3 5.3.1 5.3.2 5.3.3 5.3.4 5.4.1 5.4.2 5.5.1 5.5.2 5.5.3 5.6.1 5.6.2 5.6.3 5.8.1 5.8.2 5.8.3 5.9.1 5.9.2 5.9.3 5.10 5.11 Contents Manage your files and playlists in Windows Media Player Search for music or pictures via Windows Media Player Delete files and playlists from Windows Media Player library Delete files and playlists from your player Add or change album art...
-
Page 5: Important Safety Information
• Active mobile phones in the vicinity may cause interference. • Backup your files. Please ensure that you retain the original files you have downloaded to your device. Philips is not responsible for any loss of data if the product becomes damaged or not readable / legible. - Page 6 Owners, which may disable your device’s ability to copy, display and/or play Secure Content. In the event of revocation, Philips will attempt to make available software updates to restore some or all of your device’s ability to transfer, store, access, copy, display and/or play Secure...
-
Page 7: Disposal Of Your Old Product
Secure Content even after you have paid for and obtained it. Neither your consent nor the consent or approval of Philips is necessary for any of them to deny, withhold or otherwise restrict your access to Secure Content or to disable your device’s ability to transfer, store, access, copy, display, and/or play... -
Page 8: Notice For Canada
• This device may not cause harmful interference, and • This device must accept any interference received, including interference that may cause undesired operation. Notice for the European Union This product complies with the radio interference requirements of the European Union. Philips SA6125 SA6145 SA6185... -
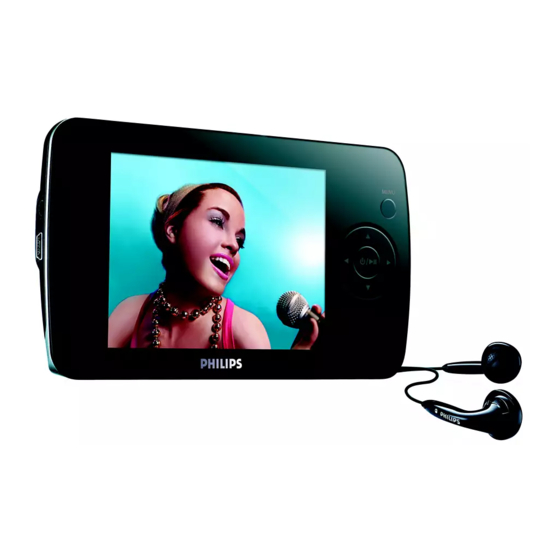
Page 9: Your New Player
• FM radio • Voice recording • Built-in speakers 2.1 What’s in the box The following accessories are included with your player: Player Philips GoGear audio video player SA6125 SA6145 SA6185 Quick start guide Quick start guide Handleiding voor snel gebruik Guide de démarrage rapide... -
Page 10: Getting Started
3 Getting started 3.1 Overview of controls and connections Loud Active when no speaker headphones connected Microphone For voice recordings USB connector Headphones jack E - Vol + Control volume F MENU Press to access the menu / return to previous menu G PLAYLIST Press to add songs to Playlist on the go... -
Page 11: Main Menu
1 Insert the CD supplied with your product into the CD ROM drive of your PC. 2 Follow the on-screen instructions to complete the installation of Windows Media Player, MediaConverter for Philips and Philips Device Manager. 3 If the installation program does not start automatically, browse the CD contents via Windows Explorer and run the program by double clicking on the file ending with .exe. -
Page 12: Connect And Charge
3.4 Connect and charge Your player will be charged when connected to the PC. 3.4.1 Use the supplied USB cable Connect the supplied USB cable to PC for charging and data transfer. However, your PC must be switched on and have hi-power capability in order to perform charging. Note Charge your player for at least 5 hours before using it for the first time. -
Page 13: Battery Level Indication
3.4.2 Battery level indication The approximate power levels of your battery are indicated as follows: Battery is full Battery is two-thirds full Battery is half full Battery is low Battery is empty Note When the batteries are almost empty, the low battery screen player will power down in less than 60 seconds. -
Page 14: Transfer Videos
Windows Media Player before transferring them to your player using MediaConverter for Philips. Use MediaConverter for Philips to convert the video files to the correct screen size and transfer videos from your PC to your player. This application will convert your video files to the right format and resolution before transferring them to your player so that they are guaranteed to playback on your player without any problems. -
Page 15: Enjoy
3.7 Enjoy 3.7.1 Power on and off To power on, press until the Philips welcome screen appears. To power off, press and hold Tip Your player automatically powers down if there is no operation and no music or video is played for 10 minutes. -
Page 16: Organize And Transfer Music And Pictures With Windows Media Player 11
CD for music and picture transfer. Although Windows Media Player also lets you transfer video files from your computer to the player, please use the MediaConverter for Philips provided in the accompanying CD for video transfers. For more information regarding transfer of videos, see 3.6 Transfer video. -
Page 17: Before Installing Windows Media Player 11 (Optional)
4.1.1 Before installing Windows Media Player 11 (optional) If necessary, before you install Windows Media Player 11, go to Windows Update and install any high-priority updates that are available for your computer. Perform the following steps if you wish to save media information and star ratings to your media file, as well as back up your existing data: 1 In Windows Media Player 10, click Tools, and then click Options. -
Page 18: Installing Windows Media Player 11
4.1.2 Installing Windows Media Player 11 1 Insert the accompanying CD into the CD ROM drive of your computer. Note If the installation program does not start automatically, browse the CD contents via Windows Explorer and run the program by double clicking on the file ending with .exe. - Page 19 4 Click I Accept to continue. 5 Select EXPRESS and click Finish.
- Page 20 Note Your existing media library is currently migrating to Windows Media Player 11. This may take several minutes depending on the size of your existing media library. 6 Click on the checkboxes to select the file types that you want Windows Media Player to play by default or click Select all and then click Finish.
-
Page 21: Rolling Back To A Previous Version Of Windows Media Player
7 Click on the checkboxes to select your privacy options and then click Next to complete the necessary settings. 4.1.3 Rolling back to a previous version of Windows Media Player If you encounter some problems with Windows Media Player 11, you can simply roll back to the version that was previously on your computer. -
Page 22: More About Rolling Back To A Previous Version Of Windows Media Player
12 When the rollback process is completed (this may take several minutes), click Restart. 13 Select Start, and then click Control Panel. 14 In the Control Panel, select Add or Remove Programs. 15 Select Microsoft User-Mode Driver Framework Feature Pack 1.0, and then click Remove. -
Page 23: Add Music And Picture Files To Windows Media Player Library
4.2.1 Add music and picture files to Windows Media Player library By default, Windows Media Player automatically loads all the music and picture files stored in your My Music and My Pictures folders into the library. If you add new files to these folders, they will also be automatically added to the library. -
Page 24: Switch Between Music And Pictures Library In Windows Media Player And Your Player
4 Click Add... > Add folder dialog box appears. 5 Select a folder in which you have kept your music or picture files and click OK. 6 Return to Add to library dialog box and click OK. > Windows Media Player will start scanning the folder and add available music or picture files to the library. -
Page 25: Rip Songs From A Cd
4.2.3 Rip songs from a CD If you want to transfer music from a CD to your player, you need to create a digital copy of the music on your computer first. This is called ripping. 1 Start Windows Media Player. 2 Click the down arrow beneath the Rip tab and select Format to choose the format you want. - Page 26 4 Insert the Audio CD into your computer's CD drive. > All the tracks from the CD are listed. By default, Windows Media Player will start to rip all the songs in the CD. To modify this option, click the down arrow beneath the Rip tab and select Rip CD Automatically When Inserted >...
-
Page 27: Buy Music Online
5 Select the songs that you want to rip by clicking on the checkboxes. 6 Click Start Rip. > The selected tracks will be converted and added to Windows Media Player library. 4.2.4 Buy music online If you want to buy music online, you need to select a music store. 1 Start Windows Media Player. -
Page 28: Sync Your Windows Media Contents To Your Player
Note Depending on where you are and the language used, the list of stores may differ from what is shown here. > After you have bought a song or an album, it will appear in Windows Media Player library. 4.3 Sync your Windows Media contents to your player You can sync your music and pictures to your player using Windows Media Player. -
Page 29: Switch Between Automatic And Manual Sync
After your player is set up the first time, depending on your preference, you can switch between automatic and manual sync. 1 Click the down arrow beneath the Sync tab, select Philips GoGear SA61xx > Set Up Sync. 2 Select or clear the Sync this device automatically check box. -
Page 30: Select Files And Playlists For Manual Sync
3 To create a playlist, click New Auto Playlist and follow the steps on the screen to specify criteria for files in the auto playlist (for details on how to create an auto playlist, see 4.4.2 Create an Auto Playlist). 4 To remove a playlist, click the playlist in the list of Playlists to sync, and then click Remove. - Page 31 5 In the Sync List pane, verify that the items you have selected to sync will all fit on your player. If necessary, remove items from the list. 6 To remove items, right-click on the item in the Sync List pane, and then select Remove from List.
-
Page 32: Shuffle Manual Sync Items On Your Player
2 Switch on your player and then connect it to your computer using the supplied USB cable. 3 Click the down arrow beneath the Sync tab and select Shuffle "Philips GoGear SA61xx". 4 If prompted, click Yes button to start synchronization. Otherwise synchronization starts immediately. -
Page 33: Copy Files From Your Player To Your Computer
2 Switch on your player and then connect it to your computer using the supplied USB cable. 3 Click on Philips GoGear SA61xx in the left Navigation pane. > You can browse your player's contents in a variety of views, such as Recently Added, Artist, Album, Songs, etc. -
Page 34: Create An Auto Playlist
2 Click on Untitled Playlist and enter a new name for the playlist. 3 To add items to your playlist, drag them from the Contents pane onto the List pane. Your playlist can contain both songs and pictures. Tip To switch between music and pictures library in your player, simply click the arrow on the top left of Windows Media Player and select the category you want to view. -
Page 35: Edit Playlist
2 Enter a name for the auto playlist. 3 Click the first green plus sign and select your first criteria from the pull-down list. > Your criteria is listed. 4 Click on the underlined words to further define your criteria. 5 Click the second and third green plus signs to select and define more criteria for your auto playlist. -
Page 36: Transfer Playlists To Your Player
2 Right-click on the playlist you wish to edit and select Edit in List Pane from the pop-up menu. > The contents in the playlist appears on the List pane. 3 To remove an item from the playlist, right-click on the item and select Remove from List. 4 To change the order of the items in the playlist, click and drag any item to a new position within the List pane. -
Page 37: Manage Your Files And Playlists In Windows Media Player
Windows Media Player. You can then delete files or playlists, just as you would any other files displayed in Windows Media Player. 1 Click on Philips GoGear SA61xx in the left Navigation pane. > You can browse your player's contents in a variety of views, such as Recently Added, Artist, Album, Songs, etc. -
Page 38: Add Or Change Album Art
3 Navigate to the file or playlist you wish to delete. 4 Right-click on the file or playlist and select Delete. 5 Click OK. 4.5.4 Add or change album art 1 Locate and store your album art (preferably in JPG format) on your computer. 2 Right-click on the album art and select Copy. -
Page 39: Edit Song Information Via Windows Media Player
4.5.5 Edit song information via Windows Media Player 1 Click the Library tab. 2 Navigate to the song you wish to edit. 3 Right-click on the song and select Advanced Tag Editor from the pop-up menu. > The Advanced Tag Editor dialog box appears. 4 Select the appropriate tab and enter or edit the information. -
Page 40: Format Your Player Via Windows Media Player
You can reformat the hard disk on your player to erase all data. 1 Start Windows Media Player. 2 Switch on your player and then connect it to your computer using the supplied USB cable. 3 Click the down arrow beneath the Sync tab and select Philips GoGear SA61xx > Format. -
Page 41: Detailed Operation
5 Detailed operation 5.1 Music mode Your player is preloaded with some songs. You can transfer your digital music and picture collection from your computer to your player using Windows Media Player. More information on music transfer can be found in section Organize and transfer pictures and music with Windows Media Player in this user manual. -
Page 42: Find Your Music
5.1.2 Find your music 1 From the main menu, select You can search from the following music options: All songs Alphabetically listed tracks Artists Alphabetically listed artists Albums art Alphabetically listed album art Albums Alphabetically listed albums Genres Alphabetically listed genres Playlists Playlists collections... -
Page 43: Play Mode
5.1.3 Play mode You can set your player to play songs randomly (Shuffle All or Repeat All 1 From the main menu, select 2 Press to scroll up or down the options. 3 Press to select an option. While you are playing music, you can see the above active play mode screen. Note Digital Rights Management (DRM) Information If you have songs that have been bought online stored on your player, from time to time you may see a message pop up “Licence problem”. -
Page 44: Playlist On The Go
5.3 Playlist on the go Playlist on the go is a playlist that can be created on the player while on the move. You can create up to 3 different Playlists on the go. All songs will be displayed and listed in play order in the playlist. New songs are automatically added to the end of the playlist. -
Page 45: Other Playlists
You can only delete your player's playlists (except for Playlist on the go) via Windows Explorer. 1 Connect the player to your computer. > Your player will be identified as Philips or Philips GoGear in Windows Explorer. 2 Go to Music (Windows Media Player 10) or Playlists (Windows Media Player 11). 3 Delete playlist. -
Page 46: Videos
Windows Explorer. 1 Connect it to your computer. > Your player will be identified as Philips or Philips GoGear in Windows Explorer. 2 Go to Videos folder. 3 In Windows Explorer, right click to create and name a folder in your player. -
Page 47: Controls
5.5.2 Controls During video playback, you can do the following: Play / pause video Search forward and backward Use the Go to previous / next video Adjust volume Go back to previous menu 5.5.3 Resume play The video function has a "resume play" feature. When returning to a previously viewed video, you can "resume"... -
Page 48: Pictures
5.6.2 Transfer pictures from your player to your computer 1 Connect the player to your computer. > Your player will be identified as Philips or Philips GoGear in Windows Explorer. 2 Go to Media > Pictures (Windows Media Player 10) or Pictures (Windows Media Player 11). -
Page 49: Find Pictures On Your Player
5.6.3 Find pictures on your player Pictures on your player are organized in albums which are similar to the way they are organized in Windows Media Player. Fig1 1 From the main menu, select You can search from the following options: All pictures Alphabetically listed pictures 2 Select the picture album folder you wish to view. -
Page 50: Radio
5.8 Radio From the main menu, select Connect the headphones The supplied pair of headphones serves as a radio antenna. Make sure that it is properly connected to ensure optimal reception. 5.8.1 Select your FM region From the main menu, select Region Frequency range Europe... -
Page 51: Play A Preset Radio Station And Tune The Station
5.8.3 Play a preset radio station and tune the station 1 From the Radio menu 2 Press to browse and select the preset stations. 3 After you select a preset station, short press 4 You can also tune the frequency of selected preset station by long pressing 5 Short press to move one tuning step, long press strongest signal. -
Page 52: Play Back Recordings
5.9.1 Play back recordings From the main menu, select 1 Select the recording you want to hear. 2 Press to confirm. 5.9.2 Delete your recordings The player provides the option to delete all the recordings files of your player. 1 From the main menu, select 2 Press to confirm. -
Page 53: Settings
5.10 Settings The settings menu allows you to make adjustments and personal preferences on your player. 1 From the main menu, select 2 Use to select an option. 3 Press to go to the next level or 4 Press to confirm your selection. 5 Press to exit the Settings menu. -
Page 54: Use Your Player To Store And Carry Data Files
Settings Options Date and time Set date format MM/DD/YY Set date Set time format 12-hrs / 24-hrs Set time Show time in header Radio settings Select frequency region Factory settings Restore factory settings Information Capacity, Free space, Firmware version summary 5.11 Use your player to store and carry data files You can use your player to store and carry data files by copying data files into your player via Windows Explorer. -
Page 55: Update Your Player
3 Select your device. 4 Click Update. > Philips Device Manager will check whether a new firmware is available on the Internet and install it on your player. 5 When Update completed appears on the screen, click OK and disconnect the player. -
Page 56: Frequently Asked Questions
Your device battery may be out of power due to long period of non-usage. Please charge your player. In case of device error, connect your player to the computer and use Philips Device Manager to restore your player. Important All your contents will be erased from your player after completion of repair process. - Page 57 1 Reset your player first by inserting a pin or sharp object into the reset hole at the back of the player. 2 Launch Philips Device Manager from Start > Programs > Philips Device Manager. Select the Repair Tab. 3 While pressing the...
- Page 58 2 If nothing happens, recharge the battery for at least 4 hours and try to power on or reset again. If this does not work, you might have to repair your player with Philips Device Manager. (See Updade your player section in this user manual for details.) My player is full and I have fewer songs on my player than I expected.
-
Page 59: Technical Data
• Headphone 3.5mm, USB 2.0++ Software • Device manager To restore and upgrade • MediaConverter for Philips Converts following formats to player: AVI (Microsoft video I format), MPEG-1, 2, 4, DVD (*.vob), MOV, WMV, RM etc. Needs Quicktime (for MOV) and Windows Media Player 10 or above (for WMV) installations. -
Page 60: System Requirements
System requirements • Windows® XP (SP2 or above) or Vista • Pentium III 800MHz processor or higher • 256MB RAM • 200MB hard disk space or more • Internet connection (preferable) • Microsoft Internet Explorer 6.0 or later • CD-ROM drive •... -
Page 61: Glossary
9 Glossary Album A collection list of songs / pictures. Digital Rights Management (DRM) A technology that provides a persistent level of protection to digital content by encrypting it with a cryptographic key. Authorized recipients (or end users) must acquire a license in order to unlock and consume the content. - Page 62 Superscroll A Philips trademark user interface navigator feature to enhance the speed of browsing long lists of content. Synchronization The process of maintaining digital media files on a portable device based on the rules specified by the users. This may require copying digital media files from a computer to a device, updating information on the device or deleting files from the device.
- Page 63 PHILIPS reserves the right to make design and specification changes for product improvement without prior notice.
- Page 64 Specifications are subject to change without notice. Trademarks are the property of Koninklijke Philips Electronics N.V. or their respective owners © 2007 Koninklijke Philips Electronics N.V. All rights reserved. Printed in China www.philips.com wk7291...