Table of Contents
Advertisement
> Before Start
> Part Names
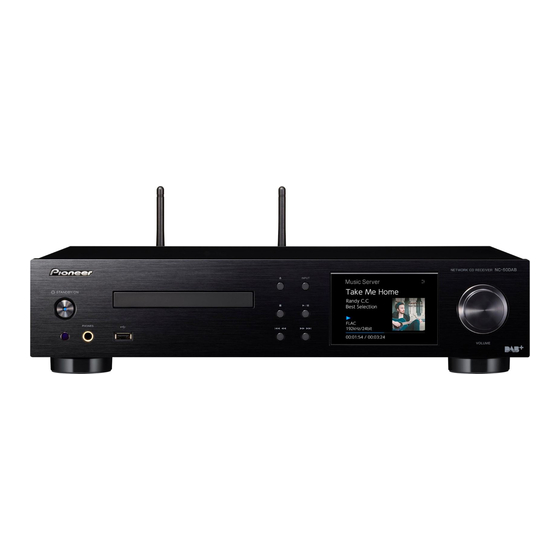
NETWORK CD RECEIVER
NC-50DAB
Instruction
Manual
> Install
> Initial Setup
> Playback
Advanced Setup | Firmware Update | Others
Before Start
What's in the box .................................................................... 2
Part Names
Front Panel ............................................................................. 3
Rear Panel .............................................................................. 4
Remote Controller .................................................................. 5
Display .................................................................................... 6
Install
Connect the Speakers ............................................................ 7
Connecting the antennas and power cord, etc. ...................... 8
Power On & Initial Setup ........................................................ 9
Playback
Playing CDs .......................................................................... 12
USB Storage Device/HDD .................................................... 14
Internet Radio ....................................................................... 16
Spotify ................................................................................... 17
Listening to the FM Radio ..................................................... 18
Listening to DAB Digital Radio ........................................................ 20
®
..................................................................... 21
®
................................................................................ 23
Playing audio from a turntable .............................................. 24
Playing audio from other external device ............................. 25
Music Server ......................................................................... 27
Entering text, adjusting sound quality, etc. ........................... 29
Advanced Settings................................................................. 30
Firmware Update .................................................................. 34
Others
Troubleshooting .................................................................... 36
General Specifications .......................................................... 39
License and Trademark Information ..................................... 41
E
N
Advertisement
Table of Contents

Related Manuals for Pioneer NC-50DAB


Summary of Contents for Pioneer NC-50DAB
-
Page 1: Table Of Contents
> Initial Setup > Playback Advanced Setup | Firmware Update | Others Before Start NETWORK CD RECEIVER What's in the box ..............2 NC-50DAB Part Names Front Panel ................3 Rear Panel ................4 Remote Controller ..............5 Display ..................6... -
Page 2: What's In The Box
> Before Start > Part Names > Install > Initial Setup > Playback Advanced Setup | Firmware Update | Others What's in the box Before Start 0 The power cord must be connected only after all other cable connections are completed. 0 Connect speakers with 4 Ω... -
Page 3: Front Panel
> Before Start > Part Names > Install > Initial Setup > Playback Advanced Setup | Firmware Update | Others Front Panel Part Names 1. Í STANDBY/ON button: Turns the unit on or to standby mode. /;... -
Page 4: Rear Panel
> Before Start > Part Names > Install > Initial Setup > Playback Advanced Setup | Firmware Update | Others Rear Panel 90° 180° 1. AC IN: Connect the supplied power cord. 11. -
Page 5: Remote Controller
> Before Start > Part Names > Install > Initial Setup > Playback Advanced Setup | Firmware Update | Others Remote Controller 1. Í STANDBY/ON button: Turns the unit on or into standby mode. 2. INPUT SELECTOR buttons: Switches the input to be played. ... -
Page 6: Display
> Before Start > Part Names > Install > Initial Setup > Playback Advanced Setup | Firmware Update | Others Display USB Front Song Artist Album FLAC 44.1 00:01:45 / 00:03:23 1. -
Page 7: Connect The Speakers
> Before Start > Part Names > Install > Initial Setup > Playback Advanced Setup | Firmware Update | Others Connect the Speakers Install Use the illustration as a reference to connect your own speakers. After inserting the speaker cables, tighten the terminals firmly by turning to the right. -
Page 8: Connecting The Antennas And Power Cord, Etc
> Before Start > Part Names > Install > Initial Setup > Playback Advanced Setup | Firmware Update | Others Connecting the antennas and power cord, etc. Antenna Hookup Move the antenna around while playing the radio to find the position with the best reception. -
Page 9: Initial Setup
"Hello" is displayed on the display about 20 seconds later. After this, the display goes blank, then after the Pioneer logo is BLUE BLINKING displayed, you can start operating the unit. - Page 10 "WEP", "WPA", or "WPA2", enter the password and SPEAKER..." item on the screen of the iOS device and without entering a password. confirm. select "Next". is displayed when the settings are complete. 0 This unit is displayed as "Pioneer NC-50DAB...
- Page 11 > Before Start > Part Names > Install > Initial Setup > Playback Advanced Setup | Firmware Update | Others...
-
Page 12: Playing Cds
> Before Start > Part Names > Install > Initial Setup > Playback Advanced Setup | Firmware Update | Others Playing CDs Playback This unit can also play CD-R recorded with MP3 or WMA format files, along with commercially available music CDs. 0 The supported sampling rates for MP3 files are 8 kHz to 48 kHz, and supported bitrates are between 64 kbps and 384 kbps. - Page 13 > Before Start > Part Names > Install > Initial Setup > Playback Advanced Setup | Firmware Update | Others Playing MP3/WMA discs Program play (Music CDs) 1. Turn the unit on. You can program up to 32 tracks to play. 2.
-
Page 14: Usb Storage Device/Hdd
> Before Start > Part Names > Install > Initial Setup > Playback Advanced Setup | Firmware Update | Others USB Storage Device/HDD Basic operations You can play music files by connecting a USB storage device or HDD (hard disk drive) to the USB port on the front or rear of the unit. - Page 15 > Before Start > Part Names > Install > Initial Setup > Playback Advanced Setup | Firmware Update | Others 0 USB storage devices with security function are not AIFF (.aiff/.aif/.aifc/.afc/.AIFF/.AIF/.AIFC/.AFC): DSD (DSF only) format music files. The formats for embedded images are JPEG and PNG.
-
Page 16: Internet Radio
> Before Start > Part Names > Install > Initial Setup > Playback Advanced Setup | Firmware Update | Others Internet Radio Basic operations When this unit is connected to a network, you can listen to TuneIn or other preregistered Internet radio services. Depending on the internet radio service, the user may need to register from their computer first. -
Page 17: Spotify
2. Click the Connect icon in the track play screen of the Spotify app. 3. Select this unit. 0 This unit is displayed as "Pioneer NC-50DAB XXXXXX" 4. This unit turns on automatically and the input selector changes to NETWORK and streaming of Spotify starts. -
Page 18: Listening To The Fm Radio
> Before Start > Part Names > Install > Initial Setup > Playback Advanced Setup | Firmware Update | Others Listening to the FM Radio Tuning Automatically Tuner FM 1. Turn the unit on. 2. Repeatedly press TUNER to switch input to Tuner FM. 87.50 Tuner FM AUTO... - Page 19 > Before Start > Part Names > Install > Initial Setup > Playback Advanced Setup | Firmware Update | Others receives unsupported characters. However, this is not a Folk music Selecting registered stations 1. Repeatedly press TUNER to switch input to Tuner FM. malfunction.
-
Page 20: Listening To Dab Digital Radio
> Before Start > Part Names > Install > Initial Setup > Playback Advanced Setup | Firmware Update | Others Listening to DAB Digital Radio Tuning Tuner DAB 1. Turn the unit on. 2. Repeatedly press TUNER to switch input to Tuner DAB. 0 The very first time you select Tuner DAB, the Auto Tuning function automatically scans the DAB Band 3 for the multiplexes (i.e., stations) available in your... -
Page 21: Bluetooth
BLUETOOTH enabled device, then select this unit from amongst the devices displayed. If a password is requested, enter "0000". 0 This unit is displayed as "Pioneer NC-50DAB XXXXXX". 4. "Now Pairing... " on the display changes to the name of the BLUETOOTH enabled device. - Page 22 > Before Start > Part Names > Install > Initial Setup > Playback Advanced Setup | Firmware Update | Others 4. Play the music files. Increase the volume of the BLUETOOTH enabled device to an appropriate level. 0 Due to the characteristics of BLUETOOTH wireless technology, the sound produced on this unit may slightly be behind the sound played on the BLUETOOTH enabled device.
-
Page 23: Airplay
Wi-Fi displayed, and tap "Done". iPhone 0 This unit is displayed as "Pioneer NC-50DAB XXXXXX". Pioneer NC-50DAB 0 If an "AirPlay Password" has been set on this unit, enter the password you set. -
Page 24: Playing Audio From A Turntable
> Before Start > Part Names > Install > Initial Setup > Playback Advanced Setup | Firmware Update | Others Playing audio from a turntable Connections Phono You can play the audio from turntables with MM cartridges through this unit. 3. -
Page 25: Playing Audio From Other External Device
> Before Start > Part Names > Install > Initial Setup > Playback Advanced Setup | Firmware Update | Others Playing audio from other external device Connections You can play the audio from external devices such as TVs and game consoles through this unit. Connect as follows according to the output jacks on the external devices you are connecting. - Page 26 > Before Start > Part Names > Install > Initial Setup > Playback Advanced Setup | Firmware Update | Others Digital In 1 When playing a device connected to the LINE IN terminal, press LINE/DIGITAL repeatedly to change the input on this unit to "Line". Line 3.
-
Page 27: Music Server
> Before Start > Part Names > Install > Initial Setup > Playback Advanced Setup | Firmware Update | Others Music Server It is possible to stream music files stored on PCs or NAS there may be differences in the names of items you can devices connected to the same network as this unit. - Page 28 > Before Start > Part Names > Install > Initial Setup > Playback Advanced Setup | Firmware Update | Others playback times may not be displayed correctly. LPCM (Linear PCM): You can use this unit to play music files stored on your PC by operating the PC inside your home network.
-
Page 29: Entering Text, Adjusting Sound Quality, Etc
> Before Start > Part Names > Install > Initial Setup > Playback Advanced Setup | Firmware Update | Others Entering text, adjusting sound quality, etc. Entering text Emphasizing the low range (P.BASS) 1. Press SOUND button (c) three times. Text entry, for passwords, etc., uses the following remote 2. -
Page 30: Advanced Settings
> Before Start > Part Names > Install > Initial Setup > Playback | Firmware Update | Others Advanced Setup Advanced Settings Advanced Setup The unit allows you to configure advanced settings to provide you with an even better experience. 1. - Page 31 > Before Start > Part Names > Install > Initial Setup > Playback | Firmware Update | Others Advanced Setup Make Wi-Fi connection settings. ( For details on how to enter text, refer to "Entering text" ( P29). After finishing input, press This can be set only when "Wi-Fi"...
-
Page 32: System Info
> Before Start > Part Names > Install > Initial Setup > Playback | Firmware Update | Others Advanced Setup Select the language displayed on the display. Bluetooth Select whether or not to use the BLUETOOTH function. English (Default Value), German, French, Spanish, Italian, Dutch, Swedish, Russian, "On"... - Page 33 > Before Start > Part Names > Install > Initial Setup > Playback | Firmware Update | Others Advanced Setup Factory Reset Reset the settings of this unit to the status at the time of shipment. We recommend that you take a note of the settings you have changed before going ahead with a factory reset.
-
Page 34: Firmware Update
> Before Start > Part Names > Install > Initial Setup > Playback Advanced Setup | Firmware Update | Others Firmware Update Firmware Update The updating function on this unit How to update 0 Stop any playing Internet radio, USB storage device, or server content. - Page 35 > Before Start > Part Names > Install > Initial Setup > Playback Advanced Setup | Firmware Update | Others the USB storage device. firmware is updated to the latest version. 0 * -01, * -10: Ethernet cable not found. Connect the Ethernet cable properly.
-
Page 36: Troubleshooting
> Before Start > Part Names > Install > Initial Setup > Playback Advanced Setup | Firmware Update | Others Troubleshooting Others Before starting the procedure amplifier section. Unplug the power cord from the wall power-on status, and try reboot of the wireless LAN outlet immediately and contact the dealer or our router. - Page 37 > Before Start > Part Names > Install > Initial Setup > Playback Advanced Setup | Firmware Update | Others Cannot play discs the router, and try rebooting the router. not other times 0 Music Server depends on the specifications of the server Cannot access the Internet radio 0 Place the disc in the disc tray so the label is facing up.
- Page 38 > Before Start > Part Names > Install > Initial Setup > Playback Advanced Setup | Firmware Update | Others device is set low, the playback of audio may be unavailable. Turn up the volume on the BLUETOOTH enabled device. 0 Some BLUETOOTH enabled devices may be equipped with a Send/Receive selector switch.
-
Page 39: General Specifications
> Before Start > Part Names > Install > Initial Setup > Playback Advanced Setup | Firmware Update | Others General Specifications Analog Audio Output Section CD Section Compatible Bluetooth profiles 0 A2DP 1.2 RMS Output Power Media/Format 0 AVRCP 1.3 0 50 W + 50 W 0 CD : Standard CD 0 HOGP-Host (Client) - Page 40 > Before Start > Part Names > Install > Initial Setup > Playback Advanced Setup | Firmware Update | Others 0 On (20 min)/Off Dimensions (W t H t D) 0 435 mm t 103 mm t 333 mm Weight 0 6.4 kg...
-
Page 41: License And Trademark Information
> Before Start > Part Names > Install > Initial Setup > Playback Advanced Setup | Firmware Update | Others License and Trademark Information FireConnect is technology powered by BlackFire Research. ® The Wi-Fi CERTIFIED Logo is a certification mark of Wi-Fi Alliance The product with this logo is conformed to Hi-Res Audio standard defined by Japan Audio Society. - Page 42 (Europe) © 2016 Onkyo & Pioneer Corporation. All rights reserved. © 2016 Onkyo & Pioneer Corporation. Tous droits de reproduction et de traduction réservés. http://www.pioneer-audiovisual.com/privacy/ F1701-1 “Pioneer” and “PBASS” are trademarks of Pioneer Corporation, and is used under license.