
Related Manuals for Pioneer VSX-1017AV-K


Summary of Contents for Pioneer VSX-1017AV-K
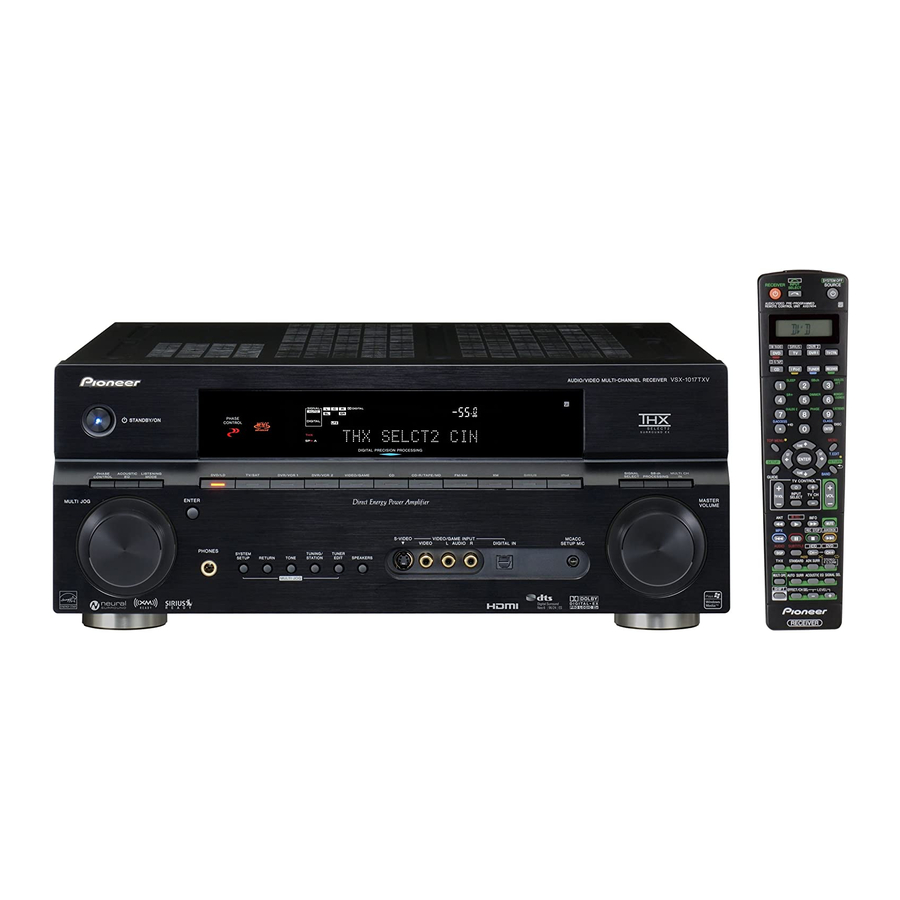
- Page 1 VSX-1017AV- VSX-1017AV- Discover the benefits of registering your product online at http:// (or http://www.pioneer.eu). Operating Instructions AUDIO/VIDEO MULTI-CHANNEL RECEIVER www.pioneer.co.uk...
- Page 2 IMPORTANT The lightning flash with arrowhead symbol, within an equilateral triangle, is intended to alert the user to the presence of uninsulated "dangerous voltage" within the product's enclosure that may be of sufficient magnitude to constitute a risk of electric shock to persons.
-
Page 3: Operating Environment
If the AC plug of this unit does not match the AC outlet you want to use, the plug must be removed and appropriate one fitted. Replacement and mounting of an AC plug on the power supply cord of this unit should be performed only by qualified service personnel. -
Page 4: Table Of Contents
Thank you for buying this Pioneer product. Please read through these operating instructions so you will know how to operate your model properly. After you have finished reading the instructions, put them away in a safe place for future reference. - Page 5 LFE Attenuator Setup ......54 SR+ Setup for Pioneer plasma displays..54 Video Converter Setup .
-
Page 6: Before You Start
• Advanced Direct Energy design This receiver offers a new advancement in discrete design unique to Pioneer for high-power drivability, low distortion and stable imaging. Through symmetrical placement of power amplification units, this receiver generates equal amplifier power to all channels, eliminating the possibility of one channel dominating a particular sound field. -
Page 7: Checking What's In The Box
Before you start Checking what’s in the box Please check that you’ve received the following supplied accessories: • Setup microphone (cable: 5 m) • Remote control unit • AA/IEC R6P dry cell batteries x2 • AM loop antenna • FM wire antenna •... -
Page 8: 02 5 Minute Guide
5 minute guide Chapter 2: 5 minute guide Introduction to home theater Home theater refers to the use of multiple audio tracks to create a surround sound effect, making you feel like you’re in the middle of the action or concert. The surround sound you get from a home theater system depends not only on your speaker setup, but also on the source and the sound settings of the receiver. - Page 9 5 minute guide Switch on the receiver and your TV. Connect the microphone to the MCACC SETUP MIC jack on the front panel. Place the microphone so that it’s about ear level at your normal listening position (use a tripod if possible). Make sure there are no obstacles between the speakers and the microphone.
-
Page 10: Problems When Using The Auto Mcacc Setup
5 minute guide Problems when using the Auto MCACC Setup If the room environment is not optimal for the Auto MCACC Setup (too much background noise, echo off the walls, obstacles blocking the speakers from the microphone) the final settings may be incorrect. Check for household appliances (air conditioner, fridge, fan, etc.), that may be affecting the environment and switch them off if necessary. -
Page 11: Connecting Your Equipment
RROUND 1 1 3 1 DVR/VCR2 Control input/output Use to connect other Pioneer components so that you can control all your equipment from a single IR remote sensor. Operating other Pioneer components with this unit’s sensor on page 61. -
Page 12: When Making Cable Connections
Connecting your equipment 10 Multichannel pre-amplifier outputs Use to connect separate amplifiers for front, center, surround, surround back and subwoofer channels. Connecting additional amplifiers on page 49 (see also Installing your speaker system on page 18 for powered subwoofer connection). 11 Composite and S-video monitor outputs Use to connect monitors and TVs. -
Page 13: Connecting Your Tv And Dvd Player
Connecting your equipment Connecting your TV and DVD player VIDEO VSX-1017AV ANTENNA OPTICAL DIGITAL COMPONENT VIDEO (DVD/LD) (DVR/ VCR1) IN 2 (TV/SAT) (TV/SAT) IN 3 ASSIGNABLE (CD) ASSIGNABLE S-VIDEO HDMI ASSIGNABLE CONTROL iPod VIDEO AUDIO IN 1 (DVD/LD) IN 2 (DVR/VCR2) CD-R/TAPE/MD DVD/LD... -
Page 14: Connecting A Dvd/Hdd Recorder, Vcr And Other Video Sources
Connecting your equipment Connect the audio/video outputs on the set-top box to the TV/SAT AUDIO and VIDEO inputs. Connect using a stereo RCA/phono jack cable and a video or S-video cable. Connect an optical-type your set-top box to the OPTICAL 2 (TV/SAT) input. Use an optical cable for the connection. -
Page 15: Connecting Using Hdmi
Connecting your equipment VSX-1017AV ANTENNA OPTICAL DIGITAL COMPONENT VIDEO (DVD/LD) (DVR/ VCR1) IN 2 (TV/SAT) (TV/SAT) IN 3 ASSIGNABLE (CD) ASSIGNABLE S-VIDEO HDMI ASSIGNABLE CONTROL iPod VIDEO AUDIO IN 1 (DVD/LD) IN 2 (DVR/VCR2) CD-R/TAPE/MD DVD/LD TV/SAT DVR/VCR1 COAXIAL ASSIGNABLE COMPONENT VIDEO COMPONENT... -
Page 16: About Hdmi
Connecting your equipment To hear audio from your HDMI component through this system, make analog and/or digital connections as necessary. On the rear panel, you must connect to the audio jacks from a set of audio/video inputs (for example, DVR/VCR1 or DVR/VCR2 as shown in the illustration). -
Page 17: About The Wma9 Pro Decoder
Connecting your equipment About the WMA9 Pro decoder This unit has an on-board Windows Media Professional (WMA9 Pro) decoder, so it is possible to playback WMA9 Pro-encoded audio using a coaxial or optical digital connection when connected to a WMA9 Pro-compatible player. -
Page 18: Installing Your Speaker System
Connecting your equipment Installing your speaker system To take full advantage of the receiver’s surround sound capabilities connect front, center, surround and surround back speakers, as well as a subwoofer. Although this is ideal, other configurations with fewer speakers—no subwoofer or no center speaker, or even no surround speakers—will work. -
Page 19: Placing The Speakers
Connecting your equipment Bare wire connections Make sure that the speaker cable you’re going to use is properly prepared with about 10 mm of insulator stripped from each wire, and the exposed wire strands twisted together (fig. A). To connect a terminal, unscrew the terminal a few turns until there is enough space to insert the exposed wire (fig. -
Page 20: Thx Speaker System Setup
Connecting your equipment The diagrams below show suggested surround and surround back speaker orientation. The first diagram (fig. A) shows orientation with one surround back speaker (or none) connected. The second (fig. B) shows orientation with two surround back speakers connected. º... -
Page 21: Connecting External Antennas
Check the power cord once in a while. If you find it damaged, ask your nearest Pioneer authorized independent service company for a replacement. • The receiver should be disconnected by removing the mains plug from the wall socket when not in regular use, e.g., when on vacation. -
Page 22: Controls And Displays
Controls and displays Chapter 4: Controls and displays Front panel STANDBY / ON LISTENING MODE SEARCH MODE ENTER MULTI JOG SYSTEM RETURN SETUP MULTI JOG MULTI JOG dial Use the MULTI JOG dial to select various settings and menu options. ... -
Page 23: Operating Range Of Remote Control Unit
Controls and displays 12 PHONES jack Use to connect headphones. When the headphones are connected, there is no sound output from the speakers. 13 Input source buttons Press to select an input source. 14 VIDEO/GAME INPUT See Connecting a component to the front panel inputs on page 17. -
Page 24: Display
Controls and displays Display AUTO SBL SB DIGITAL ANALOG STREAM DIRECT PRO LOGIC ADV.SURROUND STEREO STANDARD SLEEP SIGNAL indicators Light to indicate the currently selected input signal. AUTO lights when the receiver is set to select the input signal automatically (page 30). Program format indicators These change according to which channels are active in digital sources. -
Page 25: Remote Control
Controls and displays Remote control SYSTEM OFF RECEIVER INPUT SOURCE SELECT DVR 2 DVR 1 TV CTRL CD-R/TAPE iPod TUNER RECEIVER SLEEP SB ch ANALOG DIMMER MIDNIGHT/ DIALOG E PHASE S.RETRIEVER D.ACCESS CLASS DISC ENTER TOP MENU MENU TUNE T.EDIT ENTER SETUP RETURN... - Page 26 Controls and displays TV CONTROL buttons These buttons are dedicated to control the TV assigned to the TV CTRL button. Thus if you only have one TV to hook up to this system assign it to the TV CTRL input source button.
-
Page 27: Listening To Your System
Listening to your system Chapter 5: Listening to your system Important • The listening modes and many features described in this section may not be available depending on the current source (for example, PCM 88.2 kHz/96 kHz, DTS 96 kHz (24 bit) or WMA9 Pro), settings and status of the receiver. -
Page 28: Using The Home Thx Modes
Listening to your system • 2 Pro Logic IIx MOVIE – See above (only available when you’re using two surround back speakers) • 2 Pro Logic IIx MUSIC – See above • Dolby Digital EX – Creates surround back channel sound for 5.1 channel sources and provides pure decoding for 6.1 channel sources (like Dolby Digital Surround EX) -
Page 29: Setting The Effect Options
Listening to your system Setting the effect options When using surround effects, there are a number of settings you can adjust. Press EFFECT/CH SEL repeatedly to select the setting you want to adjust. Depending on the current status / mode of the receiver, certain options may not appear. -
Page 30: Using Stream Direct
Listening to your system Using Stream Direct Use the Stream Direct modes when you want to hear the truest possible reproduction of a source. All unnecessary signal processing is bypassed. STANDARD MULTI OPE AUTO SURR SHIFT EFFECT/CH SEL RECEIVER • While listening to a source, press AUTO SURR to select the Stream Direct mode. -
Page 31: Using The Virtual Surround Back Mode
Listening to your system The table below indicates when you will hear the surround back channel when playing various kinds of sources ( =Sound plays through surround back speaker(s)). DVR 2 DVR 1 TV CTRL CD-R/TAPE iPod TUNER RECEIVER SLEEP SB ch ANALOG... -
Page 32: Using Midnight And Loudness
Listening to your system Using Midnight and Loudness The Midnight listening feature allows you to hear effective surround sound of movies at low volume levels. The effect automatically adjusts according to the volume at which you’re listening. The Loudness listening feature can be used to get good bass and treble from music sources at low volume levels. -
Page 33: Usb Playback
FAT16/32. It is not possible to connect this unit to a personal computer for USB playback. • Pioneer cannot guarantee compatibility (operation and/or bus power) with all USB mass storage devices and assumes no responsibility for any loss of data that may occur when connected to this receiver. -
Page 34: Compressed Audio Compatibility
USB playback Press RETURN to display the folder/file list for the USB device connected. US B P lay MP 3 /V BR R e l a x Yo u r B o d y K e v i n J a c k s o n W e a r e a l l o n e 128Kb p s 0: 1 5... -
Page 35: Using The Tuner
Using the tuner Chapter 7: Using the tuner Listening to the radio The following steps show you how to tune in to FM and AM radio broadcasts using the automatic (search) and manual (step) tuning functions. If you already know the frequency of the station you want, see Tuning directly to a station below. -
Page 36: Naming Station Presets
Using the tuner Naming station presets For easier identification, you can name your station presets. Choose the station preset you want to name. See Listening to station presets below for how to do this. Press T.EDIT (TUNER EDIT). The display shows STATION NAME, then a blinking cursor at the first character position. -
Page 37: Using Eon
Using the tuner Press ENTER to search for the program type. The system starts searching through the station presets for a match. When it finds one, the search stops and the station plays for five seconds. If you want to keep listening to the station, press ENTER within the five seconds. -
Page 38: The System Setup Menu
The System Setup menu Chapter 8: The System Setup menu Making receiver settings from the System Setup menu The following section shows you how to make detailed settings to specify how you’re using the receiver (for example, if you want to set up two speaker systems in separate rooms), and also explains how to fine-tune individual speaker system settings to your liking. -
Page 39: Manual Mcacc Setup
The System Setup menu Manual MCACC setup You can use the settings in the Manual MCACC setup menu to make detailed adjustments when you’re more familiar with the system. Before making these settings, you should have already completed Automatically setting up for surround sound (Auto MCACC) on page 8. -
Page 40: Fine Speaker Distance
The System Setup menu 3a.Fine Channel Level 0.0dB 0.0dB ] 1.0dB -3.0dB ] [+ 10.0dB ] [– 10.0dB ] 9.5dB ] [– 1.5dB ] • For comparison purposes, the reference speaker will change depending on which speaker you select. • If you want to go back and adjust a channel, simply use /... - Page 41 The System Setup menu Setting the Acoustic Calibration EQ automatically When you perform the Auto MCACC setup as specified in Automatically setting up for surround sound (Auto MCACC) on page 8, the correction is automatically done with the time period already selected (when TYPE1 is selected for EQ TYPE, the calibration is set only for ALL CH ADJUST).
- Page 42 The System Setup menu Select ‘EQ Data Copy’ from the Manual MCACC setup menu. 3.Manual MCACC a.Fine Ch Level b.Fine SP Distance c.Advanced EQ Setup d.EQ Data Copy e.EQ CUSTOM1 Adjust f .EQ CUSTOM2 Adjust g.EQ Data Check Select CUSTOM1 or CUSTOM2 then use / to select the setting you want to copy.
-
Page 43: Manual Speaker Setup
The System Setup menu Manual speaker setup This receiver allows you to make detailed settings to optimize the surround sound performance. You only need to make these settings once (unless you change the placement of your current speaker system or add new speakers). -
Page 44: Crossover Network
The System Setup menu • If you have a subwoofer and like lots of bass, it may seem logical to select LARGE for your front speakers and PLUS for the subwoofer. This may not, however, yield the best bass results. Depending on the speaker placement of your room you may actually experience a decrease in the amount of bass due to low frequency cancellations. -
Page 45: Speaker Distance
The System Setup menu Speaker Distance For good sound depth and separation from your system, you need to specify the distance of your speakers from the listening position. The receiver can then add the proper delay needed for effective surround sound. Select ‘Speaker Distance’... -
Page 46: Other Connections
• The connected iPod should be updated with iPod updater software higher than version 2004-10-20. 3 The controls of your iPod will be inoperable when connected to this receiver (Pioneer shows in the iPod display). Features such as the equalizer cannot be controlled using this receiver, and we recommend switching the equalizer off before connecting. -
Page 47: Connecting The Multichannel Analog Inputs
Other connections Use the / buttons to browse the selected category (e.g., albums). • Use / to move to previous/next levels. Continue browsing until you arrive at what you want to play, then press to start playback. Navigation through categories on your iPod looks like this: Playlists ... -
Page 48: Speaker B Setup
Other connections Make sure you have set the playback source to the proper output setting. For example, you might need to set your DVD player to output multichannel analog audio. Press MULTI CH IN (front panel). • Depending on the DVD player you’re using, the analog output level of the subwoofer channel may be too low. -
Page 49: Bi-Wiring Your Speakers
Other connections Connect your speakers as shown below. This illustration below shows the connections for bi- amping your front left speaker. Hook up your front right speaker in the same way. SPEAKERS FRONT CENTER SURROUND Front left speaker High Since both front and surround back speaker terminals output the same audio, it doesn’t matter which set (front or surround back) is powering which part (High or Low) of the speaker. -
Page 50: Using This Receiver With A Pioneer Plasma Display
Note 1 The 3-ringed SR+ cable from Pioneer is commercially available under the part number ADE7095. Contact the Pioneer Customer Support division for more information on obtaining an SR+ cable (you can also use a commercially available 3-ringed mini phone plug for the connection). -
Page 51: Using The Sr+ Mode With A Pioneer Plasma Display
• On-screen display of listening mode. • Automatic video input switching on the plasma display. • Automatic volume muting on the plasma display. See also SR+ Setup for Pioneer plasma displays on page 54 for more on setting up the receiver. DVR 2 DVR 1... -
Page 52: Other Settings
Other Settings Chapter 10: Other Settings The Input Assign menu You only need to make settings in the Input Assign menu if you didn’t hook up your digital equipment according to the default settings for the digital inputs, or if you have connected equipment using component video cables. -
Page 53: The Other Setup Menu
LFE channel (LFE Attenuator Setup on page 54). • SR+ Setup – Specify how you want to control your Pioneer plasma display (SR+ Setup for Pioneer plasma displays on page 54). • Video Conv. Setup – Specify if you want analog video signals converted for output to your TV (Video Converter Setup on page 54). -
Page 54: Dual Mono Setup
Pioneer plasma display to this receiver using an SR+ cable. Note that the number of settings available will depend on the plasma display you’ve connected. See also Using this receiver with a Pioneer plasma display on page 50. Select ‘SR+ Setup’ from the Other Setup menu. -
Page 55: Using Other Functions
Using other functions Chapter 11: Using other functions Making an audio or a video recording You can make an audio or a video recording from the built-in tuner, or from an audio or video source connected to the receiver (such as a CD player or TV). Keep in mind you can’t make a digital recording from an analog source or vice-versa, so make sure the components you are recording to/from are hooked up in... -
Page 56: Dimming The Display
Using other functions Dimming the display You can choose between four brightness levels for the front panel display. Note that when selecting sources, the display automatically brightens for a few seconds. CD-R/TAPE iPod SLEEP DIALOG E • Press RECEIVER then press DIMMER repeatedly to change the brightness of the front panel display. -
Page 57: Controlling The Rest Of Your System
2 • When using a Pioneer HDD recorder, please select PIONEER DVR 487, 488, 489 or 493. • When using a Pioneer plasma display released prior to summer 2005, please select preset codes 600 or 231. To try out the remote control, switch the component on or off (into standby) by pressing SOURCE . -
Page 58: Multi Operation And System Off
(except DVD recorders); • program the power to switch on if it’s the source component selected in step 3; • program a Pioneer TV or monitor to switch on if the input function (selected in step 2) has video input terminals;... -
Page 59: Using Multi Operations
Press MULTI OPE. MULTI OP flashes in the display. Press SOURCE. The command sequence you programmed will run, then all Pioneer components will switch off receiver. Controls for TVs This remote control can control components after entering the proper codes or teaching the receiver the commands (see Setting the remote to control other components on page 57 for more on this). -
Page 60: Controls For Other Components
Controlling the rest of your system Controls for other components This remote control can control these components after entering the proper codes or teaching the receiver the commands (see Setting the remote to control other components on page 57 for more on this). Use the input source buttons to select the component. -
Page 61: Operating Other Pioneer Components With This Unit's Sensor
If you have connected a remote control to the CONTROL IN jack (using a mini-plug cable), you won’t be able to control this unit using the remote sensor. • See Using this receiver with a Pioneer plasma display on page 50 if you are connecting a Pioneer plasma display. -
Page 62: Additional Information
• Something is obstructing the fan. Remove the obstruction and try switching the receiver back on. If the fan is still not working, or you can’t remove the object, unplug the receiver from the wall and call a Pioneer authorized independent service company. -
Page 63: Other Audio Problems
Additional information Symptom Remedy • Check that the surround back speakers are set to LARGE or SMALL (see Speaker Setting on page 43). No sound from surround back speakers. • Make sure surround back processing is set to SBch ON (see Using surround back channel processing on page 30). -
Page 64: Video
Additional information Symptom Subwoofer output is very low. Everything seems to be set up correctly, but the playback sound is odd. The PHASE CONTROL feature doesn’t seem to have an audible effect. Noise or hum can be heard even when there is no sound being input. -
Page 65: Display
• The preset code may be incorrect. Redo the procedure for entering preset codes. • Reinsert the SR cable, making sure it’s connected to the right jack (see Using this receiver with a Pioneer The SR cable is connected, but the connected components can’t... -
Page 66: Usb Interface
• If this message continues to appear after going through all the checks in Important on page 34 of USB playback, take the unit to your nearest Pioneer authorized service center or your dealer for servicing. • The WMA or MPEG-4 AAC files were recorded using DRM (digital rights management), or the bit rate/ sampling rate is not compatible (see Compressed audio compatibility on page 34). -
Page 67: Surround Sound Formats
Additional information Surround sound formats Below is a brief description of the main surround sound formats you’ll find on DVDs, satellite, cable and terrestrial broadcasts, and video cassettes. Dolby The Dolby technologies are explained below. See www.dolby.com for more detailed information. Dolby Digital Dolby Digital is a multichannel digital audio coding system widely used in cinemas, and in the home for DVD and digital... -
Page 68: Windows Media Tm Audio 9 Professional
Additional information Windows Media Audio 9 Professional Windows Media Audio 9 Professional (WMA9 Pro) is a discrete surround format developed by Microsoft Corporation. WMA9 Pro can support up to 5.1/7.1 channel playback with sampling rates up to 24-bit/96 kHz. Using the unique WMA compression techniques, WMA9 Pro can deliver multichannel music and soundtracks over high-speed internet networks at low bit rates with minimal audio... -
Page 69: Listening Modes With Different Input Signal Formats
Additional information • Advanced Speaker Array (ASA) ASA is a proprietary THX technology which processes the sound fed to 2 side and 2 back surround speakers to provide the optimal surround sound experience. When you set up your home theater system using all eight speaker outputs (Left, Center, Right, Surround Right, Surround Back Right, Surround Back Left, Surround Left and Subwoofer) placing the two Surround Back speakers close together... - Page 70 Additional information Multichannel signal formats SBch Processing Input signal format SBch WMA9 Pro (6.1/7.1 channel) Processing Dolby Digital EX (6.1 channel flagged) (7.1 channel decoding used for all sources) DTS-ES (6.1 channel sources/6.1 channel flagged) (5.1 channel encoding) Dolby Digital WMA9 Pro (5.1 channel encoding) DTS 96/24...
-
Page 71: Specifications
Additional information Specifications Amplifier section Continuous Power Output (Stereo) Front..150 W + 150 W (DIN 1 kHz, THD 1 %, 6 Ω) 120 W + 120 W (DIN 1 kHz, THD 1 %, 8 Ω) Continuous Power Output (Multichannel) Front. - Page 72 253 Alexandra Road, #04-01, Singapore 159936 TEL: 65-6472-7555 PIONEER ELECTRONICS AUSTRALIA PTY. LTD. 178-184 Boundary Road, Braeside, Victoria 3195, Australia, TEL: (03) 9586-6300 PIONEER ELECTRONICS DE MEXICO S.A. DE C.V. Blvd.Manuel Avila Camacho 138 10 piso Col.Lomas de Chapultepec, Mexico,D.F. 11000 TEL: 55-9178-4270 <07C00001>...