Table of Contents
Advertisement
Quick Links
Advertisement
Table of Contents

Related Manuals for Kenwood NX-3000 series


Summary of Contents for Kenwood NX-3000 series
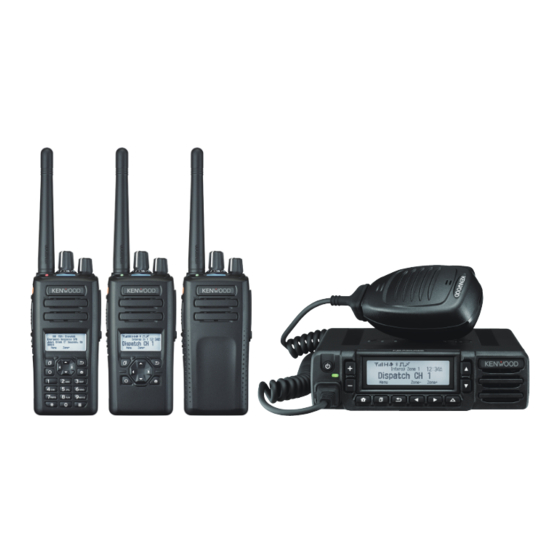
- Page 1 NX-3000 series USER GUIDE GUIDE DE L'UTILISATEUR GUIA DEL USUARIO B5A-2071-00 (K)
- Page 2 Radio FRequency eneRgy SaFety inFoRmation This KENWOOD transceiver has been tested and complies with the standards listed below, in regards to Radio Frequency (RF) energy and electromagnetic energy (EME) generated by the transceiver. • FCC RF exposure limits for Occupational Use Only. RF Exposure limits adopted by the FCC are generally based on recommendations from the National Council on Radiation Protection and Measurements, &...
- Page 3 ® owned by the Bluetooth SIG, Inc. and any use of such marks by JVC KENWOOD Corporation is under license. Other trademarks and trade names are those of their respective owners. Firmware Copyrights...
-
Page 4: Table Of Contents
Thank You We are grateful you have chosen kEnWooD for your Digital Transceiver applications. Contents notiCes to the User..........3 PreCaUtions ............5 terMinaL DesCriPtions ..........12 UnPaCKinG anD CheCKinG eQUiPMent ......13 Supplied AcceSSorieS ................ 13 PreParation ............14 inStAlling/ removing the (optionAl) BAttery pAck .... -
Page 5: Notices To The User
Changes or modifications to this equipment may cause harmful interference unless the modifications are expressly approved by the party responsible/ JVC KENWOOD. The user could lose the authority to operate this equipment if an unauthorized change or modification is made. - Page 6 For information on Li-ion battery recycling in your area, call (toll free) 1-800-8-BATTERY (1-800-822-8837). kEnWooD’s involvement in this program is part of our commitment to preserve our environment and conserve our natural resources. aTTEnTIon:...
-
Page 7: Precautions
Ensure that there are no metallic items located between the transceiver and the battery pack. • Do not use options not specified by kEnWooD. • If the die-cast chassis or other transceiver part is damaged, do not touch the damaged parts. - Page 8 Turn the transceiver power off before entering the following locations: • Near explosives or blasting sites. • In aircrafts. (Any use of the transceiver must follow the instructions and regulations provided by the airline crew.) • Where restrictions or warnings are posted regarding the use of radio devices, including but not limited to medical facilities.
- Page 9 If an abnormal odor or smoke is detected coming from the transceiver, switch the transceiver power off immediately, remove the battery pack from the transceiver, and contact your kEnWooD dealer. • Use of the transceiver while you are driving may be against traffic laws.
- Page 10 Information concerning the battery pack: The battery pack includes flammable objects such as organic solvent. Mishandling may cause the battery to rupture producing flames or extreme heat, deteriorate, or cause other forms of damage to the battery. Please observe the following prohibitive matters. •...
- Page 11 • Do not charge the battery near fires or under direct sunlight! If the battery’s protection circuit is damaged, the battery may charge at extreme current (or voltage) and an abnormal chemical reaction may occur. The battery may generate heat or smoke, rupture, or burst into flame.
- Page 12 Do not reverse-charge or reverse-connect the battery! • The battery pack has positive and negative poles. If the battery pack does not smoothly connect with a charger or operating equipment, do not force it; check the polarity of the battery. If the battery pack is reverse-connected to the charger, it will be reverse-charged and an abnormal chemical reaction may occur.
- Page 13 Lightly shake the transceiver to remove the water from the speaker and/or microphone before operating the transceiver. • Use of any option on the transceiver not specified by kEnWooD, may reduce or void the water resistant and dust resistant performance.
-
Page 14: Terminal Descriptions
terMinaL DesCriPtions universal connector (nX-3200/ nX-3300) It is possible to use a resin-based cover for the Universal connector. Pin no. name Description Specification Ext/ Int Speaker Switch Input Hi: INT, Low: EXT BTL Output + for External Standard load 8 Ω Speaker BTL Output –... -
Page 15: Unpacking And Checking Equipment
UnPaCKinG anD CheCKinG eQUiPMent note: • The following unpacking instructions are for use by your kEnWooD dealer, an authorized kEnWooD service facility, or the factory. Carefully unpack the transceiver. We recommend that you identify the items listed in the following table before discarding the packing material. -
Page 16: Preparation
PreParation instaLLinG/ reMovinG the (oPtionaL) Battery PaCK • Do not short the battery terminals or dispose of the battery by fire. • Never attempt to remove the casing from the battery pack. • Install the battery pack after cleaning the battery pack contacts and the transceiver terminals. -
Page 17: Installing/ Removing Alkaline Batteries (Optional Battery Case)
instaLLinG/ reMovinG aLKaLine Batteries (oPtionaL Battery Case) ◆ Do not install batteries in a hazardous environment where sparks could cause an explosion. ◆ Never discard batteries in fire; extremely high temperatures can cause batteries to explode. ◆ Do not short circuit the battery case terminals. ◆... -
Page 18: Installing The (Optional) Antenna
instaLLinG the (oPtionaL) antenna Screw the antenna into the connector Optional antenna on the top of the transceiver by holding the antenna at its base and turning it clockwise until secure. instaLLinG the BeLt CLiP If necessary, attach the belt clip using the two supplied M3 x 8 mm Belt clip binding screws. -
Page 19: Installing The Cap Over The Universal Connector
When not using an optional speaker/ microphone or headset, install the cap over the universal connector. • The noise canceling function on KMC-54WD Speaker Microphone works using the built-in DSP of the transceiver, and can only be used with NX-3000 series Portable models. -
Page 20: Installing The Cap Over The Speaker/ Microphone Jacks
instaLLinG the CaP over the sPeaKer/ MiCroPhone JaCKs <nX-3220/ nX-3320> Install the cap over the speaker/ microphone jacks when not using an optional speaker/ microphone. note: To keep the transceiver water resistant, you must cover the speaker/ microphone jacks with the supplied cap. 1 If you are not using an optional speaker/ Speaker/ microphone or headset, install the cap... -
Page 21: Orientation
orientation BUttons anD ControLs Microphone Speaker Full Button Model Standard Button Model Basic Button Model a Selector Rotate this control to activate its programmable function. The default setting is Channel Select. b Power switch/ Volume control Turn clockwise to switch the transceiver ON. To switch the transceiver OFF, turn counterclockwise fully. -
Page 22: I Lcd Display
c Transmit/ Receive/ Battery low indicator The indicator lights in different colors to indicate the current status of the transceiver. Lights red while transmitting and green while receiving. Flashes red when the battery power is low while transmitting. Replace or recharge the battery pack when the battery power is low. - Page 23 The keypad buttons can also be programmed with secondary functions if a programmable function buttons is programmed as Function. For details on programming functions to the buttons on your transceiver, please contact your dealer or refer to the instruction manual available from the following URL. http://manual.kenwood.com/en_contents/search/keyword...
-
Page 24: Display
DisPLay Basic Frame Function Indicator Area Main Area Button Guide Area Display area Description Display the various function Icons ,signal Function Indicator strength indicator and battery power indicator Area and clock. Display the information of the transceiver such Main Area as Channel number and Zone number. - Page 25 Indicator Description Connected to Bluetooth device. The Bluetooth function is activated. Blinks in the process of turning on Bluetooth. The GPS position is determined. Blinks when the GPS is unable to determine the position. Scan, Priority Scan or Voting/Site Roaming is in progress.
- Page 26 Indicator Description The External Speaker is activated. Blinks when an incoming call matches your Optional Signaling. The Vibrator function is activated. Blinks when the Vibrator is not functioning. A message is stored in the memory. Blinks when a new message is received. The VOX function is activated.
-
Page 27: Basic Operations
BasiC oPerations sWitChinG PoWer on/ oFF Turn the Power switch/ Volume control clockwise to switch the transceiver power ON. Turn the Power switch/ Volume control counter-clockwise to switch the transceiver power OFF. aDJUstinG the voLUMe rotate the Power switch/ Volume control to adjust the volume. seLeCtinG a Zone anD ChanneL 1 Select the desired zone using the Selector or 4-way D-pad or the buttons programmed as [Zone up]/ [Zone Down]. -
Page 28: Transmitting
transMittinG 1 Select the desired zone and channel using the Selector or 4-way D-pad and the [Zone up]/ [Zone Down] or [Channel up]/ [Channel Down] buttons. 2 Press the PTT switch and speak into the microphone. Release the PTT switch to receive. green while •... -
Page 29: Information On Software License
inForMation on soFtWare LiCense This transceiver uses a software according to the following license agreements. *zlib LICEnSE Copyright (C) 1995-2013 Jean-loup Gailly and Mark Adler This software is provided 'as-is', without any express or implied warranty. In no event will the authors be held liable for any damages arising from the use of this software. - Page 30 Simon-Pierre Cadieux Eric S. Raymond Gilles Vollant and with the following additions to the disclaimer: There is no warranty against interference with your enjoyment of the library or against infringement. There is no warranty that our efforts or the library will fulfill any of your particular purposes or needs.
- Page 31 Permission is hereby granted to use, copy, modify, and distribute this source code, or portions hereof, for any purpose, without fee, subject to the following restrictions: 1. The origin of this source code must not be misrepresented. 2. Altered versions must be plainly marked as such and must not be misrepresented as being the original source.
- Page 32 © 2017...