Table of Contents
Advertisement
WIRED REMOTE CONTROLLER
INSTALLATION MANUAL
CONTENTS
9. CONTACT INFORMATION REGISTRATION (SERVICE MENU) ........................... 7
MODEL
SPX-WKT2
........................... 2
........................... 2
........................... 4
........................... 5
........................... 5
........................... 6
........................... 6
........................... 7
Advertisement
Table of Contents

Related Manuals for Hitachi SPX-WKT2


Summary of Contents for Hitachi SPX-WKT2
-
Page 1: Table Of Contents
WIRED REMOTE CONTROLLER INSTALLATION MANUAL MODEL SPX-WKT2 CONTENTS 1. SAFETY PRECAUTIONS ......2 2. INSTALLATION WORK ......2 3. NAMES AND FUNCTIONS OF REMOTE CONTROLLER ......4 4. ADJUSTING DATE/TIME ......5 5. LANGUAGE SETTING ......5 6. SCREEN DISPLAY SETTING ...... -
Page 2: Safety Precautions
1. SAFETY PRECAUTIONS Also see installation manual attached to the indoor unit. • Please read the “Safety Precaution” carefully before operating the unit to ensure correct usage of the unit. • Pay special attention to signs of “ Warning” and “ Caution”. - Page 3 2.3 INSTALLATION PROCEDURES 1 Insert the edge of the slotted screwdriver into the groove at the bottom of the holding bracket, push and then remove the remote controller from holding bracket. Rear cover Approx. 6mm Slotted Screw driver Groove Figure seen from bottom side Groove for attaching controller 2 Attach the remote controller to holding bracket as follows.
-
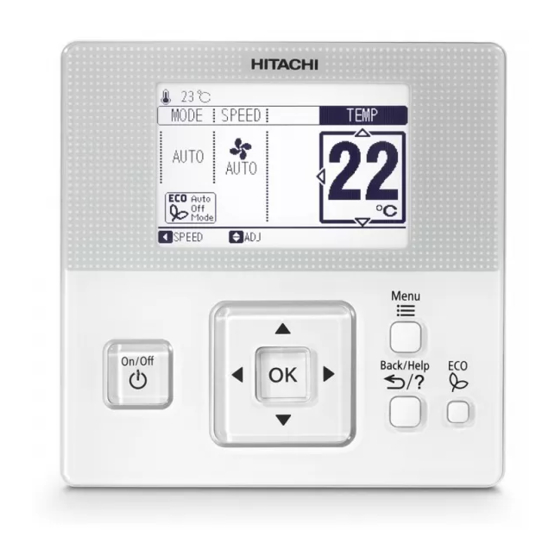
Page 4: Names And Functions Of Remote Controller
3. NAMES AND FUNCTIONS OF REMOTE CONTROLLER The figure below shows all the indications for reference. The actual display during operation is different. Display part Eco Auto Off Indicator It is indicated when the eco auto off function is set. Fan Speed Indicator Auto Swing Indicator Sleep Timer Indicator... -
Page 5: Adjusting Date/Time
4. ADJUSTING DATE/TIME This function is used to adjust the date and time. 5 After the setting is completed, press "OK" and the confirmation Periodic time setting is recommended. (Clock accuracy : Difference screen will be displayed. within +/-5 seconds by month). As for this remote controller, the clock can work up to 72 hours when power failure occurs. -
Page 6: Screen Display Setting
6. SCREEN DISPLAY SETTING This function is used to change the display adjustment. • Brightness : ◆ Function Press "" or "" and the brightness of backlight is changed. • Time Format : • Back light : To change the time form to 12 hour 24 hour. The display backlight is OFF after the specified time interval of •... -
Page 7: Display Room Temperature (Service Menu)
8. DISPLAY ROOM TEMPERATURE (SERVICE MENU) Room temperature(around remote controller) can be displayed 1 Press and hold simultaneously for at least 3 seconds 2 Select "Yes" by pressing ""or "" and press "OK". The setting during the normal mode (when unit is not operated). will be confirmed and the screen will return to the normal mode.