Table of Contents
Advertisement
Quick Links
Advertisement
Table of Contents

Related Manuals for Philips 766


Summary of Contents for Philips 766
- Page 1 Philips 766 User Guide...
-
Page 2: Table Of Contents
Index 1. Discover your phone ..................3 2. Menu Tree....................5 3. Getting started ...................10 4 Input methods .....................13 5 Stylus operations..................14 6 Call functions ....................15 7. Call services....................20 8 Contacts......................22 9 WAP......................25 10 Organiser ....................28 11 Multimedia....................35 12 Messages ....................37 13 Camera .....................46 14 Settings.....................52 15 STK......................60... -
Page 3: Discover Your Phone
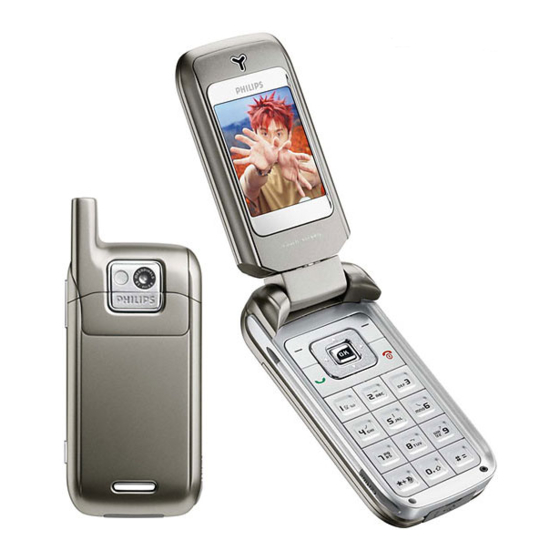
1. Discover your phone Earpiece Soft keys Volume keys Pick up key OK key Hang up and Navigation keys on/off key Camera key Microphohe Lens Flashlight... -
Page 4: Keypad Description
Keypad description • In idle screen, press to access the main menu. • Function list screen: select the highlighted function • Others: 1st press to access the option menu, 2nd press to confirm a selection. Left soft key • In idle mode, locked to be shortcut for the main menu. •... -
Page 5: Menu Tree
[Right] • Cursor right. • In idle screen, short press the access new SMS (can be user defined) Number keys • In idle screen, short press 0-9 to enter numberes. • In idle screen, long press to fast access a designated function or flash dial a designated phone number (“0”... - Page 6 3 Outgoing calls 2 Call Settings 1 Call forward 1 All calls 2 If busy 3 If not answered 4 If not reached 2 Call barring 1 Incoming 1 All 2 When roaming 2 Outgoing 1 All 2 International 3 Intl. exc. Home 3 Fixed dial 1 Settings 2 Fixed dial list...
- Page 7 2 Dictionary 1 Eng-Chi 2 Chi-Eng 3 Calculator 4 Alarm 1 Alarm 1 2 Alarm 2 3 Alarm 3 4 Alarm 4 5 PC communication 6 Others 1 Notepad 2 Anniversary 3 World clock 4 Currency converter 5 Multimedia 1 Picture album 1 Own pictures 2 Standard pictures...
- Page 8 2 Outbox 1 MMS unread 2 MMS read 3 Outbox 1 MMS unsent 2 MMS sent 3 Broadcast SMS 4 Settings 1 SMS settings 2 MMS settings 3 Message groups 1 SMS groups 2 MMS groups 4 Broadcast SMS 7 Camera 1 Still camera 2 Video camera 8 Settings...
- Page 9 2 Answer 3 Reject 3 Security 1 Phone code 2 PIN code 3 Data protection 4 Edit phone code 5 Edit PIN 6 Edit PIN2 4 Shortcuts 1 Right soft key 2 Navigation keys 3 Hotkeys 5 Factory defaults 6 Netwk. services 1 Network info 1 Select network 2 Frequency...
-
Page 10: Getting Started
3. Getting started Insert the SIM card To user your phone, you must insert a valid SIM card supplied by your GSM operator or retailer.The SIM card contains your subscription, your mobile number, and memory in which you can store phone numbers and messages. Insert the SIM card 1. -
Page 11: Copy The Sim Phonebook
If you enter a wrong PIN code 3 times, your SIM card will be blocked. To unlock it, you must require the PUK code rom your operator. Set date and time As prompted by the phone at first switch on, set the date by pressing the appropriate nueric keys (press [Hang up key] to erase a number), and then set the time. - Page 12 • SMS full – Memory for SMS is full. Delete old messages to receive new ones. • MMS message – You have received a new multimedia message. • MMS full – Memory of MMS is full. Delete old messages to receive new ones. •...
-
Page 13: Input Methods
4 Input methods Keypad input methods Your phone provides you with the following keypad input methods: • T9 Pinyin • T9 Stroke • T9 English • • In text editors, you can press the left soft key to switch from one input method to another. On-screen keyboard An on-screen keyboard will appear in any text edition contexts when entering your PIN code, typing a message, entering a name in the phonebook, etc. -
Page 14: Stylus Operations
5 Stylus operations The main display of your phone is a touch screen, which is a faster and more intuitive way of navigating through lists and menus. It becomes available as soon as you operate with the stylus located on the side of your phone. Basic operations In menu lists, double tap a menu/icon to enter/activate it, and then apply a reasonable pressure, as if you were writing on paper. -
Page 15: Call Functions
6 Call functions Make or answer calls Make calls In idle screen, enter the phone number using the number key. Press [Pick up key] or the left soft key to dial the number. Press [Hang up key] to end or cancel the call. Note: -... - Page 16 Press the [Pick up key] to dial the number. Dial a number set in schedule alarm If you have set a phone number as an alarm in Schedule, the phone number will be displayed on the screen when the alarm rings. You can press [Pick up key] to dial the number, or press any key (exept [Pick up key]) to turn the alarm off.
-
Page 17: Functions During A Call
- If Call forward (If busy) is set to be On, incoming calls will be forward to designated number for Call forward. - If the caller hangs up the call before you answer it, a missed call icon will be displayed on the subdisplay, while a missed call icon and prompt will be displayed on the main display. - Page 18 Conference call You can activate a conference call by making several outgoing calls. You may have up to five members at the same time. Make a first call with someone, then a second one. Press [OK] and select Multiparty->Join all and press [OK] to confirm.
- Page 19 menu. Plese be noted that you can not access Call settings, WAP, Multimedia, MMS, Camera, PC communication and Settings during a call.
-
Page 20: Call Services
7. Call services Call list The last 30 missed calls/incoming calls/outgoing call are stored in corresponding folders in Call list. In the call list menu list, you can press [1] to access Missed calls, press [2] to access Incomingcalls or press [3] to access Outgoing calls. Meanwhile, you can move cursor to select item, and then press the left soft key [Select] to view the corresponding information. -
Page 21: Call Counters
outgoing calls from your phone with the following options: Incoming (All) - All incoming calls are forbidden. — Incoming (When roaming) - All incoming roaming calls are forbidden. — Outging (All) – All outgoing calls are forbidden. — Outgoing (International) - All outging international calls are forbidden. —... -
Page 22: Contacts
8 Contacts There are two available phonebooks: the one on your SIM card (number of entries depending on SIM card capacity) and the one in your phone (up to 500 entries), whick is the default selected phonebook. Add an entry in a phonebook In the list screen of the names list, select <New>... -
Page 23: Use The Phonebook
Group to enter the list screen, press the left soft key [Add] enter the name editor, enter the desired name and press [OK] to confirm. At most 8 user-defined groups can be added. To rename a user-defined call group, move the cursor to select a group and press the right soft key [Rename] to enter the name editor, change the group name and press [OK] to confirm. -
Page 24: Contacts Select
To copy all the entries in a phonebook, you can select Copy all in the Settings menu of Contacts. You will be required to choose between Copy to phone and Copy to SIM, make your choice and press [OK] to confirm. Delete entries Delerte a single entry In the names list of the phonebook, move the cursor to select an entry, press [OK] and select... -
Page 25: Wap
9 WAP Your mobile phone supports services based on the Wireless Application Protocol (WAP). The built-in WAP browser allows you to access services supplied with your network, such as news, sports, weather, etc. Your mobile phone readily supports the WAP function if it is included in your subscription; if your phone was pre-configured, it shouldn’t be necessary for you to change the settings described in this section. -
Page 26: Managing Bookmarks
Managing bookmarks On the bookmark list screen, press [OK] to access the following options. --Add : to add new bookmarks. --View: to view and or edit the select bookmark. --Delete: to delete the select bookmark. --Delete All: to delete all the bookmarks Using bookmarks To connect to a WAP site you have stored as a bookmark, simply select it in the list and press the left soft key to launch the connection. -
Page 27: Push Inbox
IP Address: the gateway IP address Delay Time: time delay for auto shut-down of WAP connection CSD connect Dial Number: the phone number for WAP connection User Name: the user name for WAP login Password: the password for WAP login Link Type: ISDN/PSTN GPRS Settings (where service is available) –... -
Page 28: Organiser
10 Organiser To access the Organiser function:In dle mode, press [OK] and then press [4]. Calendar Calendar makes it quick and easy for you to record your daily appointments, agenda and work plans (up to 200 records can be added). Before arranging the calendar, check that you have set the correct date, time and display format in Settings. - Page 29 current date. Press the left soft key to view the details. If there are no scheduled records, a blank list will be displayed. Searching for a schedule On the Month view screen, press [OK], select For schedule, then press [OK]. Enter a keyword and press [OK] to start searching.
- Page 30 Press [OK] to display the definition. Press the left/right soft key to display the previous/next word and press【3/4】to scroll through pages. Calcular On the ORGANISER screen, select Calculator, and press [OK] to enter the Calculator screen. Simple calculations When 0 is displayed on the screen, enter the first number in the calculation. To add, press the up button of the navigation key.
- Page 31 In the Ring Tone field, press the left/right button of the navigation key to choose a ring tone you like. Or press the left soft key to display a ring tone list, move the cursor to select a desired one and then press [OK]. In the Ring Tone Volume field, press the left/right button of the navigation key to adjust the volume.
- Page 32 Press [OK] to save the modification. Deleting a notepad entry Deleting a single entry On the Notepad screen, scroll to the entry you would like to delete, press the right soft key[Delete]. The display will prompt “Deleteit?”. Press [OK] to confirm. Or, on the browsing screen of a selected entry, press [OK] , select Delete and press [OK].
-
Page 33: World Clock
Deleting an anniversary entry On the Anniversary list screen, scroll to a record you would like to delete, press [OK], select Delete, and then press [OK]. The display will prompt “Delete all?”. Press [OK] to confirm. World Clock World Clock displays the time of your local city and that of a world city simultaneously. The local time is displayed on the top of the screen;... - Page 34 press [Unit] to display a list of currency units, select a desired one from the list, and then press [OK]. Setting the exchange rate It is recommended that you change the default exchange rate for your chosen currency unit before continuing with currency conversion.
-
Page 35: Multimedia
11 Multimedia Picture album This menu allows you to mange and display the pictures stored in your mobile phone, in Own pictures or Standard pictures. When entering one of the available sub menus, the picrtures stored in your phone are displayed as a text list. To access the graphical display, select a picture in the list and press the left soft key [View]. - Page 36 • Delete all – to delete all the sounds in Own melodies. • Rename – to change the name of the selected sound. • Set as ringer – to set the selected sound as call ringer. • Set as message ringer – to set the selcted sound as message ringer. •...
-
Page 37: Messages
12 Messages Your phone supports three types of messaging service: SMS, EMS and MMS. SMS (Short Message Service) messages are text messages sent and received via the network operator’s message centre. When a text message has pictures, sounds and animations inserted, it becomes an EMS (Enhanced Message Service). -
Page 38: Forwarding A Message
After entering a recipient’s phone number, press [OK], select Separator, then press [OK]. Add a “;” after the phone number. Repeat this to add further recipients. Or, on the Phone Number screen, press [Menu], select Group, and then press [OK]. Select the desired Group and press [OK]. - Page 39 Saving a phone number from a message You can save the sender’s phone number in the Contacts or on the SIM card. When reading a message, press [OK] and select Call Back. Press [OK], select Save number, and press [OK]. Press the left soft key and select As New Record ( create a new entry) or Into Old Record (Replace the old record)..
- Page 40 To rename the user folder On the User Folder list screen, press [OK] and select Rename, press [OK]. Enter the name and press [OK]. To delete the user folder On the User Folder list screen, press [OK] and select Delete, press [OK]. At the promt “Delete?”...
- Page 41 For availability and a subscription to a multimedia message service, contact your network operator or service provider. Writing and sending an MMS message An MMS message can consist of up to10 pages. A typical page will consist of a picture, some text and a sound byte.
- Page 42 Sound: mmf/I-melody/midi Receiving and reading MMS messages When you have a new MMS message, the MMS message icon will be displayed on the external display and the message “X new MMS(s)” will be displayed on the internal display. If Auto download setting is set to On. In idle screen, press the left soft key to display the MMS list.
-
Page 43: Mms Folders
Erasing an MMS message On the MMS list screen, scroll to the MMS you would like to delete, and press the right soft key [Delete]. Or when view the MMS message, press [OK] and select Delete. The screen prompts: “Delete?”. Press [OK] to confirm the deletion. -
Page 44: Mms Setting
MMS Setting WAP Setting Homepage: the homepage address of the WAP service that you would like to use IP Address: the gateway IP address GPRS Setting APN: the Access Point Name address User Name: the user name for GPRS connection Password: the password for GPRS connection Other Setting: Scroll to the item that you would like to set. - Page 45 The display will prompt “Delete”. Press [OK]. To delete all groups On the SMS/MMS group list screen, press [OK] and select Delete all. The display will prompt: “Delete all?”. Press [OK]. Broadcast SMS settings To access the Broadcast SMS settings: In idle mode, press [Menu], select Messages > Settings > Broadcast SMS.
-
Page 46: Camera
13 Camera Your mobile phone feartuers a digital camera that aloows you to take picture, store them in your phone, use them as wallpaper or send them to your friends. Meanwhile, you can also record short video clips without sound using the buit-in camera. Still camera How to …... - Page 47 Delete the picture Press [Hang up key] right after the shot. Access the shot options Press [OK] right after the shot. Activate/deactivate the self-timer Press [0]. Settings Preview mode settings Once the camera is activated, the lens of the camera is automatically focused and functions icons are displayed in the bottom (Zoom, Effect, Camear mode, Vision Mode) and top (Option menu and Back icon).
- Page 48 Self-timer Allows you to set the Self-timer option On or Off. You can press [0] to toggle between the two modes. In preview screen, you can also press [OK] to access further settings other than the ones available directly within the preview screen. General settings Camera mode Allows you to choose a camera mode among the five available modes, the default being...
- Page 49 the defaut being Off. Default settings This menu is used to reset all the values to the default ones. Frame To choose a frame and apply to the picture you take. This function is only available in Wallpaper mode. Own pictures This menu allows you to access Own pictures folder to view the pictures taken by the built-in camera.
-
Page 50: Video Camera
self-timer mode. The countdown starts at 5 sedonds (this value cannot be changed). An alert sound is played 2 seconds before the picture is taken, then the shoot sound is played when it is actually taken. After the picture is taken and displayed on the screen, you can: press the camera key (or tap the corresponding icon using the stylus) to save the picture and go back to the preview screen. - Page 51 In the preview mode, you can : press the [5/6] to zoom in/out, or press [3/4] to switch from one available effect to another. press the left soft key (or camera key) or tap the green dot on the upper left corner of the screen to begin recording, and then the green dot will be changed into a red dot with “Recording…”...
-
Page 52: Settings
14 Settings The different functions of your phone can be customized to suit your own preferences via the Setting functions. To access the Setting functions, you can: In main menu screen, move the cursor to Settings icon and press [OK]. In main menu screen, press [8]. - Page 53 In the Group field: press to select a desired group from General, Family, Friends, Business, VIP, SIM and user-defined groups. In the Melody field: press to select the desired one.Or, press [Select] to display the melody list and move the cursor to select the desired one and press [OK]. —Ringtone volume Press to adjust the volume.
-
Page 54: Stylus Calibration
image, press to back to the image list screen, press5/6 to display the previous/next image.) —Idle screen You can set the clock display mode on the main display and adjust the screen contrast. On the Clock option list screen, press [select] to select the clock display mode from Analogue, Digital, Tiny digital. -
Page 55: Phone Settings
screen. Press [Select] to select a desired colour. Note: When the caller’s number is not matched in the phonebook, the LED will flash in all colour. —Event indicator You can set LED to be On/Off in case of events (roaming, battery low, etc.). Press [Select] to select On or Off. - Page 56 To disable the phone guard function, you can just press to choose No in the Guard method option. Security In the Security function, you can activate/deactivate Phone Code, PIN Code and Data protection, as well as edit phone code, PIN and PIN2 code. —Phone Code: a code protects your phone against unauthorized use.
- Page 57 Note: To disable data protection, you will also be required to enter the phone code. —Edit Phone Code To edit the phone code, you can move the cursor to the Phone Code and press [OK], the screen will prompt “Old code:” for entering the old code, and then prompt “New code:” if the correct old code has been entered, and then prompt “Re-enter:”...
-
Page 58: Network Services
—Navigation keys You can change the definitions for the four directions on the navigation key. Scroll to Up, Down, Left or Right, indicated by an arrow, and then: press to change the setting, or press [Select] to display a function list, select a function and press [OK]. —Hotkeys You can only program keys 2 to 9 as 0 (select language),1 (call voice mailbags), # (access WAP) and * (enter international prefix) are predefined and locked, preventing reprogramming. - Page 59 and then you can enter the switch off time in the format of hh:mm.
-
Page 60: Stk
15 STK Function items of this menu are subscription dependent and specific to operators. For details,please contact your network operator. -
Page 61: Fcc Regulations
FCC Regulations: This mobile phone complies with part 15 of the FCC Rules. Operation is subject to the following two conditions: (1) This device may not cause harmful interference, and (2) this device must accept any interference received, including interference that may cause undesired operation. - Page 62 4RF Exposure Information (SAR) This model phone meets the government’s requirements for exposure to radio waves. This phone is designed and manufactured not to exceed the emission limits for exposure to radio frequency (RF) energy set by the Federal Communications Commission of the U.S. Government.