
Related Manuals for Brother Dream Quilter 15


Summary of Contents for Brother Dream Quilter 15
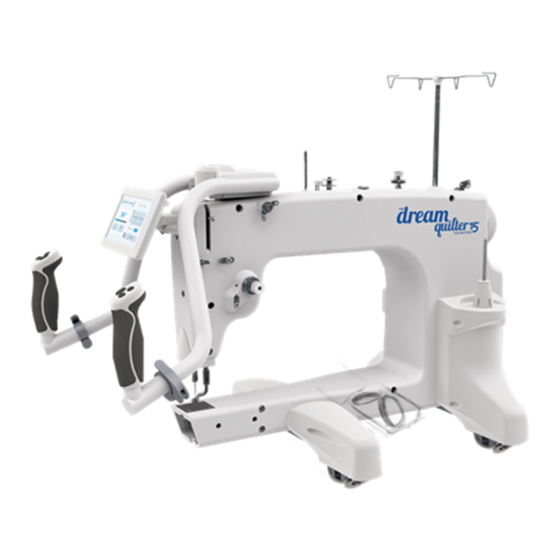
- Page 1 Service Manual Copyright Aug 01, 2016 Jim M. Bagley, GraceWood, Inc (Reproduction Prohibited) Version 1...
-
Page 2: Table Of Contents
Table Of Contents Bobbin Winder Display Board Box Adjust Needle Bar Height Hopping Foot Height Hook Holder Timing the Sewing Machine Handle Bars Needle Plate Thread Tensioner Right Rear Pod Front Housing Needle Rod Holders Upper Shaft Main Board Power Supply Grounding Wire Motor Driver Board Plugs Optical Encoding Board... -
Page 3: Bobbin Winder
Bobbin Winder Assembly Tools Needed: • 1.5mm Allen Wrench • 9mm Crescent Wrench 1. Adjust the Bobbin Winder Cam to be centered to the Bobbin without touching it by loosening the Set Screw by the 1.5mm Allen Wrench, adjusting the Cam, and retightening the Set Screw. -
Page 4: Display Board Box
Display Board Box Assembly Assembly Tools Needed: • Flat Head Screw Driver Press here Press here... -
Page 5: Adjust Needle Bar Height
Adjust Needle Bar Height Assembly Tools Needed: • Needle Bar Height Spacer • Flat Head Screw Driver Adjust Needle Bar height with a Flat Head Screw Driver here. Tip of Needle Height Spacer Flat Spot Needle Bar Thread Guide faces front of machine... -
Page 6: Hopping Foot Height
Hopping Foot Height Assembly Tools Needed: • 3mm Allen Wrench 1. Using the hand wheel in the back of your machine, rotate your machine until the nee- dle bar is in the lowest position. 2. Attach your hopping foot to the press bar using a M3 socket head screw (don’t tighten during this step) 3. -
Page 7: Hook Holder
Hook Holder Assembly Tools Needed: • 3mm Allen Wrench - Green Handle 1. Rotate your hook assembly so that the positioning guide is at the highest point during rotation. 2. Attach your hook holder to your sewing machine with a M5 X 10 FHCS (don’t tighten the screw during this step) with the hook holder’s finger in the middle of the hook assembly’s positioning guide. -
Page 8: Timing The Sewing Machine
Timing the Sewing Machine Assembly Tools Needed: • 2mm Allen Wrench - Red Handle • Timing Spacer 1. Remove needle plate. 2. Loosen all three hook assembly set screws with a M2 allen wrench by inserting the wrench into the machines timing hole cut out when each set screw aligns with the hole. 3. -
Page 9: Handle Bars
Handle Bars Assembly M6 x 15mm SBHCS Tools Needed: • 4mm Allen Wrench • 3mm Allen Wrench Front Handle Support Bar Display Clip - Top M6 x 10mm SBHCS Display Clip - Bottom M4 x 8mm SBHCS M5 x 10mm SBHCS Needle Plate Tools Needed:... -
Page 10: Thread Tensioner
Thread Tensioner Assembly Figure 1 Tools Needed: • 2.5mm Allen Wrench Removal Steps 1. Loosen 1 M5 X 8mm Set Screw in sewing machine. 2. Remove old Thread Tension Thread Tension Assembly. Assembly Assembly Steps 3. Press Thread Tension Assembly M5 X 8mm Set Screw into sewing machine body until it bottoms out. -
Page 11: Right Rear Pod
Right Rear Pod Assembly Tools Needed: • 3mm Allen Wrench Front Housing Tools Needed: • 4mm Allen Wrench... -
Page 12: Needle Rod Holders
Needle Rod Holders Assembly Tools Needed: • Flat Head Screw Driver Retaining Ring Press Bar Rod Holder Needle Rod Holder Long Pin for Swing Bracket (Loc- Needle Rod Tite and Fasten) Swing Bracket Holder Note: Set Press Bar Press Bar to be about 2mm Rod Holder above Needle Rod... - Page 13 Upper Shaft - Version 1 Assembly Tools Needed: • 3mm Allen Wrench • Flat head Screw Driver Top Shaft Bushing Clamp M5 X 15 SBHCS Pin for Swing Bracket Top Shaft Assembly Top Shaft Bearing Top Shaft Bearing M4 x 4mm Set Assembly Assembly Screw (x3)
-
Page 14: Upper Shaft
Upper Shaft - Version 2 Assembly Tools Needed: • 3mm Allen Wrench • Flat head Screw Driver Thread Take-up Thread Take-up Lever Clamp Lever Clamp Right Top Shaft Bushing Clamp M5 X 15 SBHCS M4 x 8mm Pin for Swing SBHCS Bracket Loosen Needle... - Page 15 Pulley and Optical Encoding Wheel Assembly Note: Top Shaft Pulley needs to be 7mm from Bearing Collar Lower Shaft - Version 1 Lower Shaft Bushing Clamp M5 x 10mm M5 x 10mm SBHCS SBHCS Lower Shaft Assembly Lower Shaft Bushing Clamp Lower Shaft - Version 2 Lower Shaft Rear...
- Page 16 Lower Shaft Assembly Assembly M4 x 4mm Set Screw x3 Lower Shaft Hook Bearing Assembly Set Assembly Screw x3 Lower Shaft Bearing M4 x 4mm M4 x 4mm Lower Shaft Assembly Set Screw x3 Set Screw x3 Pulley Hook Assembly...
- Page 17 Bushing Block Assembly Tools Needed: Needle Bar • 3mm Allen Wrench Bushing Block • 2.5mm Allen Wrench Adjustment Plate M6 x 25mm M4 x 8mm Set Screws Assembly Steps SBHCS Step 1: Attach the Bushing Block Adjustment Plate to the body with M4 x 8mm SBHCS.
-
Page 18: Main Board
Main Board Electronics Tools Needed: • Phillops Head Screw Driver • 3mm Allen Wrench Back Handle Cable or Front Handle Cable Back Handle Cable or Front Handle Cable Motor Driver Signal Cable Speed Sensor Cable 24V Power Supply LED Cable (2 wires together) Bobbin Winder Cable (2 separate wires) -
Page 19: Power Supply
Power Supply Electronics Motor Driver 24V Power Cable Power Supply (Thinner Cable) Power Supply Main Controller 24V Power Cable Grounding Wire to M6 x 20 SBHCS of Cable to AC Pulley Assembly Power Supply Cable Grounding Wire Tools Needed: • 4mm Allen Wrench Grounding Wire Terminal... -
Page 20: Motor Driver Board Plugs
Motor Driver Board Plugs Electronics *Note: Do not confuse the Motor Driver Cable and the Motor Power Cable. If plugged in opposite it will burn out the board. Motor Driver 24V Power Cable (Thinner Cable) To Power Suply Motor Driver Signal Cable Motor Cable (Thicker Cable) Optical Encoding Board Tools Needed:... - Page 21 Motor Driver Board Location Electronics Tools Needed: • 4mm Allen Wrench • Flat Head Screw Driver Motor Driver Board Assembly M6 X 20 SBHCS Motor Plate Pulley Base Assembly Thread Pin...
-
Page 22: Idler Pulley Tension
Idler Pulley Tension Electronics Tools Needed: • 4mm Allen Wrench • Force Gauge 2-Idler Pulley Screw Use force gauge to set belt tension between 5-5.5kg or press so Belt slack is minimalized, then tighten pulley screws. Idler Pulley Tension Adjust Assembly...