Table of Contents
Advertisement
Specifications
Model No.
Power supply
Power plug shape
Dehumid.
Dehumidifying capacity
Dry clothes
Cool
Dehumid.
1
Power consumption *
Dry clothes
Cool
Water tank capacity
Weight
Dimensions (H x W x D)
*1 The unit consumes approximately 0.5 W of power when operation is off. (While power plug is inserted)
*2 The heater is used in order to maintain dehumidifying performance at room temperatures of 18°C or less, so that
power consumption will increase by approximately 200 to 460 W.
The rated dehumidifying performance is the daily dehumidifying capacity in order to continuously maintain a
relative humidity of 80% at a room temperature of 30°C.
Customer's record
The model number and lot number of this product can be found on the side and the bottom of the unit.
Please record them in the space provided and keep for future reference.
MODEL NO.
F-YHE15X
DATE OF PURCHASE
DEALER'S ADDRESS
TELEPHONE NUMBER
Web Site : http://panasonic.net/
© Panasonic Ecology Systems Co., Ltd. 2010
F-YHE15X
220 V − 50 Hz
14 L/Day (Hi)
15 L/Day (Super (cont.))
10.5 L/Day (Hi)
2
250 W (Hi) *
710 W (Super (cont.))
250 W (Hi)
Automatically stops at about 3.2 litres
13.6 kg
570 mm x 370 mm x 225 mm
LOT NO.
DEALER'S NAME
HE15X8770AH
K1209M0
Warranty included separately
Thank you very much for purchasing this Panasonic product.
Please read these operating instructions carefully in order to use the
product correctly and in a safe manner.
Also, be sure to read the "Safety precautions" section (pages 4-5)
before use.
Make sure that the correct information is written on the warranty card,
including the date of purchase and the name of the distributor. Keep
the warranty documentation in a safe place along with the operating
instructions for future reference.
Operating Instructions
Dehumidifier
F-YHE15X
Model No.
This product is for indoor use only.
Contents
Page
Safety precautions ..................... 4
Part names (main unit) .............. 3
Part names (operation panel) .... 6
Points to note ............................. 7
When drying clothes .................. 8
When dehumidifying .................. 9
Selecting the air direction ........ 10
If you want cool air ................... 12
periods of time ...................... 15
• If the louver and flap have been
removed ................................... 7
Frequently asked questions ..... 16
Troubleshooting ....................... 17
For further information ............. 18
Specifications .......................... 20
Advertisement
Table of Contents

Summary of Contents for Panasonic F-YHE15X
-
Page 1: Table Of Contents
• If the louver and flap have been Warranty included separately removed ........7 Thank you very much for purchasing this Panasonic product. Please read these operating instructions carefully in order to use the Frequently asked questions ..16 product correctly and in a safe manner. -
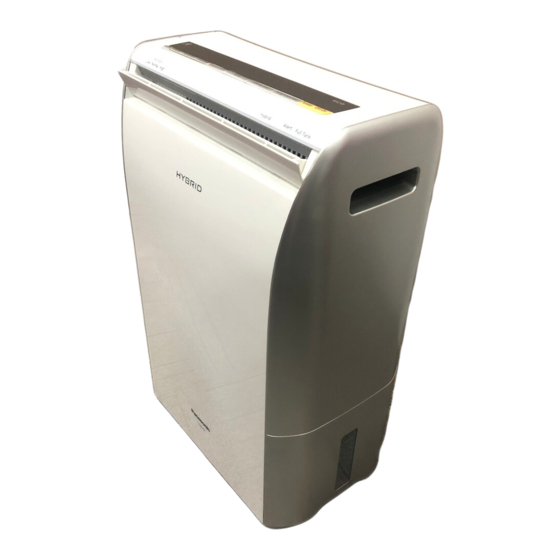
Page 2: Part Names (Main Unit)
This hybrid dehumidifier provides comfortable and powerful dehumidifying all year round. Part names main unit In the humid season, or on cold and wet winter days ... Effective all year round! ■Front What is hybrid technology? Cool air louver (manual, page 12) Hybrid dehumidification technology takes the best of both Operation panel (page 6) compressor technology and desiccant technology. - Page 3 Safety precautions Always observe these precautions WARNING These safety precautions are provided for your protection. Please read and follow them carefully to avoid unnecessary injury and damage to the product itself or other properties. ■ Insert the power plug thoroughly. ■The following symbols differentiate the levels of danger and injury that may result if the product is not (If the power plug is not inserted securely, electric shock or fire due to overheating may occur.) used specifically as instructed.
-
Page 4: Part Names (Operation Panel)
Part names Points to note operation panel If the louver and flap have been removed Do not use the dehumidifier in the operation panel The display indicators only illuminate when the corresponding item is selected. following places. Power Off/On button ■... -
Page 5: When Drying Clothes
When drying clothes When dehumidifying Louver Direction button and indicators Louver Direction button and indicators Dehumidify button and indicators Air Swing button and indicators Dry Clothes button and indicators Air Swing button and indicators ECO indicator Intelligent dryness monitoring system Power Off/On Power Off/On button... -
Page 6: Selecting The Air Direction
Selecting the air direction Air direction setting examples Tips on drying Place the dehumidifier so that it reaches all of the clothes evenly. After selecting the operation mode on pages 8 page Leave space between each item of clothing so that air can and 9, set the air direction. -
Page 7: If You Want Cool Air
If you want cool air Using the Timer/Emptying the tank Cool button and indicators Using the Timer “Eco (Auto)” and “Hi (Auto)” modes for drying clothes cannot 4hrs. be used. When using the “4 hrs.” setting, the “2 hrs.” indicator will Power Off/On (Press to select) illuminate when there are two hours left. -
Page 8: Cleaning(Tank Assembly/Filter)
Cleaning Be sure to Dampen a cloth, wring it out firmly, and then use it to Filter wipe the outside of the main unit. empty the water · Do not lay down the unit. (Water leaks will occur.) before cleaning ·... -
Page 9: Frequently Asked Questions
Frequently asked questions Troubleshooting First, check the following. If this does not solve the problem, be sure to disconnect the power plug, and then ask the place where the dehumidifier was purchased to carry out inspection and repairs. Before contacting the place Symptom What to check where the dehumidifier was... -
Page 10: For Further Information
· If the weight of clothing is approximately 4.0 kg, the dehumidifier will operate for about 4 – 6 hours in “Hi (Auto)”mode, and for about 6 – 8 hours in “Eco (Auto)” mode. (From tests carried out by Panasonic in a 9.72 square meter room at a temperature of approximately 20°C and a humidity of approximately 70%) - Page 11 常見問題 ........多謝閣下選購本 Panasonic 產品。 題 疑難排解 ........● 請仔細閱讀本操作說明書,以便正確安全地使用產品。 發 生 ● 使用前,請謹記閱讀「安全預防措施」章節 (第 24-25 頁)。 進階資訊 ........時 ● 請確定在保證書上正確寫明「購買日期」和「商戶名稱」等資料。 規格 封頁 .......... Web Site : http://panasonic.net/ 然後於購買十日內寄回,並將保證書連存根同操作說明書一起妥善保管, 以備日後參考。 HE15X8770AH © Panasonic Ecology Systems Co., Ltd. 2010 K1209M0...
- Page 12 本混合式抽濕機可以一年四季提供舒適的濕度和 強勁的抽濕力。 零件名稱 主機 無論是梅雨季節還是濕冷的冬天… 一年四季都能有效抽濕! 何謂混合技術? ■正面 冷風風向板 (手動,第 32 頁) 混合抽濕技術結合了壓縮式和熱石式兩種抽濕技術的 第 操作面板 (第 26 頁) 優點。 冷風出風口 要乾衣時 頁 您可以隨意調校風向,避免衣物未能完全乾透。 把手 自動停機功能 (第 38 頁) 可減少不必要的電力成本。 (左及右) 第 水位顯示 要抽濕時 頁 窗 使用混合技術 (第 23 頁) 調校抽濕方式以適應 腳輪...
- Page 13 安全注意事項 警告 請務必遵守 為了避免對您自己或其他人造成可能的傷害或財物損害,請務必注意以下安全注意事項。 ■請將插頭完全插入電源插座。 ■無視或錯誤理解這些標誌,會產生下列兩種情況。 (如果插頭沒有完全插牢,可能會因為過熱導致觸電,甚至引起火災事故。) 警告 注意 本標誌所表示的內容為“可能 本標誌所表示的內容為“可能造 ˙切勿使用已損壞的插頭或鬆動的電源插座。 造成人員重傷或死亡”。 成人身傷害或其他物品損害”。 ■請您定期清潔電源插頭。 如果電源插頭上有灰塵,濕氣可能破壞插頭的絕緣部分,從而導致火災事故。 ■務必遵守的內容分類,用標誌區分說明如下: ˙拔下電源插頭,用乾布擦淨。 ˙電器如長期不使用,應拔下電源插頭。 此標誌表示為禁止事項。 此標誌表示為強制事項。 ■在清洗電器前,務必確保斷開電源。 (否則抽濕機可能會突然工作,造成觸電受傷、燙傷事故。) 警告 注意 ■切勿使用超出額定值的電源、萬 能插座或連接設備,只可使用 切勿放置於此類場所 切勿用布、毛毯或類似的物品遮蓋吸氣口 或出風口。 220V 50Hz的交流電源。 ● 傾斜、不穩固或高於地板的地方 (抽濕機可能會掉下或翻倒,可能會因此受傷, (氣流將會減少,可能會導致過熱或火災。) (使用超出額定值的萬能插座或連接設備, 導致家居物品被浸壞、漏電、火災或觸電。) 可能會導致電源線過熱,引起火災事故。) 下列人士不應自行使用抽濕機。 ■移動或存放時切勿拉扯電源線。...
- Page 14 零件名稱 使用須知 操作面板 風向板及活蓋板被拆除時 切勿在以下地方使用抽濕機。 操作面板 ● 只有當相應項目被選擇時,指示燈才會亮起。 ■安裝抽濕風向板和活蓋板 ●直接暴露於陽光底下或靠近加熱器的地方 (主機 可能會變形、變色或損壞。) ●抽濕風向板 ●吸氣口或出風口可能被窗簾等物品遮蓋的地方 將右端的突起物插進主機的小孔內。 (空氣不流通可能會造成各種問題。) ●不穩固的表面 (可能會漏水。) 抽濕風向板 抽濕風向板 D 形突起物 翻動風向板使其正確 對齊。 ●靠近電視和收音機 避免陽光直射。 D 形小孔 ( 可能會造成影像或聲 音失真。) 預留 1 m 或以上 的空隙 將風向板擺放成水平方 向,從中間部分將之向 外輕微屈曲。 以相同方式插進左邊小 切勿遮蓋吸氣口...
- Page 15 要乾衣時 要抽濕時 搖擺方向按鈕和指示燈 搖擺方向按鈕和指示燈 抽濕模式設定按鈕和指示燈 送風範圍按鈕和指示燈 乾衣按鈕和指示燈 送風範圍按鈕和指示燈 節能指示燈 衣物濕度 指示燈 電源開 關 電源開 關 按鈕 按鈕 將電源插頭插進電源插座, 將電源插頭插進電源插座, 然後啟動抽濕機。 然後啟動抽濕機。 ●以節省能源模式 ( 自動停止 ) 乾衣 ●自動維持濕度在一個舒適的水平 Auto ●抽濕風向板會自動打開,抽 ●抽濕風向板會自動打開,抽 ( 約 55%) 濕機會以「中」模式開始運 ●快速乾衣 濕機會以「中」模式開始運 ●快速除濕 作。 (「Med」指示燈和濕 ( 自動停止 ) 作。...
- Page 16 選擇風向 風向設定例子 快速乾衣法 將抽濕機放在能夠將風平均吹向所有衣物的地方。 第 選擇運作模式 ( 第 28 及 29 頁 ) 後,設定風向。 衣物之間要保持一定距離,以便讓空氣流通。 視衣物的數量而定,抽濕機與衣物之間應保持 40 cm 或以上的距離。 ページ 頁 您可以參考右頁 的指引選擇風向! ● 要輕微向上送風,請反轉活 Louver Dir. 蓋板。 ( 第 30 頁 ) 弄乾下方的 Down 衣物 Air Swing ■ 運作 Wide 您可以設定縱向搖擺的幅度,將風送達您需要的高度範圍。...
- Page 17 需要冷風時 使用定時器 / 排清水箱 冷風按鈕和指示燈 使用定時器 ●不能使用「Eco (Auto)」和「Hi (Auto)」乾衣模式。 4hrs. ●使用「4 hrs.」設定時,在只餘兩小時的時候, 「2 hrs.」指示 燈會亮起。 ( 按下以選擇 ) 電源開 關 ●設定定時器後,即使水箱水滿,抽濕機停止運作,定時器仍會 2hrs. 按鈕 繼續倒數。 ( 指示燈亮起。) 排清水箱 將電源插頭插進電源插座, 然後啟動抽濕機。 用一隻手按住主 滿水指示燈 ●抽濕風向板會自動打開,抽 機,另一隻手輕輕 濕機會以「中」模式開始運 亮起時 … 拿出水箱。 作。 (「Med」指示燈和濕 度顯示器會亮起。) ●切勿觸碰主機...
- Page 18 清潔 ●弄濕抹布,用力扭乾,然後用來抹拭主機外圍。 過濾網 清潔水箱前請先確 ˙ 切勿傾側抽濕機。 ( 可能會導致漏水。) 定已排清水箱! 利用吸塵機除去塵垢。 ˙ 要清除頑固污漬,可用水混合少量稀釋的廚房清潔劑 一起清洗。 ( 切勿用水沖洗過濾網。) 抽濕風向板 ●不能使用左圖所示的清潔劑。 ■務必要拔去電源插頭並排清水箱。 ( 可能會導致變形或退色。) (排清水箱 → 第 33 頁) ●若使用經化學處理的抹布, 吸咀 請務必遵守抹布附帶的指示。 ■取出過濾網 ■安裝過濾網 水箱裝置組合 ●用水沖洗水箱及水箱蓋 2-3 次。 ●不取出浮標,用水沖走所有黏液。 排水口 水箱蓋 ■取走水箱蓋 將過濾網底部的舌片 ●將板手拉向自己。 排水口...
- Page 19 常見問題 疑難排解 首先,檢查以下各項。 若這樣未能解決問題,請務必拔去電源插頭, 然後要求您購買抽濕機的商店進行檢查和維修。 在聯絡您購買抽濕機的商 徵 狀 檢查內容 店,或是打電話要求維修 前,請先自行檢查以下各 無法操作按鈕,主機不能 ●滿水指示燈有沒有閃動 ( 第 33 頁 ) ? 項。 運作。 檢查指示燈有沒有亮起? ( 如下。) ●水箱和浮標是否已正確裝入主機內? ( 第 34 頁 ) 水箱未滿,但滿水指示燈 ●裝入水箱時,水箱是否撞擊到了主機? ( 第 33 頁 ) 在閃動。 → 拿出水箱,然後輕輕再次裝入主機。 抽濕機發出異味? 當抽濕機運作時室溫上升?...
- Page 20 ■自動停止功能 (乾衣感應器) 在「Eco (Auto)」和「Hi (Auto)」運作期間,乾衣感應器會偵測溫度和濕度,並以此作為參考,判斷乾衣的程度, 以自動停止運作。 ●自動停機前的運作時間指南 ˙ 若衣物重量約有 4.0 kg,使用「Hi (Auto)」的話,抽濕機會運作約 4-6 小時;而使用「Eco (Auto)」模式的 話,則會運作約 6-8 小時。 ( 測試由 Panasonic 進行,測試房間面積為 9.72 平方尺,溫度約為 20℃,濕度 約為 70%) ˙ 抽濕機最長大約 10 小時後停止運作。 ■「Eco (Auto)」、「Hi (Auto)」和「Super (Cont.)」的分別 ●耗電量 (「Hi (Auto)」時 = 100%) ●乾衣時間...