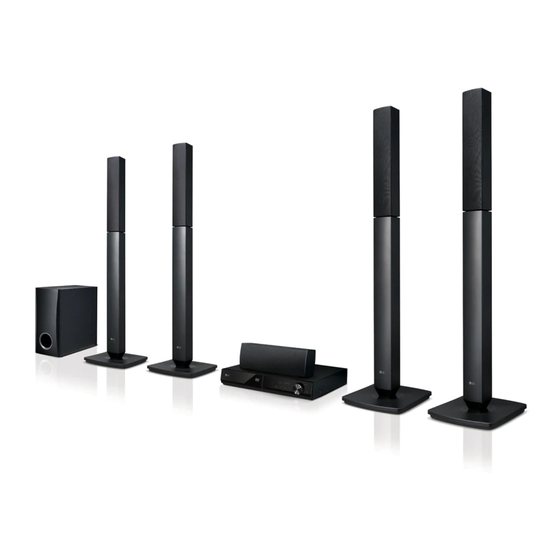
LG LHD457B Owner's Manual
Hide thumbs
Also See for LHD457B:
- Simple manual (4 pages) ,
- Simple manual (2 pages) ,
- Simple manual (2 pages)

Related Manuals for LG LHD457B


Summary of Contents for LG LHD457B
-
Page 1: Theater System
OWNER’S MANUAL DVD Home Theater System Please read this manual carefully before operating your set and retain it for future reference. MODEL LHD457B (LHD457B, S47T1-S, S47T1-C, S47T1-W) *mfl00000000* www.lg.com... - Page 2 Getting Started Safety Information CAUTION RISK OF ELECTRIC SHOCK CAUTION: This product employs a Laser System. DO NOT OPEN To ensure proper use of this product, please read CAUTION: TO REDUCE THE RISK OF ELECTRIC this owner’ s manual carefully and retain it for future SHOCK DO NOT REMOVE COVER (OR BACK) reference.
- Page 3 Getting Started POWER: This unit operates on a mains supply of This device is equipped with a portable battery or accumulator. 200 - 240 V ~, 50 / 60 Hz. Safety way to remove the battery or the battery Wiring: This unit is supplied with a BS 1363 from the equipment: Remove the old battery or approved main plug.
-
Page 4: Table Of Contents
Table of Contents Table of Contents – Audio – Lock (Parental Control) Operating Getting Started Using the Home Menu Basic Operations Safety Information Unique Features Other Operations – Portable In – Displaying Disc Information on-screen – To display the DVD Menu –... - Page 5 Table of Contents Troubleshooting Troubleshooting Appendix Maintenance – Handling the Unit – Notes on Discs Area Code List Language code List Trademarks and Licenses Specifications...
-
Page 6: Getting Started
Getting Started Unique Features Portable In Listen to music from your portable device. (MP3, Notebook, etc.) USB Direct Recording Records music from CD to your USB device. Full HD up-scaling Views Full HD picture quality with simple setup. Bluetooth® Listens to music stored on your bluetooth device. -
Page 7: Introduction
Getting Started Introduction Symbols Used in this Manual DVD-Video, DVD ± R/RW in Video mode or VR mode and finalized Playable Discs Audio CDs This unit plays DVD ± R/RW and CD-R/RW that contains audio titles, MP3, WMA and/or JPEG files. Video files contained in the USB/ Some DVD ±... -
Page 8: Playable File Requirement
When setting the option to Live File System, within 32 to 48 kHz (WMA) you cannot use it on LG players.(Mastered/ Live File System : Disc format system for Windows y Bit rate : within 32 to 320 kbps (MP3), 40 to 192... -
Page 9: Remote Control
- You can control the sound b ENTER : Acknowledges menu level, input source, and power selection. switching of LG TVs as well. Hold Presetting the radio stations. 1 (TV) and press PR/CH ( W/ x RETURN : Moves backwards... -
Page 10: Front Panel
Getting Started Front panel 6 7 8 a Disc Tray g T (PLAY/PAUSE) Starts playback. b Display window Pauses playback temporarily, press again to exit Shows the current status of the unit. pause mode. c Microphone jacks 1/2 h I (STOP) d PORT. -
Page 11: Rear Panel
Getting Started Rear panel a Power cord d VIDEO OUT Connects to a TV with video inputs. b Speaker connectors Connects the speaker cables. e AUX (L/R) INPUT Connects to an external source with 2 channel c HDMI OUT audio outputs. Connects to TV with HDMI inputs. -
Page 12: Connecting
Connecting Assembling the speaker 2. Draw the speaker cord through the hole on the base. Before connecting the speakers, assemble the speakers. Please check the items for assembling the speakers. Preparation Base Note Make sure speaker cable unfolded or in straight condition before insert it to the hole. - Page 13 Connecting 3. Connect the speaker wire to the terminal on the speaker. Make sure the wire marked black goes in to the terminal marked “-”(minus) and the other wire goes in to the terminal marked “+”(plus) > Caution Be careful that the speaker does not fall down.
-
Page 14: Attaching The Speakers To The Unit
Connecting Attaching the speakers Color Speaker Position to the unit Grey Rear Rear right Blue Rear Rear left Green Center Center 1. Connect the wires to the unit. Match each wire’ s colored band to the same Orange Sub woofer Any front position colored connection terminal on the rear of the Front... -
Page 15: Positioning The System
Connecting Positioning the system Front left speaker (L)/ Front right speaker (R): Place the front speakers to the sides of the monitor or screen and as flush with the screen The following illustration shows an example of surface as possible. positioning the system. -
Page 16: Connections To Your Tv
Connecting Connections to Your TV HDMI Out Connection If you have a HDMI TV or monitor, you can connect it to this unit using a HDMI cable (Type A, High Speed Make one of the following connections, depending on HDMI™ Cable). the capabilities of your existing equipment. -
Page 17: Video Connection
Connecting Note Video Connection y If a connected HDMI device does not accept Connect the VIDEO OUT jack on the unit to the video the audio output of the unit, the HDMI in jack on the TV using a video cable. device’... -
Page 18: Resolution Setting
Connecting Optional Equipment Resolution Setting Connection The unit provides several output resolutions for HDMI OUT. You can change the resolution using [Setup] menu. 1. Press n . AUX (L/R) INPUT Connection 2. Use A/D to select the [Setup] and press b ENTER. -
Page 19: Port. In (Portable Input) Connection
Connecting PORT. IN (Portable Input) USB Connection Connection Connect the USB port of USB Memory (or MP3 player, etc.) to the USB port on the front of the unit. Connect an output of portable device (MP3 or PMP etc.) to the PORT. IN connector. Note Removing the USB Device from the unit. -
Page 20: Antenna Connection
Connecting Antenna Connection Connect the supplied FM antenna for listening to the radio. Connect the FM Wire antenna to the FM antenna connector. Note Be sure to fully extend the FM wire antenna. -
Page 21: System Setting
System Setting Adjust the setup To display and exit the Setup menu settings 1. Press n . Displays the [Home Menu]. By using the Setup menu, you can make various adjustments to items such as picture and sound. You can also set a language for the subtitles and the Setup menu, among other things. -
Page 22: Language
System Setting Language [Panscan] Automatically displays the wide picture on the Menu Language entire screen and cuts off the portions that do not fit. (If the disc/file is not compatible with Pan Select a language for the Setup menu and on screen Scan, the picture is displayed at Letterbox ratio.) display. -
Page 23: Audio
System Setting Audio DRC (Dynamic Range Control) Make the sound clear when the volume is turned down (Dolby Digital only). Set to [On] for this effect. 5.1 Speaker Setup Make the following settings for the built-in 5.1 Vocal channel surround decoder. Select [On] to mix karaoke channels into normal 1. -
Page 24: Lock (Parental Control)
System Setting Lock (Parental Control) Password You can enter or change password. Initial Setting the Area Code: 1. Select [Password] on the [Lock] menu and then press D . When you use this unit for the first time, you have to set the Area Code. -
Page 25: Operating
Operating Using the Home Menu Do this Stop Press Z . 1. Press n . Playback Press d MONO/STEREO. Displays the [Home Menu]. Pause Press M . Press M repeatedly to play title Frame-by- Frame-by-Frame. (DVD, Movie Frame playback only) 2. -
Page 26: Other Operations
Operating Other Operations 1.5 times speed playback The 1.5 speed allows you to watch the pictures and Displaying Disc Information on- listen to the sound quicker than playing at a normal speed. screen 1. During playback, press d MONO/STEREO to You can display various information about the disc play at 1.5 times speed. -
Page 27: Changing Subtitle Code Page
Operating Note 2. Select a desired music on the [List] by using the then press MARKER to appears the mark on y The resume point may be cleared when a the list. button is pressed (for example; 1 (POWER), B , etc). 3. -
Page 28: Viewing A Photo File
Operating Viewing a PHOTO file About help menu in the full screen Menu Buttons Operation This unit can play discs with photo files. Displaying the Option Menu INFO/ 1. Select [Photo] on the [Home Menu] and press b menu. DISPLAY ENTER. -
Page 29: Sleep Timer Setting
Operating Note Sleep Timer Setting If the USB device is connected or a disc is Press SLEEP one or more times to select delay time inserted, this function is not operated. between 10 and 180 minutes, after the unit will turn off. To check the remaining time, press SLEEP. -
Page 30: Radio Operations
Operating Radio Operations Deleting all the saved stations 1. Press and hold CLEAR for two seconds. “ERASEALL” will flash up on the unit display. Be sure that FM antenna is connected. (Refer to the page 20.) 2. Press CLEAR to erase all saved of the radio stations. -
Page 31: Sound Adjustment
Operating Note Sound adjustment y In some of surround modes, some speakers, there’ s no sound or low sound. It depends on the mode of surround and the source of Setting the surround mode audio, it is not defective. y This function is not operated when the This system has a number of pre-set surround sound microphone is connected to the unit. -
Page 32: Advanced Operations
Operating Note Advanced Operations y You can check the recording percentage rate for the USB record on the screen during the recording. (Audio CD or MP3/ WMA CD only) Recording to USB y During recording MP3/WMA, there is no sound. You can record music or sound source to USB device by connecting in to the port on the unit. -
Page 33: Using A Bluetooth Wireless Technology
XX:XX means the last four digits of BT address. For example, if your unit has a BT address Bluetooth Profiles such as 9C:02:98:4A:F7:08, you will see “LG In order to use Bluetooth wireless technology, HTS(F7:08)” on your Bluetooth device. devices must be able to interpret certain profiles. This unit is compatible with following profile. - Page 34 Operating Note y The sound may be interrupted when the connection interfered by the other electronic wave. y You cannot control the Bluetooth device with this unit. y Pairing is limited one Bluetooth device per one unit and multi-pairing is not supported. y Depending on the type of the device, you may not be able to use the Bluetooth function.
-
Page 35: Auto Function Change
Operating Auto function change This unit recognizes input signals such as Bluetooth and then changes suitable function automatically. When you try to connect Bluetooth device When you try to connect your Bluetooth device to this unit, Bluetooth function is selected. Play your music on the Bluetooth device. -
Page 36: Auto Power On
Operating AUTO POWER On This unit automatically turns on by an input source : Bluetooth. If you try to connect your Bluetooth device, this unit turns on and is paired automatically. And then play your music. Note y After the unit is turned on by AUTO POWER function, it will be automatically turned off if there is no signal for a certain period of time from the external device. -
Page 37: Troubleshooting
Troubleshooting Troubleshooting PROBLEM CORRECTION y Turn off the power of this unit and the connected external device (TV, Woofer, DVD-player, Amplifier, etc.) and turn it on again. The unit does not work properly. y Disconnect the power cord of this unit and the connected external device (TV, Woofer, DVD-player, Amplifier, etc.) and then try connecting again. -
Page 38: Appendix
Appendix Maintenance Notes on Discs Handling Discs Handling the Unit Do not touch the playback side of the disc. Hold the disc by the edges so that fingerprints do not get on the surface. Never stick paper or tape on the disc. When shipping the unit Please save the original shipping carton and packing Storing Discs... -
Page 39: Area Code List
Appendix Area Code List Choose an area code from this list. Area Code Area Code Area Code Area Code Afghanistan Fiji Monaco Singapore Argentina Finland Mongolia Slovak Republic Australia France Morocco Slovenia Austria Germany Nepal South Africa Belgium Great Britain Netherlands South Korea Bhutan... -
Page 40: Language Code List
Appendix Language code List Use this list to input your desired language for the following initial settings: [Disc Audio], [Disc Subtitle] and [Disc Menu]. Language Code Language Code Language Code Language Code Afar 6565 French 7082 Lithuanian 7684 Sindhi 8368 Afrikaans 6570 Frisian... -
Page 41: Trademarks And Licenses
“DVD Logo” is a trademark of DVD Format/Logo Licensing Corporation. The Bluetooth® word mark and logos are owned by the Bluetooth SIG, Inc. and any use of such marks by LG Electronics is under license. Other trademarks and trade names are those of their respective owners. -
Page 42: Specifications
Appendix Specifications General Power requirements Refer to main label. Refer to main label. Power consumption Networked standby 0.5 W (If all network ports are activated.) Dimensions (W x H x D) Approx. 360 mm x 58 mm x 293 mm without foot Net Weight (Approx.) Approx. - Page 43 Appendix Front Speaker Type 1 way 1 speaker Impedance Rated 3 Ω Input Power 42 W Max. Input Power 84 W Net Dimensions (W x H x D) Approx. 250 mm x 1050 mm x 250 mm Net Weight Approx. 3.2 kg Rear Speaker Type 1 way 1 speaker...