Table of Contents

Related Manuals for Pioneer AVH-W4400NEX


Summary of Contents for Pioneer AVH-W4400NEX
-
Page 1: Operation Manual
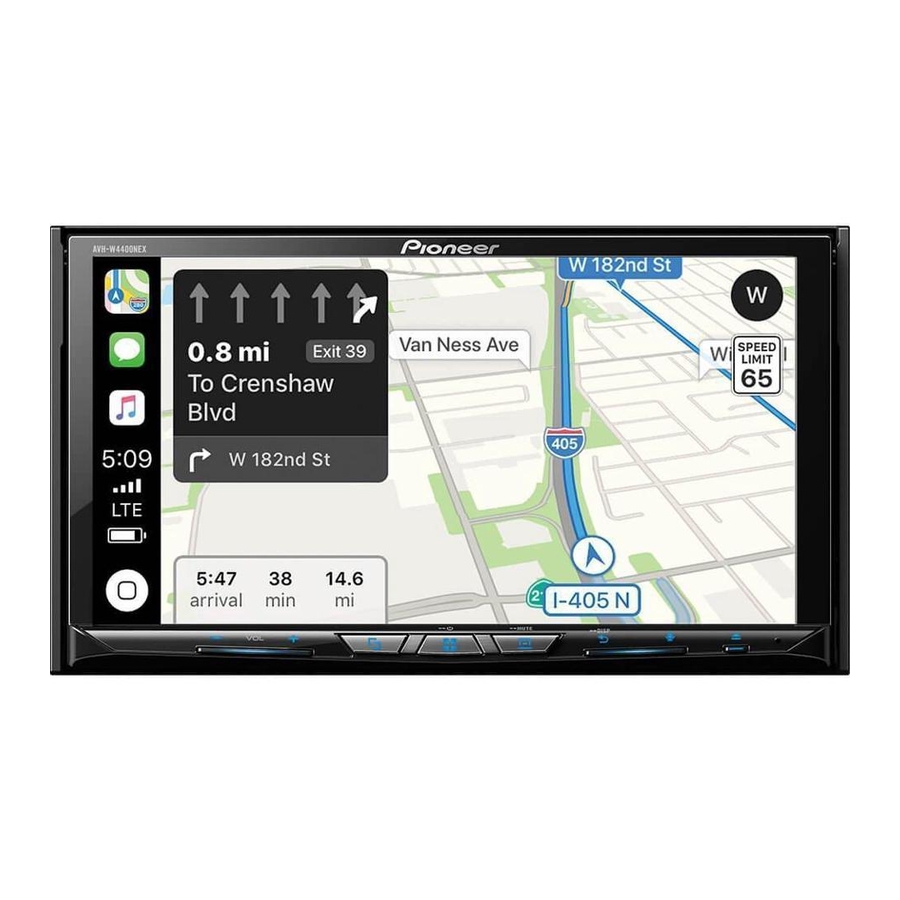
AVH-W4400NEX DVD RDS AV RECEIVER Important (Serial number) The serial number is located on the bottom of this unit. For your own security and convenience, be sure to record this number on the enclosed warranty card. Operation Manual... -
Page 2: Table Of Contents
Basic operation ............30 Basic operation............45 AppRadio Mode + ... 32 Wireless Mirroring ..45 Starting up the unit........... 10 Thank you for buying this Pioneer Using the touch panel..........11 Using AppRadio Mode +......... 32 Starting procedure............ 45 product. -
Page 3: Precaution
Contents Precaution Information to user AAC ................. 70 Google™, Google Play, Android ......70 Android Auto............... 70 –MODEL NO.: AVH-W4400NEX Detailed information regarding connected iPod FCC ID: AJDK103 devices ..............70 IC: 775E-K103 Using app-based connected content....71 –This device complies with Part 15 of FCC Rules and Innovation, Science, and Economic Development Canada licence-exempt RSSs. -
Page 4: Important Safety Information
Wash hands after handling. Pioneer Service Station. Using this product in this condition may result in permanent damage to the • Slots and openings in the cabinet are provided for ventilation to ensure reliable operation of the system. -
Page 5: To Ensure Safe Driving
• If data loss or corruption occurs on the storage device for any reason, it is usually not possible to recover the data. Pioneer accepts no liability for damages, costs or expenses arising from data loss or corruption. -
Page 6: Handling The Usb Connector
• Pioneer cannot guarantee compatibility with all USB mass storage devices and assumes no responsibility for any loss of data on media players, iPhone, smartphone, or other devices while using this product. -
Page 7: Parts And Controls
Press to activate the voice recognition mode with a connected iPhone or Parts and controls smartphone. Press and hold to display the connectable device list screen or device search screen. Main unit RESET Press to reset the microprocessor (page 9). SD card slot Refer to Inserting and ejecting an SD memory card (page 26). -
Page 8: Protecting Your Product Against Theft
RETURN Press to return to the specified point and start playback from there. Press to pause or resume playback. For audio: Press and hold to perform fast reverse or fast forward. For video: Press to perform fast reverse or fast forward. Press to return to the previous track (chapter) or go to the next track (chapter). -
Page 9: Basic Operation
Basic operation Notes on using the LCD panel WARNING • Keep hands and fingers clear of this product when opening, closing, or adjusting the LCD panel. Be especially cautious of children’s hands and fingers. • Do not use with the LCD panel left open. It may result in injury in the event of an accident. •... -
Page 10: Preparing The Remote Control
NOTE Preparing the remote control The remote control may not function properly in direct sunlight. Remove the insulation sheet before use. Important • Do not store the remote control in high temperatures or direct sunlight. • Do not let the remote control fall onto the floor, where it may become jammed under the brake or gas How to replace the battery pedal. -
Page 11: Using The Touch Panel
Switching the speaker mode Operating the time bar To change the speaker mode, you need to restore this product to the default settings. Restore the default setting (page 62). Using the touch panel You can change the playback point by dragging the key. You can operate this product by touching the keys on the screen directly with your The playback time corresponding to the position of the key is displayed while fingers. -
Page 12: Top Menu Screen
The hidden function keys appear. Top menu screen NOTE This key does not appear for some AV sources. Operating the on-screen keyboard Favorite source icons TIPS • When you connect the external navigation system to this unit, the navigation mode key is displayed at the middle of the right side of the display. •... -
Page 13: Bluetooth
Connected device key Bluetooth Displays connected device. Switches the source or application with connected devices such as AppRadio Mode +, external navigation system, Apple CarPlay, Android Auto. TIPS Bluetooth connection • When a device with a compatible application is connected, the favorite application key appears. -
Page 14: Hands-Free Phoning
Menu Item Description [Connection] Connect, disconnect, or delete registered Bluetooth device manually. Touch to delete registered device. To connect a registered Bluetooth device manually, touch the name of the device. To disconnect the device, touch the name of the connected device in the list. - Page 15 Using the preset dial lists Voice recognition function ▶Registering a phone number You can use the voice recognition function of iPhone or smartphone. You can easily store up to six phone numbers per device as presets. NOTES Press • When an iPhone running iOS 6.1 or higher is used, Siri Eyes Free Mode is available with this product. •...
-
Page 16: Bluetooth Audio
• The registered name will appear if the phone number is already registered in the Setting the private mode phone book. When the same phone number is registered under different names, only the phone number will be displayed. During a conversation, you can switch to private mode (talk directly on your cellular ▶The received call and dialed number histories phone). - Page 17 Touch Bluetooth audio playback screen 2 The AV source screen appears. Touch [Bluetooth Audio]. The Bluetooth audio playback screen appears. Basic operation Bluetooth audio playback screen 1 Sets a repeat play range. Plays files in random order. Switches between playback and pause. Skips files forward or backward.
-
Page 18: Wi-Fi
Wi-Fi audio Wi-Fi Before using the Wi-Fi audio player, connect the device to this product via Apple CarPlay (page 34) or Android Auto wirelessly (page 36). You can connect your Wi-Fi certfied mobile device to this product via Wi-Fi connection. Press then touch Touch [Wi-Fi Audio]. -
Page 19: Av Source
Displays the source list. AV source Recalls equalizer curves (page 55). Supported AV source Selecting a source You can play or use the following sources with this product. • HD Radio Broadcasts (HD Radio™ tuner) • CD Source on the AV source selection screen •... -
Page 20: Adjusting The Range Of Favorite Source Icons Area
Drag the source key to the desired position. Setup for iPod/iPhone or Adjusting the range of favorite source icons area smartphone NOTE This function is available only when you stop your vehicle in a safe place and apply the parking brake. Press When using an iPod/iPhone or a smartphone with this product, configure settings of this product according to the device to be connected. -
Page 21: Smartphone (Android™ Device)
Touch [OK]. HD Radio™ Technology Smartphone (Android™ device) Compatible smartphones About HD Radio stations Compatibility with all smartphones is not guaranteed. For details about smartphone compatibility with this product, refer to the information on our website. HD Radio stations offer high quality audio and data services. HD Radio stations are brought to you by your local FM or AM stations. -
Page 22: Starting Procedure
Program Service Data: Contributes to the superior user experience of HD Radio Recalls the preset channel stored to a key from memory. Technology. Presents song name, artist, station IDs, HD2/HD3 Channel Guide, and other relevant data streams. Stores the current broadcast frequency to a key. Displays the preset channel list. -
Page 23: Radio Settings
Radio settings Disc Press Touch then Inserting and ejecting a disc The system setting screen appears. You can play a normal music CD, Video-CD, or DVD-Video using the built-in drive of this Touch [AV Source Settings]. product. Touch [Radio Settings]. WARNING The menu items vary according to the source. - Page 24 Audio source Video source CAUTION Audio source screen 1 For safety reasons, video images cannot be viewed while your vehicle is in motion. To view video images, stop in a safe place and apply the parking brake. Video source screen 1 Switches between playback and pause.
- Page 25 Searches for the part you want to play. Displays the DVD menu keypad. Touch [Title], [Chapter], [10key], or [Track] then input the desired number from [0] If items on the DVD menu appear, the touch panel keys may overlay them. If so, to [9].
-
Page 26: Compressed Files
Touch to open the LCD panel. Compressed files Insert an SD memory card into the SD card slot. Press Inserting and ejecting media NOTES • This system is not compatible with the Multi Media Card (MMC). You can play compressed audio, compressed video, or still image files stored in a disc or •... -
Page 27: Starting Procedure
Unplugging a USB storage device Audio source Pull out the USB storage device from the USB cable. Audio source screen 1 (Example: USB) NOTES • Check that no data is being accessed before pulling out the USB storage device. • Turn off (ACC OFF) the ignition switch before unplugging the USB storage device. Starting procedure For Disc Insert the disc (page 26). - Page 28 Audio source screen 2 (Example: USB) Once the database is created in the USB storage, there is no need to create the database again as long as the same contents are saved. To enter the Music Browse mode directly, touch and then touch [Tag] before selecting the song.
- Page 29 Sets a repeat play range for all files/the current folder/the current file. Switches between playback and pause. Switches the following media file types. [Music]: Compressed audio files [Video]: Compressed video files Switches the audio/subtitle language. [Photo]: Image files Skips files forward or backward. Selects a file from the list.
-
Page 30: Ipod
Audio source iPod Audio source screen 1 Connecting your iPod When connecting an iPod to this product, the settings are automatically configured according to the device to be connected. NOTES • Depending on the generation or version of the iPod, some functions may not be available. •... - Page 31 Audio source screen 2 Apple Music Radio screen Switches between playback and pause. Changes the audiobook speed. Normal—Fast—Slow Displays the pop-up menu for Apple Music Radio. • Touch [Play More Like This] to play back songs similar to the current song. NOTE •...
-
Page 32: Appradio Mode
• AppRadio Mode + allows access to applications other than those listed, subject to limitations while driving. For iPhone users • PIONEER IS NOT RESPONSIBLE AND DISCLAIMS LIABILITY FOR THIRD PARTY (NON-PIONEER) APPS AND CONTENT, INCLUDING WITHOUT LIMITATION ANY INACCURACIES OR INCOMPLETE Connect your iPhone to this product via USB. -
Page 33: Using The Keyboard (For Iphone Users)
Touch desired icon in the tab. Start up the AppRadio Mode +. The AppRadio app is launched. Press VOL (+/-). The audio mix menu will be displayed on the screen. For smartphone (Android) users NOTES NOTE • The audio mix menu is displayed for four seconds. If the screen disappears, press VOL (+/-) again. The The video playback capability depends on the connected Android device. -
Page 34: Apple Carplay
Apple CarPlay in the Bluetooth setting menu of the device (page 13). while driving. • PIONEER IS NOT RESPONSIBLE AND DISCLAIMS LIABILITY FOR THIRD PARTY (NON-PIONEER) APPS Turn on the Wi-Fi function on the device. AND CONTENT, INCLUDING WITHOUT LIMITATION ANY INACCURACIES OR INCOMPLETE INFORMATION. -
Page 35: Adjusting The Volume
• Android Auto allows access to applications other than those listed that are subject to limitations while driving. • PIONEER IS NOT RESPONSIBLE AND DISCLAIMS LIABILITY FOR THIRD PARTY (NON-PIONEER) APPS AND CONTENT, INCLUDING WITHOUT LIMITATION ANY INACCURACIES OR INCOMPLETE Touch to mute. -
Page 36: Starting Procedure
Touch a desired device on the screen. Touch [Smartphone-related Settings]. The unit configures the connection then start the application. Touch [Driving Position]. [Left] You can use voice recognition function by pressing once Android Auto is activated. Select for a left-hand drive vehicle. NOTES [Right] •... -
Page 37: Pandora
Pandora® Android Auto will launch automatically only when an Android Auto compatible device is correctly connected to this product. Press Pandora Music is a music service not affiliated with Pioneer. More information is Touch then available at http://www.pandora.com. The Pandora mobile application is available for iPhone and smartphones. Please visit Touch [Smartphone-related Settings]. -
Page 38: Basic Operation
• For details on USB connection, refer to the Installation Manual. Selects a Pandora station from the list. • : Switches to the station list. • : Switches to the genre list. Basic operation • : Plays only one track based on particular musical characteristics from several shuffled stations. -
Page 39: Siriusxm® Satellite Radio
• The activation process usually takes 10 to 15 minutes, but it may take up to an hour. Your radio will SiriusXM® Satellite Radio need to be powered on and receiving the SiriusXM signal to receive the activation message. Listening to SiriusXM Only SiriusXM®... -
Page 40: Tunescan
Displays the preset channels. Selects a channel from the list. Select an item on the list ([1] to [6]) to switch to the preset channel. Select the category name or the list of all channels then touch the desired channel. To switch the display list, touch Selects a band. -
Page 41: Sportsflash
• TuneScan™ may take a few minutes to become available after the product is turned on or the preset Using Featured Favorites Band band is changed. • Tune Scan™ is compatible with SXV200 or later tuner models. Featured Favorites are groups of channels that are created by the SiriusXM Programming Touch to display the following display. -
Page 42: Siriusxm Settings
Menu Item Description To set the alert function, you can set up at [Alert List] (page 42) in the [SiriusXM Settings]. [Featured Favorites] Set to [On] to allow you to discover new channels created by [On] [Off] the SiriusXM Programming department. SiriusXM settings NOTE If the Featured Favorite Band needs to update, the Featured Band... -
Page 43: Hdmi
HDMI You can display the video image output by the device connected to video input. CAUTION For safety reasons, video images cannot be viewed while your vehicle is in motion. To view video CAUTION images, stop in a safe place and apply the parking brake. For safety reasons, video images cannot be viewed while your vehicle is in motion. -
Page 44: Basic Operation
Basic operation AV input AUX screen You can display the video image output by the device connected or the camera to video input. For details, refer to the Installation Manual. CAUTION For safety reasons, video images cannot be viewed while your vehicle is in motion. To view video images, stop in a safe place and apply the parking brake. -
Page 45: Basic Operation
Basic operation Wireless Mirroring AV source screen (This function is available only for Android device.) Wireless Mirroring is a wireless display designed to mirror your mobile device on this product screen via Wi-Fi connection. Starting procedure Wireless Mirroring operations and procedures vary depending on the connected mobile device. -
Page 46: Basic Operation
Basic operation iDatalink Wireless Mirroring screen (Example) Using iDatalink You can access the satellite radio source provided for the vehicle. The vehicle information and many OEM systems such as steering wheel controls, warning chimes, driver safety systems, and etc. can be displayed on this product by connecting the optional iDatalink adapter. -
Page 47: Starting Procedure
Displays the Gauge screen. Access the following website and follow the on-screen instructions to configure the desired firmware. http://maestro.idatalink.com/ Displays the Vehicle Information screen. NOTE When the serial number input is required, input the device number of this product. Displays the Climate screen. Install the vehicle/head unit specific firmware on your iDatalink Maestro module. -
Page 48: Displaying Obstacle Detection Information
Menu Item Description Climate screen [OEM Settings] Setting for iDatalink function when the iDatalink adapter is connected to the unit. [OEM Volume Settings] Setting for iDatalink function volume when the iDatalink adapter is connected to the unit. Parking Assist screen Displaying obstacle detection information CAUTION This function is intended solely to assist the driver’s vision. -
Page 49: Settings
Menu Item Description Settings [Android Auto Auto- Select [On] to automatically launch Android Auto when an launch] Android device is connected to the unit. [On] [Off] You can adjust various settings in the main menu. [Input/Output Settings] Displaying the setting screen Menu Item Description Press... - Page 50 CAUTION [Off] [On] NOTE Pioneer recommends the use of a camera which outputs mirror reversed images, otherwise the screen This function is available when [Back Camera Input] is set to [On] image may appear reversed. (Page XX).
- Page 51 NOTE Menu Item Description This setting is available only when you stop your vehicle in a safe place and apply the parking brake. [Touch Panel Calibration] Touch two corners of the screen along the arrows then Menu Item Description touch the centers of the two [+] marks at the same time twice.
- Page 52 * With some pictures, you cannot adjust [Hue] and [Color]. Menu Item Description NOTES [Dimmer Duration] Adjust the time that the dimmer is turned on or off by • The adjustments of [Brightness], [Contrast], and [Dimmer Level] are stored separately when your dragging the cursors or touching vehicle's headlights are off (daytime) and on (nighttime).
-
Page 53: Theme Settings
Menu Item Description Menu Item Description [3D Calibration Status] Check the sensor learning status, such as the degree of [iDataLink] Displays the status of the optional iDatalink adapter. learning. You can also check the current sensor values and the total number of speed pulses. [OEM Settings] To delete the learned results stored in the sensor, follow the below instructions. -
Page 54: Audio Settings
NOTES Menu Item Description • If multiple external storage devices that include available data are connected to this product, the [Illumination] Select an illumination color from the color list or create a order of priority for the targets that the Theme settings are exported to or imported from is as follows: defined color. - Page 55 Menu Item Description Menu Item Description [Graphic EQ] Select or customize the equalizer curve. [Source Level Adjuster] Adjust the volume level of each source to prevent radical [Super Bass] [Powerful] Select a curve that you want to use as the basis of [-4] to [+4] changes in volume when switching between sources other [Natural] [Vocal] [Flat]...
- Page 56 Menu Item Description Menu Item Description [Time Alignment] Select or customize the time alignment settings to reflect [Rear Speaker Output] Select the rear speaker output. [On] [Off] the distance between the listener’s position and each [Rear] [Subwoofer] NOTES Listening position*1*2 speaker.
- Page 57 – When the speakers are incorrectly connected. (For example, when a rear speaker is connected as a NOTE subwoofer output.) If driving restrictions are detected during measurement, the measurement is canceled. – When a speaker is connected to a power amp delivering output higher than the speaker’s Fix the microphone for acoustical measurement (sold separately) in the center of maximum input power capability.
-
Page 58: Video Settings
If the microphone is subjected to direct sunlight for an extended period, high Menu Item Description temperatures may cause distortion, color change, or malfunction. [Audio Language]*1*2 Set an audio language preference. When you select [Others], a language code input screen is shown. Input the four-digit code of the desired language then touch Adjusting the cutoff frequency value [Menu Language]*1*2... - Page 59 Menu Item Description Menu Item Description [Parental] Set restrictions so that children cannot watch violent or [DVD Auto Play] Set to display the DVD menu automatically and start adult-oriented scenes. You can set the parental lock level in [On] [Off] playback from the first chapter of the first title when a DVD steps as desired.
-
Page 60: Favorite Menu
Favorite menu Other functions Registering your favorite menu items in shortcuts allows you to quickly jump to the Setting the time and date registered menu screen by a simple touch on the [Favorites] screen. NOTE Touch the current time on the screen. Up to 12 menu items can be registered in the favorite menu. -
Page 61: Selecting The Video For The Rear Display
Important Selecting the video for the rear display If you forgot your password, contact the nearest authorized Pioneer Service Station. You can choose either to show the same image as the front screen or to show the Setting the password selected source on the rear display. -
Page 62: Restoring This Product To The Default Settings
Touch then correctly, and apply the parking brake. authorized Pioneer service facility. → The parking brake interlock is activated. Touch 1, followed by 2, and then touch 3 (page 61). – Park your vehicle in a safe place and Common problems Touch [Clear Password]. -
Page 63: Error Messages
– Update the iPod software version. check the screen on the smartphone. – Stop playback once, then restart. → An error has occurred. dealer or your nearest Pioneer service center. – Reconnect the iPod with the USB The screen is displayed, but operation The picture is stretched, with an incorrect interface cable for iPod/iPhone. - Page 64 Memory Full about your subscription. – Do not exceed the skip limit. Pioneer service center for assistance. → The memory has become full while – Pandora limits the total number of playback was paused.
- Page 65 – Press the RESET button. – Disconnect the device and replace it Your device is not authorized to play this Protect with another USB storage device. → All the files on the connected external DivX protected video. Different Region Disc →...
-
Page 66: Handling And Care Of Discs
→ The power failed for the Bluetooth label surfaces, check the instructions and Pioneer Service Station. module of this product. the warnings of the discs. Depending on → The time set in this product is not –... -
Page 67: Detailed Information For Playable Media
be possible to play the CD side with this DVD-Video discs Common notes about the external stored on an SD memory card will be product. deleted when the card is formatted. Back storage device (USB, SD) • DVD-Video discs that have incompatible •... - Page 68 code, refer to Displaying your DivX VOD such as 0.1 seconds, the subtitles may not • Maximum playback time of audio file MP3 compatibility registration code on page 59. be displayed at the correct time. stored on an external storage device •...
-
Page 69: Bluetooth
Bluetooth States and/or other countries. Maximum frame rate 30 fps • Some special operations may be SIG, Inc. and any use of such marks by PIONEER prohibited because of the composition of CORPORATION is under license. Other .mov SDXC DivX files. -
Page 70: Flac
DivX, LLC and are used under this list of conditions and the following license. • Pioneer accepts no responsibility for data disclaimer in the documentation and/or This DivX Certified® device has passed rigorous lost from an iPod, even if that data is lost other materials provided with the testing to ensure it plays DivX®... -
Page 71: Using App-Based Connected Content
Using app-based The terms HDMI and HDMI High-Definition service by its provider. Multimedia Interface, and the HDMI Logo • Pioneer is not liable for any issues that connected content Notice regarding open are trademarks or registered trademarks of may arise from incorrect or flawed app- source licenses HDMI Licensing Administrator, Inc. -
Page 72: Specifications
22 W × 4 (50 Hz to 15 kHz, 5 %THD, 4 Ω visible. In that case, please consult your HPF (Mid): from the heater may break the LCD LOAD, Both Channels Driven) dealer or the nearest authorized Pioneer Frequency: screen, and cool air from the cooler may Load impedance: Service Station. - Page 73 DVD drive <USB audio> AAC decoding format: 80 dB (digital broadcasting) (IHF-A MP3 decoding format: MPEG-2 AAC-LC, MPEG-4 AAC-LC network) System: MPEG-1/Layer-1, MPEG-1/Layer-2, MPEG- WAV signal format: 62 dB (analog broadcasting) (IHF-A DVD-V, VCD, CD, MP3, WMA, AAC, DivX, 1/Layer-3 Linear PCM network) MPEG player...
- Page 74 CEA2006 Specifications Power output: < = 14 W RMS × 4 Channels (4 Ω and THD+N) S/N ratio: 91 dBA (reference: 1 W into 4 Ω) NOTE Specifications and design are subject to possible modifications without notice due to improvements.
- Page 75 © 2018 PIONEER CORPORATION. All rights reserved. <CRI1024-A> UC...