
Related Manuals for Kenwood DRV-830


Summary of Contents for Kenwood DRV-830
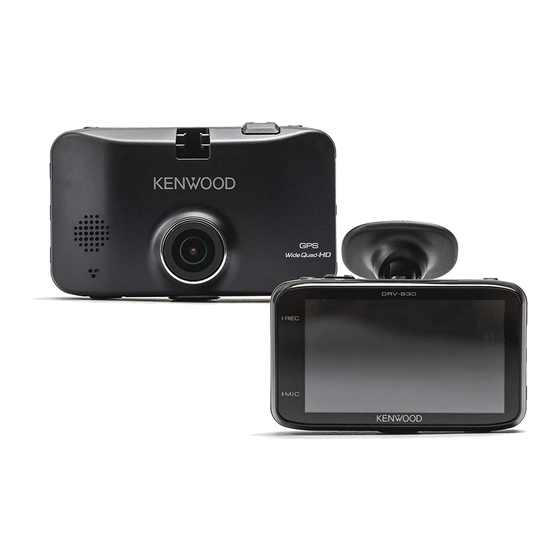
- Page 1 DRV-830 GPS Integrated Dashboard Camera INSTRUCTION MANUAL © 2018 JVC KENWOOD Corporation B5A-2175-11 (E)
-
Page 2: Table Of Contents
Precautions for use ..........11 Disclaimer Installing the software ...........37 Cleaning the device ..........11 Please note that JVC KENWOOD shall not Playing files ..............37 If you notice a problem with the device ...11 be responsible for any damages suffered by Outputting still pictures from the the customer or a third party as a result of How to Install ............ -
Page 3: About The Setup Function
Arrival Continuous recording Continuous recording The time for recording after the Dashboard camera Function Guide impact is detected can be changed. Approximately 10 seconds before impact Approximately 15 seconds after impact This dashboard camera records videos and still pictures and stores them P. -
Page 4: Setting The Microphone Sound During Recording
Accessories Dashboard camera Function Guide Manual recording: Images can be stored in a manual recording folder separate from the normal recording folder by pressing the [REC] button during continuous recording. P. 22 Cigarette lighter plug cord (4 m) × 1 Mount bracket ×... -
Page 5: Precautions For Use
Precautions for Use Precautions and notices Warning! Do not operate the device while driving. Using this product does not change the requirement for a driver to take full responsibility for his or her behavior. This responsibility includes observing all traffic rules and regulations in order to avoid accidents, personal injury or property damage. -
Page 6: Precautions For Installation
Install the device so that it is within the wiping range of the wiper. may be recorded. JVC KENWOOD assumes no responsibility with regard to the distinguishing Install the device in a position where it will not interfere with the movement of the rear-view or recording of traffic lights. -
Page 7: How To Install
How to Install How to Install Adjust the device's mount angle, then Recommended installation position Installation Procedure fasten it. Install the device in a position where it will not block the front view of the driver (position where hidden Check that the vehicle is parked on a level When adjusting the mount angle, check that the by the rear-view mirror). -
Page 8: How To Wire
How to Wire Part Names and Functions Connecting the cigarette lighter plug cord (accessory) Connect the dashboard camera and power cord of the cigarette lighter plug cord. When disconnecting the power cord, disconnect it while pressing the hook of the connector. Open the power cord connector terminal’s cover and connect the power cord. -
Page 9: Before Using The Driving Support Functions
Before Using the Driving Support Functions How to Wire Operate the [ ] and [ ] buttons to Adjust according to the vehicle REC button select the mounting height from the MENU/OK button When pressed during continuous recording, Before using the driving support functions, adjust road surface to the camera, then press starts manual recording. -
Page 10: Before Using
Before Using Before Using the Driving Support Functions Operate the [ ] and [ ] buttons to Inserting and ejecting SD cards Formatting SD cards adjust the guide line (the white line) Turn the camera's power off, then insert the SD card To use an SD card, first format it on the camera. -
Page 11: Recording When The Power Is On
Before Using Operate the [ ] and [ ] buttons to Recording when the power is on select <OK>, then press the [MENU/ continuous recording OK] button. The SD card is formatted. When the camera's power turns on, continuous recording starts. The maximum recording time for continuous recording depends on the resolution setting. -
Page 12: Parked Recording When The Power Is Off
・・・・・ Before Using A p p r o x . 3 m i n u t e s A p p r o x . 3 m i n u t e s A p p r o x . 3 m i n u t e s Manual recording Automatically captured still image file storage location Continuous recording... -
Page 13: Recording
Recording Recording manually (manual Taking photos (still image Indicators on the recording % SD card slot 2 status SD card detected recording) recording) screen Currently recording on SD card Videos can be recorded whenever desired Photos (still images) can be taken at any time by Recording on SD card not possible ^ Button guide (shortcut menu/recording and stored in the manual recording folder by... -
Page 14: Playback
Playback Playing files Indicators on the playback Continuous REC This contains the continuous (Slot 1) recording files (SD card slot 1). screen Use the procedure below to select and play recorded files, photos (still images), etc. Continuous REC This contains the normal recording (Slot 2) files (SD card slot 2). -
Page 15: Protecting Files
Deleting Files Protecting Files Recorded video and still image files can be Canceling file protection Deleting Files „ Deleting files in a group protected and their protection can be canceled. Recorded video files in groups of continuous Recorded video files and still image files can Play the protected file. -
Page 16: Configuring The Settings
Configuring the Settings Deleting Files Operate the [ ] and [ ] buttons to Operate the [ ] and [ ] buttons to Operating using the menu The menu screen in step 2 switches in the order select <OK>, then press the [MENU/ select the folder you want to delete, shown below. - Page 17 Configuring the Settings MENU * Factory default settings * Factory default settings Recording settings Playback Audio recording ON*/OFF Continuous REC (Slot 1) Select the folder and play the desired file. (➜ P. 26) Set whether or not to record the sound from the microphone when recording. It is also possible to protect or delete the file during file playback.
- Page 18 About updating the system This function updates the camera's system firmware. For information and instructions on Driving support settings updating, see the Kenwood website. http://www.kenwood.com/cs/ce/ Forward collision warning ON/OFF* This function detects the distance between you and the vehicle in front, and...
-
Page 19: Setting The Date And Time
Using the Viewer Software Configuring the Settings Select the SD card drive from the list Setting the date and time KENWOOD DRIVE REVIEWER is viewer software Set the time zone. of drives. for computers, allowing images recorded on the The date and time are set Set the date and time. - Page 20 Using the Viewer Software @ Map display button 1 File operations 6 Image screen When the file list is clicked, the position information of the selected video file is displayed on the map. Perform the file operations, such as file selection, The image of the selected file is displayed here.
-
Page 21: Outputting Travel Information
Backing up files Find the corresponding symptom on the table below and take the appropriate measures. If you cannot find a solution, contact your store of purchase or a Kenwood service center. the images Back up the files on SD cards onto a computer's hard disk, etc., as necessary. -
Page 22: Troubleshooting
Troubleshooting Display messages and audio guidance Message Cause/Countermeasures If any of the messages below should be displayed, take the countermeasures indicated on the table. Playback has stopped For some reason a file that cannot be played was recorded. For messages marked , audio guidance is also provided. -
Page 23: Appendix
Please note using a computer, etc. Doing so may make it About file name that Kenwood will accept no responsibility for any positioning conditions, it could take about 5 minutes impossible to properly play the files on the damages incurred thereby. -
Page 24: Recording Time
Main Specifications Appendix Recording times Recording Mode Screen size 1 / 3 / 5 min. Resolution SD card capacity 3.0inches full color TFT (recording quality) Video format 8 GB 16 GB 32 GB 64 GB 128 GB Operating voltage (frame rate) H.264 / MPEG-4 AVC 2560×1440 DC 12V... -
Page 25: Important Notice Concerning The Software
X^22+X^16+X^12+X^11+X^10+X^8+X^7+ ed that the following conditions are met: X^5+X^4+X^2+X^1+X^0 http://www.kenwood.com/gpl. 1. Redistributions of source code must retain the copyright notice, this list of conditions and the Note that we take it “backwards” and put the Important notices regarding software following disclaimer.