Motorola CLP1010 Quick Reference
Clp series two-way radio
Hide thumbs
Also See for CLP1010:
- User manual (52 pages) ,
- User manual (56 pages) ,
- User manual (48 pages)
Advertisement
Available languages
Available languages
Quick Links
Download this manual
See also:
User Manual
M
QUICK REFERENCE
CLP SERIES™ TWO-WAY RADIO
Power Battery
Button
Volume
Control (+/-)
Congratulations on your new radio!
Your radio is ready for use after a fully-charged battery has been installed and it is connected to an
appropriate audio accessory. Please refer to www.motorolasolutions.com/CLP for information on
approved accessories.
CLP Series business two-way radios operate on radio frequencies that are regulated by the Federal
Communications Commission (FCC). In order to transmit on these frequencies, you are required to
have a license issued by the FCC. http://www.fcc.gov
This device complies with Part 15 of the FCC Rules. Operation is subject to the condition that this
device does not cause harmful interference.
GETTING STARTED
1.
INSTALL THE BATTERY
•
Push up the latch at the bottom of the battery door and lift the battery door off the radio.
•
Align the battery contacts with tabs in the battery compartment. Insert the contact side of the
battery first, then press the battery down to secure in place.
•
Put the battery door back on the radio. Push down the latch to lock.
2.
CHARGE THE BATTERY
•
Connect the power supply to the drop-in charging tray or multi-unit charger and insert the radio into
the tray. The light on the charger is red when the radio is charging. It turns to green once the radio
is fully charged.
3.
CONNECT AN AUDIO ACCESSORY
•
Connect a wired audio accessory or pair with a wireless accessory (selected models only).
Accessory
Connector
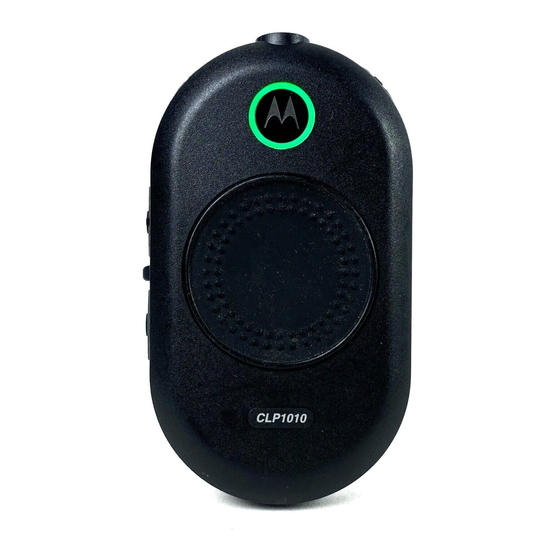
Menu Button
Smart Status
Glow
Push-to-Talk
(PTT) Button
4.
TURN THE RADIO ON
•
Press and hold the Power/Battery button until you hear a short tone and the Smart Status Glow
lights up. (To turn off, press and hold the button until you hear a short tone and the Smart Status
Glow indicator flashes once.)
5.
CHECK THE BATTERY STATUS
•
When powered on, short press and release the Power/Battery button, the Smart Status Glow and
Voice Assisted Operation* features will give you the battery status.
•
Green – high level
•
Yellow – medium level
•
Red – low level
•
Red blink – critical
•
After the Smart Status Glow and Voice Assisted Operation* features indicate the BATTERY
STATUS, it will return to the current channel color.
•
* Voice-Assisted Operation may not be available on certain previous shipping radios
TRANSMITTING AND RECEIVING
1.
Turn radio on and set volume level by pressing volume control +/- buttons. A total of 16 volume
levels are available. (*) To quickly lower the headset volume, press and hold + or - button while
receiving audio. To switch back to the previous headset volume setting, press and hold + or -
button again.
2.
To talk, press and hold the PTT button on the front of the radio (or on selected wired audio
accessories with an inline PTT). Speak clearly into the microphone on the audio accessory. When
finished talking, release the PTT to listen.
3.
To receive, listen through the earpiece at the volume level you have set. Press the PTT to respond.
Note:
(*) Enhancement feature on CLP radios. May not available on previous shipping radios. CLP Series radios always
require the use of an audio accessory with microphone and speaker. Make sure to have the earpiece portion of the
accessory on ear before turning radio on and doing any feature changes.
OPERATION WITH MENU SETTINGS
Press Menu button to navigate through the Menu settings. Voice Assisted Operation feature may not be
available on certain previous shipping radios. At any time in Menu mode, short press PTT or wait 3
seconds to exit the menu.
HOW TO...
Change Channel
Press Menu button to navigate to Channel.
Enter Monitor mode
Press Menu button to navigate to Monitor.
Enter Scan mode
Press Menu button to navigate to Scan.
Send Call Tome (enable
Press Menu button to navigate to Call Tone.
through CPS)
Quick Tip: It is not necessary to wait for the voice prompt to be completed before continuing with next button press.
Note:
For single channel models, monitor, scan mode and call tone are supported. Single channel models support scan
mode when the user enables "dynamic talkaround scan" on a repeater channel via the customer programming
software.
For further information, refer to your specific product User Guide. For product-related questions, please
call: 1-800-448-6686 (USA), 1-800-461-4575 (Canada) or visit www.motorolasolutions.com/CLP.
ATTENTION
Before using this product, read the RF energy awareness information and operating instructions
contained in the Safety and RF Energy Exposure Booklet enclosed with your radio package.
MOTOROLA, MOTO, MOTOROLA SOLUTIONS and the Stylized M logo are
trademarks or registered trademarks of Motorola Trademark Holdings, LLC and
are used under license. All other trademarks are the property of their respective
owners.
© 2010, 2011 Motorola Solutions, Inc.
All rights reserved.
Printed in Malaysia.
STEP 1
STEP 2
Press +/- button to change channel.
Press +/- button to activate or
deactivate Monitor.
Press +/- button to activate or
deactivate Scan.
Press +/- button to send Call Tone.
*68012000054*
68012000054-C
Advertisement

Related Manuals for Motorola CLP1010


Summary of Contents for Motorola CLP1010
- Page 1 Safety and RF Energy Exposure Booklet enclosed with your radio package. the tray. The light on the charger is red when the radio is charging. It turns to green once the radio MOTOROLA, MOTO, MOTOROLA SOLUTIONS and the Stylized M logo are is fully charged.
- Page 2 à pleine capacité. radio. CONNEXION D’UN ACCESSOIRE AUDIO MOTOROLA, MOTO, MOTOROLA SOLUTIONS et le logo M stylisé sont des *68012000054* • Branchez un accessoire audio avec fil ou appariez un accessoire sans fil (certains modèles seulement).