Table of Contents
Advertisement
Quick Links
Operating Instructions
Fixed-Focus Lens
Commercial Use
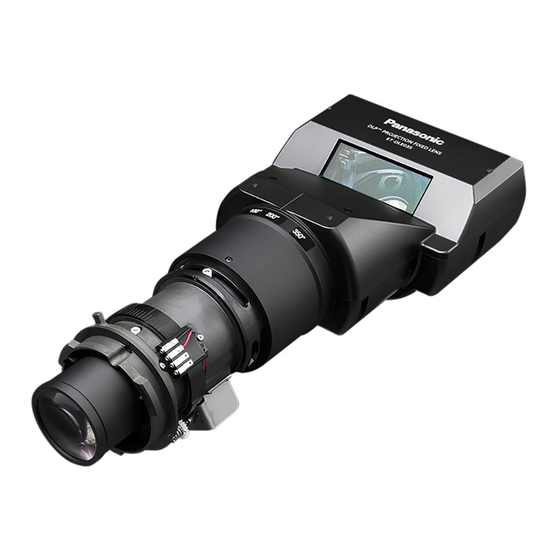
ET-DLE035
Model No.
ENGLISH
Thank you for purchasing this Panasonic product.
■ To ensure correct use of this lens, please read the operating instructions supplied with the lens and the
projector carefully.
■ Before using this product, be sure to read "Read this first!" (
Page 3).
■ Please save this manual for future use.
Product information (for Turkey only)
EEE Yönetmeliğine Uygundur.
EEE Complies with Directive of Turkey.
DPQX1334ZA/X1
Advertisement
Table of Contents

Related Manuals for Panasonic ET-DLE035


Summary of Contents for Panasonic ET-DLE035
- Page 1 ET-DLE035 Model No. ENGLISH Thank you for purchasing this Panasonic product. ■ To ensure correct use of this lens, please read the operating instructions supplied with the lens and the projector carefully. ■ Before using this product, be sure to read “Read this first!” ( Page 3).
-
Page 2: Table Of Contents
█ Contents Read this first! ..................3 Before Use.....................4 Attaching the Lens / Detaching the Lens ...........4 Before replacing the projection lens ............4 Attaching the Lens................... 5 Detaching the Lens ................. 6 Projection relationships...............7 Lens position setup and focus adjustment ........9 Lens position setup ................. -
Page 3: Read This First
Read this first! Always follow these precautions WARNING: Do not look at or place your skin into the light emitted from the lens while the projector is being used. Doing so can cause burns or loss of sight. z Strong light is emitted from the projector’s lens. Do not look at or place your hands directly into this light. -
Page 4: Before Use
Before Use Supported projectors PT-RZ120 / PT-RZ970 / PT-RW930 / PT-RX110 / PT-RZ870 / PT-RZ770 / PT-RW730 / PT-RZ660 / PT-RW620 / PT-DZ870 / PT-DW830 / PT-DX100 / PT-DZ780 / PT-DW750 / PT-DX820 Note z Models other than the above may also be supported. Refer to the operating instructions of the projector you are using. z In this document, the alphabet letters at the end of the projector part numbers are omitted. -
Page 5: Attaching The Lens
Attaching the Lens / Detaching the Lens (continued) Attaching the Lens * Unless specified otherwise, the illustrations in these operating instructions show the lens used with the PT-DZ870 projector. 1) With this lens already passed Guide groove through the lens mount cover that Positioning guide came with your projector, align the positioning guide with the guide groove on the projector, and insert the lens fully. -
Page 6: Detaching The Lens
Attaching the Lens / Detaching the Lens (continued) Detaching the Lens 1) Turn the lens mount cover Lens mount cover counterclockwise to detach it from the lens and slide it towards the front end of the lens. 2) Hold down the lens release button while turning the lens counterclockwise to release it. -
Page 7: Projection Relationships
Projection relationships The dimensional relationship between the screen and the projector is shown below. Dimensional relationship diagram Projected image Screen Note z The indications of this illustration are premised on aligning the projected image size and position to the full screen. z This illustration is not drawn to scale. - Page 8 Projection relationships (continued) Dimensional relationship z When using one of PT-RZ120 / PT-RZ970 / PT-RW930 / PT-RX110 / PT-RZ870 / PT-RZ770 / PT-RW730 / PT-RZ660 / PT-RW620 / PT-DZ870 / PT-DW830 / PT-DX100 / PT-DZ780 / PT-DW750 / PT-DX820 For details on projection distance (L1), and A1, A2, L2, L3 and L4 values, refer to "Projected image size and Projection distance"...
-
Page 9: Lens Position Setup And Focus Adjustment
5) Select [LENS TYPE] on the [LENS] BRIGHTNESS CONTROL AUTO STANDBY MODE NORMAL screen and then use the ◄► QUICK STARTUP buttons to select [ET-DLE035]. NO SIGNAL SHUT-OFF DISABLE NO SIGNAL LIGHTS-OUT DISABLE z Each press of the ◄► buttons switches the MENU SELECT item to [NORMAL] or [ET-DLE035]. - Page 10 The [HOME POSITION] screen appears. 4) Use the ◄► buttons to select [ET-DLE030]. z Each press of the ◄► buttons switches the item to [NORMAL] or [ET-DLE030]. 5) Press the <ENTER> button. z [PROGRESS] is displayed on the [HOME POSITION] screen and the lens position moves to the lens standard position for ET-DLE035. 10-ENGLISH...
- Page 11 CANCEL MENU moves to the standard position for ET-DLE035. Note z After returning the lens to the standard projection position, lens shift adjustments are possible within the range where the projector will not interfere with the edges of the projected image.
-
Page 12: Focus Adjustment Function
Lens position setup and focus adjustment (continued) Focus Adjustment Function After setting the lens position, adjust the focus. The focal balance between the center and periphery of the projected image changes depending on the size of the projected image. The lens is equipped with a focus balance adjustment function for the screen periphery. Adjusting the Focus ... -
Page 13: Specifications
Specifications F value Focal Length (f) 5.3 mm (7/32") Width 132 mm (5-3/16") Dimensions Height 102 mm (4-1/32") Depth 311 mm (12-1/4") Net Weight Approx. 1.3 k ] (2.9 lb) *1: Excluding protrusions. Dimensions (Unit: mm) 311 (12-1/4") ENGLISH-13... - Page 14 MEMO 14-ENGLISH...
- Page 15 MEMO ENGLISH-15...
- Page 16 Atıkların atılmasıyla ilgili yanlış uygulamalar yasayla belirlenmiş olan cezalara sebebiyet verebilir. Panasonic Corporation Web Site : https://panasonic.net/cns/projector/ © Panasonic Corporation 2018 Panasonic System Solutions Company of North America Two Riverfront Plaza, Newark, NJ 07102 TEL: (877) 803 - 8492 Panasonic Canada Inc. 5770 Ambler Drive, Mississauga, Ontario L4W 2T3...