Table of Contents

Related Manuals for Sanyo CLT-J30

Summary of Contents for Sanyo CLT-J30
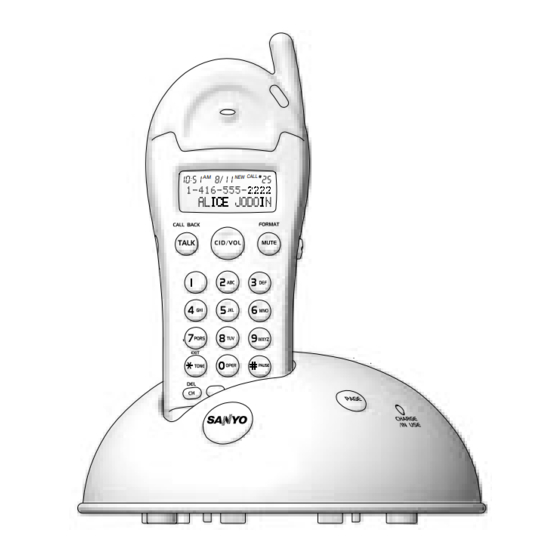
- Page 1 INSTRUCTION MANUAL 2.4 GHz Cordless Telephone with Caller ID Important Charge the handset battery for 12 continuous hours prior to first use. CLT-J30 CLT-J40 CLT-J40(BK) CLT-J50 CLT-J60 NEW CALL SANYO Canada Inc. www.sanyocanada.com...
-
Page 2: Table Of Contents
TABLE OF CONTENTS INTRODUCTION ----------------------------------------------------------------------- 4 GETTING STARTED ------------------------------------------------------------------ 5 Checking package contents ... 5 Modular jack ... 5 Installation tips ... 5 Battery setup ... 6 Telephone line connection ... 6 Tone/pulse setting ... 6 Mounting on a wall ... 7 Digital security system ... - Page 3 MAINTENANCE -------------------------------------------------------------------- 29 MAXIMIZE BATTERY PERFORMANCE ------------------------------------- 30 TECHNICAL INFORMATION --------------------------------------------------- 31 SANYO COMFORT WARRANTY --------------------------------------------- 32 SOS HELP LINE -------------------------------------------------------------------- 34 The exclamation point within the triangle is a warning sign alerting you of important instructions accompanying the product.
-
Page 4: Introduction
INTRODUCTION Congratulations on your purchase of this Sanyo cordless telephone. Your Sanyo 2.4 GHz cordless telephone is a fine-quality home communications product. It is carefully designed and produced by a world leader of consumer and industrial electronic equipment. With proper maintenance and care, it will provide you with years of enjoyment and convenience. -
Page 5: Getting Started
Some cordless telephones operate at frequencies that may cause interference to nearby TVs, microwave ovens, and VCRs. To minimize or prevent such interference, the base of the cordless telephone should not be placed near or on top of a TV, microwave oven, or VCR. If such interference continues, move the cordless telephone farther away from these appliances. -
Page 6: Battery Setup
Note: It is normal for the handset and base to get warm when the handset is charging in the base. Caution: Use only the Sanyo AC adaptor that is supplied with this phone. Using another AC adaptor may damage the phone. Telephone line connection 4. -
Page 7: Mounting On A Wall
GETTING STARTED Mounting on a wall Do not attempt to wall mount the phone before initial 12-hour charging is complete. 8. Remove the handset from the base and set aside. 9. Turn the base over and unplug the AC adaptor and telephone cords. Run the cords through the square hole on the wall mount. -
Page 8: Names And Controls
NAMES AND CONTROLS Handset 1. Belt clip 2. Headset jack 3. CH (channel)/DEL key 4. REDIAL key 5. MEM (memory) key 6. FLASH/PROG (program) key 7. Charging contacts 8. Antenna 9. Incoming call/in use LED 10. Earpiece NEW CALL 11. LCD screen 12. -
Page 9: Base Unit
NAMES AND CONTROLS Base Unit 1. Wall mount 2. Handset cradle 3. CHARGE/IN USE LED 4. PAGE key... -
Page 10: Initial Programming
INITIAL PROGRAMMING Before using this telephone, 7 initial settings must be completed on the handset: Language, Area code (this is required to use Caller ID service from your telephone company), Ringer tone, Tone/Pulse setting, LCD contrast, Do Not Disturb (DND), and Idle Animation. Language setting 1. -
Page 11: Lcd Contrast
INITIAL PROGRAMMING LCD contrast 1. Make sure the phone is off (not in TALK mode). 2. Press FLASH/PROG until “LCD CONTRAST 3. Press CID/VOL , or press the number keys (1 – 3) to select the desired contrast level. 4. Press FLASH/PROG to store selection. You will hear a confirmation tone. -
Page 12: Idle Animation
INITIAL PROGRAMMING 8. Press FLASH/PROG again to store the selection. You will hear a confirmation tone. Idle animation This feature allows animation to display when the handset is on the base cradle: 1. Make sure the phone is off (not in TALK mode). 2. -
Page 13: Basics
BASICS Receiving a call When an incoming call is received, the LED on the handset flashes, and the handset will show caller information. * * Note: A subscription is required from your local phone company to receive Caller ID information on your phone. See Caller ID Features, page 16. -
Page 14: Pre-Dialing
BASICS Pre-dialing (up to 32 digits) 1. Make sure the phone is OFF (not in TALK mode). 2. Enter the telephone number. The number is displayed as you enter it. 3. Press TALK/CALL BACK. Note: Pressing *TONE will exit pre-dialing. Changing the pre-dial number 1. -
Page 15: Handset Locator (Paging Function)
BASICS Handset locator (Paging function) This feature helps to locate a misplaced handset. 1. Press PAGE on the base, the screen shows “PAGING”. The handset beeps continuously for about 2 minutes or until you press any key on the handset. 2. -
Page 16: Caller Id Features
CALLER ID FEATURES This phone receives and displays incoming call information transmitted by your local phone company, provided you subscribe to Voice Mail, Caller ID, and/or Call Waiting services. This information can include the phone number and/or the name, date and time. The phone can store up to 40 calls for later review. -
Page 17: Reviewing Caller Id List
CALLER ID FEATURES Reviewing Caller ID list As calls are received and stored, the Caller ID list is updated to let you know how many calls have been received. 1. Press CID/VOL to scroll through the Caller ID list from the most recent to the oldest. -
Page 18: Dialing A Caller Id Number
CALLER ID FEATURES 1. Use the CID/VOL key to select desired Caller ID entry. 2. Press MEM key, “MEMO # --” shows on the top right corner of screen. 3. Select the desired memory location by pressing the number keys (0- 9). -
Page 19: Deleting Entries From The Caller List
CALLER ID FEATURES Deleting entries from the Caller list Use CH/DEL to erase the entry currently shown on screen, or all entries. Deleting the displayed entry 1. Make sure the phone is OFF (not in TALK mode). 2. Use the CID/VOL delete. -
Page 20: Directory
DIRECTORY You can store up to 10 names (up to 15 characters) and numbers (up to 24 digits) in the directory for quick dialing. If a number exceeds 24 digits, you can program it in parts, and then chain dial the number. Store a number in the directory To program a number to memory: 1. -
Page 21: Replacing A Directory Entry With A Caller Id Entry
DIRECTORY 9. Press the number (0 – 6) or use CID/VOL desired animation. The selected animation will be displayed when the incoming call matches with the number you stored. 10. Press MEM again. “RINGER TONE 1” shows on screen. 11. Press 1-3 or 1-6 depending on the model or use CID/VOL to select the desired ringer tone (6 melody ring tones available for J50/J60 or 3 tones for J30/J40/J40(BK)). -
Page 22: Reviewing And Deleting Directory Contents
DIRECTORY Reviewing and deleting directory contents 1. Make sure the phone is OFF (not in TALK mode). 2. Press MEM. 3. Use CID/VOL to scroll through the directory until the desired name/number is shown, or use the number pad to select a memory location. -
Page 23: Changing The Battery
CHANGING THE BATTERY Battery replacement and handling When the operating time becomes short even after a battery is recharged, please replace the battery. With normal usage, your battery should last about one year. For a replacement battery, please contact your place of purchase or fill out and mail the enclosed form. -
Page 24: Changing The Face Plates
CHANGING THE FACE PLATES 1. Carefully remove the existing handset cover by prying up the notch at the bottom of the cover. 2. Reattach new cover by snapping the upper portion of the cover into position first, and then snap the lower portion into the place. ** Optional face plates can be bought separately, please visit our web site www.sanyocanada.com for details. -
Page 25: Headset Jack And Belt Clip
HEADSET JACK AND BELT CLIP Headset connection (Headset not included) For hands free conversation, connect the headset (not included) to the HEADSET jack. The handset earpiece and microphone are disabled when the headset is connected. Press TALK/CALL BACK to answer or place a call while using the headset. -
Page 26: Lcd Screen Messages
LCD SCREEN MESSAGES The following indicators show the status of a message or of the phone. The person is calling from a number that has BLOCKED NUMBER/ been blocked from transmission. NAME/CALLER Do Not Disturb is activated. There is no record stored to the selected EMPTY directory location. -
Page 27: Sound Signals
SOUND SIGNALS A long warbling tone Single Tone Three short beeps Two long beeps One short beep and one long beep Two short beeps every 15 seconds TROUBLESHOOTING CALLER ID No display Is battery fully charged? Try replacing the battery. •... - Page 28 TROUBLESHOOTING Dial tone is OK, but cannot dial out Make sure the TONE/PULSE dialing mode is set to TONE or PULSE • according to your phone service. Handset does not ring Make sure the RINGER switch on the handset is turned to ON. •...
-
Page 29: Maintenance
TROUBLESHOOTING CHARGE/IN USE LED ON BASE KEEPS FLASHING Provided your phone company offers voice mail indicator service • and you subscribe to it, the CHARGE/IN USE LED flashes when the phone is in use to indicate there is a message waiting. It stops flashing after the message has been reviewed. -
Page 30: Maximize Battery Performance
MAXIMIZE BATTERY PERFORMANCE The freedom that your cordless telephone can offer is fully dependent on the performance of the rechargeable battery in the handset. To maximize the battery performance, follow these guidelines: Charge it for a full 12 hours Before initial use of your new battery, charge it for 12 hours continuously. -
Page 31: Technical Information
Privacy of communications may not be ensured when using this telephone. Other devices, including other cordless telephones, may interfere with the operation of this cordless telephone or cause noise during operation. Units without coded access may be accessed by other radio communication systems. -
Page 32: Sanyo Comfort Warranty
SANYO COMFORT WARRANTY WARRANTY APPLICATION Sanyo Communications products purchased new, unused in Canada through a Sanyo Authorized Dealer are warranted against manufacturing defects in materials and workmanship for ONE YEAR covering parts and labour, from the date of purchase by the original retail purchaser. - Page 33 You, the original retail purchaser, must present your original, dated bill-of-sale together with this warranty to SANYO Canada Inc. or to an authorized Sanyo Service Depot when you make a claim under this warranty. You, the original retail purchaser, are...
-
Page 34: Sos Help Line
SOS means you never have to worry. C.O.D. and/or Collect shipments will not be accepted. Unit must be returned to Sanyo in its original box with all accessories, i.e.: owner’s manual, battery, adaptor, telephone cord, etc.